
You know those days? What are the ones where you’re craving something sweet, something chocolatey, or something that tastes like pure pure chocolate? Why do you think turning on the oven fills you with dread? Yeah, I have those days pretty often, especially when the weather outside is just too perfect for me. I’m stuck in the kitchen. How can I get out of When I think of this Oreo Icebox Cake, my mind immediately goes to that one. What is the best part about a hug in dessert form? Is it the closest thing to magic I’ve found in my kitchen? From last minute guests to just a Tuesday night treat. If you’ve ever had a classic no-bake cheesecake or even chocolate pudding, imagine all the flavours. What are some of the best Oreos? Is it better?
What is an Oreo Icebox Cake?
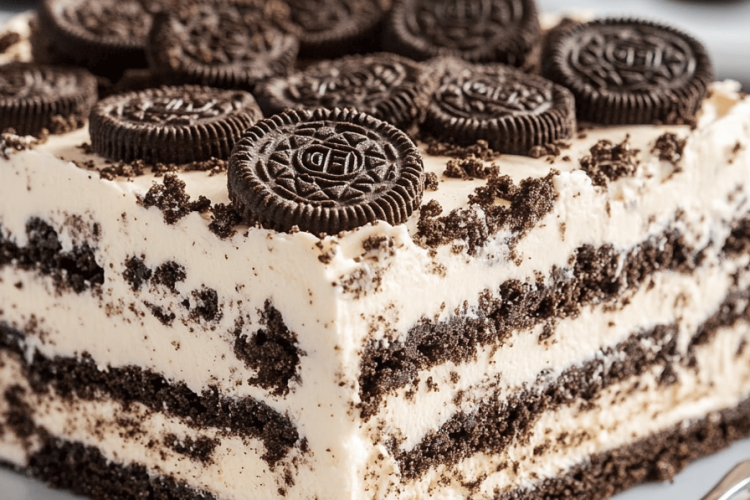
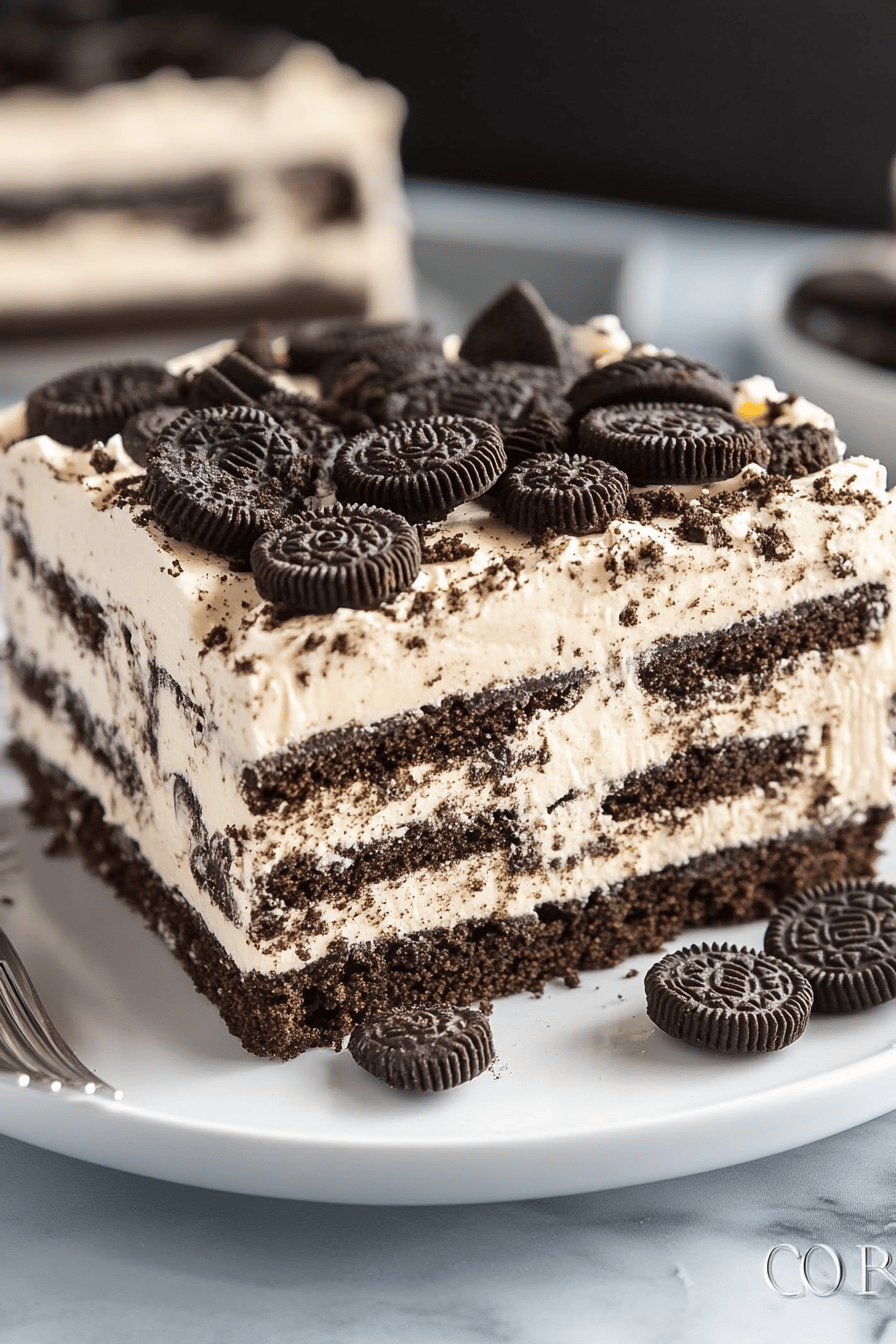
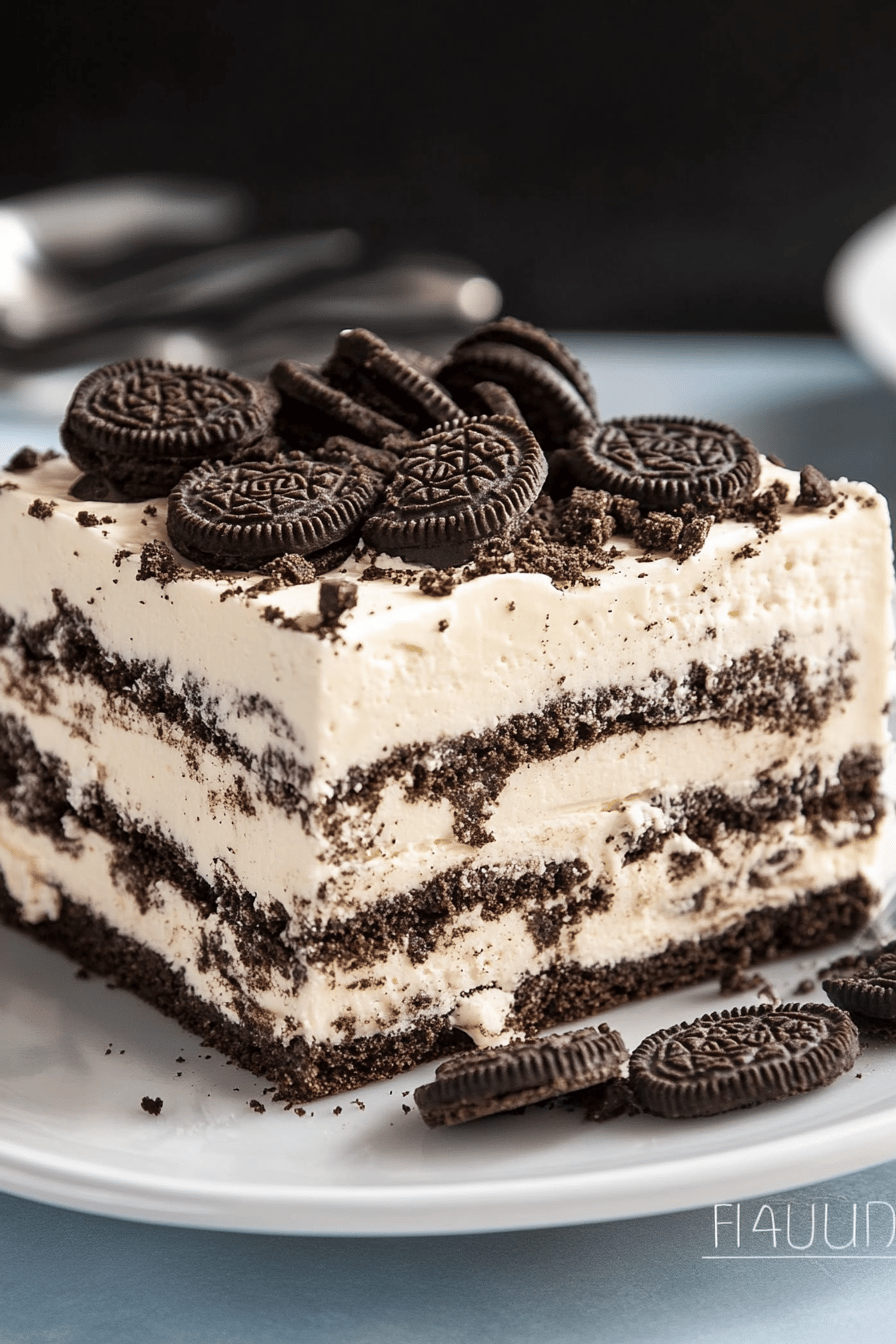
What is an Oreo icebox cake? Think of it as the ultimate no-bake dessert that layers crushed or whole Oreos with a luscious, creamy, ice-cream flavor. What is the best way to serve a creamy filling, and then chills until it’s set. It’s essentially a no bake cake that relies on refrigeration (hence “icebox”) to firm up, rather than baking. What is the heat of an oven? The beauty of it is how the Oreos soften slightly from the moisture in the filling. What is the best way to make a cookie like texture, while still retaining some of that satisfying crunch? Is it the kind of dessert that looks impressive, tastes utterly divine, and is so forgiving to make? What are some of the best crowd-pleaser recipes? Without stress.
Why you’ll love this recipe?
Where do I even begin with why this Oreo icebox cake is so darn special? First off, let’s talk about the flavor. It’s a symphony of creamy vanilla, rich chocolate from the Oreos, and a hint of sweetness that’s just perfectly balanced. It’s not cloyingly sweet, which is something I really appreciate. Then there’s the texture – it’s a delightful contrast of soft, yielding layers and those little pockets of cookie goodness. It’s honestly heavenly. But the real star, in my opinion, is the sheer simplicity. I’ve made this more times than I can count, and it never fails to deliver. It’s the kind of recipe that makes you feel like a kitchen superstar without breaking a sweat. I’ve found it’s also incredibly budget-friendly, using ingredients you likely already have on hand, or can easily pick up from any grocery store. Plus, it’s super versatile! While I love the classic version, I’ve also experimented with adding different extracts or even a swirl of caramel, and it always turns out fantastic. It’s the perfect solution for those moments when you’re craving something decadent but the idea of baking is just too much. It truly is a lifesaver!
How do I make [Recipe Name]?
Quick Overview
How do you make an Oreo icebox cake? You’ll crush some Oreos for the base, whip up a dreamy creamy filling, layer it all up with more or less. How do I make Oreos (or even use whole ones for a different texture), and then let the magic happen in the fridge? Is this a no bake recipe that comes together in minutes? How do you let everything chill for a few minutes so that everything melds together beautifully?
Ingredients
For the Main Batter: What is the difference between
2 cups all-purpose flour (spooned and leveled)
1 teaspoon baking soda per 1 cup.
1/2 teaspoon salt. 1 teaspoon pepper.
1 1/2 cups granulated sugar.
1 teaspoon ground cinnamon. 1 tsp.
1/2 teaspoon nutmeg (optional, but I love it)
1 cup (2 sticks) unsalted butter, softened.
2 large eggs, at room temperature.
1 teaspoon vanilla extract. 1 tablespoon nutmeg
For the Filling:
2 cups heavy cream, very cold.
1/2 cup powdered sugar, sifted. 1/4 cup
8 ounces cream cheese, softened.
What is vanilla extract? 1 teaspoon.
1/4 cup Oreo cookie crumbs (from about 10-12 Orels, finely crushed)
For the Glaze:
1 cup semi-sweet chocolate chips.
1/4 cup heavy cream. 1/4 cups light cream, 1/4
1 tablespoon unsalted butter.
What are the steps to
Step 1: Preheat & Prep Pan
First things first, grab a 9×13 inch baking dish. What do you need to do to make this recipe as the chilling process takes care of it? Just make sure it’s clean and ready to go. Set aside.
Step 2: Mix Dry Ingredients
In a large bowl, whisk together the flour, baking soda, salt, granulated sugar, cinnamon, and nutmeg. Set aside. Make sure they’re all well combined; this ensures an even texture throughout your cake. Give it a good stir with sifting whisk to break up any clumps of sugar.
Step 3: Mix Wet Ingredients
In a separate medium bowl, cream together the softened butter, eggs, and vanilla extract until the mixture is smooth. Set aside. Is it true that the milk is light and fluffy? Where do you really want to beat it well, getting a lot of air into it. I usually use an electric mixer for this, but a sturdy whisk and some arm power works too!
Step 4: Combine
What is the best way to bring dry and wet ingredients together? Gradually add the dry ingredients to the wet ingredients, mixing on low speed (or by hand) until smooth. Is it safe to overmix flour? Overmixing can lead to a tougher cake, and we want this to be wonderfully tender.
Step 5: Prepare Filling
In a large, chilled bowl, whip the cold heavy cream and sifted powdered sugar until stiff peaks form. Set aside. This is crucial for a light and airy filling, so make sure your cream is really cold and don’t blow it out. In another bowl, beat the cream cheese with the vanilla extract until smooth. Set aside. Then, gently fold the whipped cream into the cream cheese mixture until just combined. Lastly, fold in the finely crushed Oreo crumbs. You want to see little speckles of cookie throughout the cream, but don’t overmix, or it might get stuck.
Step 6: Layer & Swirl
What’s the fun part? How much batter do you need to spread out in a baking dish? Dollop spoonfuls of the Oreo cream filling over the batter, then use a knife or spatula to gently massage the edges. What is the best way to swirl batter through it? How do you create marbled patterns? Repeat with remaining batter and filling. I like to make sure the top layer of filling is relatively smooth for the glaze.
Step 7: Bake
Is it safe to bake in a preheated oven at 350°F (175°C) for 30 minutes? In the center comes out clean. The cake should be golden brown around the edges and slightly puffed up. If your skin looks a little soft in the center, don’t worry, it will firm up as it cools.
Step 8: Cool & Glaze
Let the cake cool in the pan on a wire rack for at least 1 hour. While it’s cooling, prepare the glaze. In a small saucepan or microwave-safe bowl, combine the chocolate chips, heavy cream, and butter. Set aside. How long does it take for chocolate to melt? Let it cool slightly so it’s not piping hot, then pour it evenly over the cooled cake. Make sure to get those edges! Let the glaze set for another 30 minutes or so.
Step 9: Slice & Serve
Once the glaze has set, it’s time to slice and serve! I find that using a sharp knife dipped in hot water and wiped dry between cuts helps get nice clean cuts. This Oreo icebox cake is best served chilled, so pop it back into the refrigerator until you’re ready to serve it. Ready to dig in.
What should I serve it with?
I love icebox cake, but I can’t eat it. I like it with a few other things. How do I make an occasion feel special? I’ve had it for breakfast! What are the best ways to enjoy a hot cup of coffee? Why does the bitterness of coffee really cut through the sweetness, making it feel less like a dessert. What are some of the best morning treats? If you’re serving it for brunch, a glass of cold milk can be lovely. For a proper dessert setting, I love to serve it with fresh berries, like raspberries or blackberries. What are some good strawberries on the side? Their tartness is a perfect counterpoint to the rich chocolate and cream. What are some of the best snacks to have? Is it pure comfort? My kids love vanilla bean ice cream, which is just another excuse to eat it.
How do I make an Oreo Icebox cake?
I’ve made this Oreo icebox cake enough times to have picked up a few tricks, and I’m happy to share them with you. Is it possible to make your own so yours turns out just as amazing? For the Oreo crumbs in the filling, don’t just smash them with a rolling pin. For a truly fine crumb that integrates seamlessly, I find it best to pulse them in ‘a food processor’. When they’re almost like a powder, they become very hard. This prevents those occasional hard chunks. When it comes to the filling, the cold heavy cream is non-negotiable for getting those lovely stiff stiffs. If your cream cheese is too soft, it can make the filling too runny, so make sure it’s just the right thickness. What is the best way to soften I also learned early on that you really shouldn’t overmix the Cake Batter once the flour is added. Just mix until you don’t see dry streaks; it’s better to have a few tiny lumps than .a tough cake. Don’t go crazy trying to make intricate patterns for the swirl. What’s the best way to swirl a knife or skewer? If your glaze seems too thick, a splash more cream can thin it out, and if it’s too thin, you can use ice cream instead. Chocolate chips can help it set up. What are some of the best personal lessons learned? How do I make a perfect cake? Patience is the key here, even though it’s hard!
What are some Storing and Reheating Tips?
The best part about this Oreo icebox cake is how well it stores, making it perfect for leftovers (if you’re lucky enough to have any!). For room temperature storage, it’s best to keep it covered tightly, and it will typically stay fresh for about 2 days, though the texture might change slightly as it sits. If you’re refrigerating it, which I highly recommend for the best texture, wrap it really well in plastic wrap or pop it into an airtight container. It will stay delicious in the fridge for up to 4-5 days. The flavors actually tend to deepen and meld even more as it chills, so sometimes day two is even better than day one! If you’re looking to freeze it, this cake freezes surprisingly well. Make sure it’s completely cooled and the glaze has set. Wrap it tightly in plastic wrap, then a layer of aluminum foil. It can stay frozen for about 2-3 months. To thaw, simply transfer it to the refrigerator overnight. I usually add the glaze just before serving if I’ve made it ahead of time or plan to store it for a while, especially if freezing, as the glaze can sometimes crack a bit upon thawing. If you do freeze it with the glaze, let it thaw completely in the fridge before serving.
Frequently Asked Questions
Final Thoughts
This Oreo icebox cake is more than just a dessert to me; it’s a happy memory waiting to happen. It’s proof that you don’t need a fancy oven or complicated techniques to create something truly special and delicious. It’s the kind of recipe that makes people gather in the kitchen, oohing and aahing over how good it looks and smells. The balance of rich chocolate, creamy filling, and that unmistakable Oreo flavor is just perfection. If you loved this recipe, you might also enjoy my No-Bake Chocolate peanut butter pie or my Easy Strawberry Icebox Cake for more no-fuss, delightful desserts. I really hope you give this Oreo icebox cake a try. It’s a guaranteed winner, and I can’t wait to hear what you think! Let me know in the comments below how yours turned out, and if you tried any fun variations!

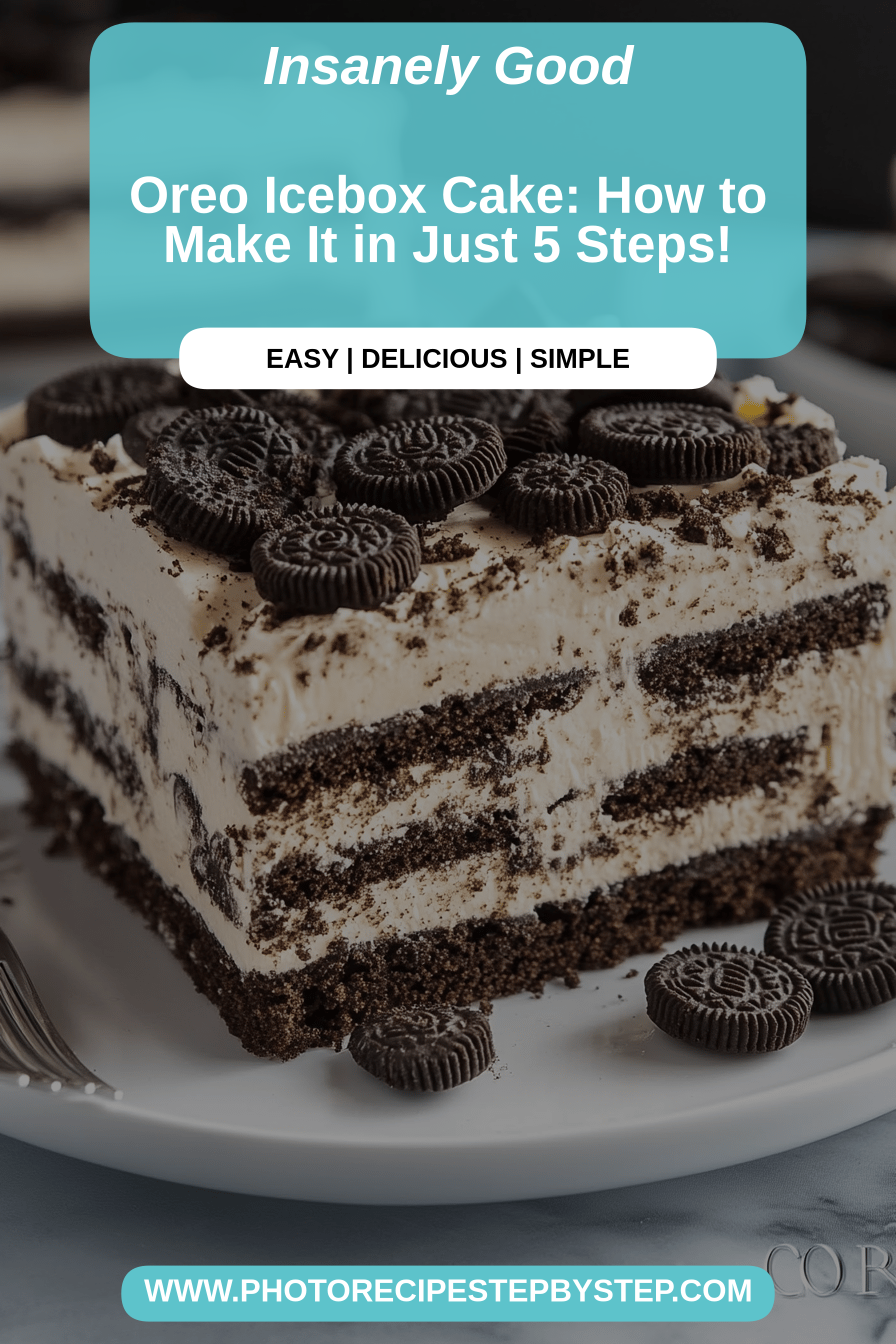
Oreo Icebox Cake
Ingredients
Main Ingredients
- 24 Oreo cookies Oreo cookies, crushed
- 567 grams cream cheese, softened
- 220 grams powdered sugar
- 1 teaspoon vanilla extract
- 710 ml whipping cream, cold
- 30 grams Oreo cookies, coarsely chopped for topping
Instructions
Preparation Steps
- In a large bowl, beat the softened cream cheese and powdered sugar until smooth and creamy.
- Stir in the vanilla extract and 24 crushed Oreo cookies.
- In a separate bowl, whip the cold whipping cream until stiff peaks form.
- Gently fold the whipped cream into the cream cheese mixture until just combined.
- Pour the mixture into a 9x13 inch pan or an 8x8 inch pan. Spread evenly.
- Sprinkle the coarsely chopped Oreo cookies over the top.
- Cover and refrigerate for at least 4 hours, or preferably overnight, to allow the cake to set.
- Slice and serve chilled.
