
Okay, picture this: I’m It’s a gloomy afternoon, you’re craving something sweet, but you don’t want to eat sugar bombs. What are lemon coconut bars? They’re like sunshine packed into a little square, bursting with bright lemon flavor and sprinkling of orange juice. What is the sweetness of coconut? What are some alternatives to lemon meringue pie? Is it safe to say these little bars are addictive? – especially around my cousin Sarah, she’s obsessed!
What is lemon coconut bar?
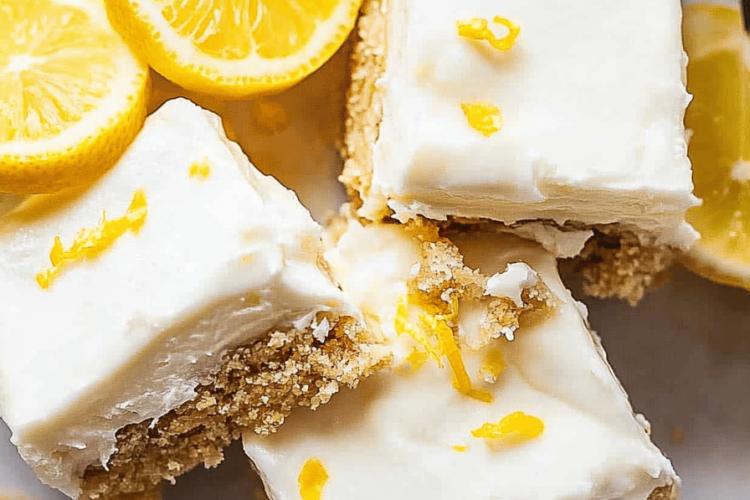
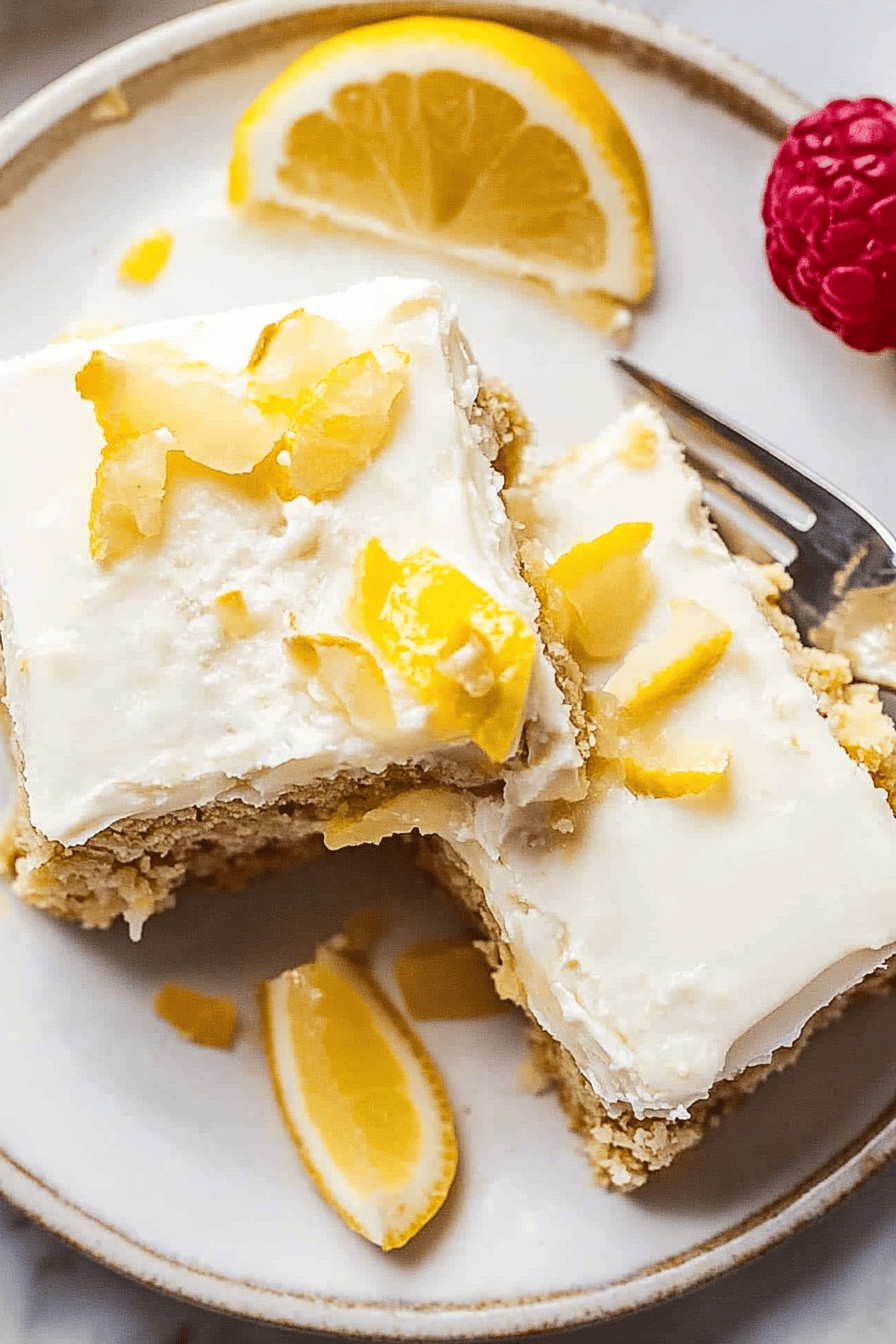
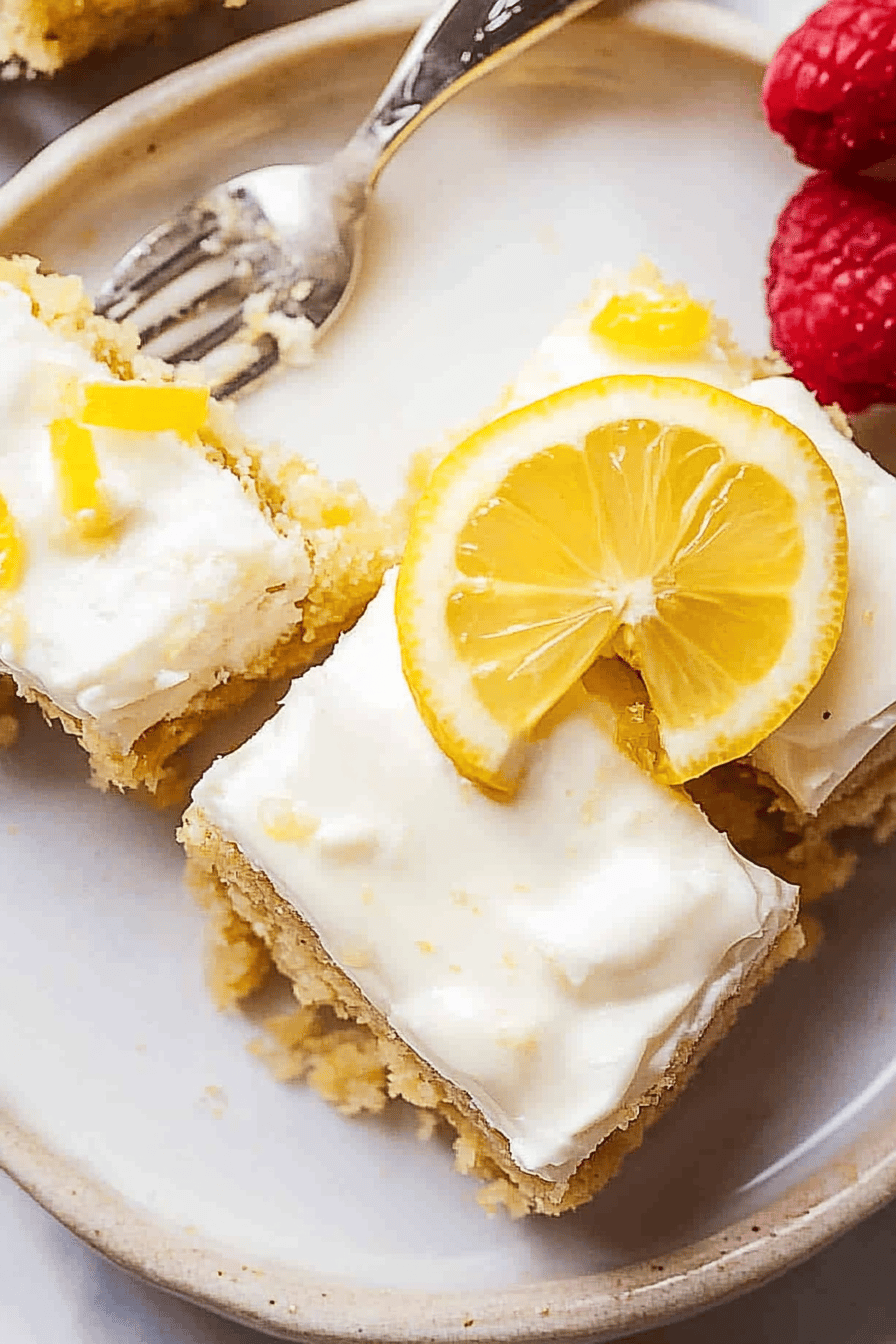
Lemon coconut bars are a layered dessert. We’re talking buttery, slightly crumbly shortbread crust topped with a creamy, tangy lemon. What is coconut filling Is it baked until golden brown, then often drizzled with a simple glaze? What is the difference between a cookie bar and miniature pie? The beauty is in simplicity – it’s not fancy or overly complicated, just pure deliciousness. My grandmother used to call them “Sunshine Squares” and honestly, that’s the perfect description.
Why you’ll love this recipe?
What are some good reasons to love this recipe?flavorWhat is that zesty lemon that wakes up your taste buds, perfectly balanced by the sweet, sour lemon? What is the nutty flavor of coconut? Is it too sweet or too tart?simpleIs this recipe easy to make? How do you make a crust in minutes? Plus, the ingredients are pretty good too.cost-effectiveNo fancy, hard-to-find items here! You probably have most of them in your pantry already. What I love about these bars is their uniqueness.versatilityWhat are some great brunch treats with coffee, a delicious dessert after dinner, or even just as an appetizer? What a great snack for an afternoon snack? What are some of the best ways to make a pie? I actually think they’re even better than traditional lemon bars because the coconut adds this flavor. What are some of the best ice creams you’ve ever had? I’ve even experimented with adding a hint of lime zest – talk about smoky flavor explosion!
How do I make lemon coconut bars?
Quick Overview
How do I make lemon coconut bars? How do you make a shortbread crust? What’s the best way to prepare a crust? When the filling is poured back into the oven, it goes until it is set. What’s the secret to a good slice of cheese? Don’t overbake the crust or the filling! This recipe is super forgiving, so don’t be intimidated.
Ingredients
For the Crust:
* 1 1/2 cups all-purpose flour: I always use unbleached for the best flavor. * 1/2 cup (1 stick) unsalted butter, cold and cut into cubes: Make sure it’s *really* cold! Is 1/4 cup powdered sugar good for crust? Adds a touch of sweetness and helps create tender crumb. What is the best way to balance the sweetness and enhance the other flavors? Add enough water to bring the dough together.
For the Filling:
* 4 large eggs: Gives the filling structure and richness. * 1 1/2 cups granulated sugar: * 1/4 cup all-purpose flour: Helps thicken the filling. * 1/4 teaspoon salt: Balances the sweetness. * 1/2 cup lemon juice, freshly squeezed: Fresh is key! Why is lemon juice so bad for you? Adds lemon flavor. Don’t skip this! * 1/2 cup unsweetened coconut: What is the best coconut flavor? * 1/4 cup (1/2 stick) unsalted butter, melted: Adds richness and flavor.
For the Glaze (optional):
* 1 cup powdered sugar: The base for the glaze. * 2-3 tablespoons lemon juice: * 1 tablespoon melted butter: 1 cup a day. Adjust to desired consistency. Is there a way to make the glaze nice and shiny?
How do I follow step
Step 1: Preheat & Prep Pan
Preheat your oven to 350°F (175°C). Grease and lightly flour a 9×13 inch baking pan. I always line the pan with parchment paper with an overhang for easy removal. Is it a lifesaver when it comes time to slice the bars?
Step 2: Mix Dry Ingredients
In a medium bowl, whisk together the flour, powdered sugar, and salt for the crust. What should I do to make sure everything is evenly distributed before adding the butter? If you skip this step, the dough can be a little lumpy.
Step 3: Cut In Butter
I used a pastry blender to cut the butter into small pieces. I like the texture of the mixture. You want to see small pieces of butter throughout the flour mixture. What is the flaky texture of a crust? Make sure your butter is cold and work quickly. I sometimes pop the butter in the freezer for 10 minutes before starting.
Step 4: Add Ice Water
Gradually add the ice water, one tablespoon at a time, mixing until the dough just comes together. Do not overmix the dough. The dough should be slightly crumbly but hold together when pressed. If you add too much water, the crust will be tough. I’ve made that mistake before!
Step 5: Press into Pan & Bake
Press the dough into the prepared baking pan. Prick the crust all over with a fork to prevent it from puffing up during baking. Bake for 15-20 minutes, or until lightly golden brown. You want it to be set but not overly browned because you will bake it again with the filling.
Step 6: Prepare Filling
While the crust is baking, prepare the filling. In a large bowl, whisk together the flour, sugar, and eggs. Set aside. What are the ingredients for the lemon juice, lemon zest, melted butter, and shredded coconut? Make sure the filling is really smooth, or you might end up with pockets of flour in the finished product.
Step 7: Pour Filling & Bake
Pour the filling over the pre-baked crust and spread evenly. Bake for 25-30 minutes, or until filling is set and lightly golden brown. The filling should be set around the edges but still have a slight jiggle in the center. If you overbake the filling, be careful not to overcook it.
Step 8: Cool & Glaze
Let the bars cool completely in the pan before glazing. This is important because it gives the filling time and prevents the glaze from melting. Once cooled, whisk together the powdered sugar, lemon juice, and melted butter for the glaze. Do not overdo glaze on bars. I like to let the glaze set for about 30 minutes before slicing.
Step 9: Slice & Serve
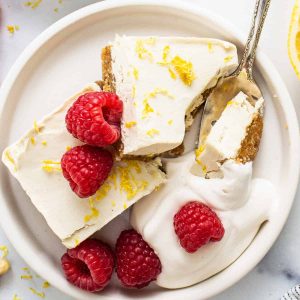
Transfer the bars to a cutting board. Lift out of the pan using the parchment paper overhang. Slice into squares and serve. These bars are delicious at room temperature or slightly chilled. I like to sprinkle a little extra shredded coconut on top of my soup. This will make it more flavorful.
What is the best way to serve it?
What are some of the best lemon coconut bars? What are some of the best wedding dresses to wear?For Breakfast:Serve them alongside a cup of strong coffee or latte. The lemon cuts through the richness of the coffee perfectly. I like to arrange them on a platter with fresh berries for an inviting presentation.For Brunch:What are some of the best brunch bars to serve? What are some good ways to enjoy iced tea with a mimosa? I like to arrange them on a tiered serving stand for an elegant touch.As Dessert:After dinner, these bars are a delightful treat. Serve with a scoop of vanilla ice cream or whipped cream. A glass of dessert wine or a cup of herbal tea would pair nicely.For Cozy Snacks:What are some great snack bars? What are some good side dishes to serve with a glass of milk or hot chocolate? I like to keep a batch on hand for those moments when I need snooze. My family tradition is to bring them to every potluck and picnic. They’re always a hit, and they are so easy to transport.
How do I make Lemon Coconut Bars?
How do I make lemon coconut bars? Is it perfect?
Butter Bliss:The colder the butter, the flakier it will be. Is it safe to put butter in the freezer for 5 minutes before you start to get it cold?
Don’t Overmix: Be careful not to overmix the crust dough. Overmixing develops the gluten in the flour, which can result in a tough crust. Mix until just combined.
Fresh is Best:How do I make a filling with lemon juice and zest? Why doesn’t bottled juice have the same zesty flavor?
What is the best way to toast coconutFor a deeper coconut flavor, lightly toast the shredded coconut before adding it to the filling. Spread the coconut on a baking sheet and bake at 350°F (175°C) for 5-7 minutes, or until lightly browned. How do you watch it closely so it doesn’t burn!
Baking Time: Keep an eye on the bars while they’re baking. The baking time can vary depending on your oven. You want the filling to be set but still have a slight jiggle in the center. If the crust starts to brown too quickly, cover it with foil.
Cool Completely: Let the bars cool completely in the pan before glazing. This is important because it gives the filling time to set and prevents the glaze from melting. I usually let them cool for at least 2 hours.
Glaze Consistency: Adjust the amount of lemon juice in the glaze to reach your desired consistency. You want it to be thick enough to coat the bars but thin enough to drizzle easily.
Ingredient Swaps: I’ve tested this recipe with gluten-free flour (a 1:1 blend) and it worked great. You can also use lime juice instead of lemon juice for a slightly different flavor. I even experimented with adding a teaspoon of vanilla extract to the filling, and it was delicious!
Oven Adventures: Every oven is different, so make sure you keep an eye on your bars. If they’re browning too quickly, cover them loosely with foil. I had one oven that burned everything on the bottom, and now I always put a baking sheet on the rack below to deflect some of the heat.
The Glaze Secret: Melted butter makes glaze really shine! Its optional but I highly recommend it.
Storing and Reheating Tips
Proper storage is key to keeping these lemon coconut bars fresh and delicious:
Room Temperature: Store the bars in an airtight container at room temperature for up to 3 days. I like to place a piece of parchment paper between the layers to prevent them from sticking together. The texture might soften slightly after a day or two.
Refrigerator Storage: For longer storage, keep the bars in an airtight container in the refrigerator for up to 5 days. The filling will firm up a bit in the fridge, but the bars will still be delicious. Bring them to room temperature before serving for the best flavor and texture.
Freezer Instructions: These bars freeze beautifully! Wrap them individually in plastic wrap and then place them in a freezer-safe container or bag. They can be frozen for up to 2 months. Thaw them in the refrigerator overnight before serving.
Glaze Timing Advice: If you’re planning to freeze the bars, it’s best to glaze them after thawing. The glaze can sometimes crack or become sticky in the freezer.
Tested Methods: I’ve found that the key is to wrap them really well to prevent freezer burn. I even double-wrap them sometimes, just to be safe. And always label the container with the date so you know how long they’ve been in the freezer!
Frequently Asked Questions
Final Thoughts
I hope you give these lemon coconut bars a try! They’re truly one of my favorite treats to make, and they always bring a smile to everyone’s face. The bright, zesty flavor and the creamy, coconutty texture are simply irresistible. Plus, they’re so easy to make – even a beginner baker can nail this recipe. If you love these, you should also check out my recipe for coconut cream pie bars – they’re another family favorite! Happy baking, and I can’t wait to hear how yours turn out! Leave a comment below and let me know if you tried them, and don’t forget to share your own variations! I love to hear what you guys come up with!
Lemon Coconut Bars
Ingredients
Crust Ingredients
- 1.5 cups Graham cracker crumbs
- 0.5 cups Sugar
- 0.5 cups Shredded coconut
- 0.5 cups melted butter
Lemon Filling Ingredients
- 1 can Sweetened condensed milk
- 1 cup Lemon juice
- 2 large Eggs
- 1 tsp Lemon zest
Instructions
Preparation Steps
- Preheat oven to 350°F (175°C).
- Combine graham cracker crumbs, sugar, coconut, and melted butter. Press into a greased 8x8 inch baking pan.
- In a separate bowl, whisk together condensed milk, lemon juice, eggs, and lemon zest.
- Pour lemon mixture over the crust.
- Bake for 25-30 minutes, or until set.
- Let cool completely before cutting into bars.
