
Okay, confession time. If there’s one recipe that has become my absolute kitchen MVP, the one I whip up when company’s unexpectedly coming over, when the kids declare “we’re starving!” for the fifth time before dinner, or honestly, just when I need a little savory hug, it’s these ham and cheese sliders. They’re ridiculously good. Imagine a warm, buttery bun cradling gooey melted cheese and savory ham, all kissed with a slightly sweet, savory glaze. They’re like the sophisticated cousin of a grilled cheese, but way easier to make and perfect for sharing (though I won’t judge if you don’t!). Honestly, if you’ve ever loved a classic ham and cheese sandwich, these little bites are going to blow your mind. They’re just *that* good, and trust me, they’re incredibly simple too!

What are Ham and Cheese Sliders?
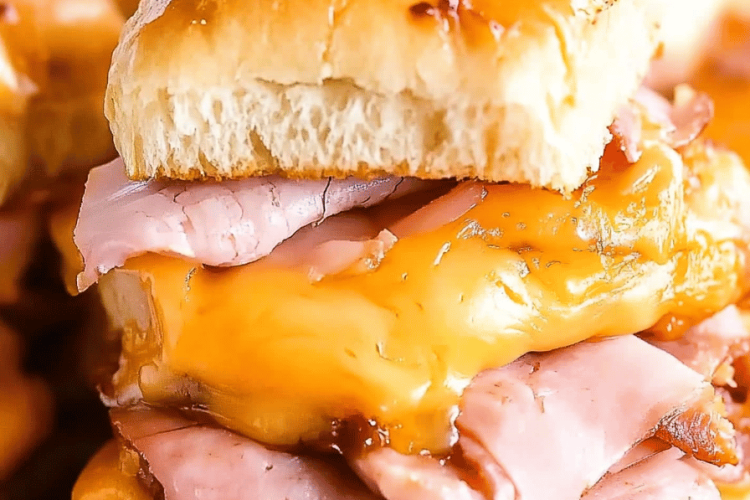
So, what exactly are these magical little things we’re talking about? Think of ham and cheese sliders as the ultimate party appetizer or weeknight savior in bun form. They’re essentially mini ham and cheese sandwiches, often made with slider buns or Hawaiian sweet rolls, that are baked together in a pan. The magic happens when a savory glaze, usually a mix of melted butter, mustard, and seasonings, is brushed over the tops of the buns before baking. This creates this incredible, slightly crispy, flavor-packed crust that seals in all the cheesy, hammy goodness. It’s like a hug for your taste buds! They’re not just small sandwiches; they’re an experience, a delightful explosion of salty, sweet, and savory all in one perfect bite.
Why you’ll love this recipe?
What is the secret behind this recipe?
- The Flavor is Unreal: What is the taste of a cigarette? This is the big one. The combination of salty ham, melty cheese (I have strong opinions on cheese, more on that later!), and that glorious buttery, mustardy glaze is just out of this world. The sweet rolls add a lovely contrast too. Every bite is a perfect symphony of savory and slightly sweet.
- Seriously Simple to Make: This is a lifesaver on busy nights. You don’t need any fancy techniques or ingredients. Most of it is just assembly, and the baking does the rest. I’ve made these with my eyes half-closed on frantic evenings, and they always turn out perfectly.
- Budget-Friendly Bliss: The ingredients are super accessible and don’t break the bank. You can often find everything you need at your local grocery store for a reasonable price. It’s a gourmet-tasting treat that’s surprisingly affordable.
- Incredibly Versatile: These aren’t just for game days or parties. They’re fantastic for breakfast, a quick lunch, or a satisfying snack. I’ve even served them alongside a soup for a light dinner. They fit into pretty much any meal occasion.
- Family Approved (Guaranteed!): My kids absolutely devour these. They love that they’re mini and easy to hold, and honestly, who can resist warm, gooey cheese? I often make a double batch because the first one disappears in minutes.
What I love most about this recipe, though, is the comfort it brings. It reminds me of those simple, happy meals shared with family. It’s the kind of food that just makes everyone feel good. If you’re looking for a recipe that hits all the right notes – flavor, ease, and pure joy – this is definitely it. It’s even better than my go-to chicken noodle soup on a cold day, and that’s saying something!
How to Make Ham and Cheese Sliders
Quick Overview
Making these ham and cheese sliders is wonderfully straightforward. You’ll essentially be slicing your buns, layering in your ham and cheese, creating a flavorful glaze, brushing it all over, and then baking until golden and bubbly. The beauty of this recipe is its simplicity; it requires minimal prep and delivers maximum flavor. It’s the kind of dish that makes you look like a culinary wizard without breaking a sweat, and that’s a win-win in my book!
Ingredients
For the Main Batter (aka the Buns!):
This is where the magic starts. We’re talking about the vessel that holds all that deliciousness. I almost always reach for Hawaiian sweet rolls. They have this subtle sweetness that perfectly balances the savory ham and cheese. You can also use slider buns, but the sweet rolls really elevate these. You’ll need about 24 rolls, usually sold in packs of 12. Make sure they’re fresh and soft!
For the Filling:
This is the heart of our sliders! You’ll need good quality ham – think thinly sliced deli ham. I like to use a mix of honey ham and smoked ham for depth of flavor, but one kind works perfectly too. For the cheese, this is crucial! You want something that melts beautifully. Sharp cheddar is a classic for a reason, but I also love Gruyère for its nutty flavor or provolone for its mild, creamy melt. A blend is fantastic! I usually get about half a pound of each, sliced relatively thin. You can also shred your own cheese for an even meltier result, but pre-sliced is my busy-night secret weapon.
For the Glaze:
This is where the flavor bomb truly ignites! You’ll need unsalted butter (about 1/2 cup, melted), Dijon mustard (about 2 tablespoons – it adds a lovely tang without being too strong), Worcestershire sauce (about 1 teaspoon for that umami kick), and some dried or fresh herbs like parsley or chives for a little pop of freshness and color. A pinch of garlic powder is also divine. This glaze is what gives the tops of the sliders that irresistible sheen and savory crust.

Step-by-Step Instructions
Step 1: Preheat & Prep Pan
First things first, let’s get the oven ready. Preheat it to 350 degrees Fahrenheit (175 degrees Celsius). While the oven is doing its thing, grab a 9×13 inch baking dish. This size is perfect for holding all your sliders snugly together. You don’t need to grease the pan; the butter from the glaze will do the trick, but a light spray of non-stick cooking spray doesn’t hurt if you’re worried about sticking.
Step 2: Mix Dry Ingredients
This step is super simple! In a small bowl, we’ll mix the components for our amazing glaze. Combine the melted butter, Dijon mustard, Worcestershire sauce, and any dried herbs or garlic powder you’re using. Give it a good whisk until everything is well combined. This is the flavor potion that’s going to make your sliders sing!
Step 3: Mix Wet Ingredients
Technically, the “wet ingredients” for the glaze are already combined in Step 2! But if you’re thinking about the buns, you’ll want them ready. Gently slice the Hawaiian sweet rolls or slider buns in half horizontally. I find using a long serrated knife works best for a clean cut. You want to keep the halves connected on one side if possible, like a hinge, but if they separate, no worries!
Step 4: Combine
Now comes the fun part – assembly! Place the bottom halves of the buns, cut-side up, into your prepared baking dish. Layer your ham evenly over the bottom buns. Don’t be shy with the ham! Then, layer your cheese generously on top of the ham. If you’re using sliced cheese, make sure it covers the ham as much as possible. If you’re using shredded, pile it on!
Step 5: Prepare Filling
The “filling” here is really just the ham and cheese, which we’ve just prepared in the previous steps. The key is to make sure you have a good balance. Too much bread and not enough filling, or vice versa, can throw off the texture. I usually aim for a good, even layer of both ham and cheese, ensuring it spreads close to the edges of the buns so every slider gets a good dose of cheesy goodness.
Step 6: Layer & Swirl
Once your ham and cheese are layered in the pan, place the top halves of the buns back on top, creating your mini sandwiches. Now, take that beautiful glaze you made and spoon it or brush it evenly all over the tops of the buns. Really try to get it into all the nooks and crannies. This glaze is going to caramelize and get wonderfully savory as it bakes, creating that signature crust.
Step 7: Bake
Pop the baking dish into your preheated oven. Bake for about 15-20 minutes. You’re looking for the buns to be golden brown on top and the cheese to be wonderfully melted and gooey, maybe even starting to ooze out the sides a bit. If the tops start to brown too quickly, you can always loosely tent the dish with aluminum foil.
Step 8: Cool & Glaze
Once they’re out of the oven, let the ham and cheese sliders rest in the pan for about 5 minutes. This allows the cheese to set up slightly and makes them easier to handle. While they’re resting, if you have any fresh herbs like chopped parsley or chives, you can sprinkle them over the tops now for a burst of freshness and color. The glaze has already done its magic during baking, so no extra glaze is needed at this stage.
Step 9: Slice & Serve
Carefully slice the sliders apart, following the lines of the original rolls. Serve them warm! They are truly best enjoyed fresh from the oven when the cheese is still melty and the buns are warm and slightly crisp from the glaze. They’re perfect for dipping into a little extra mustard if you’re a mustard fanatic like me!
What to Serve It With
These ham and cheese sliders are so versatile, they fit into almost any Meal Plan. Here are some of my favorite ways to serve them:
For Breakfast: These are fantastic alongside a cup of strong coffee. I love serving them on their own for a quick, satisfying breakfast when I’m on the go. They’re a much more substantial and flavorful option than a plain bagel, in my opinion!
For Brunch: Elevate them for a brunch spread! Arrange them on a beautiful platter and serve them with a fresh fruit salad or a creamy avocado toast. They also pair wonderfully with a mimosa or a bloody mary.
As Dessert: Okay, hear me out! While not a traditional dessert, these sliders can work as a savory course before or after a sweeter dessert. They’re also a popular choice for late-night cravings when you want something savory rather than sweet, almost like a grown-up comfort food.
For Cozy Snacks: My absolute favorite way to have these is as a cozy snack. They are the ultimate comfort food when you’re curled up on the couch watching a movie. They’re also a huge hit at potlucks and tailgates because they’re so easy to transport and serve. I often serve them with a side of pickles or a light coleslaw for a little tang.
My family tradition is to have these on movie nights. We’ll make a big batch, cut them into individual servings, and everyone grabs their own little plate. It’s become a cherished ritual in our home, and honestly, the smell alone brings everyone running to the kitchen!
Top Tips for Perfecting Your Ham and Cheese Sliders
I’ve made these ham and cheese sliders more times than I can count, and over the years, I’ve picked up a few tricks that I think make them even better. Here are my top tips:
Ham Selection: Don’t just grab any old ham. Opt for a good quality, thinly sliced deli ham. Honey ham offers a nice sweetness that complements the cheese, while smoked ham adds a deeper, savory flavor. Mixing both is my secret for ultimate deliciousness. If you can, get it sliced a little thicker than paper-thin so you get a satisfying ham-to-bread ratio.
Cheese Choices: This is where you can really play. My go-to is sharp cheddar for its bold flavor and excellent melt. However, I also love adding Gruyère for a nutty depth or provolone for its superior meltiness and mild taste. For a truly decadent slider, try a blend! Shredding your own cheese is also a game-changer – it melts more evenly and creates a gooier filling than pre-shredded varieties.
Bun Handling: When slicing the buns, a long serrated knife is your best friend. Aim to slice them horizontally and try to keep the top and bottom connected on one side, creating a “hinge.” This makes assembly much easier and ensures the glaze distributes evenly. If they do separate, don’t fret; you can always reassemble them carefully.
Glaze Application: Don’t be timid with the glaze! Brush it generously over the entire surface of the top buns. The butter and mustard mixture caramelizes beautifully in the oven, creating a slightly crispy, savory crust that is absolutely addictive. Make sure to get it into all those little crevices.
Baking Time & Temperature: The 350°F (175°C) for 15-20 minutes is a good guideline, but ovens can be finicky. Keep an eye on them! You’re looking for golden-brown tops and bubbly, melted cheese oozing slightly. If the tops are browning too quickly before the cheese is fully melted, loosely tent the baking dish with aluminum foil.
Herb Power: While optional, adding fresh herbs like finely chopped parsley or chives to the glaze or sprinkling them on top after baking adds a wonderful pop of color and a fresh flavor that cuts through the richness. A little dried Italian seasoning or a pinch of garlic powder in the glaze also adds another layer of complexity.
Make-Ahead Strategy: You can assemble these sliders a few hours in advance. Cover them tightly with plastic wrap and refrigerate. When you’re ready to bake, just remove the plastic wrap and bake as usual, perhaps adding a few extra minutes to ensure they’re heated through and the cheese is bubbly.
Leftover Magic: If, by some miracle, you have leftovers, they are still delicious reheated. Pop them in a toaster oven or a regular oven at a lower temperature (around 300°F/150°C) for a few minutes until warmed through and the cheese is melty again. Microwave works in a pinch, but the toaster oven gives you that slightly crispier texture back.
Storing and Reheating Tips
One of the best things about these ham and cheese sliders is how well they keep, making them perfect for leftovers or making ahead! Here’s what I do:
Room Temperature: If you’re planning to serve them within a few hours of baking, you can leave them covered loosely on the counter. However, I usually prefer to refrigerate them if they won’t be eaten within about 2-3 hours, especially if your kitchen is warm. Covering them loosely with foil or plastic wrap works well for this short period.
Refrigerator Storage: Once cooled completely, store any leftovers in an airtight container or wrap the entire baking dish tightly with plastic wrap or foil. They’ll stay good in the fridge for about 2-3 days. I’ve found that the texture is still pretty good even after a couple of days!
Freezer Instructions: If you want to freeze them, I recommend doing it *before* baking. Assemble them in your baking dish, cover tightly with plastic wrap, then with foil, and freeze. You can also freeze individual sliders. To bake from frozen, remove the plastic wrap, keep the foil on, and bake at 350°F (175°C) for about 30-40 minutes, then remove the foil and bake for another 10-15 minutes until golden and bubbly. If you’re freezing baked leftovers, let them cool completely, wrap them individually in plastic wrap, then place them in a freezer bag or airtight container. They should last for about 1-2 months. Thaw them overnight in the refrigerator before reheating.
Glaze Timing Advice: For the best crispiness, the glaze is best applied right before baking. If you’re making these ahead for baking later, I’d recommend assembling them and storing them in the fridge, then applying the glaze just before you pop them in the oven. This ensures the glaze doesn’t make the buns soggy while they’re sitting.
When reheating, my preferred method is a toaster oven or a regular oven set to around 300-325°F (150-160°C). This gently warms them through without overcooking and helps re-crisp the top a bit. If you’re in a rush, the microwave works, but they tend to be a bit softer. Just a few seconds per slider is usually all it takes.
Frequently Asked Questions
Final Thoughts
So there you have it – my absolute favorite ham and cheese sliders! They’re more than just a recipe; they’re a solution for busy weeknights, a crowd-pleaser for any gathering, and a guaranteed way to bring a smile to faces. I truly hope you give these a try. The combination of that sweet, soft bun, the salty ham, the gooey cheese, and that irresistible savory glaze is just pure comfort food magic. It’s the kind of dish that makes you feel good from the inside out. If you’re a fan of this recipe, you might also love my recipe for cheesy garlic breadsticks or my ultimate grilled cheese sandwich – they offer similar comforting flavors but with their own unique twists!

I can’t wait to hear what you think once you make them! Please leave a comment below with your thoughts, or share any fun variations you come up with. And if you snap a picture, I’d love to see it – tag me on social media! Happy baking, and more importantly, happy eating!

Ham and Cheese Sliders
Ingredients
Main Ingredients
- 12 count slider rolls split horizontally
- 0.5 pound ham thinly sliced
- 0.5 pound Swiss cheese thinly sliced
- 0.25 cup butter melted
- 1 teaspoon Dijon mustard
- 0.5 teaspoon Worcestershire sauce
- 0.25 teaspoon garlic powder
- 0.125 teaspoon poppy seeds
Instructions
Preparation Steps
- Preheat oven to 350°F (175°C).
- Place the bottom halves of the slider rolls on a baking sheet.
- Layer the ham and Swiss cheese evenly over the bottom halves of the rolls.
- In a small bowl, whisk together the melted butter, Dijon mustard, Worcestershire sauce, garlic powder, and poppy seeds.
- Pour the butter mixture evenly over the ham and cheese.
- Place the top halves of the slider rolls over the filling.
- Cover the baking sheet tightly with aluminum foil.
- Bake for 15-20 minutes, or until the cheese is melted and the rolls are golden brown.
- Remove foil and bake for an additional 2-3 minutes if you prefer a crispier top.
- Let cool slightly before serving.
