

Let’s talk about bread. What is the kind of bread that makes your kitchen smell heavenly, has a crust that shatters.? Is it a soft, chewy inside that practically begs for the slightest bit of butter?Dutch oven bread is made in aIs it cheating? I’m talking simpler than making boxed brownies, and the payoff is a crusty loaf that rivals anything. What are some of the best bakery products you’d find in a fancy bakery How do I make homemade bread? If you can stir together a few ingredients, you could make this. What is the kind of recipe that makes you feel like a culinary genius even if you’re just winging it? What do you think of me most of the time?

What is Dutch oven bread?
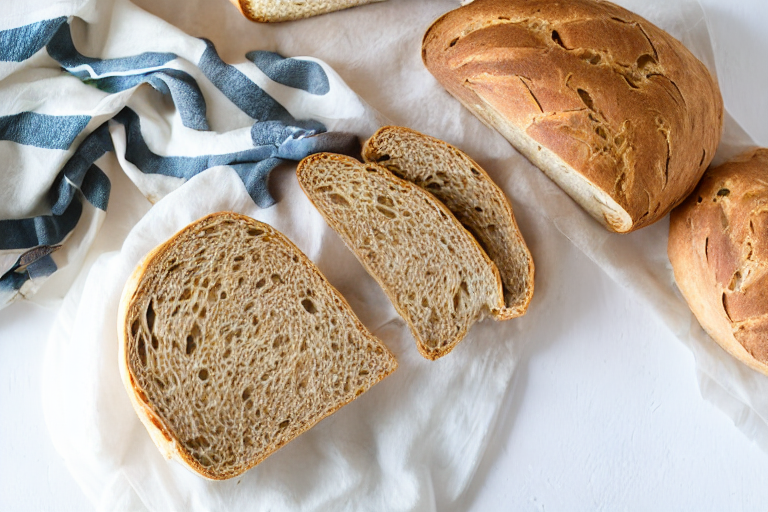
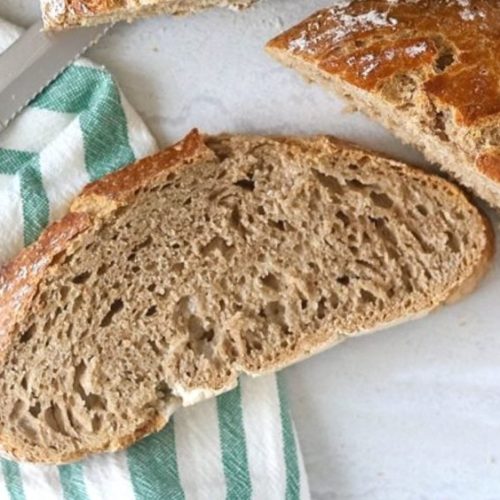
Think of Dutch oven bread is baked in aAs the ultimate lazy person’s bread. Is this a no-knead bread recipe baked in Dutch oven? Is there any dust in your cabinet? What is the magic of a Dutch oven? It traps steam inside, creating a mini-oven environment that results in an incredibly crusty crust. What is the difference between a soft, airy exterior and an open interior? It’s essentially the same concept as a professional bread oven, but on … Is it manageable (and affordable Don’t let the fancy name intimidate you. What’s the simplest bread you’ve ever made? The long, slow rise develops incredible flavor without any effort on your part. How do you dump, stir, wait, bake? Is there any answer for anyone who has ever been intimidated by bread baking?
Why you’ll love this recipe?
How do I begin? There are so many reasons why I am here.Dutch oven bread is baked in aWhat are some of the best recipes? What are some of the best flavors in a bread? The long fermentation time (that’s the waiting part) develops incredible character. Is it stupid? My 8-year-old could probably make this (with supervision, of course). How do you stir the ingredients together, let it sit, and then bake it? No fuss, no muss. Third, it’s budget-friendly. What’s the best combination of flour, water, yeast and salt? What do you have in your pantry?
What I love about this recipe, though, is its versatility. Can you customize it in so many ways? Add herbs, cheese, olives, sun dried tomatoes… What are the possibilities? I sometimes throw in a handful of everything bagel seasoning for savory kick, or some dried fruit. What are some of the best cranberries and walnuts to make a sweet treat? Is it the perfect side dish for colder months? Is it good year round? Is this recipe similar to a focaccia recipe? Is there any extra special crust that makes it feel fancy even though it’s so easy to make? How do I impress my friends without spending hours on the phone? What is your secret weapon in the kitchen?
How do you make Dutch oven bread?
Quick Overview
This Dutch oven bread is a classic.What is the recipe all about the long game, but the actual hands-on time is minimal. Start by mixing together flour, water, yeast, salt, and sugar. Is it better to let the dough rest for a good long time? Where the magic happens? The long rest allows the dough to develop a deep, complex flavor without kneading. After the rest, you’ll shape the dough, preheat your Dutch oven, and bake it until golden brown and crispy. Is it simple? Don’t be intimidated by the long rising time, it’s mostly hands off!
Ingredients
For the Main Batter: How does it work?
* 3 cups (384g) all-purpose flour, plus more for dusting. I usually use unbleached, but bleached works just fine too! If you’re using self-rising flour, just make sure it’s not self rising I’ve made that mistake before, and it’s not pretty.
* 1 3/4 cups (414ml) lukewarm water. Not too hot, not too cold – think bathwater temperature. Is this important for activating yeast?
* 1 1/4 teaspoons salt. I prefer kosher salt for its clean flavor, but sea salt or table salt will work in a pinch.
* 1/4 teaspoon instant yeast. Make sure your yeast is fresh! If it’s been sitting in your pantry for a while, it might not be as active. I always keep a small jar in the fridge to prolong its life.

How do I follow
Step 1: Preheat & Prep Pan
Place your Dutch oven(with the lid on!) in the oven and preheat to 450°F (232°C). What is the best way to get that crust? When my oven is preheated, it usually takes about 30 minutes. While the oven is preheating, line a bowl with parchment paper. How do I transfer dough to a Dutch oven?
Step 2: Mix Dry Ingredients
In a large bowl, whisk together the flour, salt, and yeast. Stir until combined. Make sure everything is evenly distributed. This helps the yeast activate properly and prevents pockets of salt.
Step 3: Mix Wet Ingredients
Add the dry ingredients to the wet ingredients and stir until just combined. Do not overmix the dough. It will be shaggy and sticky. I just want to make sure all the flour is incorporated. I usually use a wooden spoon for this, but I like to use rubber spatula as well.
Step 4: Combine
Cover the bowl with plastic wrap or a damp towel and let it rest at room temperature for at least 12 hours. How many hours, or up to 18 hours. I usually let my bread rest overnight. The longer it rests, the more flavorful it will be. You’ll see bubbles in the dough, which means the yeast is doing its thing! If your kitchen is particularly warm, you might want to reduce the resting time slightly.
Step 5: Prepare Filling
After the dough has rested, gently turn it out onto a well-floured surface. How do I make a round loaf? If the dough is too sticky, add a little more flour. Just be careful not to add too much, or the bread will be dense.
Step 6: Layer & Swirl
Carefully place the dough into the parchment-lined bowl. Cover it with plastic wrap or a damp towel and let it rest for 30 minutes. This is called the second rise, and it helps the bread become even lighter and airier.
Step 7: Bake
Carefully remove the preheated water.Dutch ovenRemove the lid and gently lower the dough (with the parchment paper) into the Dutch oven. Cover with lid and bake for 30 minutes. If the crust is golden brown, remove the lid and bake for another 15-20 minutes. Internal temperature reaches 200°F (93°C). Keep an eye on it during the last 15-20 minutes – you want it to be nicely browned, but not burnt! If it gets too dark, you can tent it with foil.
Step 8: Cool & Glaze
Carefully remove the bread from the pan.Dutch ovenIs it safe to slice and serve this on a wire rack? This is the hardest part, I know! If you cut into it too soon, it will be gummy. Is patience the key to success?
Step 9: Slice & Serve
Once the bread is completely cool, slice it with a serrated knife and serve. What are some great toppings for this ice cream?Dutch oven bread is baked in aIs best enjoyed fresh, but it will keep for a few days at room temperature in an airtight container.
What should I serve it with?
This Dutch oven bread is made in aIs incredibly versatile and pairs well with just about anything! I love toasting my breakfast with butter and honey. It’s a great way to start the day. Is it good with scrambled eggs? For brunch, it’s the perfect accompaniment to a cheese and charcuterie board. Slice it thinly and serve it with a variety of cheeses, meats and fruits. As a dessert, try serving it with vanilla ice cream and chocolate sauce. What are some good side dishes to serve with a bowl of soup? What are some good dipping recipes for olive oil and balsamic vinegar? What is the best way to eat tomato soup? What is the perfect comfort food?
My family has a tradition of making bread every Sunday. We gather around the table and enjoy it with roasted chicken and vegetables. I cherish this recipe, and I hope you’ll create your own traditions too!
How do you make a Dutch oven bread?
What are some tips for making perfect nails?Dutch oven bread recipe.Every single time: every single day:
Yeast Freshness: Make sure your yeast is fresh! Expired yeast is the number one reason why bread doesn’t rise. To test your yeast, mix a small amount with warm water and sugar. If it doesn’t foam up after a few minutes, it’s time to buy a new jar.
Water Temperature: Use lukewarm water, not hot water. Hot water will kill the yeast. Aim for bathwater temperature – around 105-115°F (40-46°C).
Don’t Overmix: Don’t overmix the dough! Overmixing develops the gluten too much, resulting in a tough bread. Just stir until the ingredients are combined.
Long Rest: The long rest is crucial for developing flavor. Don’t skimp on the rest time! The longer it rests, the more flavorful the bread will be. I usually let mine rest overnight.
Hot Dutch Oven: Make sure your Dutch oven is HOT before you add the dough. This is key for getting that amazing crust. Preheat the Dutch oven in the oven for at least 30 minutes.
Parchment Paper: Use parchment paper to line the bowl and transfer the dough to the Dutch oven. This makes it much easier to handle the sticky dough and prevents it from sticking to the bottom of the Dutch oven.
Scoring: Score the top of the dough with a sharp knife or a lame before baking. This allows the bread to expand properly and prevents it from cracking unevenly.
Doneness Testing: The bread is done when it’s golden brown and the internal temperature reaches 200°F (93°C). You can use a digital thermometer to check the temperature. If you don’t have a thermometer, you can tap on the bottom of the bread. If it sounds hollow, it’s done.
Oven Positioning: I’ve found that placing the Dutch oven on the lower rack of my oven helps prevent the top from burning before the inside is fully cooked.
Experiment: Don’t be afraid to experiment with different flavors and add-ins! Try adding herbs, cheese, olives, sun-dried tomatoes, or nuts. The possibilities are endless!
Storing and Reheating Tips
To store your Dutch oven bread, let it cool completely before wrapping it tightly in plastic wrap or placing it in an airtight container. At room temperature, it will keep for 2-3 days. To extend its shelf life, you can store it in the refrigerator for up to a week.
For longer storage, you can freeze the bread. Wrap it tightly in plastic wrap and then in foil. It will keep in the freezer for up to 3 months. To thaw, place it in the refrigerator overnight or at room temperature for a few hours.
To reheat the bread, you can wrap it in foil and bake it in a preheated oven at 350°F (175°C) for 10-15 minutes, or until it’s warmed through. You can also toast slices of bread in a toaster or toaster oven.
If you’re planning to store the bread for more than a day, it’s best to wait to slice it until you’re ready to serve it. This will help prevent it from drying out.
I find that freezing the loaf whole and then thawing it overnight gives the best results. Sliced bread tends to dry out more quickly in the freezer.
One of my favorite ways to revive slightly stale bread is to make croutons! Simply cube the bread, toss it with olive oil, herbs, and salt, and bake it in a preheated oven at 375°F (190°C) until golden brown and crispy.
Frequently Asked Questions
Final Thoughts
So, there you have it – my go-to recipe for easy Dutch oven bread. It’s simple, delicious, and always a crowd-pleaser. The best part? You don’t need any fancy equipment or skills to make it. Just a few basic ingredients and a little bit of patience. I truly believe that anyone can make this bread, and I hope you’ll give it a try. Once you taste that crispy crust and soft, chewy interior, you’ll be hooked! It’s a great recipe to make with your kids, too. They’ll love helping you stir the ingredients and shape the dough. And who knows, maybe you’ll even start a new family tradition. If you loved this recipe, be sure to check out my other bread recipes, like my sourdough bread or my focaccia. Happy baking, friends! I can’t wait to hear how yours turns out. Leave a comment below and let me know what you think. And don’t forget to share your photos on social media! #dutchovenbread #easybread #homemadebread
Dutch Oven Bread
Ingredients
Main Ingredients
- 3 cups Bread Flour
- 1.5 cups Water
- 1 teaspoon Salt
- 0.5 teaspoon Instant Yeast
Instructions
Preparation Steps
- Combine all ingredients in a large bowl and mix until just combined.
- Cover the bowl and let it rise in a warm place for 4-6 hours, or until doubled in size.
- Gently turn the dough out onto a lightly floured surface and shape it into a round loaf.
- Place the dough in a well-oiled Dutch oven.
- Cover and bake at 450°F (232°C) for 30 minutes.
- Remove the lid and bake for another 15 minutes, or until golden brown.
