
You know, there are some dishes that just feel like a warm hug on a plate. For me, that’s corned beef hash. It’s not just food; it’s a memory. I can still picture my grandmother, apron dusted with flour, coaxing her perfectly browned hash into existence on a Saturday morning. The aroma would fill our little house, a savory promise of a delicious day. This corned beef hash is my tribute to her, and honestly, it’s the one I turn to whenever I need something truly satisfying and deeply comforting. It’s the kind of meal that’s so much better than what you’d get from a can, and while it takes a little love, it’s surprisingly straightforward. If you’ve ever made a really good shepherd’s pie, you’ll appreciate the layered comfort here, but this corned beef hash brings its own unique, hearty charm to the table.
What is Corned Beef Hash?
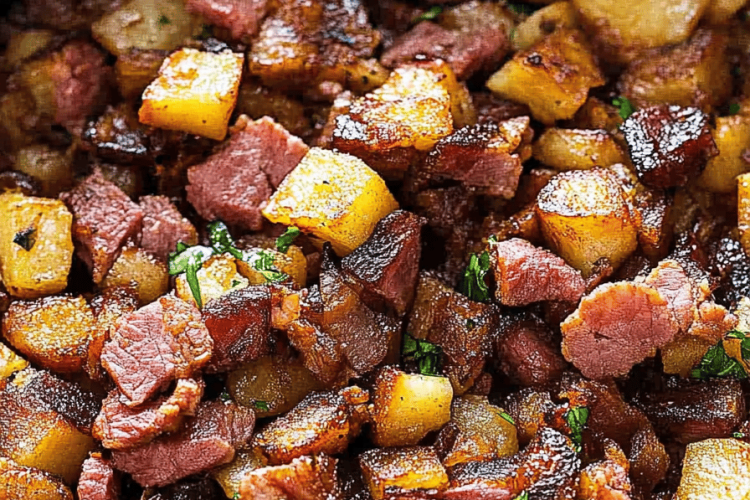
So, what exactly is corned beef hash? At its heart, it’s a beautiful marriage of tender, flavorful corned beef and hearty potatoes, usually mixed with some aromatics like onions and then pan-fried until it’s got that irresistible crispy, golden crust. Think of it as a savory, incredibly satisfying hash that’s far more substantial than your average breakfast potato hash. It’s traditionally made with leftover corned beef from St. Patrick’s Day or a good quality canned corned beef if you’re in a pinch. It’s the ultimate comfort food, a dish that feels both rustic and wonderfully refined when done right. It’s not fancy, but oh my goodness, it’s good. It’s the kind of dish that can anchor a weekend brunch or be a hearty supper on a chilly evening.
Why you’ll love this recipe?
There are so many reasons why this corned beef hash recipe has become a staple in my kitchen, and I just know you’re going to adore it too. First off, the flavor. Oh, the flavor! You get that salty, savory punch from the corned beef, beautifully complemented by the soft, fluffy potatoes and the subtle sweetness of caramelized onions. When it all hits that hot skillet, it creates these crispy, golden-brown edges that are just out of this world. What I love most about this recipe is how incredibly forgiving it is. It’s simple enough for a weeknight, but special enough for guests. And let’s talk about cost-efficiency – this is a dish that uses humble ingredients to create something truly spectacular. It’s way more economical than ordering brunch out, and honestly, much tastier! Plus, it’s so versatile. You can serve it for breakfast, lunch, or dinner, and it always feels right. It’s a bit like a really good grilled cheese or a perfect pasta dish; it hits that spot every single time. I’ve tried countless versions over the years, but this one, with its perfect balance of textures and flavors, is the one I always come back to. It’s a lifesaver on busy mornings when you need something substantial, and it’s a family favorite that always gets requests for seconds.
How do I make corned beef hash?
Quick Overview
Making this corned beef hash is a straightforward process that centers around transforming simple ingredients into a flavor-packed, satisfying meal. You’ll start by prepping your corned beef and potatoes, then sautéing your aromatics before bringing it all together in a skillet to get that glorious crust. It’s all about building layers of flavor and texture, and the key is a good, hot pan and a little patience. This method ensures every bite is a perfect blend of crispy edges and tender insides, making it a true crowd-pleaser and a joy to make.
Ingredients
For the Main Base:
1 pound cooked corned beef, finely diced (leftover or good quality canned)
2 large russet potatoes, peeled and diced into 1/2-inch cubes
1 medium yellow onion, finely chopped
2 tablespoons unsalted butter
2 tablespoons olive oil
Salt and freshly ground black pepper, to taste
For a Little Extra Zing (Optional):
1/4 cup finely chopped fresh parsley
1 tablespoon Worcestershire sauce
For Serving:
Eggs, fried or poached, to serve on top
Ketchup or your favorite hot sauce
Step-by-Step Instructions
Step 1: Preheat & Prep Pan
Grab your largest, heaviest skillet – cast iron is absolutely perfect here if you have it. We want to get this nice and hot over medium-high heat. Add the butter and olive oil. Let them shimmer; the butter should melt and start to lightly foam. This hot, greased pan is crucial for getting that beautiful crispy exterior on our corned beef hash.
Step 2: Sauté Aromatics
Toss the finely chopped onion into the hot skillet. Stir them around for about 5-7 minutes, or until they start to soften and become translucent. You want them to get a little bit golden, but not burnt. This step builds a really nice sweet foundation for the hash.
Step 3: Add Potatoes & Corned Beef
Now, add your diced potatoes and the finely diced corned beef to the skillet. Stir everything together well, making sure the potatoes and corned beef are coated in the butter and oil. Season generously with salt and freshly ground black pepper. Remember, corned beef can be salty, so taste as you go.
Step 4: Form and Cook
Press the mixture down gently with your spatula to form an even layer. This is important for developing a good crust. Now, resist the urge to stir it constantly! Let it cook undisturbed for about 8-10 minutes. You want to hear that gentle sizzle. This allows the bottom to caramelize and get nice and crispy.
Step 5: Flip and Crisp
Carefully flip sections of the hash using your spatula. It might break apart a bit, and that’s totally okay! Just try to get as much of the crispy bits exposed to the pan as possible. Cook for another 8-10 minutes on the second side, pressing down again gently. Continue to cook and flip until the potatoes are tender and everything is beautifully golden brown and crispy all around.
Step 6: Add Optional Zing
If you’re using the parsley and Worcestershire sauce, stir them in during the last couple of minutes of cooking. This adds a lovely freshness and a bit of extra depth. Just stir it all through until combined.
Step 7: Serve!
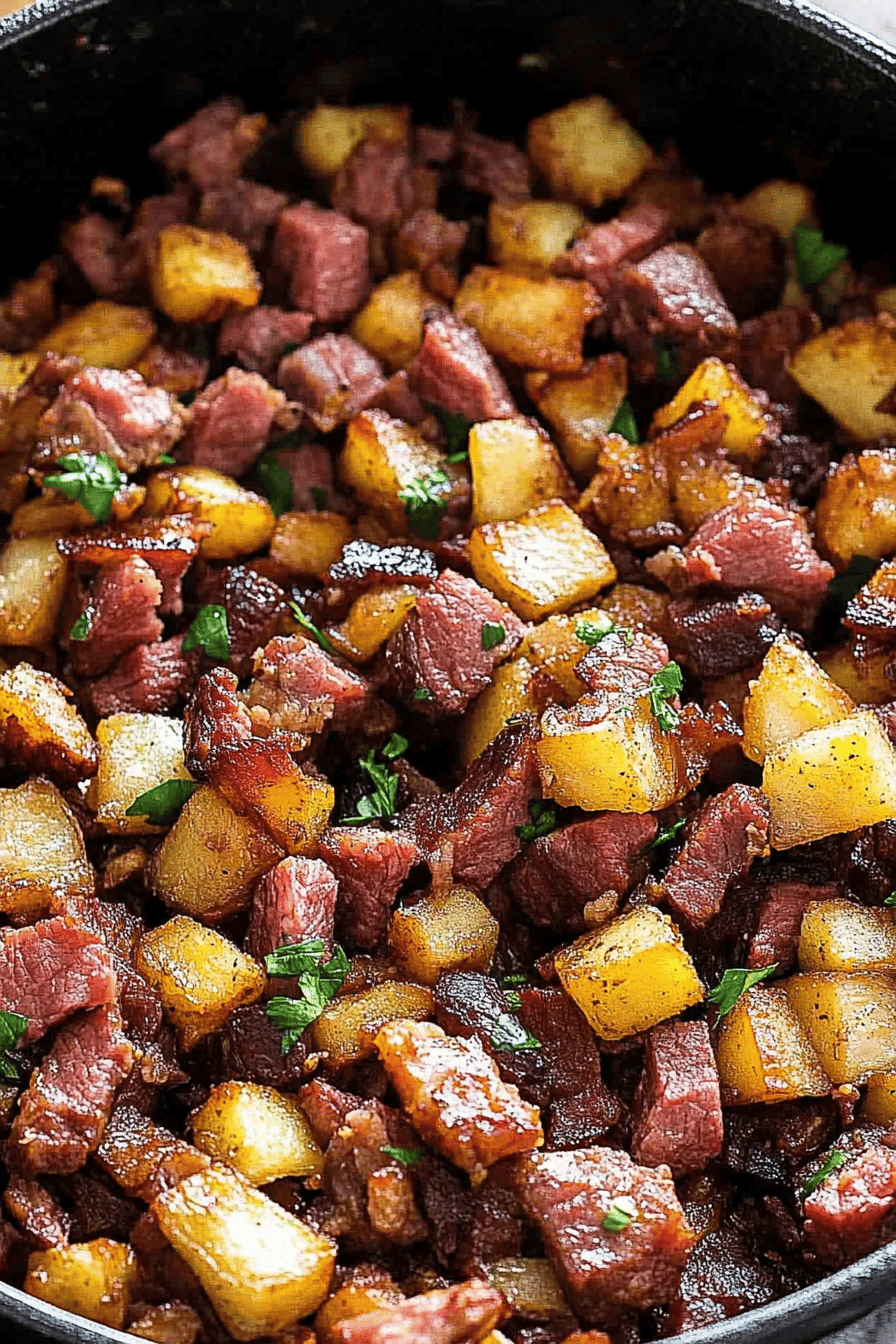
Once your corned beef hash is perfectly crispy and heated through, it’s ready to serve. Spoon generous portions onto plates.
Step 8: Top it Off
The absolute best way to enjoy this corned beef hash, in my humble opinion, is with a perfectly fried or poached egg on top. The runny yolk just creates its own delicious sauce. A little drizzle of ketchup or your favorite hot sauce is also a must for many people in my family!
Step 9: Enjoy Your Masterpiece
Dig in and savor every delicious bite. This is comfort food at its finest!
What to Serve It With
This corned beef hash is so versatile, it truly shines in so many different meal settings. For a classic breakfast, you can’t go wrong with a couple of fried eggs, sunny-side up, with that glorious yolk ready to mix into the hash. A side of toast for soaking up any extra goodness is always a winner. For a more indulgent brunch, think about serving it alongside some fresh fruit salad or perhaps some warm, buttery biscuits. It feels special without being fussy. If you’re leaning towards a dinner situation, this corned beef hash is substantial enough to be a main course. I love serving it with a simple green salad tossed with a tangy vinaigrette to cut through the richness, or perhaps some steamed green beans. And for those really cozy nights when you just need something deeply satisfying, a warm bowl of this hash, maybe with a dollop of Sour Cream or a sprinkle of chives, is pure bliss. My kids especially love it when I serve it with a side of tater tots – they call it their “super breakfast,” and who am I to argue?
Top Tips for Perfecting Your Corned Beef Hash
I’ve made this corned beef hash more times than I can count, and over the years, I’ve picked up a few tricks that really make a difference. First, and this is crucial: when you’re dicing your potatoes, aim for a relatively uniform size, about half an inch. This ensures they cook evenly and become tender without turning to mush. If they’re too small, they’ll overcook before the corned beef gets nice and crispy. If they’re too big, they might stay tough. For the corned beef itself, using leftover boiled corned beef is fantastic because it’s already tender and flavorful. If you’re using canned, make sure you dice it finely – big chunks won’t crisp up as nicely. I always find it helps to press the mixture down gently into the pan before cooking; this creates more surface area for browning and gets you that coveted crispy crust. Don’t be afraid of a good amount of fat (butter and oil combined) in the pan; it’s essential for achieving that golden-brown perfection and prevents sticking. Another tip I learned the hard way? Don’t overcrowd the pan! If you’re making a big batch, it’s better to cook it in two separate skillets. Overcrowding steams the ingredients instead of frying them, and you’ll lose that delicious crispiness. When it comes to flipping, don’t expect a perfect disc like a pancake. It’s a hash, it’s meant to be a little rustic! Use a good spatula and just flip sections; it’ll come together. If your potatoes seem to be browning too quickly before they’re tender, you can cover the pan for a few minutes to trap steam and help them cook through. Lastly, taste and adjust seasoning at the end. The saltiness of corned beef can vary, so a final sprinkle of salt and a good grind of fresh black pepper make all the difference.
Storing and Reheating Tips
One of the best things about corned beef hash is that it’s often even better the next day, and it reheats beautifully. If you have leftovers, the most important thing is to let the hash cool down completely before storing it. Once it’s cooled, transfer it to an airtight container. It will keep well in the refrigerator for up to 3 to 4 days. The texture might change slightly as it cools, but don’t worry, the flavor is still fantastic. When you’re ready to reheat, the key is to get it crispy again. The best method, hands down, is to reheat it in a skillet over medium-high heat. Add a little extra butter or oil to the skillet, just like when you first made it, and spread the hash out in a single layer. Let it cook undisturbed for a few minutes until the bottom forms a nice crust, then stir and flip to reheat evenly. This usually takes about 5-8 minutes. Microwaving is an option for speed, but it will sacrifice that wonderful crispiness, leaving you with a softer texture. If you do use the microwave, cover it loosely and heat in 30-second intervals until warmed through. For longer storage, you can freeze corned beef hash. Let it cool completely, then portion it into freezer-safe containers or wrap individual portions tightly in plastic wrap followed by a layer of aluminum foil or a freezer bag. It can be stored in the freezer for up to 2 months. To reheat from frozen, you can either thaw it in the refrigerator overnight and then reheat in a skillet as described above, or you can try reheating it directly from frozen in a skillet over medium-low heat, covered, allowing it to warm through gradually before uncovering to crisp up. For serving with eggs, I always recommend reheating it in the skillet first to get that perfect texture before topping with a freshly cooked egg.
Frequently Asked Questions
Final Thoughts
Honestly, this corned beef hash recipe is more than just a meal; it’s an experience. It’s the kind of dish that brings people together, filling your home with a wonderful aroma and your bellies with pure, unadulterated comfort. It’s a testament to how simple ingredients, prepared with a little care and attention, can create something truly magnificent. Whether you’re a seasoned cook or just starting out, I’m confident you’ll find this recipe rewarding and delicious. If you love this, you might also enjoy my recipes for Classic Shepherd’s Pie or my Easy Beef Stew – they share that same hearty, comforting spirit. I can’t wait for you to try this corned beef hash and make it your own. Please, if you do make it, leave a comment below to let me know how it turned out! I love hearing about your kitchen adventures, and seeing your photos is always a highlight. Happy cooking!
Classic Corned Beef Hash
Ingredients
Main Ingredients
- 0.45 pound cooked corned beef diced
- 0.68 pound Yukon Gold potatoes peeled and diced into 0.5-inch cubes
- 0.5 medium yellow onion finely chopped
- 2 tablespoon vegetable oil
- 2 tablespoon butter
- 0.5 teaspoon black pepper freshly ground
- 0.25 teaspoon salt
Instructions
Preparation Steps
- In a large skillet, heat the vegetable oil and butter over medium-high heat. Add the diced potatoes and cook for 10-12 minutes, stirring occasionally, until they are tender and golden brown.
- Add the chopped onion to the skillet and cook for another 5 minutes, until softened and translucent.
- Add the diced corned beef to the skillet. Season with salt and pepper. Cook for 5-7 minutes, stirring occasionally, until the corned beef is heated through and slightly crisped.
- Serve immediately. Top with a fried egg if desired.
