
You know those recipes that just feel like a warm hug on a plate? The ones you can whip up without even really looking at the instructions anymore because they’re etched into your soul? This cornbread recipe is exactly that for me. It’s the kind of thing I’ve made more times than I can count, from lazy Sunday mornings to frantic weeknight dinners when I need something comforting and quick. It’s not fussy, it’s not complicated, but oh my goodness, the flavour! It’s got that perfect balance of sweet and savory, a slightly crumbly texture that just melts in your mouth, and a gorgeous golden crust that makes you want to dive right in. Honestly, if you’re looking for a cornbread recipe that will become your go-to, your signature dish, you’ve found it. It’s miles better than those pre-packaged mixes, and dare I say, even a little more special than some of the fancier bakery versions I’ve tried. Get ready, because this is going to be your new favorite cornbread recipe.

What is this amazing cornbread?
So, what exactly makes this cornbread recipe so special? Well, think of it as the ultimate comfort food in baked form. It’s essentially a quick bread, meaning it uses a leavening agent like baking powder or baking soda instead of yeast, so you don’t have to wait around for dough to rise. This makes it incredibly fast and approachable, even for beginners. The “cornbread” part, of course, comes from the star ingredient: cornmeal. I’m pretty particular about the type of cornmeal I use – I’ll get into that later – but generally, it gives it that distinctive, slightly gritty texture and a wonderful, subtle corn flavor that’s just *chef’s kiss*. It’s not quite a cake, but it’s definitely more indulgent than a plain bread. It’s the kind of thing that bridges the gap between a side dish and a treat. It’s humble, honest, and absolutely delicious. The name is pretty straightforward, but the taste? That’s where the magic happens.
Why you’ll love this recipe?
What are some of the reasons why this cornbread recipe has earned a permanent spot in my heart (and my recipe binder)?flavor is just out of this world. It’s got a lovely sweetness that isn’t overpowering, perfectly balanced by the savory notes of the cornmeal. When it comes out of the oven, the aroma alone is enough to make your whole house smell like home. Then there’s the simplicity. I’m not kidding when I say you can have this mixed up and in the oven in about 10 minutes flat. It’s a lifesaver on busy weeknights when you need a quick side dish, or even when you’re craving something a little sweet but don’t want to go through the whole process of baking a cake. Plus, it’s incredibly cost-efficient. The ingredients are all pantry staples, meaning you likely already have most of them on hand. No fancy, expensive items needed here!versatility! Oh, my goodness. I love this cornbread for breakfast, slathered with butter and a drizzle of honey. It’s the perfect accompaniment to chili or barbecue. It’s even fantastic served warm as a simple dessert with a scoop of ice cream. What I love most about this recipe, though, is that it’s so forgiving. I’ve made little tweaks here and there over the years, and it always turns out wonderfully. It’s the kind of recipe that builds confidence in the kitchen. If you enjoyed my blueberry muffin recipe, you’ll appreciate the same level of ease and deliciousness here!
How to Make My Favorite Cornbread
Quick Overview
This cornbread recipe is all about speed and simplicity. You’ll whisk together your dry ingredients, whip up your wet ingredients in a separate bowl, then combine them just until they’re married. Pour it into a preheated, buttered pan, bake until golden and delicious, and that’s it! The whole process from start to finish, including baking time, can be done in under an hour. The key is not to overmix and to bake it in a properly hot pan for that perfect crust. It’s really that easy, and the results are consistently fantastic.
Ingredients
For the Main Batter:
2 cups all-purpose flour. I usually just grab whatever’s in the pantry, but if you have a good quality unbleached all-purpose flour, it makes a slight difference. Just make sure it’s not self-rising; we’re adding our own leavening.
1 cup yellow cornmeal. This is where the magic starts! I prefer a medium grind for a nice texture. If you can find stone-ground, even better! Avoid fine corn flour; it’s a different beast entirely.
1/2 cup granulated sugar. This gives it that lovely hint of sweetness. If you prefer it less sweet, you can reduce this to 1/3 cup, but I find this is the sweet spot.
2 teaspoons baking powder. This is crucial for that lovely lift and tender crumb.
1/2 teaspoon baking soda. Works in tandem with the baking powder and any acidity in the buttermilk (if you use it) for an extra boost.
1 teaspoon salt. Don’t skip this! Salt balances the sweetness and enhances all the other flavors.
2 large eggs. Room temperature eggs incorporate better, but honestly, I’ve forgotten to take them out of the fridge plenty of times, and it still turns out great.
1 3/4 cups buttermilk. This is my secret weapon for moist cornbread! The tanginess reacts with the baking soda to create an incredibly tender crumb. If you don’t have buttermilk, don’t fret! You can make your own by adding 1 1/2 tablespoons of white vinegar or lemon juice to a measuring cup and filling it up to the 1 3/4 cup line with milk. Let it sit for 5-10 minutes until it thickens slightly.
1/2 cup unsalted butter, melted and slightly cooled. Using butter gives it that rich flavor and lovely golden color. Make sure it’s not piping hot when you add it to the eggs!
For the Filling:
This part is optional, but it’s what takes my cornbread to the next level, especially if I’m feeling a little adventurous. It’s not a true “filling” in the sense of a separate layer, but more of a swirl that adds pockets of flavor and visual appeal.
1/4 cup finely chopped jalapeños (seeds removed for less heat, if you prefer). These add a delightful little pop of spice that cuts through the sweetness beautifully. I usually just grab a fresh one and dice it up super fine.
1/4 cup sharp cheddar cheese, shredded. The sharpness of the cheddar pairs wonderfully with the corn. Don’t use pre-shredded if you can help it; it has anti-caking agents that can affect how it melts.
Optional: A pinch of smoked paprika for a hint of smokiness.
For the Glaze:
This is the finishing touch that makes it truly special and gives it that irresistible shine.
2 tablespoons unsalted butter, melted.
1 tablespoon honey or maple syrup. I love honey for this; it has a slightly floral note that complements the corn so well. Maple syrup is a great alternative if that’s what you have.
1/2 teaspoon vanilla extract. Just a touch to round out the flavors.
Pinch of salt. To balance the sweetness.
Step-by-Step Instructions
Step 1: Preheat & Prep Pan
First things first, get that oven preheated to 400°F (200°C). A hot oven is key to a good crust. Now, grab an 8×8 inch baking pan or a 9-inch cast-iron skillet. This is where the cast iron really shines, giving you an amazing crispy bottom. Generously grease your chosen pan with about 2 tablespoons of butter or oil. Place the pan in the preheating oven while you mix the batter. This step is non-negotiable for that perfect golden crust. It allows the batter to hit a hot surface immediately, creating instant crispiness. Trust me on this one; it makes a huge difference!
Step 2: Mix Dry Ingredients
In a large mixing bowl, whisk together the all-purpose flour, yellow cornmeal, granulated sugar, baking powder, baking soda, and salt. Whisking well ensures that the leavening agents are evenly distributed, which means your cornbread will rise evenly. You don’t want any dense spots! Make sure there are no lumps of baking soda or powder hiding in there. Give it a good minute or two of whisking.
Step 3: Mix Wet Ingredients
In a separate medium bowl, whisk the eggs until they’re lightly beaten. Then, pour in the buttermilk and the melted (and slightly cooled!) butter. Whisk everything together until it’s well combined. This is where you get that beautiful emulsion that will make your cornbread wonderfully moist. If you’re using your homemade buttermilk substitute, make sure it’s had a chance to curdle a bit before adding it.
Step 4: Combine
Now, pour the wet ingredients into the bowl with the dry ingredients. Using a spatula or wooden spoon, gently stir until *just* combined. Seriously, stop mixing as soon as you don’t see any more dry streaks of flour. A few small lumps are perfectly okay! Overmixing develops the gluten in the flour, which will result in a tough, rubbery cornbread. We want tender and light, remember?
Step 5: Prepare Filling (Optional)
If you’re adding the jalapeño and cheddar swirl, now’s the time. Gently fold the finely chopped jalapeños and shredded cheddar cheese into the batter. Don’t overmix here either; we just want them distributed. If you’re feeling adventurous and using the smoked paprika, add it here. The goal isn’t to fully incorporate them, but to have nice little pockets throughout.
Step 6: Layer & Swirl
Carefully remove the hot pan from the oven (use oven mitts!). Give it a quick swirl to make sure the butter is evenly coating the bottom and sides. Pour the cornbread batter into the hot pan. If you added the filling ingredients, you can dollop a few extra pieces of jalapeño or cheese on top and gently swirl them in with a toothpick or skewer for a pretty pattern. Don’t go crazy with the swirling; a few gentle passes will do the trick.
Step 7: Bake
Immediately place the pan back into the preheated 400°F (200°C) oven. Bake for 20-25 minutes, or until a wooden skewer or toothpick inserted into the center comes out clean. The top should be a beautiful golden brown, and the edges should be pulling away slightly from the sides of the pan. Keep an eye on it; ovens can vary, so start checking around the 20-minute mark.
Step 8: Cool & Glaze
Once baked, carefully remove the cornbread from the oven. Let it cool in the pan for about 5-10 minutes. This is crucial for it to set properly and not fall apart when you cut it. While it’s cooling, whisk together the melted butter, honey (or maple syrup), vanilla extract, and pinch of salt for the glaze. Once the cornbread has cooled slightly, brush this delicious glaze generously over the warm top. It adds a beautiful sheen and an extra layer of flavor. Don’t be shy with the glaze!
Step 9: Slice & Serve
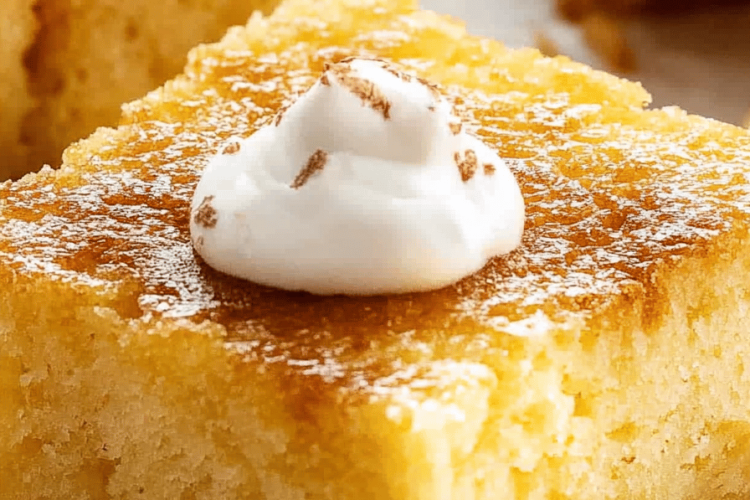
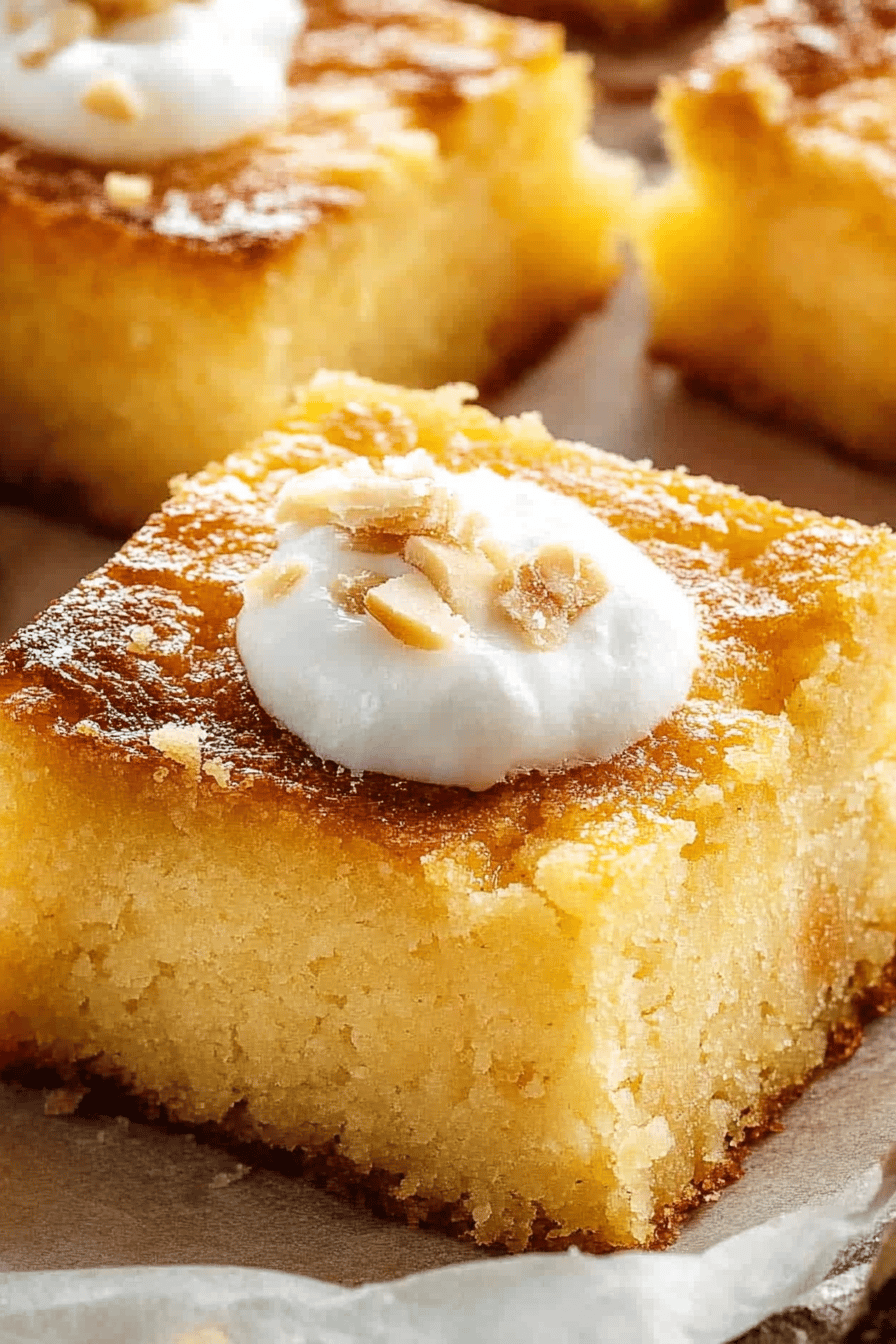
After glazing, let it cool for another 5-10 minutes. Then, cut into squares or wedges directly in the pan. Serve warm! This is when it’s at its absolute best – warm, slightly gooey from the residual heat, and with that gorgeous glaze. You can lift the pieces out with a spatula. If you used a cast-iron skillet, you can even serve it right from the skillet at the table!
What to Serve It With
This cornbread is so versatile, it fits into almost any meal. For Breakfast, I love it toasted and slathered with a generous smear of butter and a drizzle of local honey. It’s warm, sweet, and satisfying without being too heavy. Pair it with a hot cup of coffee, and you’re golden. For Brunch, it’s a fantastic addition to any spread. Serve it warm alongside scrambled eggs, crispy bacon, and maybe a fruit salad. It adds a lovely homemade touch that guests always appreciate. For a decadent Dessert, serve a warm slice with a scoop of vanilla bean ice cream. The contrast of the warm, slightly savory cornbread with the cold, sweet ice cream is pure bliss. You can even add a little raspberry coulis on top! And for those Cozy Snacks, which is honestly my favorite way to enjoy it, I just have a warm piece on its own with a glass of milk. It’s the perfect antidote to a chilly evening or a moment of craving comfort. My family loves it with chili, of course, but it’s also amazing alongside Pulled Pork sandwiches or even grilled chicken. It just works!
Top Tips for Perfecting Your Cornbread
Over the years, I’ve picked up a few little tricks that make this cornbread recipe consistently perfect. First, when it comes to Zucchini Prep – oh wait, I meant cornmeal! Ha! My mind is on other recipes today! For Cornmeal Prep, using a good quality cornmeal is key. I find that medium-grind yellow cornmeal offers the best balance of texture and flavor. If you can get your hands on stone-ground, that’s even better as it often has a richer flavor. Avoid using fine-ground corn flour, as it’s much softer and will result in a different texture altogether.
When it comes to Mixing Advice, the golden rule is: don’t overmix! As soon as you don’t see dry flour, stop. A few lumps are a good thing. Overmixing develops the gluten in the flour, leading to a tough, dense cornbread, and nobody wants that. We’re going for tender and crumbly here.
For Swirl Customization, if you choose to add the jalapeño and cheese, don’t go overboard with stirring them in. A gentle fold is all you need. You can even reserve a little bit of cheese and sprinkle it on top before baking for an extra cheesy crust. If you’re feeling artistic, you can swirl the filling ingredients in the batter after pouring it into the pan for a marbled effect. Just a few gentle passes with a knife or skewer will create lovely patterns.
When it comes to Ingredient Swaps, if you absolutely don’t have buttermilk, the milk-and-vinegar or lemon juice trick is your best friend. For a dairy-free version, you can use almond milk or soy milk with the vinegar/lemon juice, and substitute melted coconut oil or vegetable oil for the butter. The texture might be slightly different, but it will still be delicious! I’ve also experimented with adding a touch of honey directly into the batter if I’m serving it as dessert, which really ups the sweetness and flavor.
For Baking Tips, that preheated hot pan is crucial for that signature crispy crust. Whether it’s cast iron or a regular baking pan, make sure it’s well-greased and hot when the batter goes in. If your oven tends to bake unevenly, consider rotating the pan halfway through the baking time. For doneness testing, a toothpick inserted into the center should come out clean. If it has wet batter clinging to it, give it a few more minutes. If it’s browning too quickly on top, you can loosely tent it with foil.
And for Glaze Variations, while I adore the honey-butter glaze, you can get creative! A simple dusting of powdered sugar can be nice for dessert. Or, whisk in a little orange zest for a citrusy twist. A touch of cinnamon can also be lovely, especially if you’re serving it in the fall.
Storing and Reheating Tips
Keeping this cornbread delicious is pretty straightforward. For Room Temperature storage, let the cornbread cool completely in the pan before covering it tightly with plastic wrap or aluminum foil. It should stay fresh and moist for about 2-3 days. I’ve found that covering it well is the key to preventing it from drying out.
If you need to store it longer, Refrigerator Storage is your best bet. After it’s completely cooled, wrap the entire pan tightly in plastic wrap and then foil, or transfer individual slices to an airtight container. It will keep well in the fridge for up to a week. When you’re ready to eat, I highly recommend warming it up; it tastes so much better when it’s not cold straight from the fridge.
For Freezer Instructions, this cornbread freezes beautifully, making it perfect for baking ahead. Wrap individual slices or the entire cooled cornbread tightly in plastic wrap, then in aluminum foil, and place in a freezer-safe bag or container. It can be stored in the freezer for up to 3 months. To thaw, let it sit at room temperature for a few hours, or reheat it directly from frozen in a low oven (around 300°F/150°C) until warmed through. The quality holds up incredibly well!
Regarding Glaze Timing Advice, I always apply the glaze when the cornbread is still warm but not piping hot. This allows the glaze to melt slightly and absorb into the top layer, creating a lovely sheen and flavor infusion. If you plan to freeze your cornbread, I recommend glazing it *after* it has been reheated. Glazing before freezing can sometimes make the glaze a bit sticky or weepy upon thawing, so it’s best to add that final touch once it’s back to being enjoyed.
Frequently Asked Questions
Final Thoughts
There you have it – my absolute favorite cornbread recipe. It’s a recipe that’s built on comfort, ease, and incredible flavor. It’s the kind of dish that brings people together, filling your home with a warm, inviting aroma and your bellies with pure happiness. Whether you’re serving it alongside a hearty stew, as part of a brunch spread, or just enjoying a warm slice with butter, I promise it will become a staple in your kitchen too. Don’t be afraid to experiment with the optional jalapeño and cheddar swirl; it really does add a fantastic dimension. If you love this recipe, you might also enjoy my classic chocolate chip cookie recipe for another guaranteed crowd-pleaser. I can’t wait to hear how yours turns out! Please leave a comment below and share your thoughts, any variations you tried, or how your family enjoyed it. Happy baking, friends!

Classic Cornbread
Ingredients
Dry Ingredients
- 1.5 cup all-purpose flour
- 1 cup yellow cornmeal
- 0.5 cup granulated sugar
- 2 teaspoon baking powder
- 0.5 teaspoon salt
Wet Ingredients
- 1 large egg
- 1 cup milk whole milk recommended
- 0.5 cup unsalted butter melted
Instructions
Preparation Steps
- Preheat oven to 400°F (200°C). Grease and flour an 8x8 inch baking pan or a 10-inch cast-iron skillet.
- In a large bowl, whisk together the flour, cornmeal, sugar, baking powder, and salt.
- In a separate medium bowl, whisk together the egg, milk, and melted butter.
- Pour the wet ingredients into the dry ingredients and stir until just combined. Do not overmix.
- Pour the batter into the prepared baking pan or skillet and spread evenly.
- Bake for 20-25 minutes, or until a wooden skewer inserted into the center comes out clean and the top is golden brown.
- Let cool slightly before slicing and serving.
