
There are certain desserts that just feel like home, you know? For me, it’s anything that involves a rich, creamy base swirled with something sweet and decadent. And if it can be made in a fraction of the time it takes to bake a full-sized cheesecake? Even better! That’s precisely why these cheesecake bars have become my absolute obsession. They’re the perfect answer when that sweet craving hits late at night, or when I need a crowd-pleasing dessert that doesn’t require all-day babysitting in the kitchen. Forget complicated water baths and endless cooling times; these cheesecake bars are your new best friend. Honestly, they’re so good, they often disappear faster than I can count how many I’ve had. They’re like the simpler, more approachable cousin of a classic New York cheesecake, but with all the creamy goodness and none of the fuss. If you’ve ever felt intimidated by making cheesecake, you are in the right place. These bars are a game-changer!
What are cheesecake bars?
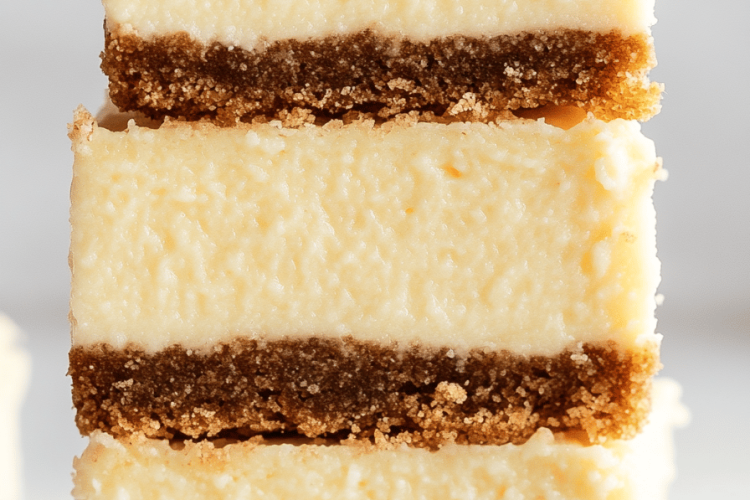
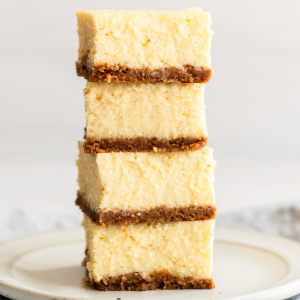
So, what exactly are these magical things we’re talking about? Think of cheesecake bars as the more portable, easier-to-share version of your favorite classic cheesecake. Instead of a whole pie, you bake the glorious, creamy filling in a rectangular pan, usually a 9×13 inch one. Once cooled and chilled, you slice it into neat little bars. It’s essentially all the deliciousness of cheesecake – that signature tangy, rich, smooth filling and often a buttery crust – condensed into a convenient, bite-sized (or not-so-bite-sized, depending on how you slice them!) format. They’re the ultimate dessert for parties, potlucks, or just a Tuesday afternoon treat because you can grab one with your fingers and enjoy. No forks required if you don’t want them!
Why you’ll love this recipe?
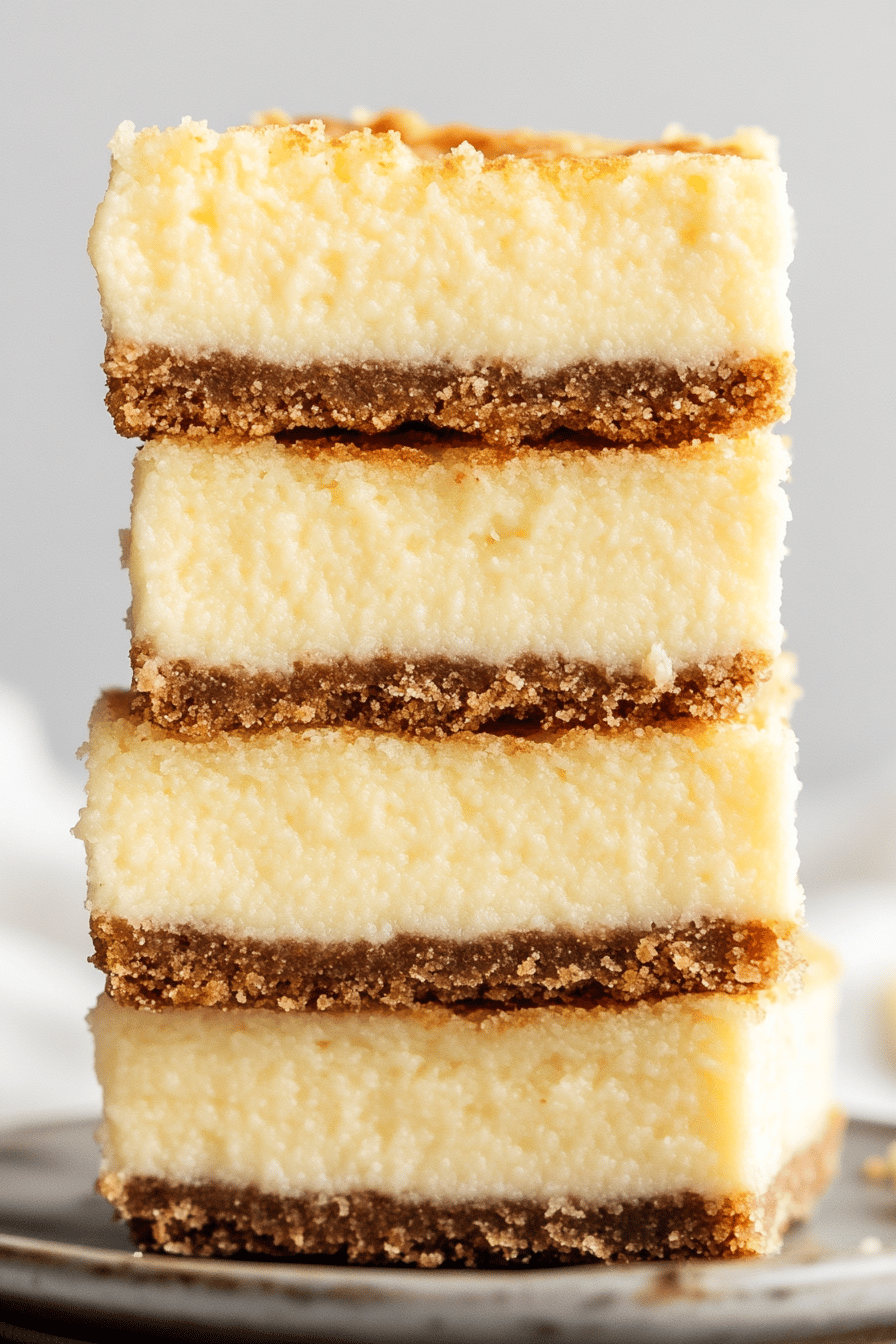
Honestly, there are so many reasons why this cheesecake Bars Recipe has earned a permanent spot in my recipe binder. For starters, the flavor is just out of this world. You get that incredible tangy sweetness that’s so characteristic of a good cheesecake, but it’s balanced perfectly. The texture is wonderfully creamy and smooth, not dense or heavy, and the base adds just the right amount of buttery crunch. What I really adore, though, is how ridiculously simple this recipe is. I can whip up the batter in about 15 minutes, and then it’s just a matter of baking and chilling. It’s a lifesaver on busy nights when I want to impress without stressing. And let’s talk cost-efficiency – the ingredients are all pantry staples, so it’s a budget-friendly way to get a fancy-feeling dessert. Plus, they are SO versatile! You can top them with fruit, chocolate, caramel, or just leave them plain because they’re perfect as is. I’ve made them with all sorts of fruit compotes over the years, and they always disappear. It’s a recipe that feels special enough for guests but easy enough for an everyday indulgence. It’s the kind of recipe that makes you feel like a baking superstar, even if you’re just starting out!
How do I make cheesecake bars?
Quick Overview
This recipe is all about simplicity and delicious results. We’ll start by making a quick, buttery crust, followed by a super smooth and creamy cheesecake filling. It all bakes up in one pan, and then a simple chill and slice is all that stands between you and pure bliss. You’ll be amazed at how few steps it takes to create such a decadent treat. It’s designed to be foolproof, even for beginners!
Ingredients
For the Crust:
Here’s where the magic starts. I always use unsalted butter for this because it gives me more control over the saltiness. You’ll need about 1.5 cups of graham cracker crumbs – you can buy them pre-crushed, or just pulse a sleeve of graham crackers in a food processor until they’re fine crumbs. A little bit of granulated sugar (about 1/4 cup) sweetens it just right, and a pinch of salt really brings out the flavor. For the butter, you’ll need about 6 tablespoons, melted. Make sure it’s melted but not boiling hot when you mix it in.
For the Filling:
This is the heart of the cheesecake bar. You’ll need three blocks (8 ounces each) of full-fat cream cheese. Make SURE it’s full-fat; the low-fat stuff just doesn’t give you that same luxurious texture. It’s super important that your cream cheese is softened to room temperature. I usually take it out of the fridge an hour or two before I plan to start mixing. You’ll also need 1 cup of granulated sugar, 2 large eggs (also at room temperature – this helps them incorporate smoothly), 1 teaspoon of pure vanilla extract for that classic flavor, and about 1/4 cup of Sour Cream or plain Greek yogurt. The sour cream adds a little extra tang and creaminess that I just can’t live without.
For the Glaze (Optional, but highly recommended!):
This is where you can really play! For a basic glaze, I like to use about 1 cup of powdered sugar sifted to avoid lumps. Then, I add 2-3 tablespoons of milk or even heavy cream for extra richness. A splash of vanilla extract is always a good idea. If you want to get fancy, you could swirl in some fruit preserves, melted chocolate, or even a caramel sauce after the bars have cooled slightly. I love a simple raspberry or strawberry glaze drizzled over the top. It adds a beautiful pop of color and a fruity contrast.
Step-by-Step Instructions
Step 1: Preheat & Prep Pan
First things first, preheat your oven to 350 degrees Fahrenheit (175 degrees Celsius). Get out a standard 9×13 inch baking pan. Now, this is a crucial step for easy removal: line the pan with parchment paper, leaving some overhang on the sides. This creates “handles” that you can use to lift the entire baked cheesecake out of the pan later. It makes slicing and serving so much neater. Lightly grease the parchment paper and the exposed edges of the pan with a little butter or cooking spray.
Step 2: Mix Dry Ingredients
In a medium bowl, combine your graham cracker crumbs and granulated sugar for the crust. Give them a good whisk to make sure everything is evenly distributed. This simple step ensures every bite of the crust has the right amount of sweetness and crunch.
Step 3: Mix Wet Ingredients
Now, pour your melted butter over the dry ingredients. Stir everything together with a fork until the crumbs are evenly moistened and resemble wet sand. It should all clump together when you squeeze it in your hand.
Step 4: Combine
Press the graham cracker mixture evenly into the bottom of your prepared baking pan. I like to use the flat bottom of a measuring cup or a sturdy glass to get a firm, even layer. Don’t pack it down too hard, just enough so it holds its shape. Then, bake this crust for about 8-10 minutes, until it’s lightly golden and smells toasty. This pre-baking step helps prevent a soggy bottom, which is never fun!
Step 5: Prepare Filling
While the crust is baking, let’s get the filling ready. In a large bowl, beat the softened Cream Cheese with an electric mixer on medium speed until it’s completely smooth and creamy. Scrape down the sides of the bowl often. Gradually add the granulated sugar and continue beating until well combined and no sugar lumps remain. This is key for a super smooth texture – no gritty cheesecake here!
Step 6: Layer & Swirl
Add the eggs one at a time, beating on low speed until just combined after each addition. Don’t overmix at this stage, as you don’t want to incorporate too much air. Stir in the vanilla extract and the sour cream (or Greek yogurt) until the filling is smooth and luscious. Pour the cream cheese filling evenly over the pre-baked crust. If you’re adding any swirls (like fruit preserves or chocolate sauce), dollop them on top now and gently swirl with a knife or skewer. Don’t over-swirl; you want defined ribbons of flavor.
Step 7: Bake
Carefully place the pan in the preheated oven. Bake for about 25-35 minutes, or until the edges are set and slightly puffed, but the center still has a slight wobble when you gently shake the pan. Overbaking is the enemy of creamy cheesecake, so err on the side of underbaking slightly. The residual heat will continue to cook it as it cools.
Step 8: Cool & Glaze
Turn off the oven, crack the oven door open just a bit, and let the cheesecake bars cool in the oven for another hour. This gradual cooling helps prevent cracks. After that, remove them from the oven and let them cool completely on a wire rack. Once they’re at room temperature, cover the pan tightly with plastic wrap and refrigerate for at least 4 hours, or preferably overnight. This chilling step is essential for the cheesecake to set properly and develop its perfect texture. Once chilled, prepare your glaze if using. Whisk together the powdered sugar, milk/cream, and vanilla extract until smooth. If it’s too thick, add a touch more liquid; if it’s too thin, add a bit more powdered sugar. Drizzle or spread the glaze evenly over the chilled cheesecake bars.
Step 9: Slice & Serve
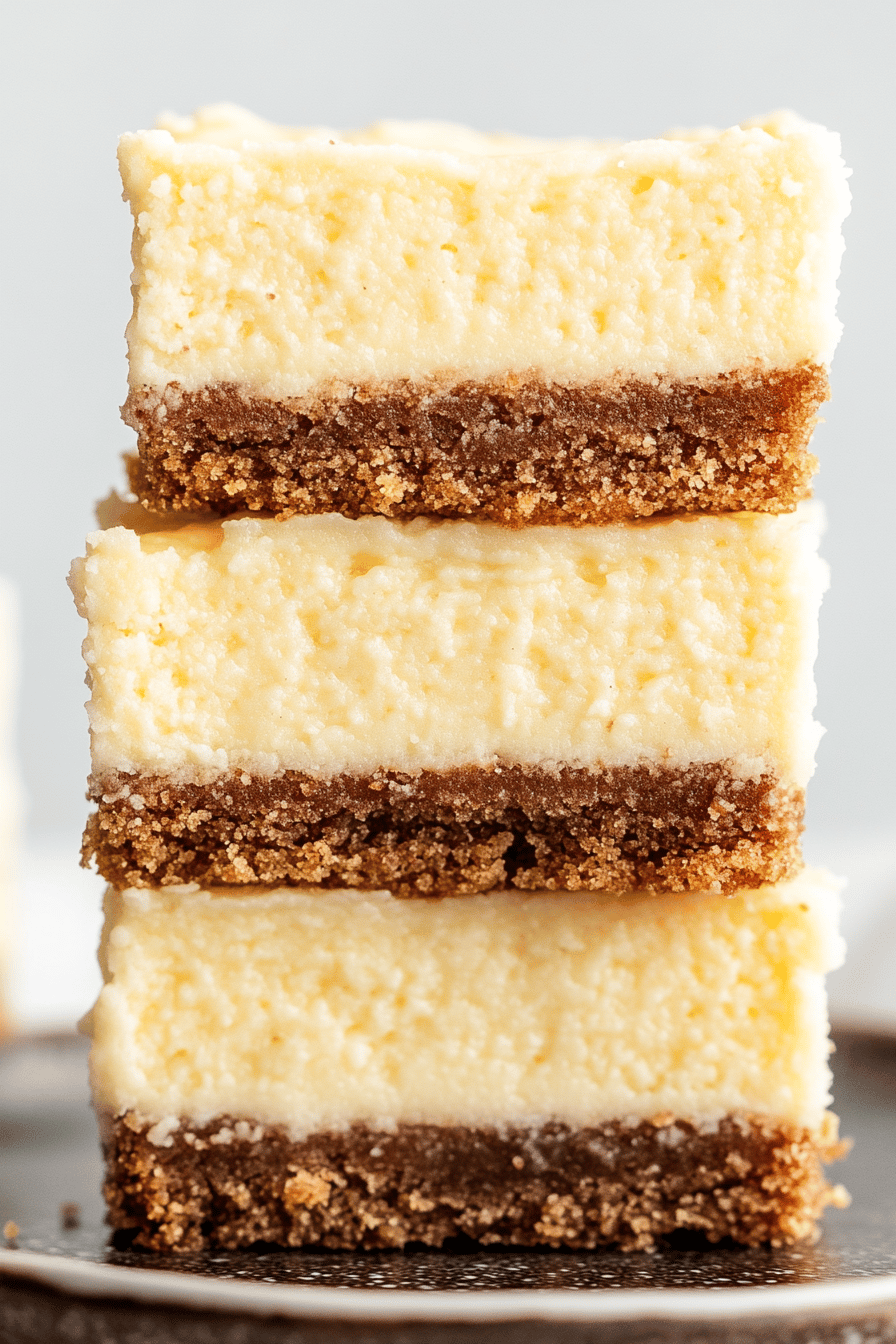
Using the parchment paper overhangs, lift the entire cheesecake slab out of the pan and onto a cutting board. For the cleanest slices, use a sharp knife that has been dipped in hot water and wiped dry between each cut. You can cut them into squares or rectangles – whatever you prefer! Serve chilled. These are truly a delight!
What to Serve It With
These cheesecake bars are incredibly versatile and can be dressed up or down for any occasion. For a delightful breakfast, a simple dusting of powdered sugar or a dollop of fresh berries is all you need. Pair them with a strong cup of coffee, and you’ve got a weekend treat that feels incredibly indulgent. For brunch, I love to serve them with a vibrant fruit salad – think mixed berries, melon, and citrus. They look so elegant on a brunch spread, and people always rave about them. As a dessert, the possibilities are endless! A drizzle of warm chocolate ganache, a sprinkle of toasted nuts, or a side of fresh whipped cream takes them to the next level. They’re perfect after a hearty meal. And for those cozy snack times? They’re perfect just as they are, perhaps with a glass of milk or a comforting cup of tea. My kids always ask for these when they have friends over, and I love seeing their little faces light up as they grab a bar. We also have a family tradition of making them for movie nights, cutting them into small squares so everyone can have a few!
Top Tips for Perfecting Your Cheesecake Bars
Over the years of making these – and believe me, I’ve made them countless times! – I’ve picked up a few tricks that I think make a world of difference. For the crust, I always make sure my graham cracker crumbs are fine enough. If you have bigger chunks, the crust can feel a bit sandy. Pressing it firmly into the pan is also key for a cohesive base. When it comes to the filling, the most important thing is using room temperature ingredients, especially the cream cheese and eggs. Cold cream cheese won’t mix smoothly, and you’ll end up with lumps. I learned this the hard way early on! Also, don’t beat the eggs on high speed; just mix them in until they’re incorporated. Too much air can lead to cracks. If you find your oven runs hot, you might want to reduce the baking temperature by 10-15 degrees and keep an eye on them. The “wobble test” is your best friend here – a slight jiggle in the center means they’re done. For swirling, less is more! Don’t go crazy with the fork; a few gentle passes create beautiful patterns without overmixing the filling. And for the glaze, I always recommend starting with the minimum amount of liquid and adding more only if needed. It’s easier to thin out a thick glaze than to thicken a runny one. If you want to try different flavor extracts, a tiny bit of almond extract or even lemon zest can add a lovely twist to the filling!
Storing and Reheating Tips
These cheesecake bars are actually quite forgiving when it comes to storage. If you’ve made them without a glaze, you can actually leave them at room temperature for a few hours if needed, as long as your kitchen isn’t too warm. However, for the best texture and to ensure they stay fresh, I always recommend refrigerating them. Store them in an airtight container, and they’ll stay delicious for up to 4-5 days. The flavor actually tends to deepen overnight, which is always a good thing! If you want to get ahead, these bars freeze beautifully. Once they’re completely chilled and glazed (or unglazed if you prefer), cut them into bars and wrap each one individually in plastic wrap, then place them in a freezer-safe bag or container. They can be stored in the freezer for up to 2 months. To thaw, simply transfer them from the freezer to the refrigerator overnight. If you froze them unglazed, you can add the glaze after thawing. I usually wait to add the glaze until just before serving if I’m not sure they’ll be eaten right away, as it can sometimes soften slightly in the fridge.
Frequently Asked Questions
Final Thoughts
Seriously, if you’re looking for a dessert that hits all the right notes – creamy, tangy, sweet, and oh-so-satisfying – then you absolutely *must* try these cheesecake bars. They’re the perfect balance of impressive and easy, and I can promise you they won’t last long in your kitchen. They’ve been a huge hit at every single gathering I’ve taken them to, and I always get asked for the recipe. If you love these, you might also enjoy my recipes for no-bake chocolate mousse or my easy lemon bars – they’re in a similar vein of crowd-pleasing, delicious desserts! Give these cheesecake bars a whirl, and I can’t wait to hear how much you and your loved ones enjoy them. Happy baking, and I hope they bring as much joy to your table as they do to mine!
Cheesecake bars
Ingredients
Crust
- 1.5 cups graham cracker crumbs
- 0.25 cups granulated sugar
- 6 tablespoons unsalted butter, melted
Cheesecake Filling
- 24 ounces cream cheese, softened
- 0.75 cups granulated sugar
- 2 large eggs
- 1 teaspoon vanilla extract
- 0.25 cup sour cream
Instructions
Preparation Steps
- Preheat oven to 350°F (175°C). Line an 8x8 inch baking pan with parchment paper, leaving an overhang on the sides.
- In a medium bowl, combine graham cracker crumbs and 1/4 cup granulated sugar. Pour in the melted butter and stir until well combined.1.5 cups graham cracker crumbs
- Press the crumb mixture evenly into the bottom of the prepared baking pan.
- In a large bowl, beat the cream cheese and 3/4 cup granulated sugar until smooth and creamy.1.5 cups graham cracker crumbs
- Beat in the eggs one at a time, then stir in the vanilla extract and sour cream until just combined.1.5 cups graham cracker crumbs
- Pour the cheesecake filling over the crust and spread evenly.
- Bake for 25-30 minutes, or until the edges are set and the center is still slightly jiggly.
- Let cool completely in the pan on a wire rack. Once cooled, refrigerate for at least 2 hours before cutting into bars.
