
There are some recipes that just… feel like home. This one for cheesecake bars is definitely one of those for me. It’s the kind of dessert that makes an ordinary Tuesday feel a little bit special, or the perfect finale to a relaxed Sunday dinner. Honestly, I think I’ve made these cheesecake bars more times than I can count. They’re just so incredibly satisfying, with that rich, creamy tang of cheesecake but in a much more manageable, bite-sized form. Think of them as your favorite classic cheesecake’s cooler, more laid-back cousin who’s always up for a party. They’re not as fussy as a full-blown cheesecake, but they deliver all that glorious flavor and texture. I first stumbled upon a version of this years ago, and it quickly became my go-to for potlucks, holidays, or frankly, just when the craving for something sweet and decadent hits me hard. My kids, who can be a bit picky sometimes, absolutely devour these. They’re the first thing to disappear from any dessert table, and people are always asking for the recipe. It’s just one of those magical recipes that feels both indulgent and surprisingly simple to pull off.
What is the ultimate cheesecake bar?
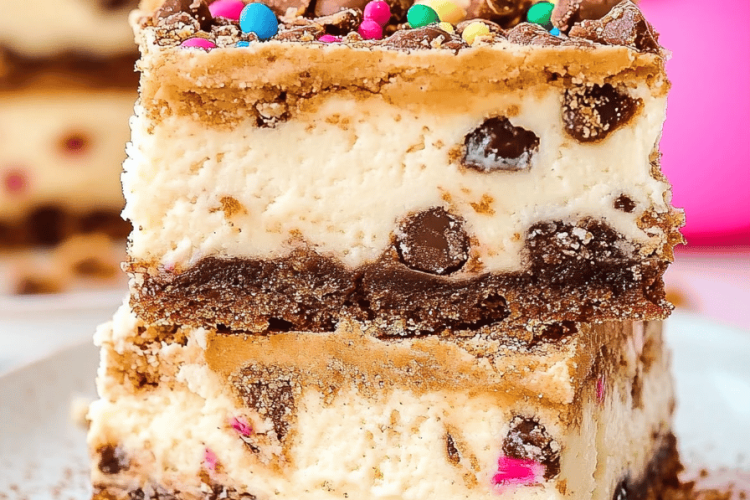
So, what exactly are these wonderful cheesecake bars? At their heart, they’re exactly what they sound like: cheesecake, but baked in a square or rectangular pan and then cut into easy-to-handle bars. It’s like taking all the dreamy, creamy goodness of a New York-style cheesecake – that perfect balance of sweet and tangy, that silky smooth texture – and making it accessible for everyone, no fancy springform pan or water bath required. It’s essentially a simplified cheesecake experience. You get that classic graham cracker crust, a luscious Cream Cheese filling that’s just heavenly, and often, a delightful topping or swirl that adds an extra layer of flavor and visual appeal. The beauty of these cheesecake bars is that they’re less intimidating than a whole cake. You don’t have to worry as much about cracking or perfect slicing. You just press, pour, bake, and cool. It’s pure, unadulterated cheesecake joy in every single bite, and that’s what makes this recipe a true lifesaver.
Why you’ll love this recipe?
Oh, where do I even begin with why this cheesecake bar recipe is my absolute favorite? Let’s break it down, because there are so many reasons to adore this simple yet spectacular dessert. First and foremost, the flavor. It’s that undeniable, comforting taste of classic cheesecake – rich, creamy, with a hint of tang that cuts through the sweetness beautifully. The graham cracker crust is buttery and perfectly crumbly, providing the ideal base for that velvety filling. It’s just pure bliss in every bite.
Then there’s the simplicity. This is honestly one of the most straightforward desserts I make. There’s no complicated water bath, no finicky techniques. It’s literally a matter of mixing ingredients and baking. I’ve made this countless times, even on weeknights when I’m short on time, and it always turns out wonderfully. It’s a real confidence booster for any home baker. If you’re intimidated by making a full-sized cheesecake, this is your gateway.
And let’s talk about cost-efficiency. The ingredients are all pantry staples – cream cheese, sugar, eggs, butter, graham crackers. Nothing outrageously expensive, which means you can whip up a batch of these delightful cheesecake bars without breaking the bank. It’s a fantastic way to enjoy a gourmet-tasting dessert that’s surprisingly budget-friendly.
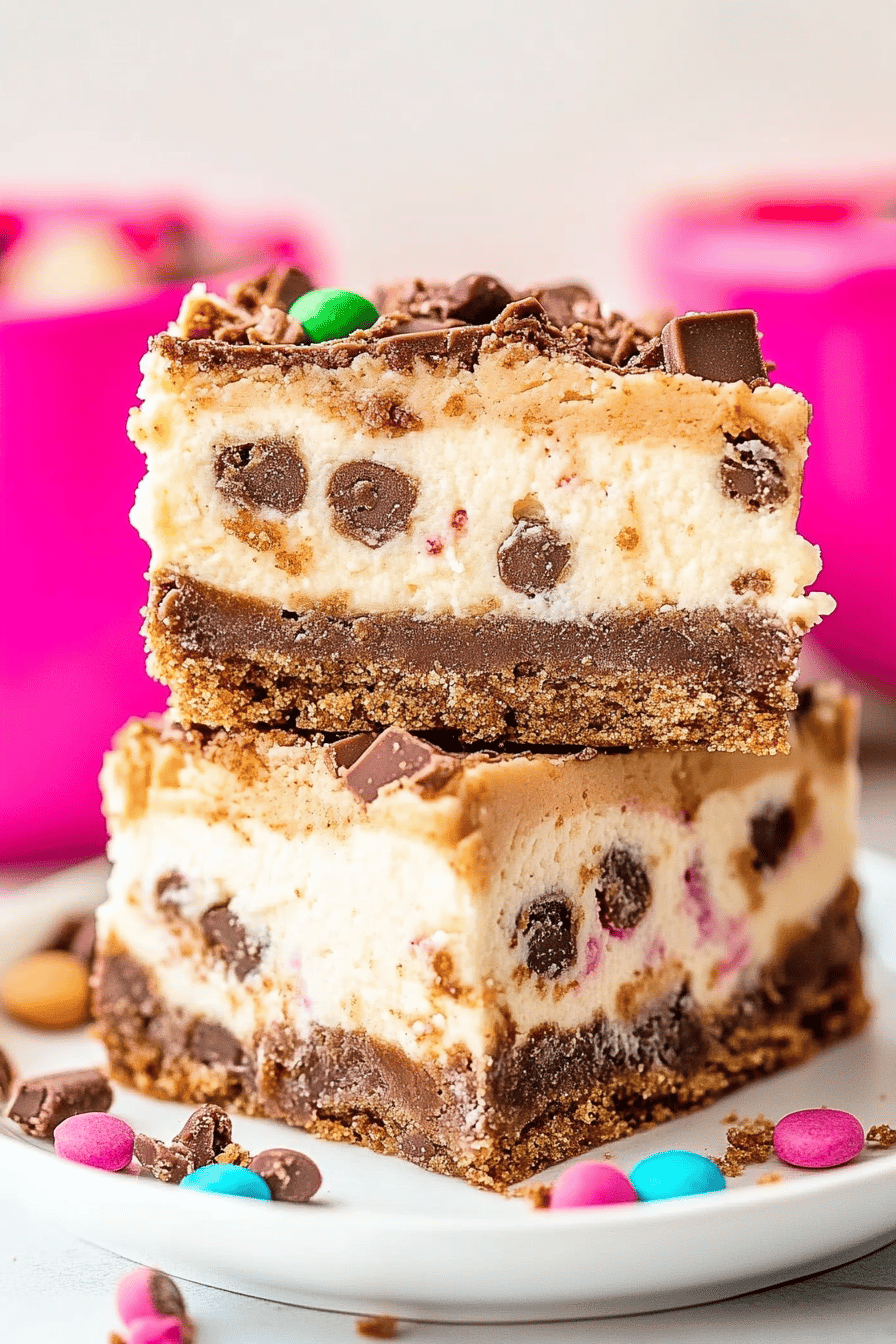
Versatility is another huge win. While I love them plain, you can do so many things with these cheesecake bars. A simple swirl of fruit puree on top before baking, a drizzle of chocolate ganache after they’ve cooled, or even a sprinkle of fresh berries – the possibilities are endless. They’re perfect for any occasion, from a casual family gathering to a more formal dessert spread. I’ve even seen people cut them into smaller, bite-sized pieces for a party appetizer. Compared to a full cheesecake, which can sometimes feel a bit too much, these bars are just right. They’re easy to serve, easy to eat, and always a crowd-pleaser. What I love most about these cheesecake bars, though, is the sheer joy they bring. The smell that fills the kitchen while they’re baking is incredible, and seeing the smiles on people’s faces when they take their first bite? Priceless. It’s the kind of recipe that makes you feel like a baking rockstar without all the fuss.
How do I make a cheesecake bar?
Quick Overview
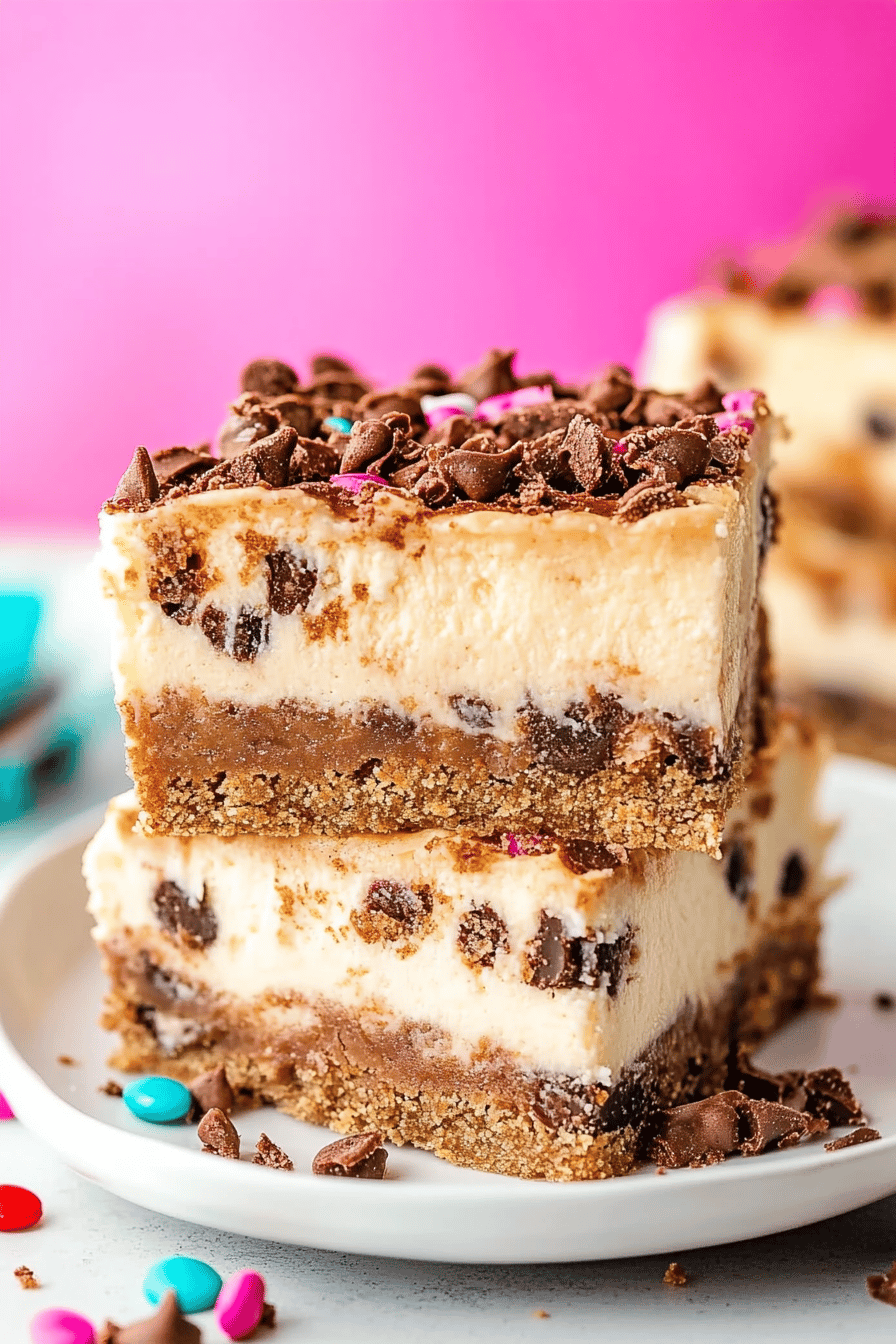
Making these ultimate cheesecake bars is a breeze! We’ll start by creating a simple graham cracker crust, then whip up a rich, creamy cheese filling. The magic happens when we combine them, bake until golden, and let them cool to perfection. The whole process involves minimal fuss and maximum reward. It’s the perfect way to get that decadent cheesecake flavor without any of the usual stress. You’ll be amazed at how simple it is to achieve such a delightful dessert!
Ingredients
For the Crust:
2 cups graham cracker crumbs (about 14-16 full graham crackers, finely crushed)
1/2 cup unsalted butter, melted
2 tablespoons granulated sugar
Pinch of salt
When I make the crust, I like to use a food processor to get the crumbs really fine, but crushing them in a zip-top bag with a rolling pin works just as well. The key is to get them as uniform as possible so the crust bakes up evenly. Using melted butter ensures everything sticks together beautifully. And a little sugar and salt? It just enhances that classic graham cracker flavor and balances the sweetness of the filling.
For the Filling:
3 (8-ounce) packages cream cheese, softened to room temperature
1 cup granulated sugar
2 large eggs, room temperature
1/4 cup Sour Cream, room temperature
1 teaspoon vanilla extract
1 tablespoon fresh lemon juice (optional, but highly recommended!)
The filling is where all the creamy magic happens. Make sure your cream cheese is truly at room temperature – this is crucial for a smooth, lump-free filling. Cold cream cheese just won’t blend properly. Same goes for the eggs and sour cream; room temperature ingredients emulsify better. The lemon juice is my little secret weapon; it adds a subtle brightness that really makes the cheesecake flavor pop without making it taste overtly lemony. You can skip it if you prefer, but I always add it!
For the Glaze (Optional):
1 cup powdered sugar
2-3 tablespoons milk or cream
1/2 teaspoon vanilla extract
This glaze is super simple and adds a lovely finish. You can adjust the consistency by adding more or less milk. If you want a thicker glaze for drizzling, use less liquid. If you want it thinner for a more delicate coating, add a bit more. You can also get creative here – a little lemon zest, a swirl of fruit puree, or even a melted chocolate drizzle would be amazing!
Step-by-Step Instructions
Step 1: Preheat & Prep Pan
First things first, let’s get our oven ready. Preheat it to 350 degrees Fahrenheit (175 degrees Celsius). Then, grab an 8×8 inch or 9×9 inch baking pan. Line it with parchment paper, leaving an overhang on two opposite sides. This little trick is a lifesaver later for lifting the whole thing out cleanly. Lightly grease the parchment paper and the exposed sides of the pan too. This helps prevent any sticking and gives us beautiful, clean edges.
Step 2: Mix Dry Ingredients
In a medium bowl, combine your graham cracker crumbs, granulated sugar, and a pinch of salt. Give it a good whisk to make sure everything is evenly distributed. This simple step helps ensure that every bite of your crust has that perfect sweet and salty balance.
Step 3: Mix Wet Ingredients
Add the melted butter to the dry ingredients. Stir until the crumbs are evenly moistened and clump together when you squeeze them. It should look like wet sand. This is exactly what you want for a crust that holds its shape.
Step 4: Combine
Pour the crumb mixture into your prepared baking pan. Use the bottom of a glass or your hands to firmly press the crumbs evenly across the bottom of the pan. You really want to pack it down well to create a solid base for our cheesecake filling. Bake this crust for about 8-10 minutes, just until it’s lightly golden and smells toasty. This pre-baking step helps prevent the crust from becoming soggy. Once baked, take it out and let it cool slightly while you prepare the filling.
Step 5: Prepare Filling
In a large bowl, beat the softened cream cheese with an electric mixer (or a whisk and some serious elbow grease!) until it’s completely smooth and creamy. You absolutely don’t want any lumps here. Gradually beat in the granulated sugar until it’s well combined. Then, add the eggs one at a time, beating well after each addition. Be careful not to overmix once the eggs are in; just mix until they’re incorporated. Stir in the sour cream, vanilla extract, and lemon juice (if using) until everything is just combined and smooth. The batter should be thick and luxurious.
Step 6: Layer & Swirl
Pour the cream cheese filling evenly over the slightly cooled crust. Gently spread it out with an offset spatula or the back of a spoon to create a smooth, even layer. If you’re adding any swirls of fruit puree or chocolate, now’s the time to dollop them on top and swirl gently with a toothpick or knife. Don’t over-swirl, or the colors will blend too much.
Step 7: Bake
Place the pan in the preheated oven. Bake for 30-35 minutes for an 8×8 pan, or 25-30 minutes for a 9×9 pan. The edges should be set and lightly golden, but the center will still be a little jiggly. This is exactly what you’re looking for – a slight wobble indicates a perfectly creamy interior. It will continue to set as it cools.
Step 8: Cool & Glaze
Once baked, turn off the oven, prop the door open slightly with a wooden spoon, and let the cheesecake bars cool in the oven for about an hour. This gradual cooling process helps prevent cracking. After an hour, remove the pan from the oven and let it cool completely on a wire rack. Once completely cool, cover the pan and refrigerate for at least 4 hours, or preferably overnight. This is key for the best texture and flavor. Once chilled and firm, prepare the glaze by whisking together the powdered sugar, milk/cream, and vanilla until smooth. Drizzle or spread it over the chilled cheesecake bars. Let the glaze set for about 15-20 minutes.
Step 9: Slice & Serve
Using the parchment paper overhangs, carefully lift the entire cheesecake slab out of the pan. Place it on a cutting board. For the cleanest cuts, use a sharp knife that has been dipped in hot water and wiped dry between each slice. Slice into your desired bar size. Serve chilled and enjoy that incredible creamy goodness!
What to Serve It With
These cheesecake bars are so wonderfully versatile, they truly fit into any occasion. For a lovely breakfast or brunch, I love serving them alongside a fresh fruit salad. The bright, fresh fruit cuts through the richness of the cheesecake beautifully. A strong cup of coffee or a refreshing mimosa is the perfect accompaniment. For a more elegant brunch spread, I’ll cut them into smaller squares and arrange them on a tiered stand with other pastries and mini quiches.
As a dessert, these cheesecake bars shine on their own, but they also pair wonderfully with a dollop of whipped cream and some fresh berries – raspberries or blueberries are always a hit! A drizzle of raspberry coulis or a light chocolate sauce takes them up another notch. If you’re having a dessert buffet, these are a must-have because they offer that decadent cheesecake experience without the commitment of a whole cake.
And for those cozy, unexpected cravings? They’re perfect with a glass of milk or a warm cup of tea. They’re simple enough for a spontaneous treat but elegant enough to impress guests. My kids love them as an after-school snack, and honestly, I’m not above sneaking one (or two!) after everyone else has gone to bed. It’s just such a satisfying treat that feels both homemade and a little bit fancy. The adaptability is truly what makes these cheesecake bars such a staple in my recipe rotation.
Top Tips for Perfecting Your Cheesecake Bars
Over the years, I’ve learned a few tricks that I think really make these cheesecake bars sing. Little things that, when you get them right, elevate the whole experience. First off, when it comes to the crust, don’t be shy about pressing it down firmly. A well-compacted crust is the foundation for success, ensuring it holds its shape and doesn’t crumble apart when you cut into it. I learned this the hard way after a few batches where the crust was a bit too loose and fell apart!
For the filling, the biggest tip I can give you is to ensure your cream cheese, eggs, and sour cream are all at room temperature. I can’t stress this enough! It’s the secret to a super smooth, lump-free filling. If your cream cheese is cold, it’ll be lumpy, no matter how long you beat it. I’ve also found that overmixing the eggs can lead to a slightly tougher texture, so just mix until they’re incorporated. A gentle hand is key here.
When it comes to baking, that slight wobble in the center is your best friend. It doesn’t mean it’s underbaked; it means it’s perfectly cooked and will set up beautifully as it cools. If you bake it until it’s completely firm, you risk a dry, overcooked cheesecake. And remember that slow cooling process in the oven – it’s your best defense against cracks. I used to just pull mine straight out of the oven, and while they tasted fine, the cracks were always a bit of a bummer visually.
Ingredient swaps can happen, of course! If you don’t have graham crackers, digestive biscuits or even shortbread cookies can work for the crust, though the flavor profile will change slightly. You can also experiment with different extracts in the filling – almond or even a touch of orange zest can be lovely additions. For the glaze, if you find it too sweet, a tablespoon of cream cheese whisked into the powdered sugar and milk can mellow it out. And if you’re feeling adventurous, a swirl of melted chocolate, fruit jam, or even a salted caramel drizzle can totally transform these cheesecake bars into something new and exciting. Trust me, experimenting with these little tweaks makes them uniquely yours!
Storing and Reheating Tips
One of the best things about these cheesecake bars is how well they store, making them perfect for making ahead of time. If you’ve got any leftovers (which is rare in my house!), you can store them covered at room temperature for up to 2 days, especially if they don’t have a delicate glaze on top. They’ll maintain their freshness and creamy texture.
For longer storage, the refrigerator is your best friend. Keep them tightly covered in an airtight container or well-wrapped in plastic wrap. They’ll stay wonderfully fresh and delicious in the fridge for up to 5 days. I often find the flavor actually deepens a bit after a day or two in the fridge, which is a bonus! Just make sure they’re well-covered to prevent them from absorbing any other odors from your fridge.
If you want to make a big batch and freeze some for later, that’s totally doable too! After they’ve been completely chilled and the glaze (if using) has set, cut them into individual bars or squares. Wrap each bar tightly in plastic wrap, then place them in a freezer-safe bag or container. They can be stored in the freezer for up to 2-3 months. When you’re ready to enjoy them, the best way to thaw them is in the refrigerator overnight. This allows them to defrost gently and retain their best texture. Avoid thawing them at room temperature, as this can make them a bit watery.
As for the glaze timing, it’s best to add it just before serving or after the bars have been fully chilled and are ready to be eaten. If you glaze them too far in advance and then store them, especially in the fridge, the glaze can sometimes become a bit sticky or melty. So, a good rule of thumb is to chill the bars first, then glaze them when you’re ready to serve or shortly before. This ensures that beautiful, clean finish.
Frequently Asked Questions
Final Thoughts
There you have it – my tried-and-true recipe for the most delightful cheesecake bars! I truly believe this recipe embodies everything you could want in a dessert: incredible flavor, satisfying creaminess, and a simplicity that makes it accessible for any home cook. It’s the kind of recipe that brings people together, sparking smiles and happy memories. Whether you’re celebrating a special occasion or just looking for a little everyday indulgence, these cheesecake bars are an absolute winner. They’re forgiving, versatile, and always, always delicious.
If you love the idea of creamy, dreamy desserts with a hint of tang, you might also enjoy my recipe for Lemon Raspberry Scones or my incredibly easy No-Bake Chocolate Mousse. They both offer a similar level of deliciousness with their own unique twists.
I genuinely can’t wait to hear how your cheesecake bars turn out! Please leave a comment below to share your experience, any creative variations you tried, or just to say hello. Your feedback and stories are what make this community so special. Happy baking!
Cheesecake Bars
Ingredients
Crust
- 1.5 cups graham cracker crumbs
- 0.25 cups granulated sugar
- 0.375 cups unsalted butter, melted
Cheesecake Filling
- 24 ounces cream cheese, softened
- 1 cup granulated sugar
- 3 large eggs
- 1 teaspoon vanilla extract
Instructions
Preparation Steps
- Preheat oven to 350°F (175°C). Line an 8x8 inch baking pan with parchment paper, leaving an overhang for easy removal.
- In a medium bowl, combine graham cracker crumbs and 1/4 cup granulated sugar. Pour in melted butter and stir until well combined.
- Press the crumb mixture evenly into the bottom of the prepared baking pan.
- In a large bowl, beat softened cream cheese and 1 cup granulated sugar until smooth and creamy.
- Add eggs one at a time, beating well after each addition. Stir in vanilla extract.
- Pour the cream cheese mixture over the crust. Spread evenly.
- Bake for 30-35 minutes, or until the edges are set and the center is almost set (it will continue to set as it cools).
- Let cool completely at room temperature, then refrigerate for at least 2 hours before cutting into bars.
