
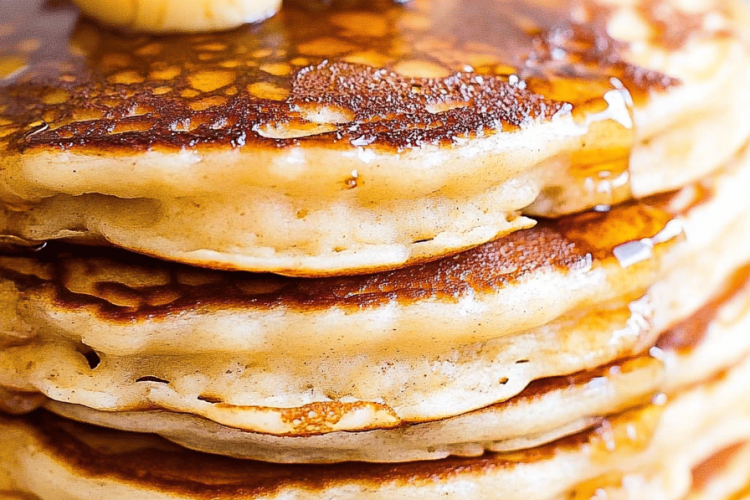
There are certain smells that just instantly transport you back to childhood, aren’t there? For me, that smell is the warm, comforting aroma of pancakes on a Saturday morning. But not just any pancakes – oh no. We’re talking about *buttermilk* pancakes. The kind that are impossibly fluffy, slightly tangy, and melt in your mouth with every bite. This recipe isn’t just a recipe for me; it’s a portal to lazy weekend mornings, my mom humming in the kitchen, and that pure, unadulterated joy of a stack of golden goodness slathered with butter and syrup. I’ve tried a gazillion pancake recipes over the years, trying to capture that elusive perfection, and I can honestly say, this is the one. It’s surprisingly simple, uses ingredients you probably already have, and delivers results that are, frankly, out of this world. Forget those dry, rubbery discs you might have made before. This is the real deal, folks. These buttermilk pancakes are going to be your new go-to, I just know it!
What is buttermilk pancake?
So, what exactly makes these buttermilk pancakes so special? It all comes down to the star ingredient: buttermilk. Now, I know what some of you might be thinking, “Buttermilk? I don’t always have that on hand!” Don’t worry, we’ll get to that later. But for now, let’s talk about why buttermilk is a game-changer. When buttermilk reacts with baking soda, it creates a beautiful, airy texture that’s unlike anything you’d get from regular milk. It’s this reaction that gives us those clouds of fluffy goodness we all dream of. Think of it as nature’s secret weapon for the perfect pancake. It’s essentially a slightly acidic liquid left over from the butter-making process, but even if you buy it specifically for this recipe, it’s worth every penny. These aren’t your average, flat diner pancakes; these are elevated, restaurant-quality buttermilk pancakes that you can whip up in your own kitchen. It’s this simplicity, coupled with that delightful tang and airy crumb, that defines them.
Why you’ll love this recipe?
Honestly, there are so many reasons why I think you’re going to adore this buttermilk pancake recipe. First off, the flavor is just divine. That subtle tang from the buttermilk cuts through the sweetness beautifully, making them perfectly balanced. They aren’t overwhelmingly sweet, which I really appreciate, especially before my first cup of coffee. And the texture? Oh my goodness. They’re incredibly light and fluffy, almost like little edible clouds. They just melt in your mouth. What I love most is how incredibly easy this recipe is. Even if you’re a total beginner in the kitchen, you can nail these on your first try. Seriously, the steps are straightforward, and there’s no fancy equipment needed. Plus, they’re super budget-friendly! Most of the ingredients are pantry staples, so you won’t need to break the bank. And the versatility! You can dress them up or down depending on your mood. Serve them with a drizzle of maple syrup and a pat of butter for a classic, comforting breakfast. Or, go wild with fresh berries, whipped cream, or even a dollop of Greek yogurt for a healthier twist. They’re also fantastic as a base for savory toppings if you’re feeling adventurous – think a fried egg and some crispy bacon on top! Compared to other pancake recipes I’ve tried, like those dense, heavy ones or ones that require a million steps, this one just stands out for its perfect balance of flavor, texture, and sheer, unadulterated ease. It’s the kind of recipe that makes you feel like a kitchen superhero, even if you just threw it together on a busy Tuesday morning.
How do I make buttermilk pancakes?
Quick Overview
The magic of these buttermilk pancakes lies in their simplicity and the science behind that beautiful rise. In essence, you’ll whisk together your dry ingredients, whisk together your wet ingredients (including that all-important buttermilk!), then gently combine the two. The key is not to overmix, which is crucial for that fluffy texture. Then, it’s just a matter of cooking them on a lightly greased griddle until golden brown and perfectly cooked through. It’s truly that straightforward. This method ensures that every batch comes out consistently delicious and impossibly light, making them a lifesaver for weekend brunches or even a quick weekday treat.
Ingredients
For the Main Batter:
2 cups all-purpose flour (I always use unbleached for a better texture)
2 tablespoons granulated sugar (you can adjust this slightly, but I find this is the sweet spot)
2 teaspoons baking powder (make sure it’s fresh! Old baking powder is the enemy of fluffy pancakes)
1 teaspoon baking soda
1/2 teaspoon salt
1 3/4 cups buttermilk (if you don’t have buttermilk, you can make a quick substitute by adding 1 tablespoon of lemon juice or white vinegar to 1 3/4 cups of regular milk, let it sit for 5-10 minutes until it curdles – works like a charm!)
2 large eggs, lightly beaten
4 tablespoons unsalted butter, melted and slightly cooled (don’t use hot butter, it can cook the eggs)
1 teaspoon vanilla extract (optional, but highly recommended for that extra depth of flavor)
For the Filling:
This recipe doesn’t technically *need* a filling, but for a special occasion or if you’re feeling fancy, you could absolutely add some fresh blueberries or chocolate chips directly into the batter just before cooking! Just gently fold them in. For this particular recipe, I’m keeping it classic and focusing on the pancake itself.
For the Glaze:
This recipe is designed to be served with your favorite toppings. A classic maple syrup is perfect, or you could make a quick fruit compote. If you’re craving something a little different, a simple dusting of powdered sugar is always elegant!
Step-by-Step Instructions
Step 1: Preheat & Prep Pan
First things first, get your griddle or a large non-stick frying pan heating up over medium heat. You want it nice and warm, but not scorching hot. Too hot and your pancakes will burn on the outside before the inside cooks. I like to test it by flicking a tiny bit of water onto the surface; it should sizzle and evaporate quickly. Lightly grease the pan with a little butter or cooking spray. I usually do this every few pancakes to ensure they don’t stick.
Step 2: Mix Dry Ingredients
In a large mixing bowl, whisk together the flour, sugar, baking powder, baking soda, and salt. Give it a good whisk to make sure everything is evenly distributed. This step is important for ensuring that your leavening agents (baking powder and soda) work their magic evenly, giving you that beautiful, consistent rise. You want it to look like a uniform, pale yellow powder.
Step 3: Mix Wet Ingredients
In a separate medium bowl, whisk together the buttermilk, lightly beaten eggs, melted butter (make sure it’s cooled a bit so it doesn’t scramble your eggs!), and vanilla extract if you’re using it. Whisk until everything is well combined and smooth. You’ll see the buttermilk start to look a little frothy, which is a good sign!
Step 4: Combine
Now for the crucial part: combining the wet and dry ingredients. Pour the wet ingredients into the bowl with the dry ingredients. Using a whisk or a rubber spatula, gently stir until just combined. You want to see *just* a few lumps. Seriously, don’t overmix! Overmixing develops the gluten in the flour, which leads to tough, dense pancakes. A few small lumps are perfectly fine and actually desirable. It might look a little shaggy, and that’s exactly what you’re going for. Trust me on this one!
Step 5: Prepare Filling
As I mentioned earlier, this recipe is glorious in its simplicity and doesn’t require a separate filling preparation. However, if you’re adding mix-ins like blueberries or chocolate chips, have them ready. Once your batter is just combined, gently fold these in with a spatula. Be careful not to stir too vigorously at this stage either. We want to keep that fluffy texture!
Step 6: Layer & Swirl
This isn’t really a “layer and swirl” recipe in the traditional sense, but it’s about how you pour and cook. Once your pan is hot and greased, ladle about 1/4 to 1/3 cup of batter per pancake onto the griddle. Don’t crowd the pan; give them some space to spread and cook evenly. If you’re adding berries or chips, sprinkle them on top of the raw batter of each pancake just before they start to set.
Step 7: Bake
Cook for about 2-3 minutes per side. You’ll know they’re ready to flip when you see small bubbles forming on the surface of the pancake and the edges look set. Carefully slide a spatula underneath and flip. Cook the other side for another 1-2 minutes until golden brown and cooked through. I usually cook mine in batches, keeping the finished pancakes warm on a plate in a slightly warm oven (around 200°F or 90°C) while I make the rest.
Step 8: Cool & Glaze
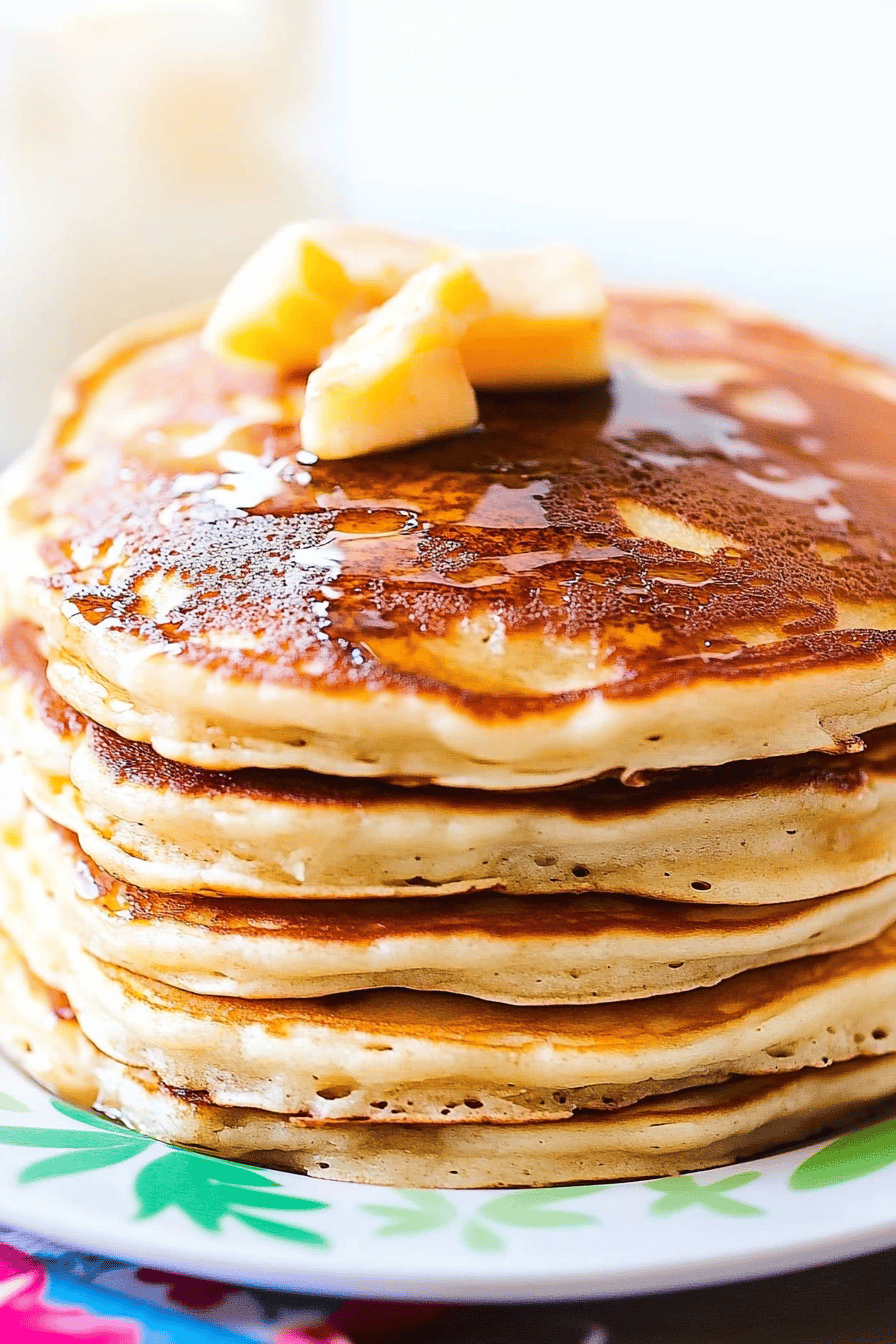
Once your pancakes are cooked, they’re technically ready to go! However, if you plan on serving them with a more elaborate topping like a fruit compote or a special syrup, prepare that while your pancakes are cooking or resting. For the classic approach, simply let them sit for a minute or two after cooking before topping. Drizzle with your favorite syrup and add a pat of butter – the heat from the pancakes will melt it beautifully.
Step 9: Slice & Serve
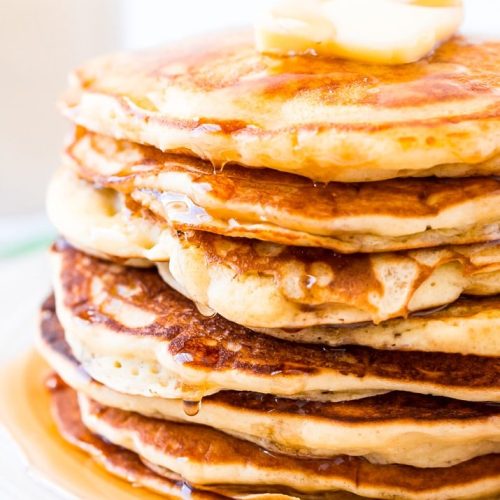
These buttermilk pancakes are best served immediately while they’re warm and fluffy. They don’t really need slicing unless you’re cutting them into smaller portions for little ones. Stack them high, add your favorite toppings, and dig in! The beauty is in their simplicity and incredible texture. Enjoy that first, perfect bite!
What to Serve It With
Oh, the serving possibilities for these glorious buttermilk pancakes are nearly endless, and that’s one of the things I love most about them! For a classic, comforting Breakfast, you really can’t beat a generous drizzle of warm maple syrup and a good quality butter. Add a side of crispy bacon or some perfectly cooked sausage, and you’ve got a meal that’ll make anyone’s morning. Coffee is, of course, essential! For a more elegant Brunch affair, I love to elevate them with a dollop of homemade whipped cream and a scattering of fresh, vibrant berries like raspberries and blueberries. A side of scrambled eggs or smoked salmon can make it feel extra special. And for a treat that rivals any restaurant, serve them as a decadent Dessert. Imagine a stack topped with a warm berry compote, a scoop of vanilla bean ice cream, and a sprinkle of toasted slivered almonds. It’s pure indulgence! Or, for those moments when you’re craving something sweet but don’t want the fuss of a full dessert, they make the perfect Cozy Snack. A simple dusting of powdered sugar and a warm cup of tea or hot chocolate hits the spot every time. My kids absolutely adore them with sliced bananas and a swirl of Peanut Butter – it’s their favorite weekend treat. They’re just so versatile, making them a winner for any occasion and any craving!
Top Tips for Perfecting Your Buttermilk Pancakes
Over the years, I’ve picked up a few tricks that take these already amazing buttermilk pancakes from great to absolutely spectacular. First, when it comes to Zucchini Prep (if you decide to add it as a variation, which I sometimes do for extra moisture and flavor!), make sure you squeeze out as much liquid as possible. Grating the zucchini on the larger holes of a box grater and then wrapping it in a clean kitchen towel or cheesecloth to wring it out is key. You don’t want a watery batter! For Mixing Advice, I cannot stress this enough: do NOT overmix the batter. Lumps are your friends. Overmixing is the fastest way to turn these fluffy clouds into rubbery discs. Stop stirring as soon as you don’t see big streaks of dry flour. It should look a little shaggy. When it comes to Swirl Customization, if you’re adding fruit or chocolate chips, fold them in very gently. Don’t stir them in vigorously, or you’ll break them up too much and end up with a uniformly colored batter, which can look a little muddy. For Ingredient Swaps, the buttermilk substitute I mentioned is fantastic. If you’re out of regular milk and don’t have lemon juice or vinegar, some people have success using plain yogurt thinned with a little water, or even Sour Cream. The key is achieving that slight acidity. For Baking Tips, medium heat is your best friend. If your pancakes are browning too quickly on the outside, turn the heat down slightly. And don’t overcrowd the pan – give each pancake room to expand and cook evenly. Flipping them only once is also a good practice; resist the urge to keep flipping them back and forth. For Glaze Variations, if you want a slightly thicker syrup, you can gently simmer your maple syrup for a few minutes to reduce it slightly. A drizzle of honey or agave nectar works too if you’re out of maple syrup. Honestly, the variations are endless, and I encourage you to experiment! I’ve learned these things through trial and error, and now I can make these buttermilk pancakes with my eyes closed!
Storing and Reheating Tips
These buttermilk pancakes are truly best enjoyed fresh off the griddle, but let’s be honest, sometimes life gets in the way, and you end up with leftovers. Don’t despair! They store and reheat beautifully. For Room Temperature storage, I would only keep them out for a couple of hours at most, especially if your kitchen is warm. Cover them loosely with foil or place them in an airtight container. They’ll stay soft for a short while, but their prime texture is best achieved when fresh. For Refrigerator Storage, this is where they hold up best for a few days. Once they’ve cooled completely (this is important, otherwise condensation can make them soggy), place them in an airtight container or wrap them tightly in plastic wrap. They should stay good for about 3-4 days. When reheating, I love to pop them in a toaster oven or a regular oven at around 350°F (175°C) for a few minutes until warmed through. They come out wonderfully fluffy again! If you’re in a real rush, a quick zap in the microwave works too, though they might be slightly less tender. For Freezer Instructions, if you want to make a big batch and save them for later, this is your best bet. Make sure they are completely cool. Then, wrap individual pancakes or stacks of a few in plastic wrap, followed by a layer of aluminum foil, or place them in a freezer-safe bag. They’ll last for about 2-3 months in the freezer. To thaw, I usually place them in the refrigerator overnight, then reheat as mentioned above. You can also reheat them directly from frozen in the toaster oven or oven, just adding a few extra minutes to the cooking time. Glaze Timing Advice is simple: always add your syrup or glaze *after* reheating. If you refrigerate or freeze pancakes that already have syrup on them, they can become quite soggy. So, store plain, reheat, and then add your delicious toppings!
Frequently Asked Questions
Final Thoughts
So there you have it – my absolute favorite recipe for buttermilk pancakes. It’s more than just a recipe for me; it’s a little piece of home, a taste of tradition, and a surefire way to bring smiles to the table. I truly believe that everyone should have a go-to pancake recipe that they can rely on, and this one, with its incredible fluffiness, perfect tang, and surprising ease, is definitely mine. It’s the kind of dish that makes even a regular Tuesday feel like a special occasion. If you’re looking for other comforting breakfast ideas, you might also enjoy my recipe for [link to fluffy blueberry muffins] or my super-speedy [link to overnight oats] for those busy mornings. Give these buttermilk pancakes a try, and I promise, you won’t be disappointed. I can’t wait to hear how yours turn out! Please leave a comment below with your thoughts or any fun variations you try, and don’t forget to share your creations! Happy baking, everyone!

buttermilk pancakes
Ingredients
Main Ingredients
- 1.5 cups all-purpose flour
- 2 tablespoons granulated sugar
- 2 teaspoons baking powder
- 0.5 teaspoon baking soda
- 0.25 teaspoon salt
- 1.25 cups buttermilk
- 1 large egg
- 3 tablespoons unsalted butter melted
Instructions
Preparation Steps
- In a large bowl, whisk together the flour, sugar, baking powder, baking soda, and salt.
- In a separate bowl, whisk together the buttermilk, egg, and melted butter.
- Pour the wet ingredients into the dry ingredients and stir until just combined. Do not overmix; a few lumps are okay.
- Heat a lightly oiled griddle or frying pan over medium-high heat. Pour or scoop the batter onto the griddle, using approximately 0.25 cups for each pancake.
- Cook for about 2-3 minutes per side, or until golden brown and cooked through.
- Serve immediately with your favorite toppings like butter, syrup, or fresh fruit.
