
There are certain things that just make food sing, aren’t there? For me, one of those unsung heroes, the quiet rockstar of my kitchen, is a really good herb butter. You know, the kind that instantly transforms a simple piece of Grilled Chicken, a steaming baked potato, or even just a slice of crusty bread into something truly special. I remember my grandma making this for Sunday roasts, and the aroma filling our tiny kitchen was just heavenly. It wasn’t just about the taste; it was about the warmth, the comfort, the feeling of being truly cared for. It’s so ridiculously easy, it almost feels like cheating, but the impact it has is enormous. Think of it like adding a little sprinkle of culinary magic. While store-bought versions are okay, they just don’t have that fresh, vibrant punch. This homemade herb butter recipe is my go-to, a lifesaver when I need to jazz up a weeknight meal without much fuss, and my family devours it every single time. It’s a recipe I’ve tinkered with over the years, finding that perfect balance of herbs and richness, and I’m so excited to finally share it with you.
What is Herb Butter?
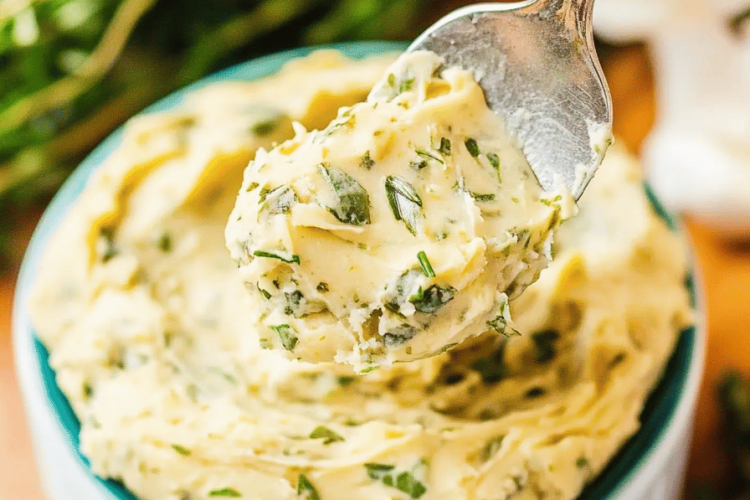
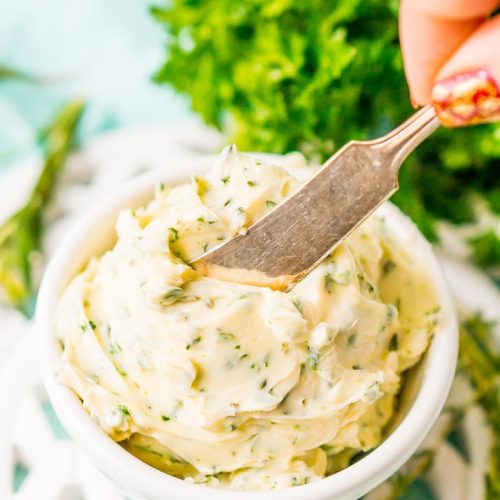
So, what exactly is this wondrous stuff? At its heart, herb butter is simply butter that’s been blended with fresh herbs and sometimes other flavorings like garlic or lemon zest. Think of it as a flavour-packed spread or finishing touch that adds a layer of complexity and deliciousness to anything it graces. It’s not a sauce, and it’s not a marinade, though it can certainly contribute to both. It’s more of a concentrated burst of flavor that melts beautifully into hot dishes or adds a cool, herbaceous note to cold ones. The “magic” comes from the combination of good quality butter, which provides that creamy, rich base, and the fresh herbs, which bring brightness, aroma, and distinct flavor profiles. We’re talking about transforming humble ingredients into something truly memorable, with minimal effort. It’s essentially a shortcut to gourmet flavor, right in your own kitchen.
Why you’ll love this recipe?
What are some of the reasons why I love this herb butter?flavor. It’s just out-of-this-world good. The fresh herbs, especially when they’re vibrant and in season, bring such a lively, aromatic punch that no processed spread can ever match. It’s bright, it’s herbaceous, and it has a lovely richness from the butter that just coats your tongue in the most delightful way. Then there’s the simplicity. I cannot stress this enough – this recipe takes mere minutes to whip up. Seriously, if you can soften butter and chop herbs, you can make this. It’s the perfect thing to make when you’re short on time but still want to serve something impressive. And speaking of impressive, it’s incredibly cost-effectiveWhat I love about herb butter is that it is so much more flavorful than a pre-made one.versatility. This isn’t a one-trick pony. I use it on everything! It’s fantastic on steak, chicken, fish, roasted vegetables, corn on the cob, baked potatoes, even just spread on toast. It’s the perfect way to elevate simple ingredients and make them feel a little bit fancy. If you’ve enjoyed recipes like my Garlic Parmesan Roasted Broccoli or my Lemon Herb Roasted Chicken, you’ll appreciate how this herb butter can add a similar depth of flavor with even less effort.
How to Make Herb Butter
Quick Overview
The process is wonderfully straightforward. We’ll start by ensuring our butter is perfectly softened so it’s easy to work with. Then, it’s simply a matter of finely chopping your favorite fresh herbs and mixing them into the butter with a touch of garlic and perhaps a squeeze of lemon for brightness. Everything gets combined until it’s beautifully homogenous, then rolled into a log and chilled. That’s it! You’ll have a ready-to-use flavor bomb waiting in your fridge for whenever inspiration strikes, or hunger calls. It’s incredibly forgiving, so don’t stress about perfection; the flavor is the star here.
Ingredients
For the Main Batter:
This is where the magic begins! You’ll need a good quality unsalted butter. I always opt for unsalted because it gives me complete control over the saltiness of the final product, and frankly, better quality butter just tastes richer. Make sure it’s softened, not melted. The easiest way to do this is to leave it on the counter for about an hour or so, depending on your kitchen’s temperature. If you’re in a rush, you can gently cut it into smaller cubes, which helps it soften faster. I usually use about 1 cup (2 sticks) of butter for a good batch.
For the Filling:
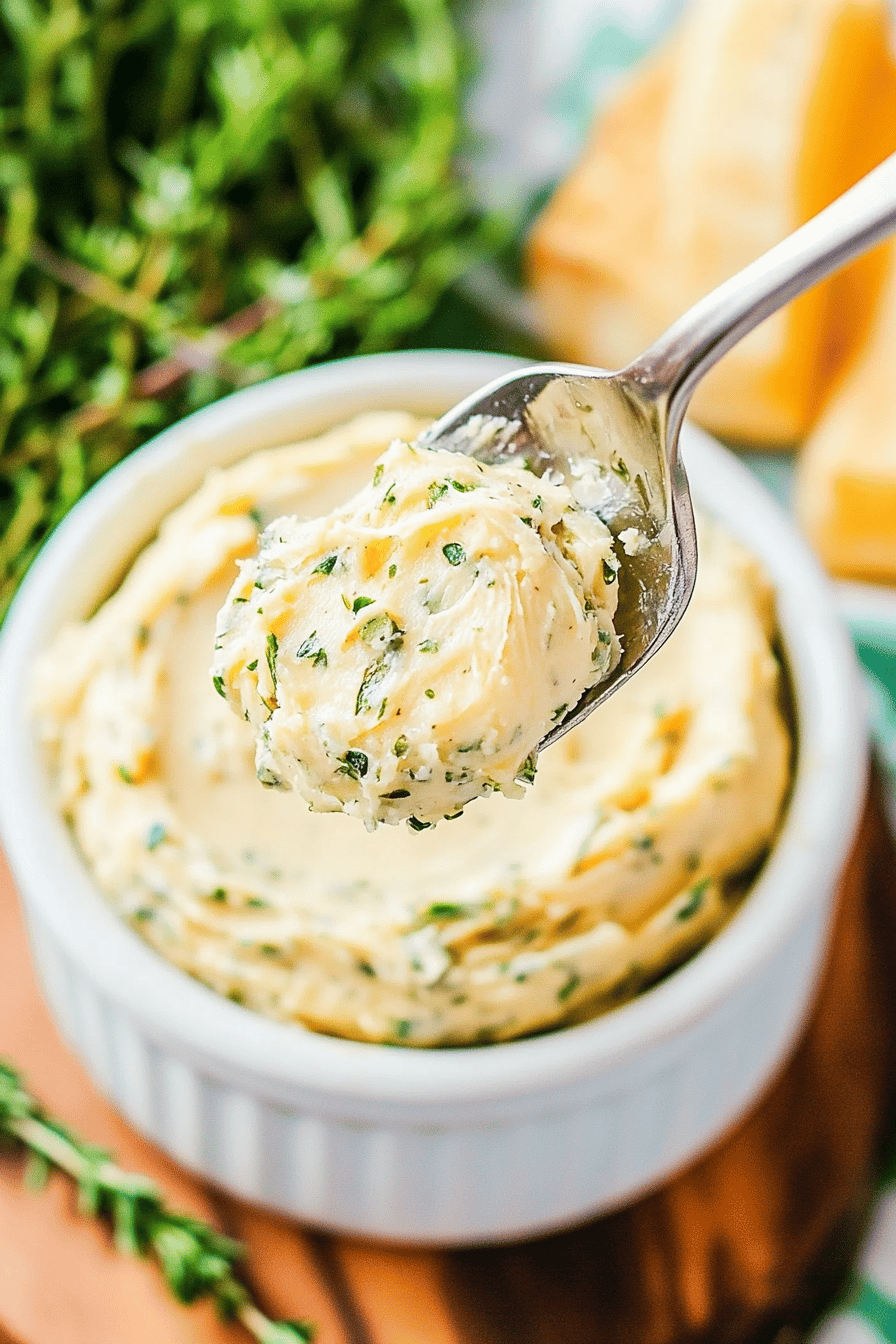
This is where we get creative! The heart and soul of this herb butter are the fresh herbs. My absolute favorites to mix are fresh parsley and chives. Parsley brings a lovely, fresh green flavor, and chives add that subtle oniony bite without being overpowering. I also love to add a bit of fresh thyme or rosemary, especially if I’m planning to use the butter on roasted meats or vegetables. For this recipe, I’d recommend about 2-3 tablespoons of finely chopped mixed fresh herbs in total. The finer you chop them, the better they’ll distribute. Don’t be afraid to experiment here! Mint, dill, or basil can also be wonderful depending on what you’re pairing it with. I also add about 1-2 cloves of garlic, minced very, very finely, almost to a paste. If raw garlic is too strong for you, you can even roast a clove or two until soft and then mash it into the butter; it’s divine. A pinch of sea salt and a good grind of black pepper are essential to enhance all those lovely flavors. Sometimes, I’ll also add a little lemon zest – about half a teaspoon – for an extra zing, especially if I’m using it on fish or chicken.
For the Glaze:
Now, you don’t strictly *need* a glaze for herb butter, but I often like to roll it into a log shape for easy slicing and storage, and sometimes I’ll even press some extra herbs onto the outside for prettiness, or wrap it in parchment paper tied with kitchen twine. If I’m feeling fancy or want to make it extra giftable, I’ll occasionally add a touch of something extra to the outside, like a sprinkle of smoked paprika or a swirl of honey, but typically, the butter itself is enough without any additional glaze.
Step-by-Step Instructions
Step 1: Preheat & Prep Pan
This step isn’t really about preheating a pan in the traditional sense, but it’s about getting your workspace ready! Make sure your butter is softened to room temperature. If it’s too cold, it will be lumpy and hard to mix. If it’s too melty, it will be greasy and won’t hold its shape. The ideal consistency is like soft-serve ice cream – pliable but not liquid. Have a clean bowl, your chopping board, and a sharp knife ready for the herbs and garlic.
Step 2: Mix Dry Ingredients
In this recipe, our “dry ingredients” are really just our finely minced garlic, salt, pepper, and lemon zest (if using). Gather these together near your softened butter. The salt is crucial here; it awakens all the other flavors and prevents the butter from tasting bland. Freshly ground black pepper adds a nice little kick, too. If you’re adding lemon zest, make sure it’s just the yellow part of the peel, avoiding the bitter white pith underneath. This prep step ensures everything is ready to go in one go.
Step 3: Mix Wet Ingredients
The “wet” component here is essentially your softened butter. This is the base for all our amazing flavors. You want it to be soft enough to easily incorporate the other ingredients without overworking it, which can make the butter greasy. If your butter is still a bit firm, don’t microwave it for too long – just a few short bursts, or try the cube trick I mentioned earlier.
Step 4: Combine
Now for the fun part! In a medium bowl, add your softened butter. Add the minced garlic, salt, pepper, and lemon zest (if using). Then, add all your finely chopped fresh herbs. Use a fork or a spatula to gently mix everything together. You want to combine it until all the ingredients are evenly distributed throughout the butter. Don’t overmix it to the point where it becomes mushy; we’re aiming for a cohesive mixture where you can still see flecks of herbs and garlic.
Step 5: Prepare Filling
The herbs are the star “filling” here. Ensure they are washed and thoroughly dried before chopping. Excess water can make your herb butter watery. Chop them as finely as you can. I find using a mezzaluna or a very sharp chef’s knife works best. The finer the chop, the more evenly the flavor will distribute, and the smoother your final butter will be.
Step 6: Layer & Swirl
This step is more about shaping. Once your herb and butter mixture is well combined, you can either leave it as is in a bowl, or you can shape it. The most common and practical way is to form it into a log. Lay out a piece of parchment paper or plastic wrap. Spoon the herb butter onto the center. Use the paper to help you roll it tightly into a log shape, about 1.5 to 2 inches in diameter. Twist the ends of the paper securely. This makes it easy to slice off rounds later. If you want to make it extra pretty, you can press extra chopped herbs onto the outside before rolling, or even roll the log in a sprinkle of flaky sea salt. It’s all about presentation and ease of use!
Step 7: Bake
This recipe doesn’t involve baking the herb butter itself, but rather, the herb butter is used *on* things that are baked! For example, if you’re topping a steak, you’d bake or grill the steak and then top it with a pat of this herb butter. If you’re using it on vegetables, you’d toss your veggies with oil, season them, and then roast them, adding the herb butter towards the end or letting it melt over them as they rest.
Step 8: Cool & Glaze
After forming your herb butter log, you’ll want to let it firm up. Place it in the refrigerator for at least 30 minutes to an hour. This will help it hold its shape beautifully when you slice it. Once it’s firm, you can slice off rounds. There’s no “glaze” in the traditional sense, but the act of chilling and firming is crucial for its final presentation and ease of use.
Step 9: Slice & Serve
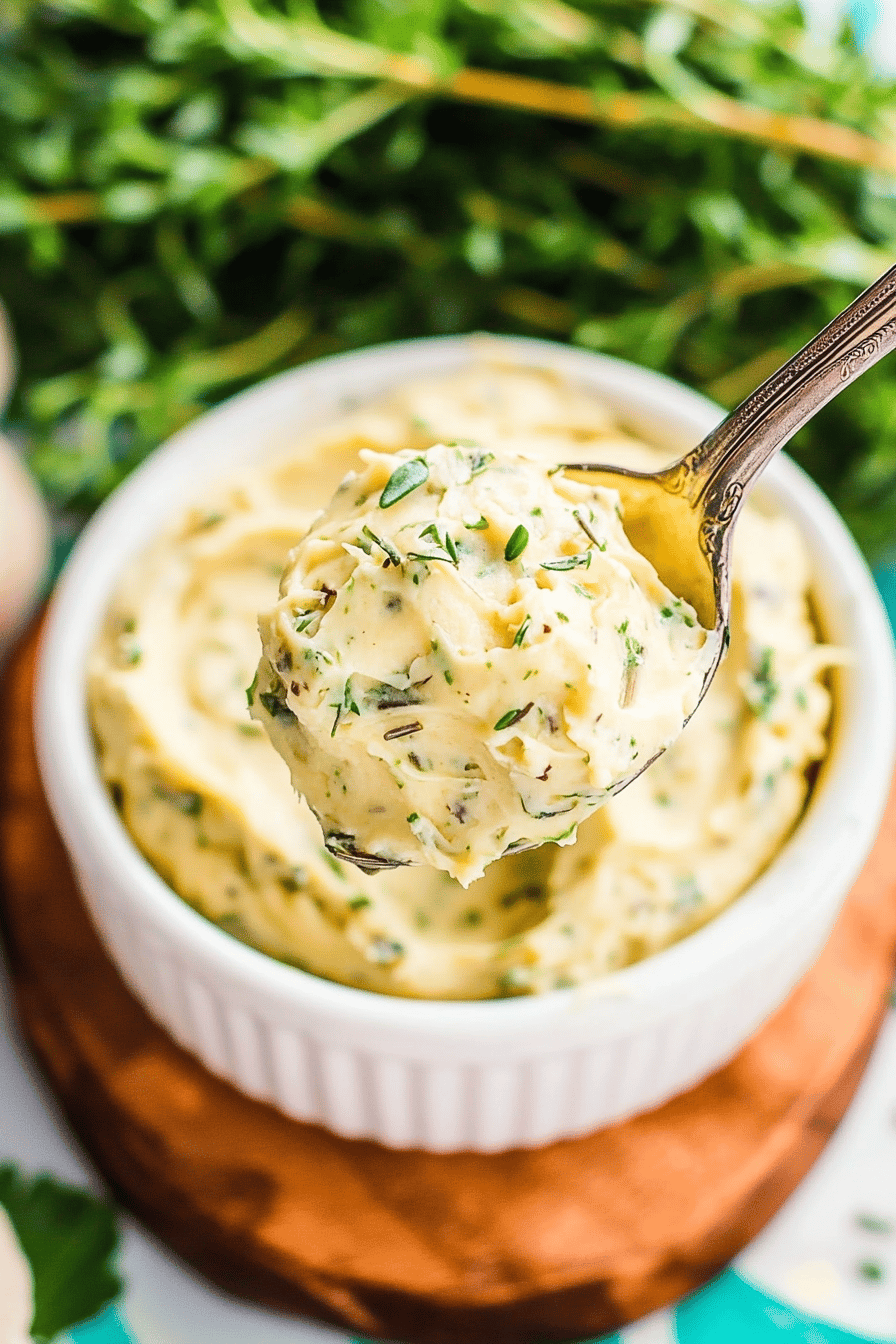
Once your herb butter log is firm, unwrap it and slice off discs about 1/4 to 1/2 inch thick. You can then place these directly onto hot food, or store them for later. The beauty of the log shape is that you can slice off just what you need without having to soften the entire batch. It looks so elegant placed on a hot steak or chicken breast, letting it melt into a luscious sauce.
What to Serve It With
Oh, the possibilities are endless! This herb butter is truly a chameleon in the kitchen. For a simple yet delightful breakfast, a thin slice melted over warm toast or English muffins is pure bliss. It’s also fantastic on a breakfast steak if you’re feeling indulgent. For a more elegant brunch, imagine topping scrambled eggs or even a savory crepe with a dollop of this golden, herbaceous goodness. It’s especially wonderful on salmon or shrimp if you’re serving seafood. As a sophisticated dessert topping, surprisingly, it works wonders! Think of it melting over grilled peaches or warm pound cake – the savory herbs cut through the sweetness beautifully. And for those simple, cozy snacks? A Baked Potato is an obvious winner, but I also love it on grilled corn on the cob, steamed asparagus, or even just a simple bowl of pasta. My personal family tradition is to always have a log of this ready for our Sunday roast chicken; it melts into the juices and makes everything sing. It’s also a lifesaver for weeknight meals when you need to make something quick feel special.
Top Tips for Perfecting Your Herb Butter
I’ve learned a few things over the years of making this, and I’m happy to share them with you so you can get it just right. When it comes to the herbs, freshness is key. Use the best quality, freshest herbs you can find. If your herbs are wilted, they won’t have that vibrant flavor. Also, make sure they are thoroughly dried after washing. Any excess water can make your butter oily and less cohesive. For mixing, don’t be tempted to overwork the butter. You want to combine the ingredients, not churn it. A gentle, thorough mix is all that’s needed. Overmixing can make the butter greasy and less pleasant. For swirl customization, if you like a really intense herb flavor and visible flecks, chop your herbs a bit coarser. If you prefer a smoother butter with a more subtle herbaceous note, chop them very finely, almost to a paste. You can also experiment with different herb combinations! For example, for fish, I love a blend of dill, parsley, and lemon zest. For steak, rosemary and thyme are fantastic. If you’re making it for vegetables like asparagus or broccoli, parsley, chives, and a hint of garlic are perfect. If you find yourself without fresh herbs, you can use dried, but you’ll need much less – about 1/3 of the amount, and the flavor won’t be quite as bright. For baking applications, remember that the butter will melt and spread. For things like cookies or biscuits, it contributes to richness and tenderness. For topping grilled or baked items, it adds a beautiful finishing touch of flavor as it melts. And when it comes to glaze variations, while not strictly necessary, you can add a tiny pinch of chili flakes for a bit of heat, or a touch of honey for a sweet and savory profile. Just remember that adding too much liquid or sweetness can alter the texture and meltability.
Storing and Reheating Tips
The beauty of making a batch of herb butter is that you can keep it on hand for whenever you need it. For room temperature storage, it’s best to keep it in a covered container, but honestly, I wouldn’t leave it out for more than a couple of hours at most, especially if your kitchen is warm, as butter can start to soften and lose its shape and quality. For optimal freshness and longevity, refrigerator storage is your best bet. Once formed into a log and wrapped tightly in parchment paper or plastic wrap, it can last for a good 2-3 weeks. Make sure it’s well-sealed to prevent it from absorbing other odors in the fridge. If you want to keep a larger batch for longer, freezer instructions are your friend! Wrap the log very tightly in plastic wrap, then in foil, and it can stay frozen for up to 3 months. To use, you can either thaw it overnight in the refrigerator, or if you need it immediately, you can often slice off a frozen pat and let it melt directly onto hot food. The glaze timing advice is simple: the butter itself *is* the flavor; there’s no separate glaze to worry about applying later. The key is to get it chilled properly after making it so it slices cleanly and melts beautifully.
Frequently Asked Questions
Final Thoughts
So there you have it – my absolute favorite way to make herb butter! It’s one of those foundational recipes that just elevates everyday cooking into something truly special, without demanding hours in the kitchen. I hope you’ll give it a try and discover how versatile and delicious it can be. It’s the perfect little secret weapon to have in your culinary arsenal. Whether you’re a seasoned cook or just starting out, this recipe is incredibly forgiving and rewarding. If you loved this recipe, you might also enjoy exploring other simple flavor boosters like my homemade garlic confit or my quick lemon-herb vinaigrette. They bring a similar punch of flavor with minimal effort. I can’t wait to hear what you think of this herb butter, and I’d absolutely love to know how you end up using it! Drop a comment below with your favorite herb combinations or dishes you’ve tried it on. Happy cooking, friends!
Herb Butter
Ingredients
Main Ingredients
- 0.5 cup Unsalted Butter softened
- 2 cloves Garlic minced
- 2 tablespoon Fresh Parsley chopped
- 1 teaspoon Fresh Rosemary chopped
- 0.5 teaspoon Salt
- 0.25 teaspoon Black Pepper
Instructions
Preparation Steps
- In a medium bowl, combine the softened butter, minced garlic, chopped parsley, chopped rosemary, salt, and pepper.
- Mix all ingredients together until well combined and evenly distributed.
- You can use the herb butter immediately, or roll it into a log shape using parchment paper and refrigerate for later use.
