
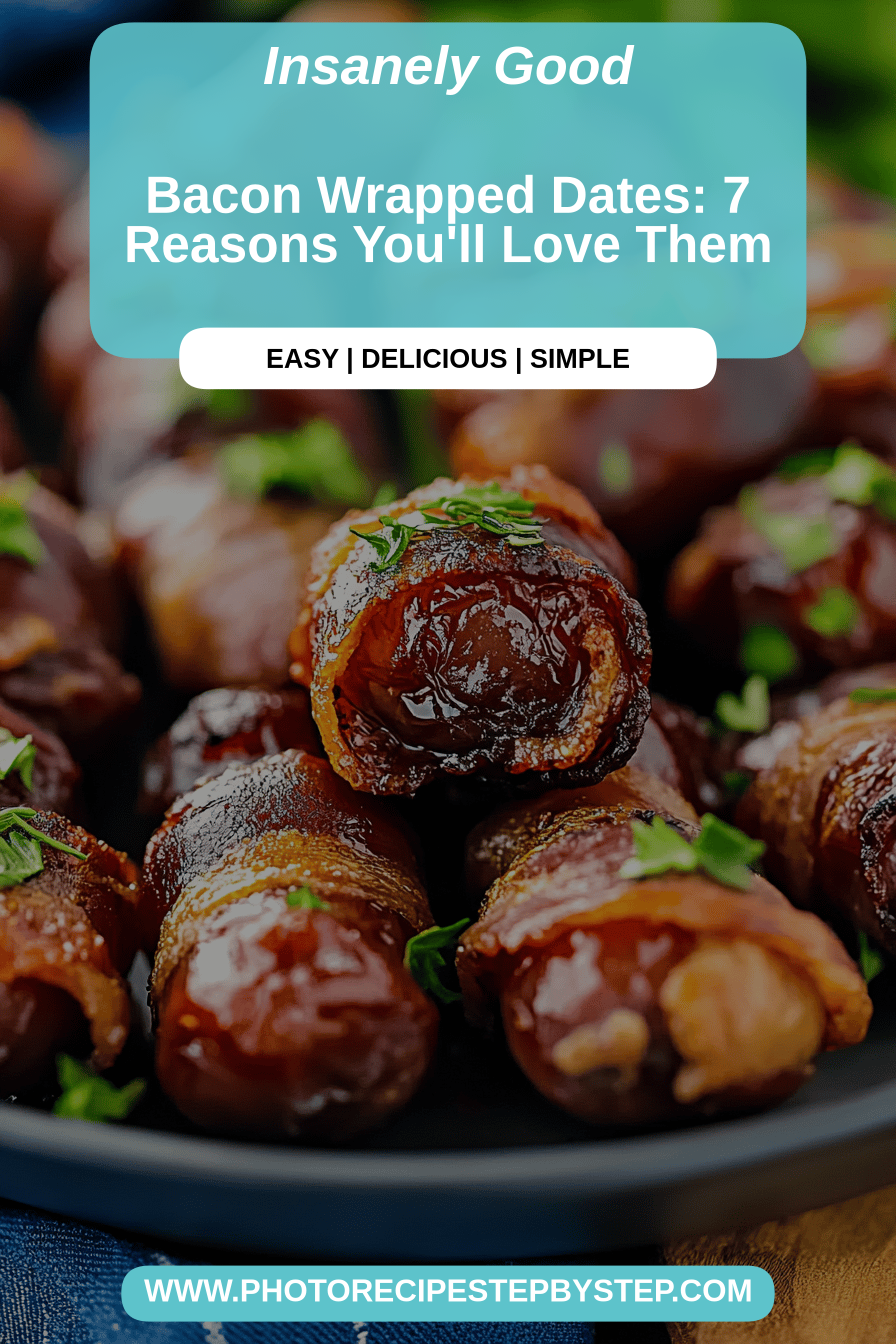
Oh, where do I even begin with these little gems? If you’ve ever found yourself staring into the abyss of your pantry, craving something that hits that perfect sweet and salty spot without a ton of fuss, then honey, you’ve found your soulmate. These bacon wrapped dates are more than just an appetizer; they’re a full-on experience. I remember the first time I ever tried making them for a holiday party, and let me tell you, I was a little skeptical. How could something so simple be so utterly divine? Turns out, it’s all about the magic that happens when smoky, crispy bacon meets a chewy, caramel-like date. They’re like the best kind of surprise party in your mouth. Honestly, they’re almost as addictive as a perfectly baked Chocolate Chip cookie, but they feel a little more grown-up, don’t you think? They’re what I reach for when I need to impress someone without breaking a sweat in the kitchen, or when I just need a little pick-me-up after a long day. The star of the show, of course, is the bacon wrapped dates themselves – a combination so classic, yet so exciting every single time.
What is Bacon Wrapped
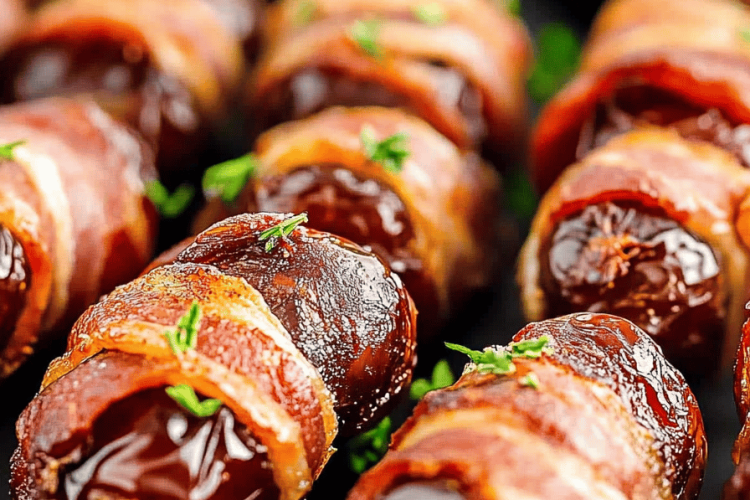
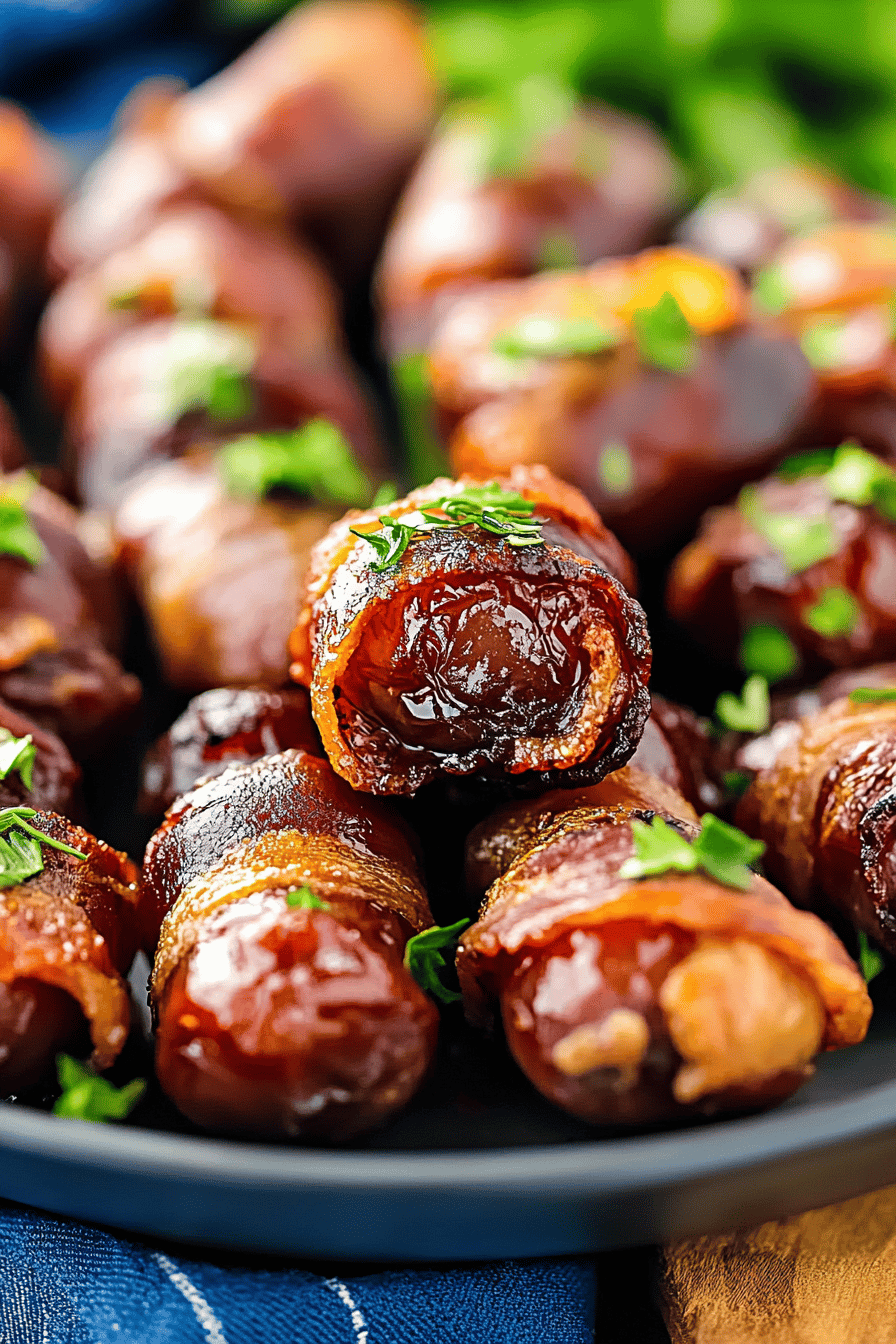
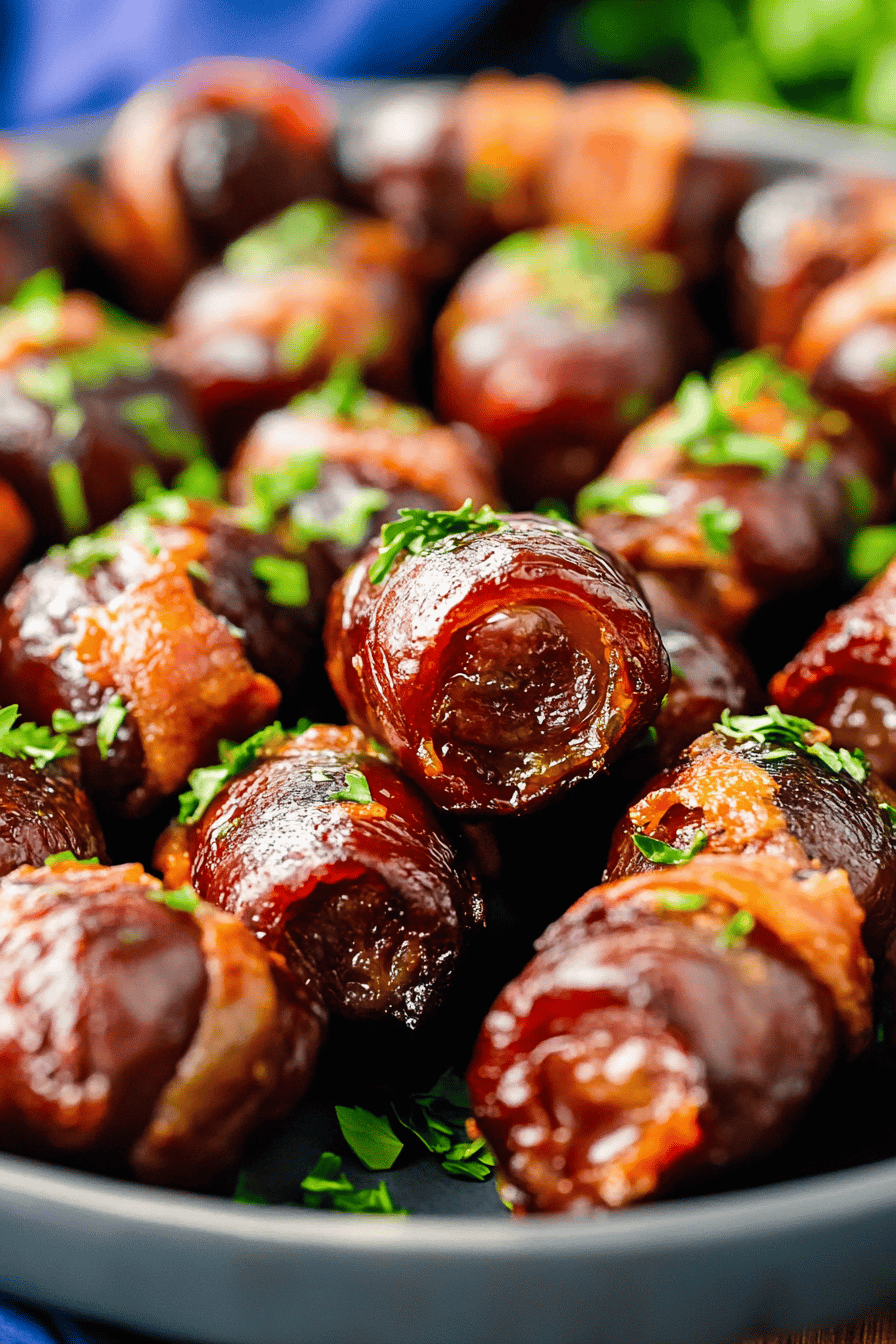
So, what exactly are these little flavor bombs? Think of them as the ultimate handheld treat. They’re essentially Medjool dates, those plump, caramelly wonders of nature, that get lovingly hugged by a strip of bacon. We’re talking about a sweet, slightly chewy fruit wrapped in salty, savory, and soon-to-be crispy bacon. It’s a match made in culinary heaven, and honestly, it’s one of those recipes that seems too good to be true because it’s so incredibly easy. The beauty of bacon wrapped dates lies in their simplicity. There are no complicated techniques, no obscure ingredients – just pure, unadulterated deliciousness. They’re the perfect little bites for any gathering, from a casual game night to a more formal cocktail party. They’re also fantastic for just snacking on when you need a little something special. It’s a concept that’s so straightforward, yet the flavor payoff is enormous. It’s the kind of thing you see on a fancy catering menu and think, “Wow, that must be complicated,” but it really, really isn’t. It’s that perfect balance of sweet and savory that we all crave.
Why you’ll love
There are so many reasons why this recipe for bacon wrapped dates has become a staple in my kitchen, and I have a feeling it’ll become one in yours too! First off, let’s talk about the flavor explosion. You get the natural, deep sweetness of the Medjool dates, which become almost jammy when baked, perfectly complemented by the salty, smoky goodness of the bacon. As the bacon renders, it crisps up beautifully, creating this irresistible contrast in textures. It’s a flavor profile that’s incredibly satisfying. Then there’s the sheer simplicity of it all. Seriously, this is one of those recipes that makes you feel like a gourmet chef without actually doing much. You can whip these up in under 30 minutes, making them a lifesaver on busy weeknights when you need a quick, impressive appetizer or even a decadent snack. And if you’re budget-conscious, you’ll be happy to know that the ingredients are pretty affordable. Dates are usually quite reasonable, and bacon is a treat that doesn’t break the bank. What I love most about this recipe, though, is its versatility. You can serve these warm as a crowd-pleasing appetizer, or even cold as a delightful snack. They’re perfect for holiday gatherings, potlucks, game days, or just when you’re craving something a little special. I’ve made countless variations, and they always disappear in minutes. They’re even better than those fancy prosciutto-wrapped melon bites you see everywhere, in my humble opinion, because they’re so much easier to make and just as elegant. Trust me, once you try them, you’ll understand why they’re a fan favorite.
How do you make Bacon Wrap
Quick Overview
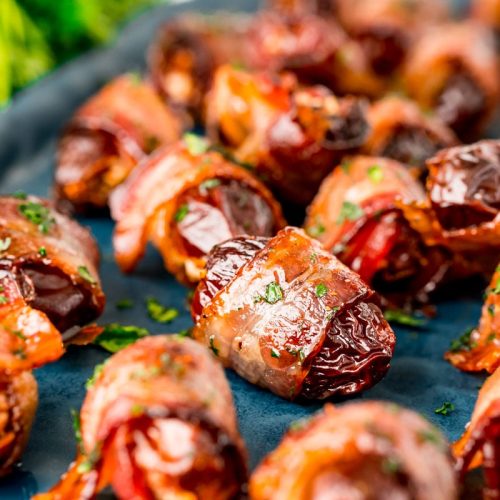
Making these delectable bacon wrapped dates is astonishingly straightforward. You’ll simply be pitting some plump Medjool dates, wrapping them snugly in a half-strip of your favorite bacon, and then baking them until the bacon is wonderfully crisp and the dates are gorgeously caramelized. The whole process is incredibly low-fuss, and the results are always spectacular. It’s the kind of recipe that makes you look like you spent hours in the kitchen, when in reality, you spent mere minutes prepping. The key is using good quality ingredients and letting the oven do the work. You get that perfect sweet, salty, crispy, chewy combination with minimal effort, making it an absolute winner for any occasion.
Ingredients
For the Main Event:
24 Medjool dates, pitted (about 1 pound)
12 strips of bacon, cut in half crosswise
For a Little Extra Zing (Optional, but recommended!):
1/4 cup almond slivers or chopped pecans (for stuffing inside the dates before wrapping)
For the Glaze (Optional, but oh-so-good!):
2 tablespoons maple syrup or brown sugar
1 tablespoon balsamic vinegar (adds a wonderful tang)
Step-by-Step Instructions
Step 1: Preheat & Prep Pan
First things first, let’s get your oven preheated. You want it nice and hot, around 400 degrees Fahrenheit (200 degrees Celsius). This high heat is key to getting that bacon perfectly crispy without overcooking the dates. Now, grab a baking sheet. I highly recommend lining it with parchment paper or aluminum foil for easy cleanup. Trust me on this one – bacon grease can be a pain to scrub off! If you’re feeling fancy and want to elevate the flavor even more, you can sprinkle a little brown sugar or a pinch of cayenne pepper onto the parchment paper before you place the dates on it. This will create a delicious, slightly caramelized crust on the bottom.
Step 2: Prepare the Dates
This is where the magic begins! Take your pitted Medjool dates. If they feel a little firm, you can gently warm them for about 10 seconds in the microwave, or briefly soak them in warm water for a minute or two, then pat them dry. This makes them more pliable and easier to work with. Make a small slit lengthwise down each date, just enough to create a little pocket. This is where you’ll either tuck in a nut if you’re using them, or it just helps the bacon adhere nicely. If you are using almonds or pecans, now’s the time to tuck one or two inside each date. Don’t overstuff them, just a little something extra for texture and flavor.
Step 3: Wrap ‘Em Up!
Now for the satisfying part – wrapping! Take one of your halved bacon strips and wrap it snugly around each prepared date. You want the bacon to overlap just a tiny bit to ensure it stays put during baking. The goal here is to fully encase the date. If the bacon strip is a little too long, you can trim it, or just wrap it around twice if it’s a shorter piece. I usually secure the end of the bacon with a toothpick, especially if it feels a bit loose. This is an optional step, but it can save you a few rogue bacon bits from falling off. Just make sure to remove the toothpicks before serving!
Step 4: Arrange on Baking Sheet
Once all your dates are beautifully swaddled in bacon, arrange them on your prepared baking sheet. Make sure they’re not touching too much; give them a little breathing room. This allows the heat to circulate evenly, ensuring the bacon gets nice and crispy on all sides. If they’re too crowded, the bacon will steam rather than crisp up, and nobody wants soggy bacon on their bacon wrapped dates! I usually place them cut-side down if I’m not using toothpicks, as the bacon tends to stick better that way. Just aim for a single layer so everything bakes evenly.
Step 5: Bake to Perfection
Pop that baking sheet into your preheated 400°F (200°C) oven. Now, this is where things get fragrant! The aroma of bacon cooking is one of my favorite kitchen smells, and it’ll fill your home in the best way. Bake for about 15-20 minutes. The exact time will depend on your oven and the thickness of your bacon. You’re looking for the bacon to be beautifully browned and wonderfully crispy. I like to flip them halfway through the baking time to ensure even crisping on all sides. Keep an eye on them towards the end – you don’t want the bacon to burn!
Step 6: Make the Glaze (Optional but Recommended!)
While your bacon wrapped dates are in the oven, you can whip up a quick glaze if you like. In a small saucepan over medium heat, combine the maple syrup (or brown sugar) and balsamic vinegar. Let it simmer gently for about 5 minutes, stirring occasionally, until it thickens slightly into a syrupy consistency. You want it to be pourable but not watery. This glaze adds another layer of sweet and tangy flavor that really takes these over the top. It’s an extra step, but it’s totally worth it!
Step 7: Glaze and Finish Baking
Once your bacon wrapped dates are almost done and the bacon is looking nice and crisp, carefully remove the baking sheet from the oven. If you’re using the glaze, brush a little bit of it over the top of each date. Then, pop them back into the oven for another 2-3 minutes, just to let the glaze set and caramelize a bit more. Watch them closely during this final stage so the glaze doesn’t burn!
Step 8: Cool Slightly and Serve
Remove the baking sheet from the oven. Let the bacon wrapped dates cool on the baking sheet for about 5-10 minutes. This is crucial! They’ll be incredibly hot, and letting them cool slightly allows the flavors to meld and makes them easier to handle. If you used toothpicks, now is the time to carefully remove them. Serve them warm and watch them disappear! They are absolutely divine when they’re fresh out of the oven, but they’re also surprisingly good at room temperature.
What to Serve It With
These bacon wrapped dates are so incredibly versatile, they can honestly fit into almost any meal or gathering. For a truly decadent breakfast, I love serving them alongside fluffy pancakes or waffles. The sweet and salty combination just sings with a cup of strong coffee. Imagine starting your day with that perfect bite! For brunch, they’re a showstopper. They pair beautifully with a fresh fruit salad, a creamy quiche, or even a smoked salmon platter. They add a touch of gourmet elegance without any fuss. I like to arrange them artfully on a platter with some fresh herbs sprinkled around. As a dessert, they’re surprisingly satisfying. They offer that perfect sweet finish without being overly heavy, especially when drizzled with a bit more of that balsamic glaze. They’re also fantastic with a scoop of vanilla bean ice cream or a small cheese board. And for those cozy nights in or casual get-togethers, they’re simply the best snack. I’ve thrown them onto a cheese board with a variety of cheeses and crackers, and they’re always the first thing to go. They’re also amazing served with a side of roasted nuts or olives for an easy happy hour spread. My family has this tradition where we always have them during movie nights – a little sweet, a little savory, and perfectly portioned for munching. They are simply the perfect complement to almost any flavor profile you can dream up.
Top Tips for Perfecting Your Bacon Wrapped Dates
Over the years, I’ve learned a few tricks that I swear by when making these bacon wrapped dates. First, the quality of your dates really matters. Opt for plump, soft Medjool dates. If they feel a bit dry, a quick 10-second zap in the microwave or a brief soak in warm water (followed by a good pat dry!) can work wonders. They should be pliable enough to wrap easily. When it comes to the bacon, I find that a good quality, regular-cut bacon works best. Avoid super thick-cut bacon, as it can take too long to crisp up and might make the dates mushy. Thinly sliced bacon crisps up perfectly and wraps more evenly. I always cut my bacon strips in half crosswise; it’s the perfect length for one date and ensures you get that ideal bacon-to-date ratio. If you’re using toothpicks (which I often do for extra security), make sure to use short ones or cut longer ones down so they don’t stick out too much. And absolutely, always, always remove the toothpicks before serving – you don’t want anyone taking an unexpected bite! For baking, don’t be afraid of high heat! The 400°F (200°C) is crucial for getting that bacon nice and crispy. I also like to flip them halfway through to ensure even cooking, and I always keep a close eye on them towards the end to prevent burning. If you’re adding nuts, stuff them in *before* wrapping the bacon. A single almond or a couple of pecan halves is usually enough to add a lovely crunch without making the date too bulky. For the glaze, consistency is key. You want it thick enough to coat but not so thick that it burns instantly. A gentle simmer is all it takes. And remember, these are best served warm, but they’re also quite delightful at room temperature, making them great for make-ahead parties.
Storing and Reheating Tips
Alright, let’s talk about what happens after they’re gone from the platter (because let’s be honest, they go fast!). If you somehow manage to have any bacon wrapped dates leftover, storing them is pretty simple. At room temperature, they’re best enjoyed within a few hours of cooling. If you’ve got a bit more time and haven’t drizzled them with glaze yet, they can hold up for a few hours at room temperature, but I always prefer to refrigerate them if they’re going to sit out for more than a couple of hours, especially if it’s warm. For refrigerator storage, let them cool completely first. Then, place them in an airtight container. They’ll keep well in the fridge for about 2-3 days. The bacon will still be nicely crisp when they’re fresh, but they might soften up slightly after a day or so in the fridge. I’ve found that they hold their texture better if you don’t glaze them until just before serving, if you’re making them ahead. If you want to freeze them for future cravings, that’s totally doable! Once they’re baked and cooled, you can freeze them on a baking sheet until solid, then transfer them to a freezer-safe bag or container. They’ll last for up to 2-3 months in the freezer. To reheat, I usually pop them back in a moderate oven (around 350°F or 175°C) for about 5-10 minutes, just until they’re warmed through and the bacon is crispy again. If you glazed them, be careful not to overheat them, as the glaze can burn. Reheating them gently is key to bringing back that delicious texture and flavor.
Frequently Asked Questions
Final Thoughts
Honestly, if there’s one recipe I could take to a desert island (assuming there was a kitchen!), it would be this one. Bacon wrapped dates are just pure joy in edible form. They’re proof that sometimes, the simplest combinations yield the most incredible results. They’re the perfect harmony of sweet, savory, salty, and smoky, with a delightful chew and crisp. I truly hope you give these a try, whether it’s for your next gathering, a cozy night in, or just because you deserve a little treat. If you love this recipe, you might also enjoy my prosciutto-wrapped figs or my candied pecans – they offer similar flavor profiles and are just as crowd-pleasing! I’d absolutely love to hear how yours turn out. Did you add a secret ingredient? Did your family devour them in minutes like mine always does? Please leave a comment below and share your experience, or even better, snap a picture and tag me on social media! Happy baking (or in this case, wrapping and baking)! I can’t wait to see your creations.
bacon wrapped dates
Ingredients
Main Ingredients
- 20 large Medjool dates pitted
- 10 slices Bacon cut in half lengthwise
- 1 tablespoon Brown sugar
- 0.5 teaspoon Cinnamon
Instructions
Preparation Steps
- Preheat your oven to 375°F (190°C). Line a baking sheet with parchment paper.
- In a small bowl, mix together the brown sugar and cinnamon.20 large Medjool dates
- Take each pitted Medjool date and roll it in the brown sugar and cinnamon mixture, ensuring it's coated on all sides.20 large Medjool dates
- Wrap one half-slice of bacon around each coated date. Secure with a toothpick if necessary.20 large Medjool dates
- Place the wrapped dates on the prepared baking sheet, seam-side down if possible.
- Bake for 18-20 minutes, or until the bacon is crispy and the dates are softened and slightly caramelized.
- Remove from oven, let cool slightly, and serve warm.
