
You know those nights, right? The ones where a craving hits HARD, usually around 10 PM, and the thought of preheating the oven and digging out all the baking pans feels like climbing Mount Everest? Yeah, me too. That’s precisely why I’m so obsessed with these no-bake cookies. Seriously, they’re a lifesaver. They taste like pure chocolatey, peanut buttery bliss, but they require zero oven time. Think of them as the happy, effortless cousin to your classic Chocolate Chip cookie – just as satisfying, if not more so, when you need a sweet fix *right now*. My kids ask for these no-bake cookies practically every week, and honestly, I’m always happy to oblige because they’re just that simple and that good.
What Are No-Bake Cookies?
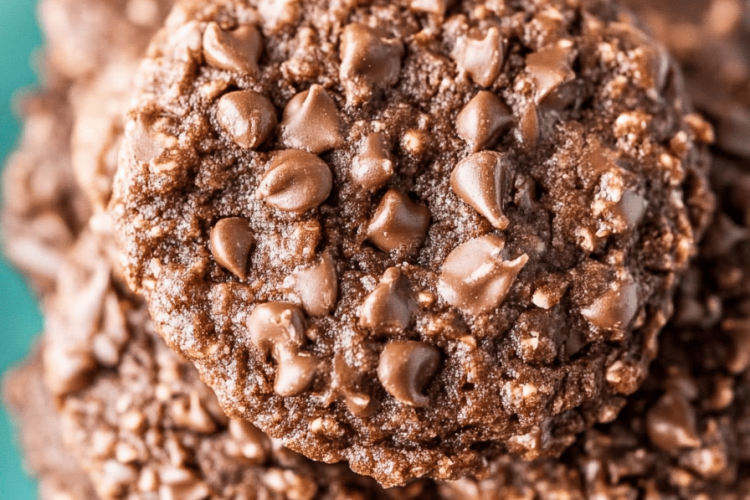
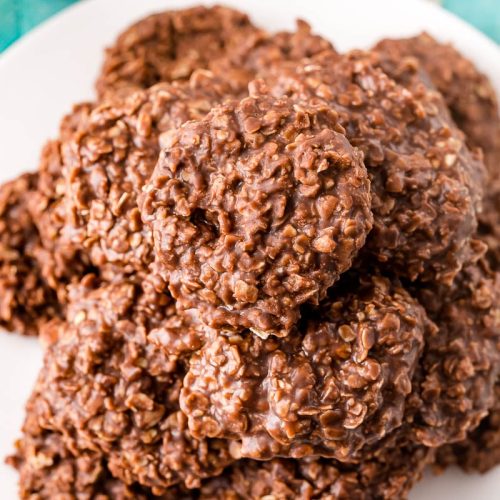
So, what exactly are these magical little treats? At their core, no-bake cookies are a confection made by boiling sugar, butter, milk, and cocoa powder, then stirring in ingredients like oats, Peanut Butter, and vanilla. They’re dropped onto wax paper and allowed to set into chewy, fudgy discs of deliciousness. The magic happens because the boiling process creates a sort of candy-like base that hardens as it cools, no oven needed! It’s like a stovetop fudge meets a cookie, all rolled into one delightfully easy package. The name itself says it all – no baking required! It’s this simplicity that makes them such a go-to for spontaneous sweet cravings or when you’re just not feeling the whole oven-and-baking-sheet routine.
Why you’ll love this
Honestly, where do I even begin with why I adore these no-bake cookies? First off, the flavor is just out of this world. You get that rich, decadent chocolate alongside the creamy, salty goodness of peanut butter, all wrapped up in a perfectly chewy texture thanks to the rolled oats. It’s a flavor combination that just hits all the right notes. Then there’s the simplicity – and oh my goodness, is it simple! Most of the time is spent just waiting for them to cool, which, let’s be real, is the hardest part. You can whip up a batch in about 15-20 minutes of active time, which is way faster than preheating an oven, mixing dough, and waiting for cookies to bake. And budget-friendly? Absolutely! The ingredients are pantry staples for most people – sugar, butter, milk, cocoa, oats, peanut butter. Nothing fancy required here! Plus, they’re so versatile. You can enjoy them as is, or even add a sprinkle of sea salt on top if you’re feeling fancy. What I love most about these no-bake cookies, though, is the immediate gratification. When that sweet tooth strikes, you can have a delicious, homemade treat in your hands in under an hour from start to finish. It’s a win-win-win!
How to Make No-Bake Cookies
Quick Overview
Making these no-bake cookies is incredibly straightforward. You’ll boil a few key ingredients on the stovetop to create a sweet, syrupy base. Then, you’ll stir in the star players – creamy peanut butter and hearty rolled oats. A quick drop onto parchment or wax paper, a little patience while they set, and voilà! You have delicious, homemade no-bake cookies that taste like pure comfort. It’s a process that feels almost like making candy, but with the familiar ease of a cookie recipe. This method ensures a perfectly chewy texture every single time, without any fuss.
Ingredients
For the Main Batter
You’ll need 2 cups of granulated sugar – this is the backbone of our sweet base. Make sure it’s granulated, not powdered, for the right texture. Then, we have 1/2 cup of unsalted butter; I find unsalted gives me better control over the saltiness, but salted works in a pinch, just be mindful if you add extra salt later. Next, 1/2 cup of milk – whole milk gives the richest texture, but I’ve had great results with 2% too. And for that deep chocolate flavor, 3 tablespoons of unsweetened cocoa powder. Use a good quality cocoa powder if you can; it really makes a difference! Lastly, 1 teaspoon of vanilla extract for that warm aroma and flavor boost.
For the Filling:
The heart of the cookie’s texture comes from 1/2 cup of creamy peanut butter. Smooth is my preference because it integrates so well, but crunchy works too if you love those little peanut bits! And the star texture maker: 3 cups of rolled oats. I always use old-fashioned rolled oats; they give the best chew. Quick oats tend to break down too much and can make the cookies a bit gummy, so I really recommend sticking with rolled oats.
For the Glaze:
While these are called no-bake cookies, a little something extra can take them over the top. Some people love to add a drizzle of melted chocolate or a simple confectioners’ sugar glaze. For a simple glaze, I often use about 1 cup of powdered sugar mixed with 1-2 tablespoons of milk and a splash of vanilla until it’s a pourable consistency. But honestly, these no-bake cookies are absolutely divine even without any glaze at all!
Step-by-Step Instructions
Step 1: Preheat & Prep Pan
First things first, you’ll want to grab a good-sized saucepan. A heavy-bottomed one is best because it distributes heat more evenly and helps prevent scorching. Line a baking sheet or a large plate with parchment paper or wax paper. This is crucial because these cookies are sticky, and you don’t want them adhering to your pan! Make sure you have plenty of space to drop them, as they’ll need room to cool undisturbed.
Step 2: Mix Dry Ingredients
In a separate bowl, measure out your 3 cups of rolled oats and set them aside. You’ll add these in a bit, but it’s good to have them ready to go. This step might seem simple, but having your oats pre-measured ensures you can quickly add them once the sugary mixture is ready.
Step 3: Mix Wet Ingredients
In your saucepan, combine the granulated sugar, butter, milk, and cocoa powder. Place this mixture over medium heat. Stir constantly until the butter is melted and the sugar is dissolved. Once it comes to a rolling boil (meaning it’s bubbling vigorously and won’t stop when you stir), let it boil for exactly 1 minute. This timing is important – too short and they won’t set properly, too long and they might get too crunchy.
Step 4: Combine
Remove the saucepan from the heat immediately after the 1-minute boil. Stir in the vanilla extract and the peanut butter until everything is smooth and well combined. Then, quickly add in your pre-measured rolled oats. Stir everything together until the oats are thoroughly coated in the chocolatey peanut butter mixture. You want to work relatively fast here so the mixture doesn’t start to set up too much in the pot.
Step 5: Prepare Filling
At this stage, the “filling” is actually the mixture you just created in the saucepan! It’s a thick, fudgy, oat-filled concoction ready to be transformed into cookies. Make sure the peanut butter is fully incorporated and you don’t see any streaks of it remaining. The warmth of the mixture will help it melt and blend beautifully.
Step 6: Layer & Swirl
Using two spoons, or a small cookie scoop, drop spoonfuls of the warm mixture onto your prepared parchment or wax paper. Aim for roughly tablespoon-sized portions. Don’t worry about making them perfectly round or uniform; rustic is part of their charm! If you want to add a glaze, this is where you’d do it after they’ve cooled slightly, but I often just let them be their delicious selves.
Step 7: Bake
Okay, here’s the delightful part: there’s no baking! Your “baking” is simply letting these delicious drops of goodness cool and set at room temperature. This usually takes about 30-60 minutes, depending on how warm your kitchen is. They’re ready when they are firm to the touch and no longer feel gooey.
Step 8: Cool & Glaze
Once the cookies are firm and set, you can gently peel them off the parchment paper. If you’re adding a glaze, now is the time. Drizzle with your prepared glaze or melted chocolate. Let the glaze set for another 10-15 minutes before serving.
Step 9: Slice & Serve
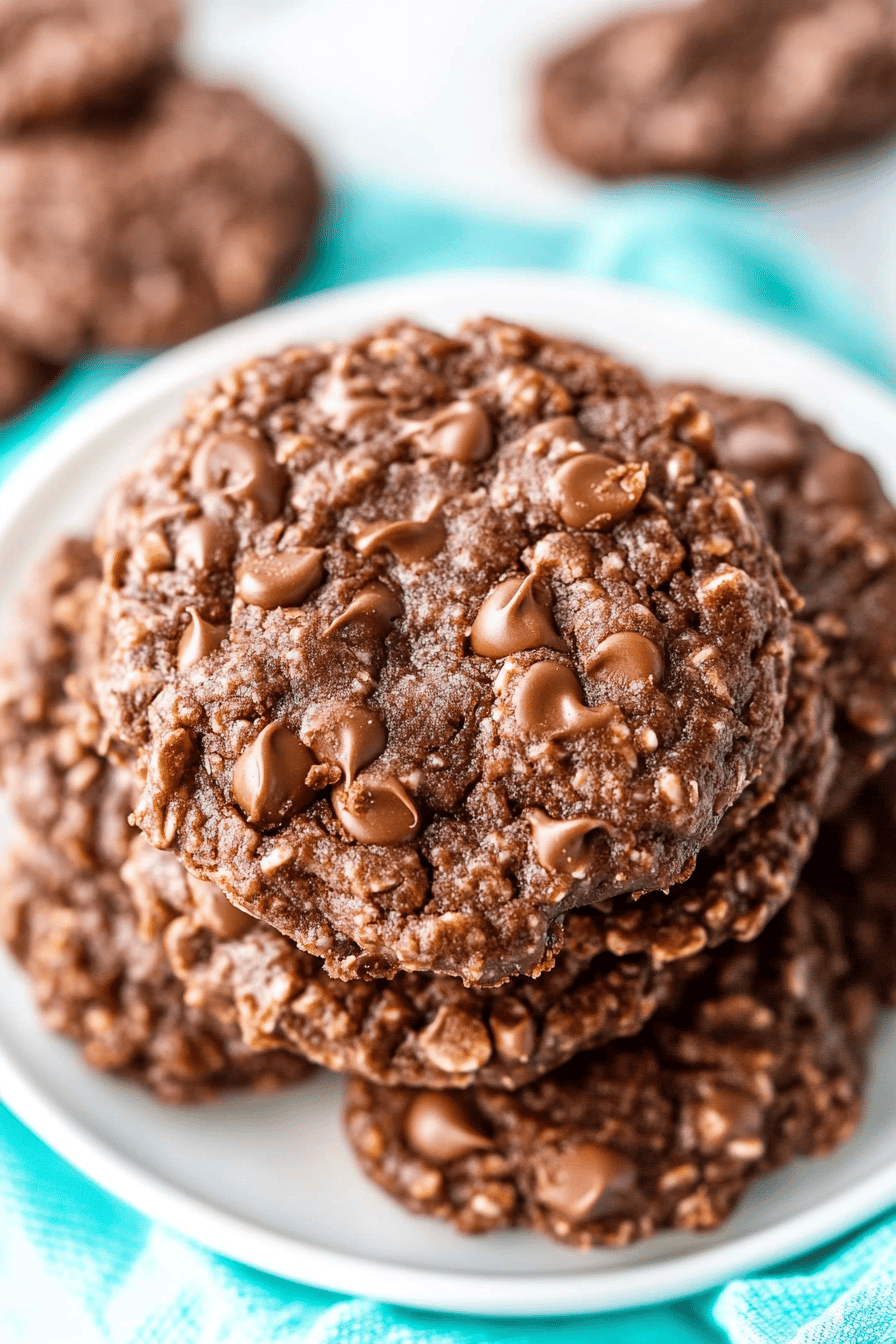
These no-bake cookies are best enjoyed at room temperature or slightly chilled. They’re perfect for grabbing on the go, sharing with friends, or just enjoying with a glass of milk. They have a wonderfully chewy texture and a rich flavor that’s incredibly satisfying.
What to Serve It With
These no-bake cookies are so wonderfully versatile, they fit in almost anywhere! For breakfast, they’re a delightful (and quick!) treat alongside a strong cup of coffee or a glass of cold milk. Imagine a busy morning and you can just grab one or two of these – it feels like a little indulgence before the day really begins. For brunch, they add a charming homemade touch to any spread. I love to arrange them on a pretty platter with fresh berries; it makes them feel a little more elegant. As a dessert, they’re the perfect way to end a meal, especially if you’ve had a heavier main course. They satisfy that sweet craving without being too overwhelming. And for cozy snacks? This is their prime time! Picture this: a rainy afternoon, a good book, and a few of these chewy, chocolatey delights. They pair perfectly with a warm mug of tea or hot chocolate, creating that ultimate comfort food vibe. My family also loves them during movie nights; they’re easy to eat without making a mess and disappear surprisingly fast!
Top Tips for Perfecting Your No-Bake Cookies
Over the years, I’ve learned a few tricks that really elevate these no-bake cookies. First, when it comes to the oats, I always opt for old-fashioned rolled oats. They provide a substantial chew that holds up beautifully. Quick oats tend to get mushy, and steel-cut oats are just not the right texture for this. For the peanut butter, creamy is my go-to because it blends seamlessly into the hot mixture, ensuring a consistent flavor and texture throughout. However, if you love a bit of crunch, crunchy peanut butter is a fun variation! Make sure your saucepan is heavy-bottomed; this is key to preventing scorching and ensuring even cooking of the sugar mixture. When you reach the boiling stage, be precise with your timing. Boiling for exactly one minute after it reaches a rolling boil is crucial for achieving that perfect chewy consistency. Too short, and your cookies might be too soft and fall apart. Too long, and they could end up too hard and brittle. I’ve definitely had a few batches that were a bit too firm when I wasn’t paying close enough attention! For ingredient swaps, I’ve experimented with different types of milk. While whole milk offers the richest outcome, I’ve found 2% works just fine, and even a plant-based milk like almond milk can work, though it might slightly alter the texture – it can sometimes make them even creamier, which isn’t a bad thing! If you’re not a huge fan of peanut butter, you can try using almond butter or even sunflower seed butter for a nut-free option. The flavor profile will change, of course, but it’s a delicious alternative. When dropping the cookies, use two spoons or a small cookie scoop. This helps you get them onto the paper quickly and creates lovely, rustic shapes. Don’t fuss too much about perfection; their charm lies in their homemade, slightly imperfect look. Finally, patience is a virtue with these! Resist the urge to touch them or move them too soon after dropping. Let them set up completely at room temperature; this ensures they hold their shape and have that satisfying chew you’re looking for. Rushing this step is a common mistake that can lead to a sticky mess!
Storing and Reheating Tips
Proper storage is key to keeping these delightful no-bake cookies tasting their best. If you plan on enjoying them within a few days, storing them in an airtight container at room temperature is usually sufficient. They’ll keep well for about 3-4 days this way. Make sure the container is sealed tightly to prevent them from drying out or absorbing any unwanted odors from your pantry. If you want them to last a bit longer, or if your kitchen tends to be warm, the refrigerator is a good option. Store them in an airtight container in the fridge for up to a week. They’ll firm up a bit more in the fridge, which some people actually prefer! When you’re ready to eat them, you can enjoy them straight from the fridge, or let them sit at room temperature for about 10-15 minutes to soften slightly. For longer-term storage, these no-bake cookies freeze beautifully. Place them in a single layer on a baking sheet and freeze until firm, then transfer them to a freezer-safe bag or container. They can be stored in the freezer for up to 2-3 months. To thaw, simply move them from the freezer to the refrigerator overnight, or let them come to room temperature on the counter for a few hours. If you’ve added a glaze, it’s best to let the cookies fully set before freezing. The glaze should hold up well, but it’s always a good idea to test a small batch if you’re concerned. Generally, they retain their wonderful texture and flavor even after freezing, making them a fantastic make-ahead treat!
Frequently Asked Questions
Final Thoughts
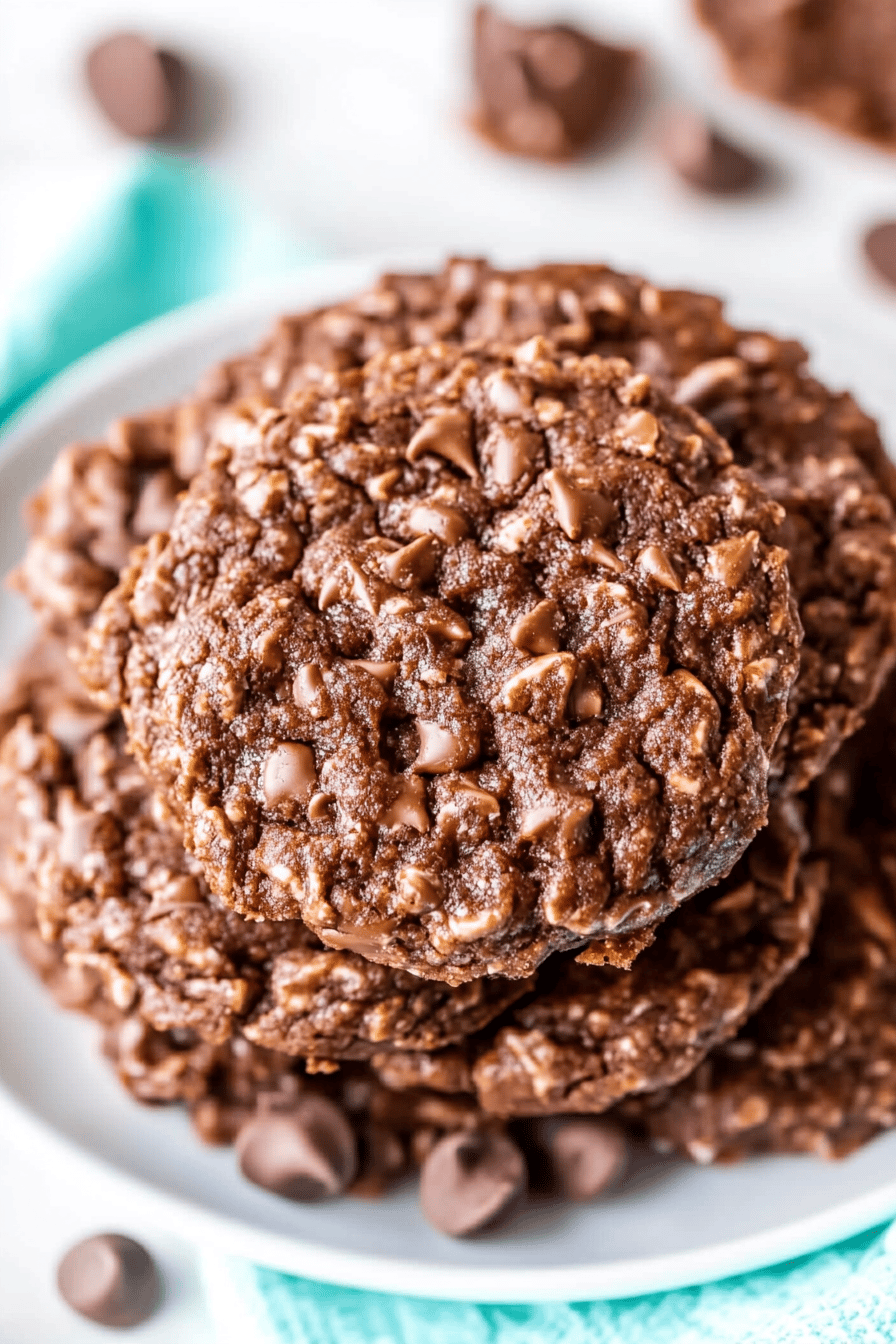
So there you have it – the easiest, most satisfying no-bake cookies that I’ve come to rely on time and time again. They’re proof that you don’t need a fancy oven or a complicated process to create something truly delicious. Whether you’re a seasoned baker or someone who usually steers clear of the kitchen, I promise you can nail these. They are the perfect solution for those unexpected dessert emergencies or when you just need a little sweet comfort. If you love this recipe, you might also enjoy my classic chocolate chip cookies or my fudgy brownies for more easy dessert inspiration. Give these no-bake cookies a try, and I can’t wait to hear how yours turn out! Let me know in the comments if you added any fun twists or how quickly they disappeared at your house!
No Bake Chocolate Cookies
Ingredients
Main Ingredients
- 2 cups granulated sugar
- 0.5 cup unsalted butter
- 0.25 cup milk
- 0.0625 cup unsweetened cocoa powder
- 1 teaspoon vanilla extract
- 3 cups rolled oats
- 0.5 cup peanut butter
Instructions
Preparation Steps
- In a medium saucepan, combine the sugar, butter, milk, and cocoa powder.
- Bring the mixture to a boil over medium heat, stirring constantly.
- Boil for exactly 1 minute.
- Remove from heat and stir in the vanilla extract and peanut butter until smooth.
- Stir in the rolled oats until well combined.
- Drop spoonfuls of the mixture onto wax paper to cool and set.
- Allow to cool completely before enjoying.
