
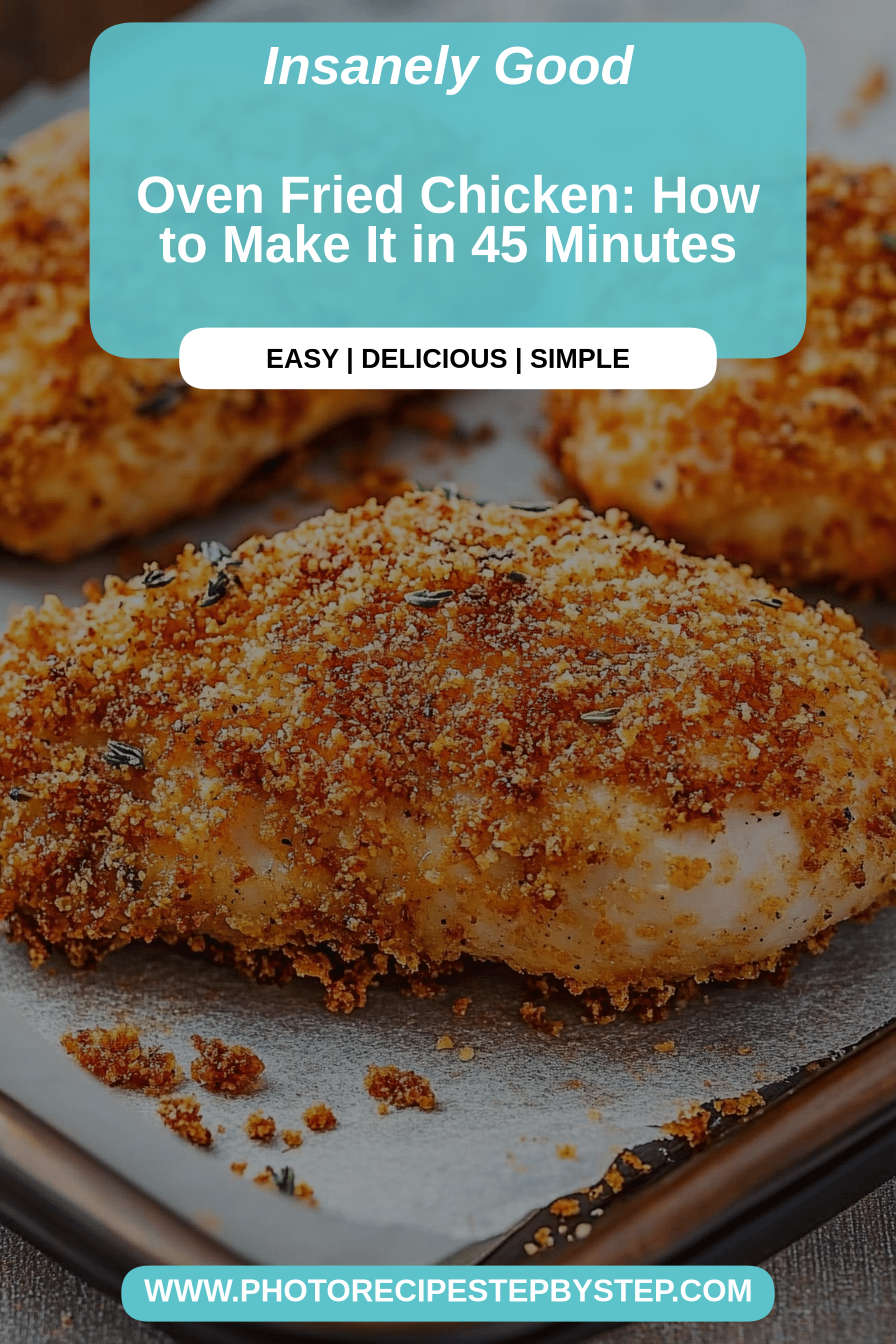
You know that feeling when a craving hits? Not just any craving, but the one for that perfectly crispy, unbelievably juicy chicken that usually requires a deep fryer and a whole lot of oil? Yeah, I used to think that was a weekend-only kind of indulgence, something reserved for when I had the time and energy to deal with the mess. Then I discovered this oven fried Chicken Recipe, and honestly, it’s been a game-changer. It tastes so close to the real deal, you’d swear you were at your favorite Southern joint, but you can whip it up right in your own kitchen, no splattering oil required. It’s the kind of dish that makes everyone happy, from my picky little eaters to my husband who swears he can tell the difference between good and *great* fried chicken. This is definitely great, and it’s surprisingly simple, which is always a win in my book!
What is oven fried chicken?
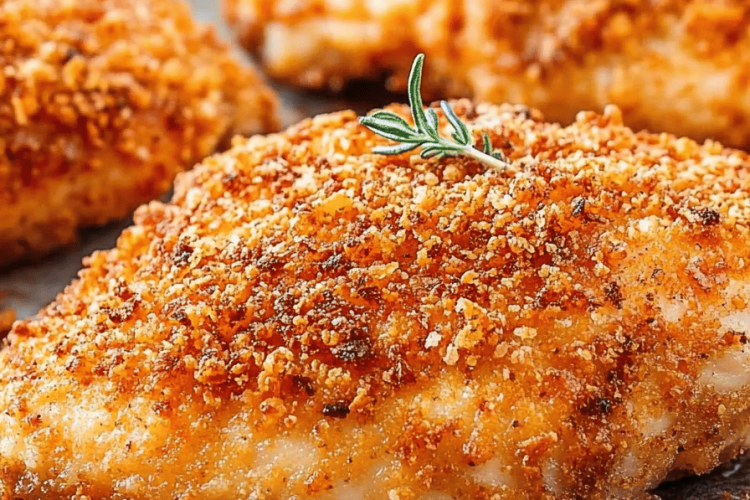
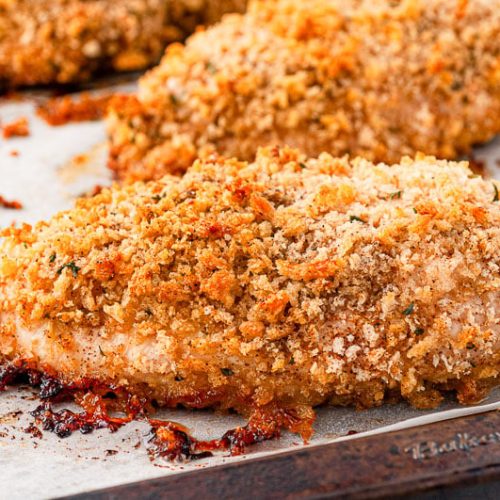
So, what exactly is “oven fried chicken“? Think of it as the best of both worlds. It’s chicken that’s coated in a flavorful breading, just like its fried cousin, but instead of being submerged in hot oil, it’s baked to crispy perfection in the oven. The magic happens with a combination of high heat and a little bit of fat (usually butter or oil) that gets drizzled over the top, mimicking that beautiful golden crust you get from frying. It’s essentially a way to achieve that deeply satisfying crunch and juicy interior without all the fuss and mess of a deep fryer. This particular recipe takes it a step further by using a unique seasoning blend that really elevates the flavor, making it more than just a substitute for fried chicken – it’s a star in its own right!
Why you’ll love this recipe?
Honestly, there are so many reasons why this oven fried chicken has become a staple in our home, and I have a feeling you’re going to adore it too. First off, the FLAVOR! It’s incredible. The chicken comes out incredibly tender and juicy on the inside, with a crust that’s so wonderfully crisp, you’ll be surprised it came out of the oven. The seasoning blend is perfectly balanced – a little bit savory, a little bit peppery, with just the right touch of warmth. It’s not bland or boring like some oven-Baked Chicken can be. What I also love most about this is its SIMPLICITY. We’re talking minimal prep and no standing over a hot stove for ages. It’s genuinely a lifesaver on busy weeknights when you want something impressive without all the effort. Plus, it’s remarkably COST-EFFECTIVE. Chicken thighs and legs are usually pretty budget-friendly, and the pantry staples for the coating are things I almost always have on hand. And let’s talk VERSATILITY. This chicken is fantastic served with all sorts of sides, from classic mashed potatoes to a fresh green salad. It’s the kind of meal that feels comforting and special, no matter the occasion. Compared to other recipes I’ve tried, this one just hits all the right notes – it’s crispy, it’s juicy, and it’s ridiculously easy.
How do I make oven fried chicken?
Quick Overview
This recipe is all about getting that craveable crispy chicken without the deep fryer. We’ll start by coating chicken pieces in a seasoned flour and breadcrumb mixture, then arrange them on a baking sheet, drizzle with melted butter or oil, and bake at a high temperature until golden and cooked through. It’s a straightforward process that delivers incredibly satisfying results, giving you that delicious crunch and moist chicken everyone loves. It’s truly a simple method for a complex-tasting dish.
Ingredients
For the Crispy Coating:
1 cup all-purpose flour. This is our base for the crispy coating. Make sure it’s regular all-purpose; cake flour might be too delicate. Some folks like to experiment with gluten-free blends here, and I’ll get into that later, but for the classic, this is what you need.
1 cup panko breadcrumbs. Don’t skip the panko if you can help it! They’re lighter and crispier than regular breadcrumbs and make a huge difference in texture. You can find them in most grocery stores.
2 teaspoons paprika. I like to use a good quality smoked paprika if I have it, but regular sweet paprika works beautifully too. It gives that lovely color and a subtle smoky note.
1 teaspoon garlic powder. Essential for that savory depth of flavor.
1 teaspoon onion powder. Pairs perfectly with garlic powder for that classic chicken seasoning.
1/2 teaspoon dried thyme. Thyme adds a lovely herbaceous note that just sings with chicken.
1/2 teaspoon black pepper, freshly ground. Always better fresh! It adds a nice little kick.
1 teaspoon salt. Adjust to your preference, but this is a good starting point for flavor.
For the Chicken:
8-10 pieces of chicken (thighs, drumsticks, or a mix). I usually go for a mix of thighs and drumsticks because they stay incredibly juicy. You can use breasts too, but you might need to adjust baking time slightly to avoid them drying out. Make sure they’re patted really dry with paper towels – this is crucial for a crispy coating!
For the Crispy Finish:
1/2 cup unsalted butter, melted. This is what helps the coating get golden brown and super crispy. Some people use olive oil or another neutral oil, but I find butter gives it the best flavor and crunch. Make sure it’s fully melted before you start.
Step-by-Step Instructions
Step 1: Preheat & Prep Pan
First things first, get that oven roaring! Preheat it to 400°F (200°C). While the oven is heating up, grab a large baking sheet. You can line it with parchment paper or aluminum foil for easier cleanup, but honestly, a good non-stick sheet works wonders too. If you’re not using parchment, I like to give my baking sheet a light spray of cooking oil just to be extra sure nothing sticks. You want everything ready to go once your chicken is coated.
Step 2: Mix Dry Ingredients
In a shallow dish or a large zip-top bag, combine the flour, panko breadcrumbs, paprika, garlic powder, onion powder, thyme, black pepper, and salt. Give it all a good whisk or shake until everything is well distributed. You want to make sure those seasonings are evenly spread throughout the breading mixture. This ensures every bite of chicken is packed with flavor. It should look like a nice, uniform sandy mixture.
Step 3: Mix Wet Ingredients
Okay, this step is super simple: just melt your butter. You can do this in a small saucepan on the stove over low heat, or pop it in a microwave-safe bowl for about 30-60 seconds until it’s fully liquid. We need it melted and ready to go for the next step!
Step 4: Combine
Now for the chicken! Take your patted-dry chicken pieces, one by one, and place them into the dry ingredient mixture. Toss them around, making sure each piece is thoroughly coated. Press the mixture onto the chicken with your hands to help it adhere. Once coated, you can either place them directly onto the prepared baking sheet, or for an extra bit of ease, you can dip each coated piece into the melted butter *before* placing it on the pan. This step is optional but truly helps in achieving that super crispy, golden crust. Make sure the chicken pieces aren’t too crowded on the baking sheet; give them a little breathing room so the air can circulate and make them crispy all around.
Step 5: Prepare Filling
Wait, there’s no filling? Ha! This is where the confusion might come in if you’re used to other types of recipes. For this specific oven fried chicken, there isn’t a separate “filling” in the traditional sense. The “filling” is really just the delicious, seasoned breading mixture we created in Step 2, which adheres to the chicken and gets super crispy when baked. So, we’ve already got our “filling” ready to go!
Step 6: Layer & Swirl
This isn’t really a layering and swirling recipe like a cake or a casserole. Instead, we’re laying out our beautifully coated chicken pieces on the baking sheet. The “swirl” comes from the beautiful golden-brown crust that forms as it bakes. I like to arrange them so they have a little space between them. If you opted to dip each piece in butter, you’ve already got that lovely sheen. If not, now’s the time to drizzle the remaining melted butter evenly over the tops of the chicken pieces. Don’t be shy with the butter; it’s your friend here!
Step 7: Bake
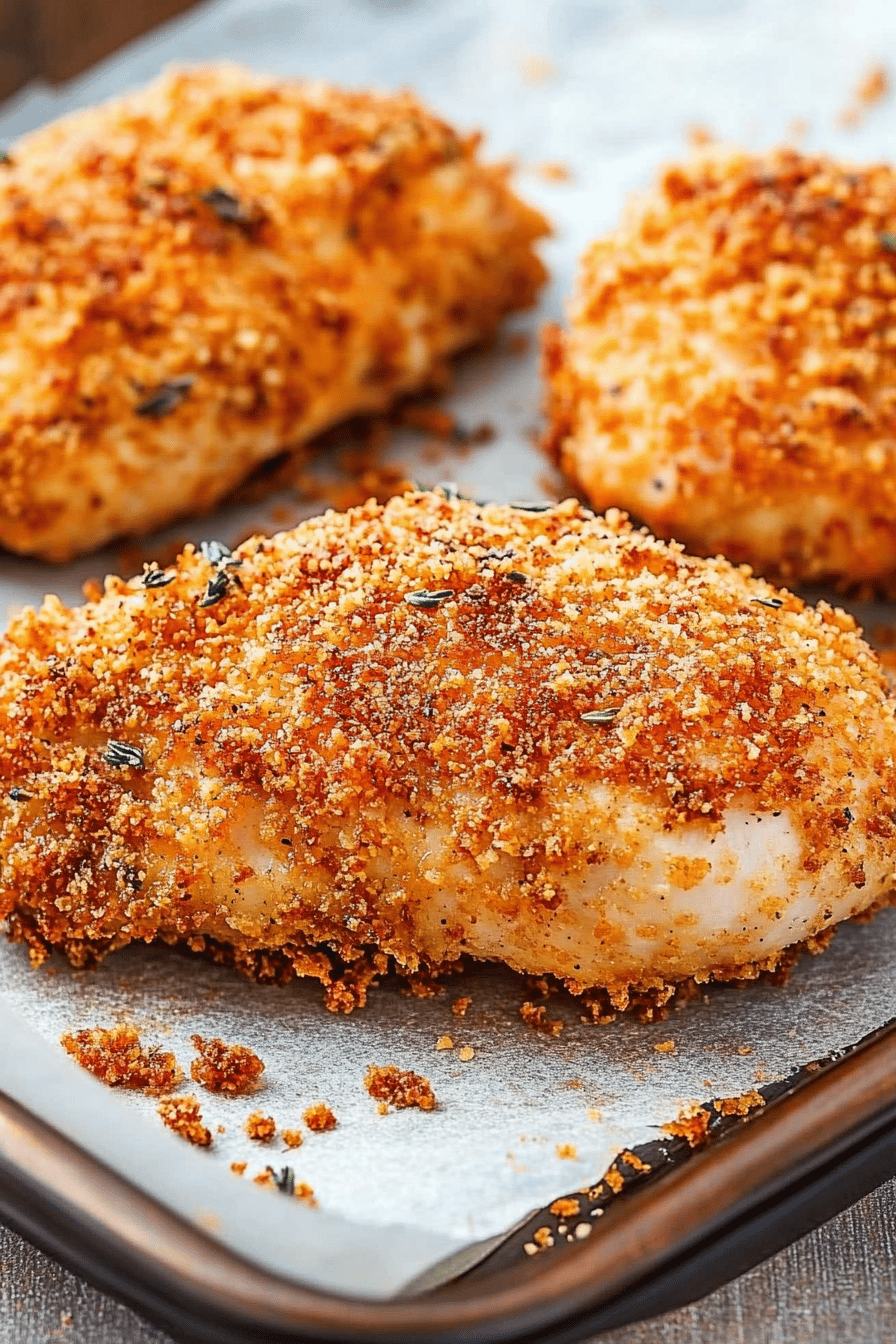
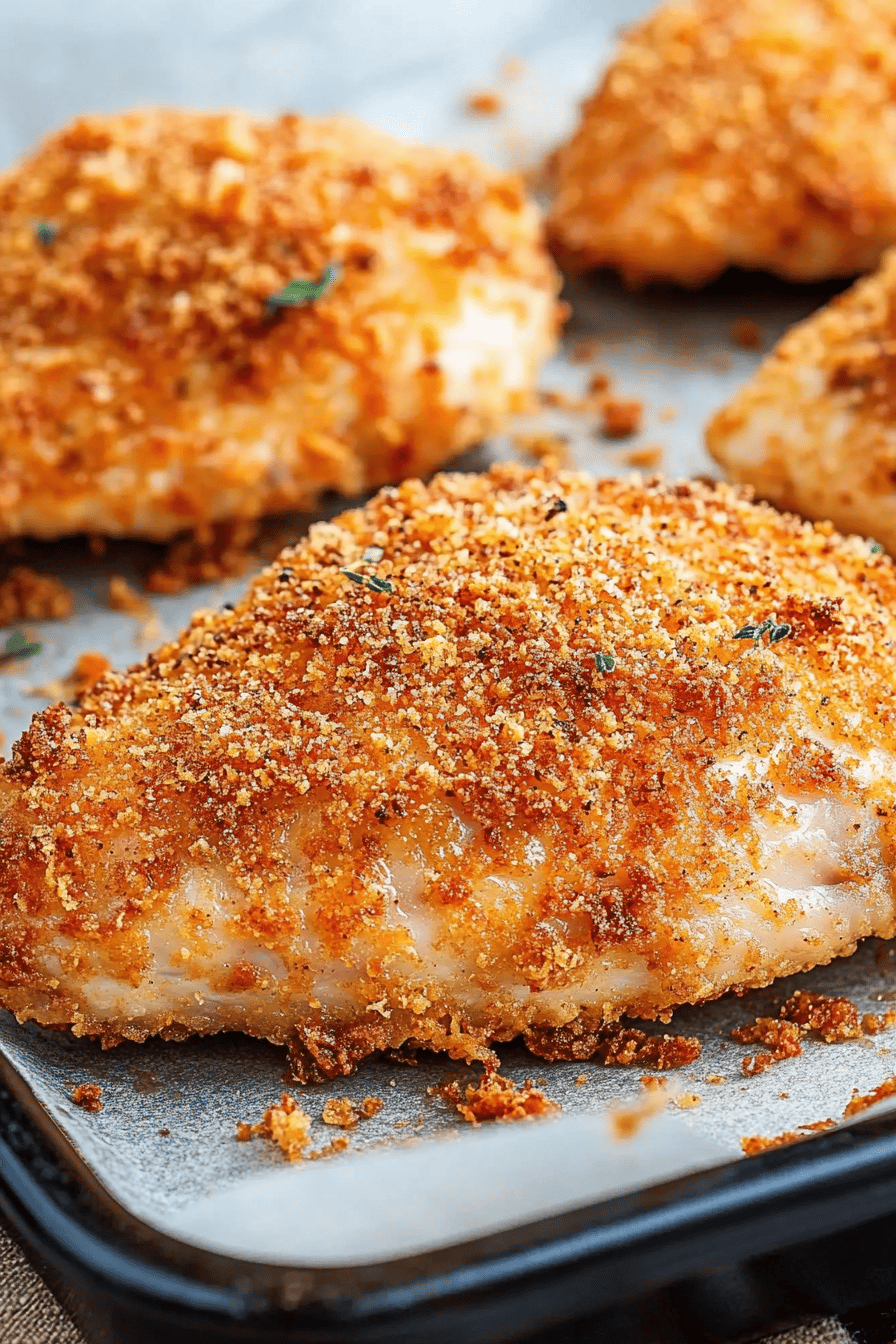
Pop that baking sheet into your preheated oven. Now, the baking time will vary slightly depending on the size and type of chicken pieces you’re using. Generally, for thighs and drumsticks, I bake them for about 35-45 minutes. You’re looking for that beautiful deep golden-brown color and for the juices to run clear when you pierce the thickest part with a fork or knife. If you’re using breasts, they might cook a bit faster, maybe 30-40 minutes. I like to flip the chicken halfway through the baking time (around the 20-25 minute mark) to ensure even crispiness on all sides. This simple flip makes a big difference!
Step 8: Cool & Glaze
Once the chicken is perfectly cooked and beautifully golden, carefully remove it from the oven. Let it rest on the baking sheet for about 5-10 minutes before serving. This resting period is super important because it allows the juices to redistribute throughout the chicken, making it even more moist and tender. There’s no separate glaze needed for this recipe, as the butter and seasonings create a delicious, crispy coating all on their own. The “glaze” is built right into the breading!
Step 9: Slice & Serve
Now comes the best part! Serve your oven fried chicken hot. It’s fantastic on its own, but even better with your favorite sides. You can slice into larger pieces if needed, but usually, the pieces are perfect for picking up and enjoying as they are. The aroma alone will have everyone gathered around the table!
What to Serve It With
This oven fried chicken is so versatile, it’s practically begging to be paired with all sorts of deliciousness. For a truly comforting meal, you can’t go wrong with classic sides like creamy Mashed Potatoes, fluffy biscuits, or a hearty mac and cheese. My kids absolutely love it with some homemade coleslaw – the cool, tangy crunch is the perfect contrast to the crispy chicken. If you’re looking for something a bit lighter, it’s fantastic alongside a fresh, vibrant green salad or some roasted vegetables like broccoli or asparagus. I’ve even served it with a side of sweet corn on the cob during the summer, and it was a huge hit! For a more casual get-together, it’s perfect for a backyard BBQ, and for a weeknight dinner, it elevates simple sides like baked beans or potato salad. Honestly, any of your favorite comfort food sides will sing alongside this chicken.
Top Tips for Perfecting Your Oven Fried Chicken
Over the years, I’ve picked up a few tricks that I think really elevate this oven fried chicken from good to absolutely fantastic. Here are my top tips:
Chicken Prep: Patting the chicken *really* dry is non-negotiable. Moisture is the enemy of crispiness! Use paper towels and get them as dry as possible. Also, consider using bone-in, skin-on pieces; they tend to stay juicier and more flavorful. If you’re using Chicken Breasts, make sure not to overcook them, as they can dry out quickly. Cutting them into smaller pieces or even pounding them slightly thinner can help ensure even cooking.
Breading Technique: When you’re coating the chicken in the flour mixture, don’t be afraid to really press it on. You want that coating to adhere well. If you’re opting for the extra step of dipping in melted butter before placing on the pan, do it right before it goes into the oven. This helps the butter coat the breading evenly and promotes that beautiful golden crust. I’ve experimented with dipping in buttermilk first, which also works wonders for a super crispy coating, but the butter method is just so quick and effective.
Don’t Overcrowd the Pan: This is a big one! Give your chicken pieces space on the baking sheet. If they’re piled on top of each other or too close together, they’ll steam instead of crisping up. You want air to circulate all around each piece. If you’re making a large batch, it’s better to use two baking sheets or bake in batches.
High Heat is Key: Baking at 400°F (200°C) is crucial for achieving that signature crispiness. It mimics the intense heat of a deep fryer. Make sure your oven is fully preheated before the chicken goes in. And don’t be tempted to lower the temperature to cook it longer; that will just dry it out.
Flipping for Evenness: Flipping the chicken halfway through the baking time is a game-changer. It ensures both sides get evenly golden and crispy. Use tongs to carefully flip each piece. I’ve definitely skipped this step before and noticed one side was crispier than the other, so trust me on this one!
Ingredient Swaps: While the recipe calls for all-purpose flour and panko, you can certainly get creative. For a gluten-free version, I’ve had success using a good gluten-free all-purpose flour blend and almond flour or more panko for the coating. It might change the texture slightly, but it’s still delicious. For the spices, feel free to adjust them to your liking. A little cayenne pepper adds some heat, or a pinch of smoked paprika gives an extra layer of smokiness. Don’t be afraid to experiment!
Storing and Reheating Tips
One of the best things about this oven fried chicken is that it reheats surprisingly well, making it perfect for leftovers. Once it’s cooled completely, store any leftover chicken in an airtight container in the refrigerator. It should stay fresh and delicious for about 3-4 days. I usually find that the crispy coating holds up pretty well, especially if you’re careful not to pack it too tightly.
When it comes to reheating, the microwave is the quickest option, but it can sometimes make the chicken a bit soft. For the crispiest results, I highly recommend reheating it in a preheated oven or a toaster oven. Pop it on a baking sheet at around 350°F (175°C) for about 10-15 minutes, or until it’s heated through and the coating has regained some of its crispness. You can also get it nice and crispy in an air fryer if you have one!
If you find yourself with a big batch and want to save some for even longer, freezing is definitely an option. Let the chicken cool completely, then wrap individual pieces tightly in plastic wrap, followed by a layer of aluminum foil or a freezer bag. It should keep well in the freezer for up to 2-3 months. When you’re ready to eat it, thaw it overnight in the refrigerator and then reheat using the oven or air fryer method described above. The key is to avoid making the coating soggy during storage and reheating.
Frequently Asked Questions
Final Thoughts
I truly hope you give this oven fried chicken recipe a try! It’s become such a go-to for me because it delivers on flavor and that satisfying crunch without all the hassle of deep frying. It’s the perfect dish for a family dinner, a casual get-together, or even when you just need a comforting meal that tastes like a treat. The aroma alone when it’s baking will have everyone in the kitchen asking what’s for dinner! Remember, the key is getting that chicken super dry, not overcrowding the pan, and letting that high heat work its magic. I can’t wait to hear how yours turns out! If you make it, please leave a comment below and let me know your favorite sides to serve with it, or any fun variations you tried. Happy cooking!
Oven Fried Chicken
Ingredients
Main Ingredients
- 2 pounds chicken pieces such as thighs, drumsticks, or breasts
- 1 cup all-purpose flour
- 1 cup panko breadcrumbs
- 0.5 cup grated Parmesan cheese
- 1 teaspoon paprika
- 1 teaspoon garlic powder
- 0.5 teaspoon onion powder
- 0.5 teaspoon dried thyme
- 0.25 teaspoon cayenne pepper optional, for a little heat
- 0.5 teaspoon salt
- 0.25 teaspoon black pepper
- 2 large eggs
- 2 tablespoons milk
- 0.5 cup butter melted
Instructions
Preparation Steps
- Preheat your oven to 400°F (200°C). Line a baking sheet with parchment paper or a silicone baking mat.
- In a shallow dish, whisk together the flour, panko breadcrumbs, grated Parmesan cheese, paprika, garlic powder, onion powder, dried thyme, cayenne pepper (if using), salt, and black pepper. This is your dry coating mixture.
- In a separate shallow dish, whisk the eggs and milk together. This is your wet mixture.
- Pat the chicken pieces dry with paper towels. This helps the coating adhere better.
- Dip each chicken piece into the wet mixture, ensuring it's fully coated. Let any excess drip off.
- Transfer the coated chicken piece to the dry coating mixture. Press gently to ensure the breadcrumbs and spices stick well to all sides.
- Place the coated chicken pieces on the prepared baking sheet, ensuring they are not overcrowded. You may need to cook in batches.
- Drizzle the melted butter evenly over the coated chicken pieces. This helps create a crispy, golden-brown crust.
- Bake for 35-45 minutes, or until the chicken is cooked through and the coating is golden brown and crispy. The internal temperature should reach 165°F (74°C).
- Let the chicken rest for a few minutes before serving.
