
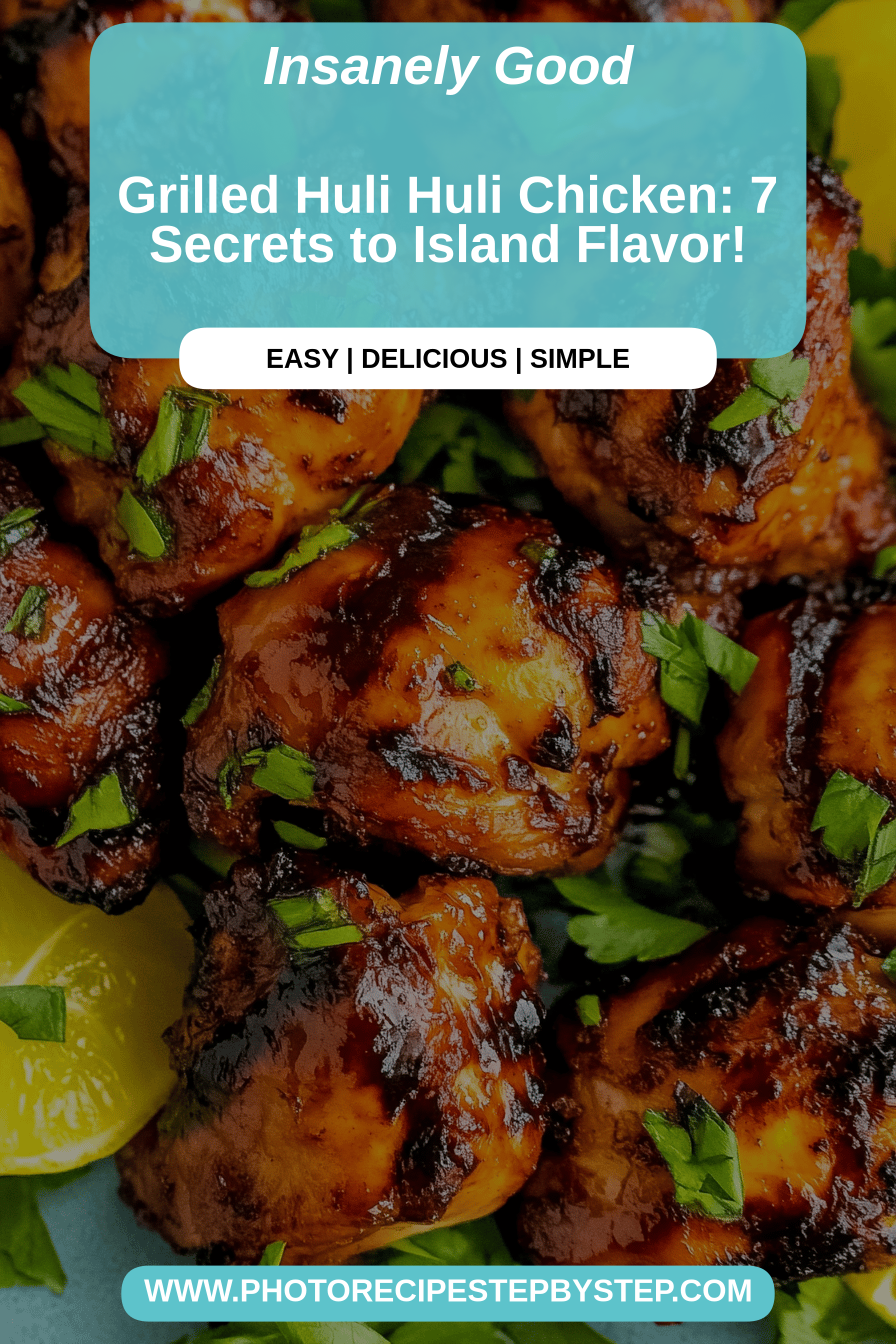
Oh, where do I even begin with this Huli Huli Chicken? It’s one of those recipes that instantly transports me back to a warm summer evening, maybe a little backyard BBQ with friends, or even a Hawaiian vacation I took years ago. The smell alone is enough to make your mouth water – that sweet, tangy, slightly smoky aroma that just screams “delicious.” It’s funny, I used to think Hawaiian food was all about pineapple and kalua pig, but then I discovered Huli Huli chicken and my world just… expanded. If you’ve ever tried a truly authentic version, you know it’s something special. It’s got this amazing balance of sweet and savory, with a little kick that keeps you coming back for more. I always tell people, if you’re looking for a chicken dish that’s a step above the usual Grilled Chicken or roasted chicken, this is it. It’s surprisingly simple to make, and the results are just spectacular. My family devours it every single time I make it, and I’m willing to bet yours will too!
What is a Huli Huli chicken?
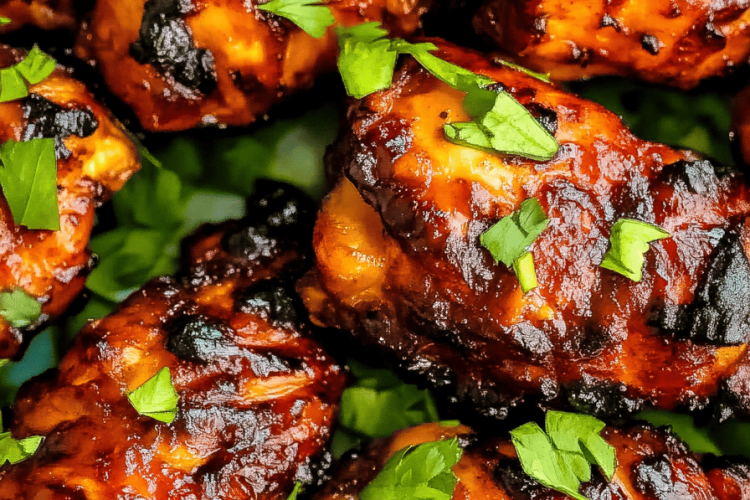
So, what exactly *is* Huli Huli Chicken? In its simplest form, it’s a Hawaiian-style grilled chicken that’s been marinated and basted in a signature sweet and savory sauce. The name “Huli Huli” actually means “turn turn” in Hawaiian, and it refers to the traditional method of grilling the chicken over mesquite charcoal and constantly turning it to ensure even cooking and that perfect, slightly charred glaze. Think of it as Hawaii’s answer to barbecue chicken, but with its own unique island flair. It’s not just about the marinade, though; the real magic happens with the basting. This creates those incredible layers of flavor that are both complex and incredibly comforting. It’s essentially a flavor explosion on a plate, and it’s become a beloved dish far beyond the shores of Hawaii.
Why you’ll love this recipe?
Honestly, there are so many reasons why this Huli Huli Chicken Recipe has earned a permanent spot in my recipe box, and I’m so excited to share them with you. First and foremost, the FLAVOR. Oh my goodness, the flavor! It’s this incredible dance between sweet (from brown sugar and pineapple juice), savory (soy sauce is key here!), tangy (a little ketchup and rice vinegar), and a hint of spice. It’s the kind of flavor that just coats your palate in the best way possible. It’s not overly complicated, but it tastes like you spent hours slaving away, and that’s a huge win in my book. What I love most about this recipe is how surprisingly SIMPLE it is to pull off, even on a weeknight. The marinade comes together in minutes, and then it’s just a matter of letting it do its thing before a quick cook. Plus, it’s remarkably COST-EFFICIENT! You probably already have most of the ingredients in your pantry, and the chicken itself is usually pretty affordable. And let’s talk VERSATILITY. You can grill it, bake it, even cook it in a skillet! Serve it over rice, with a fresh salad, or alongside some grilled veggies. It’s perfect for a casual family dinner, a potluck, or even a more impressive barbecue. It’s so much more exciting than your average weeknight chicken. If you enjoy my Pineapple Chicken Stir-fry or my Teriyaki Chicken Skewers, you are going to absolutely adore this Huli Huli Chicken!
How do I make Huli Huli Chicken?
Quick Overview
This Huli Huli Chicken Recipe is all about building layers of amazing flavor. We start with a vibrant marinade that tenderizes the chicken and infuses it with those signature sweet and savory notes. Then, we’ll cook it up until it’s juicy and perfectly caramelized, basting it with a thickened glaze for that irresistible sheen and extra punch. It’s a straightforward process that yields incredibly delicious results. You’ll be amazed at how simple it is to create a dish that tastes like it came straight from a Hawaiian luau!
Ingredients
For the Marinade:
This is where all the magic starts! You’ll need 1/2 cup of Ketchup (this forms the base of our sauce), 1/2 cup of Pineapple Juice (fresh or canned is fine, just make sure it’s not from concentrate for the best flavor), 1/4 cup of Soy Sauce (low sodium is great if you’re watching salt, but regular works too!), 1/4 cup of Brown sugar (packed, for that lovely caramelization), 2 tablespoons of Honey (adds a touch more sweetness and gloss), 1 tablespoon of Rice Vinegar (for a little tang to balance things out), 1-2 cloves of Garlic, minced (or more if you’re a garlic lover like me!), and 1 teaspoon of grated fresh Ginger (this really elevates the flavor, but ground ginger can work in a pinch). If you like a little heat, a pinch of Red Pepper Flakes is a nice addition!
For the Chicken:
You’ll need about 2-3 pounds of Chicken pieces. I usually opt for bone-in, skin-on chicken thighs or drumsticks because they stay incredibly moist and flavorful during cooking. However, boneless, skinless thighs or even breasts work well too – just be mindful of cooking times to avoid drying them out. Make sure your chicken is patted dry before marinating for the best results.
For the Glaze (Optional, but highly recommended!):
To make a thicker, more concentrated glaze for basting and serving, you’ll reserve about 1 cup of the marinade *before* adding the chicken. You’ll also want 1 tablespoon of Cornstarch mixed with 2 tablespoons of cold water (this is our slurry to thicken the sauce). A little extra fresh pineapple chunks, maybe some chopped green onions for garnish, and sesame seeds are also lovely additions.
Step-by-Step Instructions
Step 1: Preheat & Prep Pan
First things first, let’s get our oven ready. Preheat it to 400°F (200°C). If you’re using an oven-safe skillet (like cast iron – my favorite for this!), make sure it’s clean and ready to go. If you’re using a baking dish, lightly grease it or line it with parchment paper for easy cleanup. I always find that getting the oven preheated right away saves so much time!
Step 2: Mix Dry Ingredients
In a medium bowl, combine your brown sugar, minced garlic, and grated ginger. Give it a good stir to break up any clumps of brown sugar and make sure the garlic and ginger are evenly distributed. This step might seem small, but it ensures those aromatics and the sugar are perfectly incorporated from the start.
Step 3: Mix Wet Ingredients
Now, in a separate larger bowl (big enough to hold your chicken later!), whisk together the ketchup, pineapple juice, soy sauce, honey, and rice vinegar. Make sure everything is well combined. This is your beautiful marinade base! I love the vibrant red color it gets from the ketchup and pineapple.
Step 4: Combine
Add the dry ingredients (sugar, garlic, ginger) to the wet ingredients in the large bowl. Whisk everything together until the sugar is dissolved and you have a smooth, fragrant marinade. Now, it’s time for the chicken! Add your patted-dry chicken pieces to the bowl and toss them gently until each piece is thoroughly coated in the marinade. Cover the bowl tightly with plastic wrap or a lid, and let it marinate. For the best flavor, I always aim for at least 2 hours in the refrigerator, but even 30 minutes will give you a good start. I’ve even marinated it overnight, and it was incredible!
Step 5: Prepare Filling
This step is for making the extra glaze. Take about 1 cup of your marinade and pour it into a small saucepan. In a separate tiny bowl, whisk together the cornstarch and cold water to create a smooth slurry. Add this slurry to the saucepan with the reserved marinade. Place the saucepan over medium heat and whisk constantly. You’ll see it start to thicken up beautifully as it heats. Once it’s thickened to a glaze-like consistency, remove it from the heat. This extra glaze is pure gold!
Step 6: Layer & Swirl
Okay, this is where the fun really starts for the baked version. If you’re baking, arrange your marinated chicken in a single layer in your prepared baking dish or skillet. Make sure not to overcrowd the pan, as this can lead to steaming rather than roasting. You want that lovely caramelization!
Step 7: Bake
Place the dish in your preheated oven. Bake for about 25-35 minutes for boneless pieces, or 40-50 minutes for bone-in pieces, or until the chicken is cooked through and has reached an internal temperature of 165°F (74°C). About halfway through the baking time, I like to brush the chicken with some of that delicious thickened glaze we made earlier. This adds an extra layer of flavor and that gorgeous glossy finish.
Step 8: Cool & Glaze
Once the chicken is cooked, take it out of the oven. Let it rest for about 5-10 minutes before serving. This is crucial for juicy chicken! During this resting time, you can brush on a little more of that reserved glaze, or spoon some over the top just before serving. The heat from the chicken will help the glaze melt slightly and coat everything perfectly. If you cooked it in a skillet, you can spoon some of the pan juices over the chicken as well.
Step 9: Slice & Serve
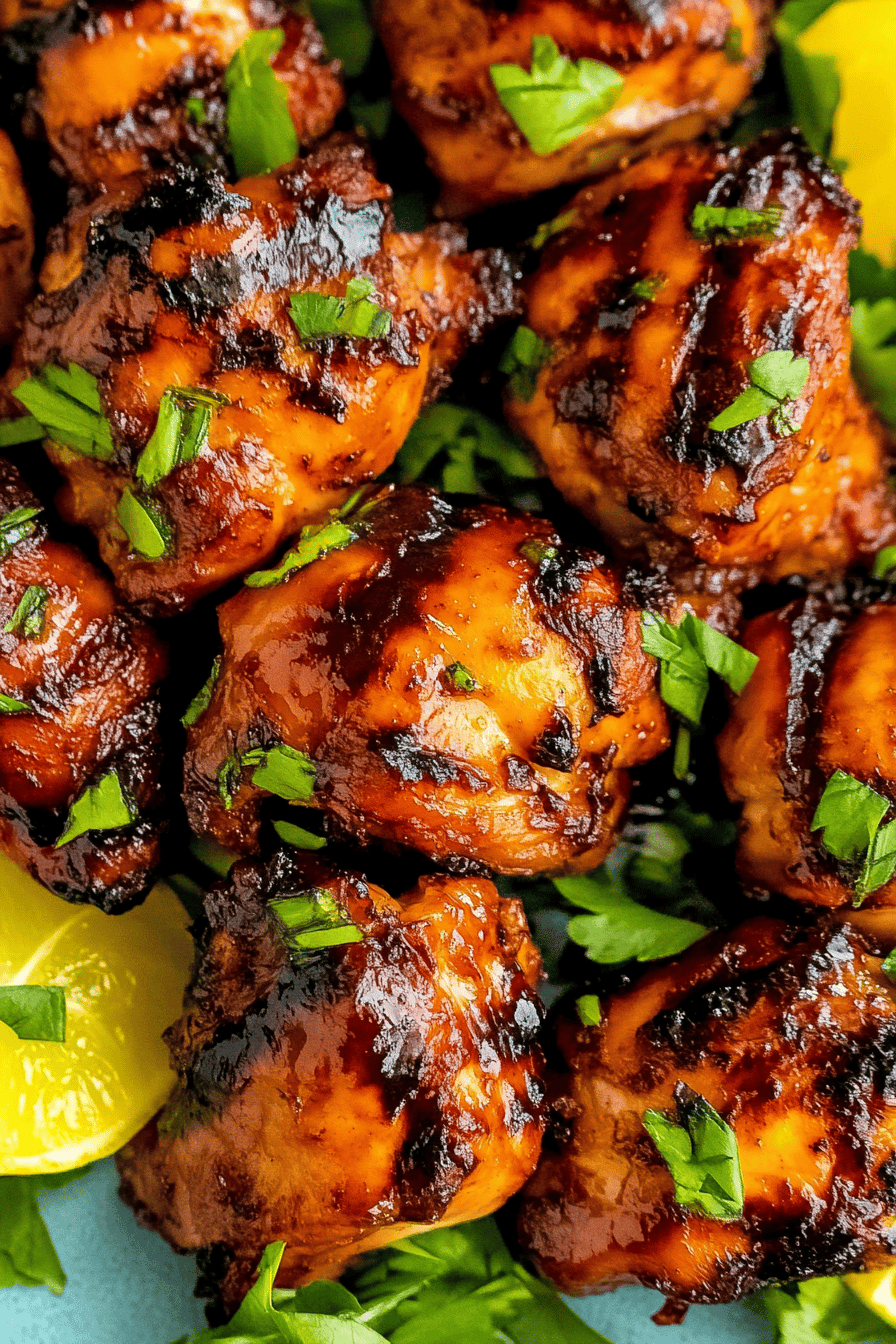
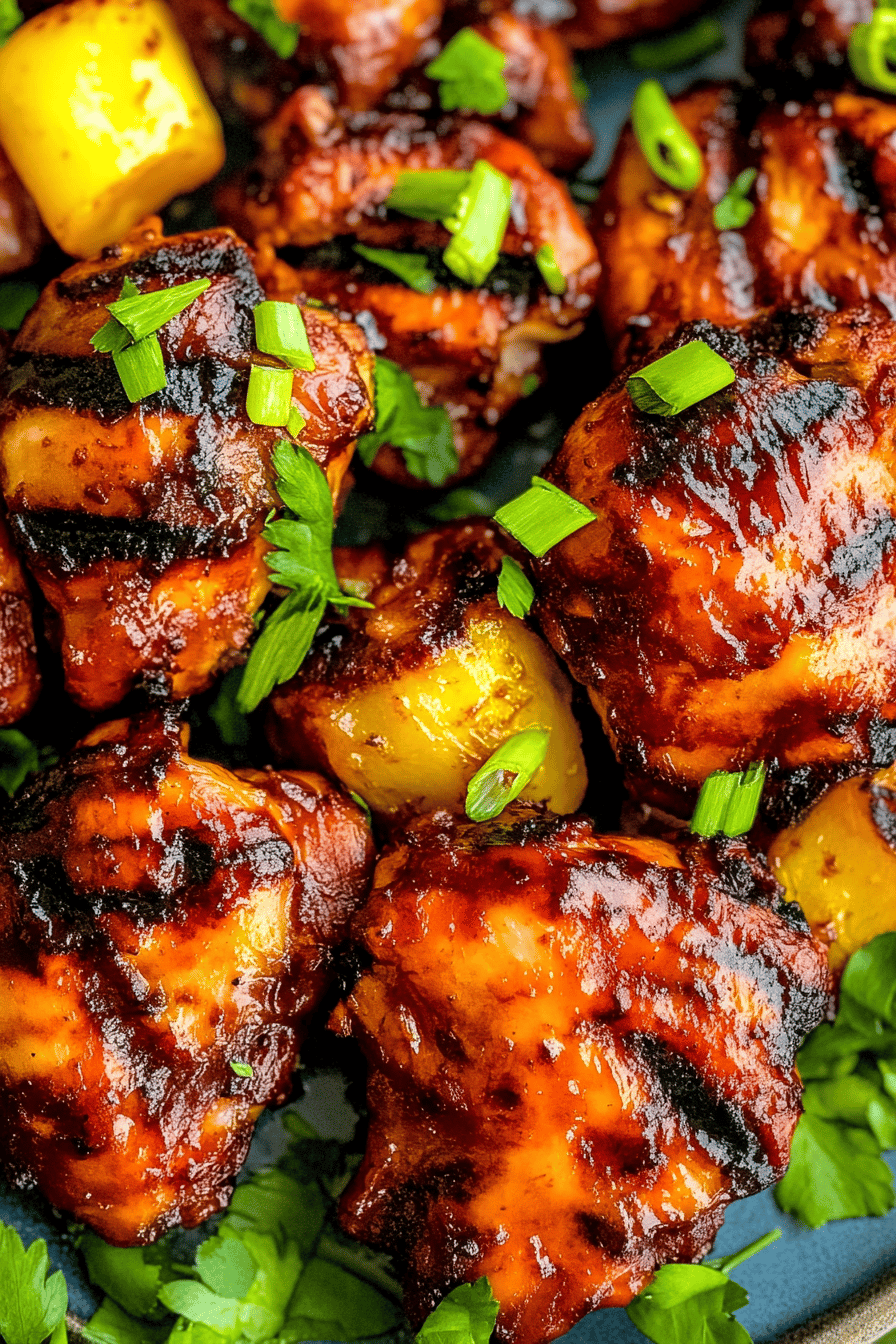
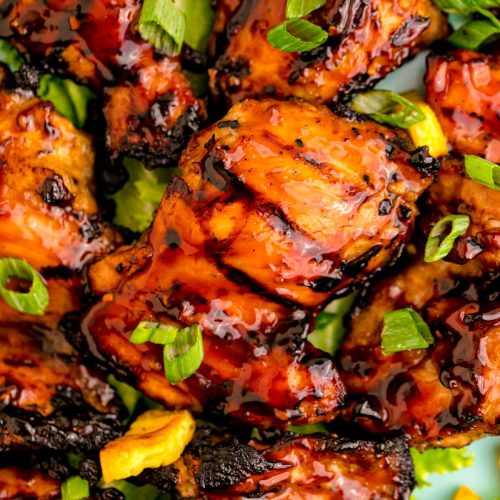
Slice or serve the Huli Huli Chicken whole. Garnish with fresh pineapple chunks, chopped green onions, and a sprinkle of sesame seeds if you like. The aroma will fill your kitchen, and I guarantee everyone will be gathering around, ready to dig in!
What to Serve It With
This Huli Huli Chicken is so incredibly versatile, it’s almost a meal in itself! But to round things out and make it a complete culinary experience, I’ve got a few favorite pairings that I’ve tried and tested over the years. For a classic Hawaiian feel, you absolutely can’t go wrong with fluffy white rice or brown rice. It’s the perfect canvas for soaking up all those amazing juices and glaze. If you’re looking for something a bit lighter, a fresh, vibrant salad is always a winner. Think a simple mixed green salad with a light vinaigrette, or even a more substantial Asian-inspired slaw with cabbage, carrots, and a sesame ginger dressing. My kids absolutely love it with some sweet potato fries or even regular French fries – it’s a fun, kid-friendly option! For a more substantial meal, grilled pineapple slices or grilled corn on the cob are fantastic accompaniments. And if you’re feeling fancy, some roasted broccoli or asparagus adds a nice touch of green. Honestly, the possibilities are endless, and that’s what makes this dish so fantastic!
Top Tips for Perfecting Your Huli Huli Chicken
Over the years of making this Huli Huli Chicken countless times, I’ve picked up a few little tricks that I think really elevate it from good to absolutely spectacular. One of the biggest things is not to rush the marinade. While 30 minutes is okay in a pinch, I find that marinating it for at least 2-4 hours, or even overnight, really allows those flavors to penetrate the chicken deeply. It makes such a difference in the tenderness and the overall taste. When you’re mixing the glaze, make sure to use a cornstarch slurry that’s been properly mixed; no one wants lumps in their beautiful glaze! And when you’re adding the slurry to the saucepan, whisk constantly. This prevents scorching and ensures a smooth, velvety texture. If you’re grilling this chicken, watch it closely! The sugars in the glaze can cause it to caramelize quickly, and you don’t want it to burn. Keep turning it and basting it. If you’re baking, using a broiler for the last few minutes can give you that lovely char and caramelization that’s so characteristic of Huli Huli chicken. Just keep a super close eye on it during that broiler phase! For ingredient swaps, if you don’t have pineapple juice, apple juice can work in a pinch, though it will slightly alter the flavor profile. Similarly, if you’re out of rice vinegar, a splash of white wine vinegar or even apple cider vinegar can be substituted, but use it sparingly as they can be more potent. Don’t skip the ginger if you can help it; fresh ginger makes a world of difference! I once tried making it without and it just wasn’t the same. This recipe is so forgiving, but these little tweaks have truly taken it to the next level for me. Trust me on this one!
Storing and Reheating Tips
One of the best things about this Huli Huli Chicken is how well it stores and reheats, making it perfect for leftovers or meal prep. If you find yourself with extra chicken, let it cool completely before storing. You can keep it at room temperature for no more than two hours before refrigerating. For refrigerator storage, place the cooled chicken in an airtight container. It will stay delicious and moist for up to 3-4 days. The glaze makes it particularly good for reheating, as it helps keep the chicken from drying out. When you’re ready to reheat, the microwave is usually the quickest and easiest method, just heat it in 30-second intervals until warmed through. If you want to achieve a slightly crispier texture, you can reheat it in a skillet over medium-low heat or even in a toaster oven. For freezer instructions, wrap the cooled chicken tightly in plastic wrap, then in aluminum foil or place it in a freezer-safe bag. It can be stored in the freezer for up to 2-3 months. When you’re ready to thaw, the best method is to transfer it to the refrigerator overnight. Then, reheat as you would the refrigerated leftovers. If you want to keep some extra glaze to add when reheating, that’s a fantastic idea! It really brightens up the flavors. Just make sure the chicken is completely cooled before wrapping for freezing to prevent ice crystals from forming.
Frequently Asked Questions
Final Thoughts
So there you have it – my go-to Huli Huli Chicken recipe! I really hope you give this a try. It’s more than just a recipe to me; it’s a little taste of sunshine, a reminder of happy times, and a dish that always brings smiles to the table. It’s proof that incredible flavor doesn’t have to mean complicated cooking. The balance of sweet, savory, and tangy is just perfection, and the aroma while it’s cooking is simply divine. If you love this recipe, you might also enjoy my recipes for Hawaiian Pork Sliders or my Coconut Shrimp – they bring similar island vibes to your kitchen! Please, if you make this Huli Huli Chicken, I would absolutely love to hear all about it! Drop a comment below, rate the recipe, and tell me how it turned out for you. Did your family love it as much as mine? I can’t wait to see your delicious creations!
Huli Huli Chicken
Ingredients
Main Ingredients
- 3 pounds chicken pieces thighs or drumsticks
- 0.5 cup soy sauce
- 0.5 cup ketchup
- 0.33 cup brown sugar packed
- 0.25 cup pineapple juice
- 2 tablespoons fresh ginger grated
- 2 cloves garlic minced
- 1 teaspoon sesame oil
- 0.5 teaspoon red pepper flakes optional
Instructions
Preparation Steps
- In a large bowl or resealable bag, whisk together soy sauce, ketchup, brown sugar, pineapple juice, grated ginger, minced garlic, sesame oil, and red pepper flakes (if using).
- Add the chicken pieces to the marinade, ensuring they are well coated. Marinate in the refrigerator for at least 30 minutes, or up to 4 hours.
- Preheat your grill to medium-high heat. Clean and oil the grill grates.
- Remove chicken from marinade, discarding the excess marinade. Grill chicken for about 20-30 minutes, flipping occasionally, until cooked through and nicely caramelized. Baste with reserved marinade (if desired) during the last few minutes of grilling.
- Let the chicken rest for a few minutes before serving.
