
There are some recipes that just hold a special place in your heart, aren’t there? For me, this Oreo cheesecake is one of them. I remember the first time I made it for a family gathering, and honestly, I was a little nervous. Cheesecake can feel a bit intimidating, right? But this one? This Oreo cheesecake is surprisingly forgiving, and the payoff is HUGE. Every single person, from my super picky niece to my dad who usually just picks at desserts, went wild for it. They were practically licking their plates! It’s got that perfect balance of creamy, rich cheesecake with those delightful little crunchy bits of Oreo that just send it over the top. If you’re looking for a dessert that feels fancy but is actually pretty straightforward, this is your winner. It’s honestly what I bring to every potluck and holiday now, and people always ask me for the recipe. It’s just that good.
What is oreo cheesecake?
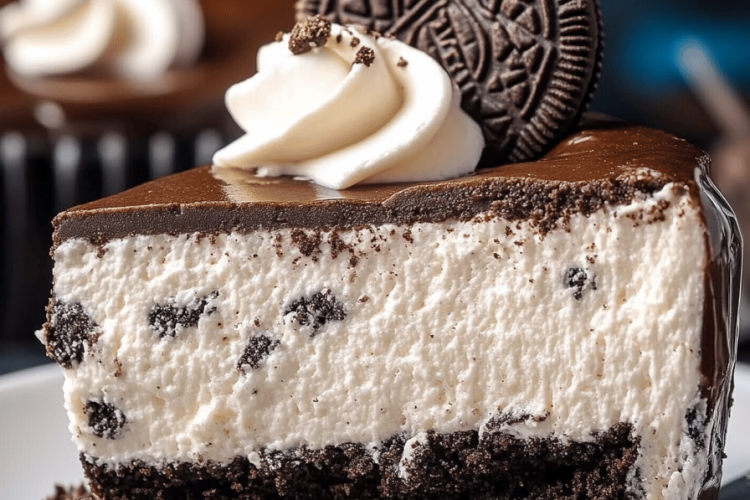
So, what exactly makes this Oreo cheesecake so special? Think of it as your favorite classic New York-style cheesecake that got a seriously delicious makeover. Instead of just a plain graham cracker crust, we’re going all out with a buttery, crumbly crust made from crushed Oreos. Then, the cheesecake filling itself has chunks of Oreos swirled throughout, creating these amazing little pockets of chocolatey goodness in every bite. It’s not just about adding Oreos on top; they’re integrated into the whole experience, from the base to the creamy center. It’s essentially a decadent dream for any cookie and cheesecake lover, combining two iconic desserts into one spectacular treat. It’s the kind of dessert that makes people close their eyes in bliss when they take their first bite.
Why you’ll love this recipe?
Oh, where do I even begin with why you’ll absolutely adore this Oreo cheesecake? First off, the flavor is just out of this world. You get that signature tang and richness from the Cream Cheese, perfectly balanced by the sweet, chocolatey punch of the Oreos. It’s a flavor combination that’s both familiar and excitingly new. Then there’s the simplicity. I know, I know, cheesecake can sound complicated, but trust me, I’ve streamlined this recipe over the years. It’s incredibly forgiving, and even if you’re a beginner baker, you can absolutely nail this. And let’s talk about cost-efficiency! Compared to buying a fancy cheesecake from a bakery, making this at home is surprisingly budget-friendly, especially when you consider how many people it serves. It’s perfect for birthdays, anniversaries, or just a really, really good Tuesday night treat. What I love most about this Oreo cheesecake, though, is its versatility. You can easily adapt it with different types of Oreos or even add a chocolate ganache drizzle on top. It truly stands out from a regular cheesecake and has become my go-to for impressing guests without breaking a sweat. It’s like the ultimate comfort dessert with a sophisticated edge.
How do you make Oreo Cheesecake?
Quick Overview
Making this delightful Oreo cheesecake involves creating a buttery Oreo crust, preparing a rich and creamy cheesecake batter, folding in those beloved cookie crumbles, and then baking it to perfection. The process is designed to be straightforward, with clear steps that minimize the risk of common cheesecake pitfalls like cracking. We’ll focus on gentle mixing and proper cooling techniques to ensure a silky-smooth texture every time. It’s a surprisingly manageable process, even for a weekend bake!
Ingredients
For the Oreo Crust: For the Oreo Crust: For the Oreo Crust: For the Oreo Crust
* 36 whole Oreo cookies (about 360g or 2 ½ cups finely crushed) – I always buy the regular kind, but chocolate sandwich cookies work like a charm!
* 6 tablespoons (85g) unsalted butter, melted – Make sure it’s fully melted; it helps bind everything together perfectly.
For the Creamy Cheesecake Filling:
* 4 blocks (32 oz or 900g) cream cheese, softened to room temperature – This is key! Cold cream cheese leads to lumps, and nobody wants that. I usually leave them out on the counter for at least 2 hours.
* 1 ½ cups (300g) granulated sugar – It balances the tang of the cream cheese beautifully.
* 4 large eggs, at room temperature – Room temperature eggs incorporate more smoothly.
* 1 teaspoon vanilla extract – Pure vanilla extract makes a noticeable difference.
* ½ cup (120ml) Sour Cream, at room temperature – This adds that extra bit of richness and tang. Full-fat is best here.
* 20 whole Oreo cookies, roughly chopped – You want some nice chunks, not just dust.
For the Optional Chocolate Glaze:
* ½ cup (90g) semi-sweet chocolate chips – Or use Dark Chocolate if you prefer a richer flavor.
* 2 tablespoons (30g) unsalted butter – This makes the glaze nice and shiny.
Step-by-Step Instructions
Step 1: Preheat & Prep Pan
First things first, let’s get your oven ready. Preheat it to 325°F (160°C). Grab a 9-inch springform pan – they’re the best for cheesecakes because they make releasing the finished product so easy. Now, to make sure our beautiful Oreo cheesecake doesn’t stick, I like to lightly grease the bottom and sides of the pan. If you want to be extra careful about preventing leaks and ensuring even baking, you can wrap the outside of the springform pan tightly with a couple of layers of heavy-duty aluminum foil. This is especially helpful if you plan on using a water bath, which I sometimes do for the creamiest results. Just make sure it’s sealed well!
Step 2: Mix Dry Ingredients
Let’s start with that irresistible Oreo crust! Take your 36 whole Oreos and crush them into fine crumbs. You can do this in a food processor for the quickest, most even result, or if you don’t have one, just pop them into a sturdy zip-top bag and crush them with a rolling pin or the bottom of a heavy pan. You want it to look like dark, sandy dirt. In a medium bowl, combine these finely crushed Oreo crumbs with the melted butter. Stir it all together until every crumb is moistened and it starts to clump up. This mixture is what holds our crust together, so make sure it’s well combined.
Step 3: Mix Wet Ingredients
Now for the creamy heart of our cheesecake! In a large bowl, using an electric mixer (a stand mixer with a paddle attachment is ideal, but a hand mixer works just fine), beat the softened cream cheese until it’s completely smooth and creamy. We’re talking no lumps whatsoever. Then, gradually beat in the granulated sugar until it’s well incorporated. Scrape down the sides and bottom of the bowl often to make sure everything is mixing evenly. This step is crucial for a super smooth texture.
Step 4: Combine
We’re going to add the eggs one at a time, beating on low speed just until each egg is incorporated. Overmixing at this stage can incorporate too much air, which can lead to cracking. After the eggs, gently mix in the vanilla extract and the sour cream. Again, just mix until everything is combined and smooth. The batter should look silky and luxurious. Don’t go crazy with the mixer here; just a gentle blend is all you need. The goal is a tender, rich, and wonderfully creamy filling.
Step 5: Prepare Filling
Now for the star ingredient – the Oreos! Take your 20 roughly chopped Oreos and gently fold them into the cheesecake batter. I like to use a rubber spatula for this. You don’t want to overmix; just fold them in until they’re evenly distributed. Some people like to leave a few larger chunks for extra texture, and that’s totally fine! I usually leave about half of the chopped Oreos aside to sprinkle on top later, or even to press into the sides of the crust if I’m feeling fancy. This is where the magic happens – those delicious chocolatey bursts within the creamy cheesecake.
Step 6: Layer & Swirl
Pour about half of the cheesecake batter over the prepared Oreo crust. Sprinkle about half of the remaining chopped Oreos over the batter. Then, gently spoon the rest of the batter on top. If you saved some chopped Oreos, sprinkle them over the top of the final batter layer. Now, for the fun part: swirling! You can use a knife or a skewer to gently swirl the Oreos into the batter. Don’t overdo it; just a few gentle passes will create those beautiful marbled patterns that make this Oreo cheesecake look as good as it tastes. You want distinct swirls, not a uniform grey color.
Step 7: Bake
Carefully place your prepared springform pan into the preheated oven. Bake for 50-60 minutes. You’ll know it’s done when the edges are set, but the center still has a slight jiggle, like Jell-O. It will continue to set as it cools. If you see any cracks forming, don’t panic! They often happen, and the Oreos and glaze can hide them beautifully. If you’re using a water bath, you’ll typically bake it for a bit longer, around 70-80 minutes. I usually just bake it directly in the oven for simplicity, and it works out great.
Step 8: Cool & Glaze
This is probably the most crucial step for a perfect cheesecake texture. Once the baking time is up, turn off the oven, crack the oven door open slightly, and let the cheesecake cool in the oven for about an hour. This slow cooling process prevents drastic temperature changes that can cause cracking. After that hour, remove it from the oven and let it cool completely on a wire rack. Once it’s at room temperature, cover it loosely with plastic wrap and refrigerate for at least 4-6 hours, or preferably overnight. Overnight is best for the flavors to meld and the texture to firm up perfectly. If you’re using the chocolate glaze, gently melt the chocolate chips and butter together in a double boiler or in the microwave in 30-second intervals, stirring until smooth. Drizzle this over the chilled cheesecake just before serving.
Step 9: Slice & Serve
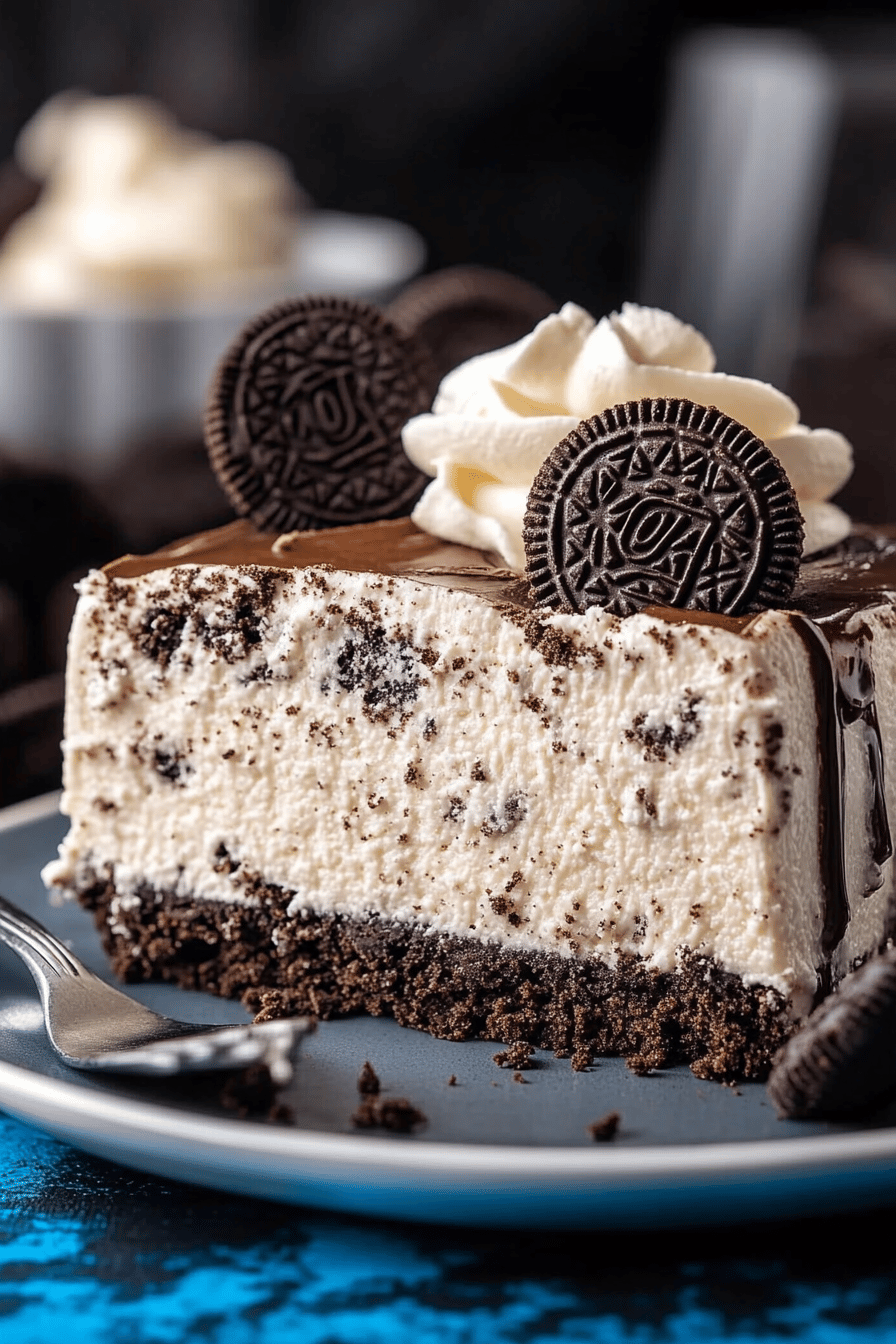
Once your Oreo cheesecake is thoroughly chilled and set, it’s time to release it from the springform pan. Run a thin knife around the edge before unclasping the sides to ensure a clean release. For the cleanest slices, use a sharp knife dipped in hot water and wiped dry between each cut. This helps get those perfect, smooth wedges. Serve chilled, and watch it disappear! I love seeing the swirls and cookie chunks in each slice – it’s pure dessert art.
What to Serve It With
This Oreo cheesecake is a star on its own, truly, but it also plays nicely with a few friends. For breakfast? (Yes, I’ve totally had leftover cheesecake for breakfast, don’t judge!) A simple cup of strong coffee is all you need. The richness of the cheesecake and the bold coffee are a match made in heaven. For a more elegant brunch spread, I like to plate a generous slice with a few fresh raspberries or a dollop of whipped cream. The tartness of the berries cuts through the sweetness, and the cream adds a cloud-like lightness. As a dessert, it’s already a showstopper, but if you want to elevate it further, a drizzle of extra chocolate ganache or a sprinkle of crushed Oreos on top adds that extra ‘wow’ factor. For those cozy snack moments, it’s perfect just as it is, maybe with a glass of cold milk. My kids always ask for it after dinner, and honestly, the simplest way to serve it is usually the best – just a fork and pure enjoyment.
Top Tips for Perfecting Your Oreo Cheesecake
Over the years, I’ve learned a few tricks that make this Oreo cheesecake consistently amazing. When prepping the Oreos for the crust, make sure they’re truly fine crumbs – this ensures a sturdy, cohesive base that won’t crumble when you slice it. I often pulse them in a food processor until they resemble coarse sand. For the filling, the absolute number one tip is to ensure your cream cheese and eggs are at room temperature. This isn’t just a suggestion; it’s crucial for a lump-free, silky-smooth batter. I’ve rushed it before by trying to soften cream cheese in the microwave, and it never turns out quite as well. When mixing the batter, use your mixer on low speed, especially after adding the eggs, and scrape down the bowl frequently. Overmixing can introduce too much air, leading to cracks and a less dense texture. For the Oreo swirls, don’t go overboard! A few gentle passes with a knife are all you need to create beautiful marbling. If you mix too much, you’ll end up with a uniform grey batter, which isn’t quite as visually appealing. Baking is where patience truly pays off. The slow cooling process in the oven after turning it off is a lifesaver for preventing cracks. I never skip this step. For ingredient swaps, if you can’t find regular Oreos, any chocolate sandwich cookie will work, but adjust the sweetness of your glaze if the cookies are particularly sweet or bitter. Sometimes I experiment with white chocolate Oreos for a different vibe, but they do change the color of the swirl. If you find your cheesecake is still a bit too soft after chilling overnight, you can pop it back in the fridge for another few hours. And remember, a perfectly cooled and chilled cheesecake will always slice cleaner and taste better!
Storing and Reheating Tips
Once this glorious Oreo cheesecake is made, you’ll want to store it properly to keep it tasting its best. If you have any leftovers (which is rare in my house!), they can be stored at room temperature for up to 2 hours, but honestly, it’s best kept chilled. For refrigerator storage, cover the cheesecake loosely with plastic wrap or foil, or better yet, use an airtight cake carrier. It will stay delicious in the fridge for about 4 to 5 days. The flavors actually tend to meld and deepen overnight, so it often tastes even better on the second day! If you find you have a substantial amount left or want to make it ahead for a special occasion, this cheesecake freezes beautifully. Wrap the chilled cheesecake very tightly in a double layer of plastic wrap, followed by a layer of aluminum foil. It can be stored in the freezer for up to 2-3 months. To thaw, transfer the frozen cheesecake to the refrigerator and let it thaw overnight. The glaze is best added just before serving after the cheesecake has fully chilled, especially if you plan to freeze it, as the glaze can sometimes crack or become gummy when frozen and thawed. If you’re planning on freezing slices, freeze them individually wrapped, and then you can just thaw a single slice when a craving strikes!
Frequently Asked Questions
Final Thoughts
So there you have it, my ultimate Oreo cheesecake recipe! I genuinely hope you give this one a try. It’s more than just a dessert; it’s a guaranteed crowd-pleaser that brings smiles to faces and makes any occasion feel a little more special. It’s proof that sometimes, the most comforting and impressive desserts are also the most approachable. If you’re a fan of Oreos and cheesecake, this recipe is pretty much your dream come true. For those who love this kind of decadent, chocolatey goodness, you might also enjoy my recipe for the best chocolate lava cakes or my surprisingly easy no-bake chocolate mousse. Let me know in the comments below how your Oreo cheesecake turns out, or if you have any special tips or variations you’ve tried! I love hearing from you all. Happy baking!

Oreo Cheesecake
Ingredients
Crust
- 25 cups Oreo cookies crushed
- 0.125 cup butter melted
Filling
- 24 oz cream cheese softened
- 1 cup powdered sugar
- 1 cup heavy whipping cream whipped to stiff peaks
- 1 cup Oreo cookies chopped
Instructions
Preparation Steps
- Combine crushed Oreos and melted butter. Press into the bottom of a 9-inch springform pan.
- In a large bowl, beat cream cheese and powdered sugar until smooth.
- Gently fold in the whipped cream until well combined.
- Stir in the chopped Oreos.
- Pour the filling over the crust and spread evenly.
- Chill for at least 4 hours, or until firm.
- Garnish with extra crushed Oreos or whipped cream before serving.
