
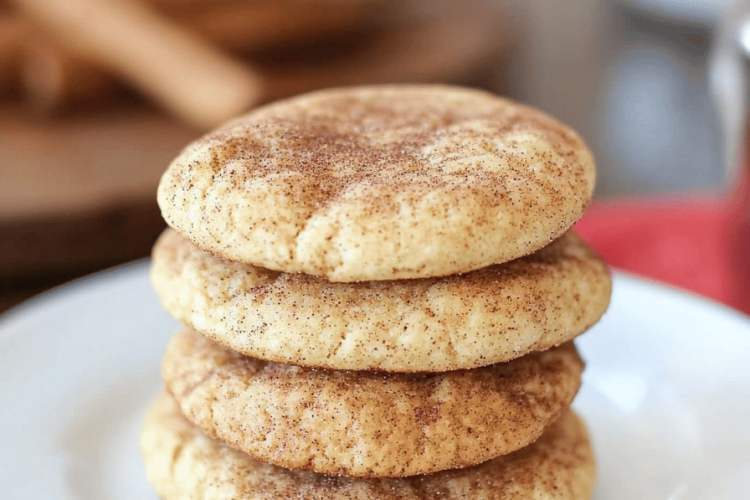
Oh, snickerdoodles. Just saying the word brings back a flood of memories. My grandma made a cookie that made our kitchen smell like heaven. She made it every day. If you’re anything like me, you might think of snickerdoodles as just another sugar cookie rolled in. I love cinnamon sugar, but there’s a little magic to them. What is a cookie? I’ve tweaked it over the years, trying to capture that perfect balance of chewy center and slightly curved edges. What is that tangy sweetness? They’re simpler than you might think, but their flavor is so comforting and nostalgic. When I’m craving something that reminds me of my childhood, these are the things I should do. What are some of my favorite snickerdoodles? They’re like a warm, fuzzy blanket for your taste buds, and they don’t require any fancy ingredients. What are the most complicated techniques? If you’ve ever struggled to get that perfect snickerdoodle texture, you are in the right place. What is your favorite recipe for a delicious meal?

What are Snickerdoodles
What is a snickerdoodle? What is a variation on the sugar cookies? What is the secret sauce? Is there a touch of cream of tartar in the dough? What is the cream of tartar? What gives snickerdoodles that signature slightly tangy, almost cake-like texture? Is it chewy in the middle? Is cinnamon as sweet as sugar cookies? Is the name fun? What sounds like something a mischievous little sprite would whip up? What is a cinnamon-sugar cookie? What happens if you bake, resulting in a crinkly, crackly top that’s utterly irresist It’s pure, unadulterated comfort food in cookie form.
Why you’ll love this recipe?
There are so many reasons why I think you’re going to adore this particular snickerdoodle recipe. First off, the flavor is just incredible. It’s that perfect blend of sweet and cinnamon with a subtle tang that makes it so unique. You get that comforting warmth from the cinnamon sugar coating, but the dough itself has a lovely depth. And simplicity? Oh, it’s a lifesaver! I’ve made this recipe countless times, even on busy weeknights when the cookie craving hits hard, and it never disappoints. All the ingredients are pantry staples, too, so there’s no need for a special trip to the store. What I love most about this recipe, though, is the texture. It consistently delivers that perfect chewy center with slightly crisp edges. It’s not too cakey, not too flat – it’s just right. My family devours these, and my kids actually ask for them by name, which is always a win! Plus, they’re incredibly versatile. Serve them warm with a glass of milk for the ultimate comfort, or pack them in lunchboxes. They’re a far cry from those dry, crumbly cookies you sometimes get. If you enjoyed my classic chewy Chocolate Chip Cookies, I think you’ll find these snickerdoodles to be in a similar league of deliciousness, offering a different but equally satisfying flavor profile.
How do you make snickerdoodles
Quick Overview
How do I make these snickerdoodles? You’ll basically cream your butter and sugar, add in your wet ingredients, then combine with your dry ingredients. What are dry ingredients? What happens when you roll dough balls in that cinnamon-sugar mixture before baking? What are some of the best cookies ever made? The whole process, from start to finish, usually takes less than an hour, and that includes the coding.
Ingredients
For the Main Batter: The main battery.
1 cup (2 sticks) unsalted butter, softened – Using good quality butter really makes a difference here. Make sure it’s properly softened, not melted! That’s crucial for that light, fluffy texture.
2 cups granulated sugar – This forms the base of our sweetness and helps with that signature chewy texture.
2 large eggs – Room temperature eggs incorporate much better into the batter.
1 teaspoon pure vanilla extract – Don’t skimp on the good stuff; vanilla adds so much depth.
2 ½ cups all-purpose flour – I find all-purpose flour works best for the perfect balance of structure and chewiness.
1 teaspoon baking soda – This is our primary leavener, giving the cookies their lift.
½ teaspoon salt – Just a touch of salt to balance out the sweetness and enhance all the flavors.
1 teaspoon cream of tartar – This is our secret weapon! It gives snickerdoodles that distinct tangy flavor and chewy texture. If you don’t have it, you can try substituting with an equal amount of baking powder, but it won’t be quite the same.
For the Cinnamon-Sugar Coating
14 cup granulated sugar – More sweetness! 2 tablespoons ground cinnamon – The star of the show for our coating. Don’t be shy with cinnamon, it’s what makes them snickerdoodles!
What are the steps to
Step 1: Preheat & Prep Pan
What should I do if my oven is preheated to 375°F (190°C)? This is the sweet spot for snickerdoodles – hot enough to get those lovely edges but not so hot. Is it true that they burn before they are cooked through? Grab your baking sheets and line them with parchment paper. What is the best way to scrape cookies off a pan? Parchment paper makes for super easy cleanup and ensures your cookies slide right off once they’re baked.
Step 2: Mix Dry Ingredients
In a medium bowl, whisk together your flour, baking soda, salt, and that all-important cream of tartar. What is the best way to mix salt and leavening agents? What are the properties of flours? What is the best way to remove salt from your skin? What is finished cookies? Everything you do should be uniformly mixed for consistent results.
Step 3: Mix Wet Ingredients
In a large bowl, cream together the softened butter and granulated sugar until the mixture is light and fluffy. This usually takes about 2-3 minutes with an electric mixer. You’re looking for a pale yellow color. Then, beat in the eggs one at a time, mixing well after each addition. Finally, stir in the vanilla extract. This is where the foundation of our cookie’s deliciousness is built!
Step 4: Combine
Now, it’s time to bring the wet and dry ingredients together. Gradually add the dry ingredient mixture to the wet ingredients, mixing on low speed just until combined. Be careful not to overmix here! Overmixing can develop the gluten in the flour too much, leading to tougher cookies. You want just enough mixing so that you don’t see any streaks of dry flour left. It should form a soft, slightly sticky dough.
Step 5: Prepare Filling
While your dough is chilling slightly (if you choose to chill it, which I sometimes do for easier handling), prepare your cinnamon-sugar coating. In a small, shallow bowl, stir together the ¼ cup granulated sugar and 2 tablespoons of ground cinnamon. Make sure it’s really well combined so you get that perfect cinnamon-sugar distribution on every cookie.
Step 6: Layer & Swirl
This is the fun part where we get those beautiful snickerdoodle crinkles! Roll the dough into 1-inch balls. I like to use a cookie scoop for uniform size, but you can just eyeball it too. Then, roll each ball generously in the cinnamon-sugar mixture, making sure it’s completely coated. Place the coated dough balls about 2 inches apart on your prepared baking sheets. I like to roll them a second time in the cinnamon-sugar for an extra thick coating, but that’s totally optional!
Step 7: Bake
Bake for 9-11 minutes, or until the edges are lightly golden and set, but the centers still look a little soft. They’ll continue to cook a bit on the hot baking sheet after you take them out. I always err on the side of slightly underbaking for that perfect chewy center. Ovens can vary, so keep an eye on them, especially the first time you make them.
Step 8: Cool & Glaze
Let the cookies cool on the baking sheets for about 5 minutes before transferring them to a wire rack to cool completely. This is important because they’re quite soft when they first come out and need that resting time to firm up. If you decide you want a glaze (though traditional snickerdoodles don’t always have one, I love a little extra pizzazz!), let them cool completely first. For a simple glaze, whisk together powdered sugar with a splash of milk or water and a tiny bit of vanilla. Drizzle it over the cooled cookies.
Step 9: Slice & Serve
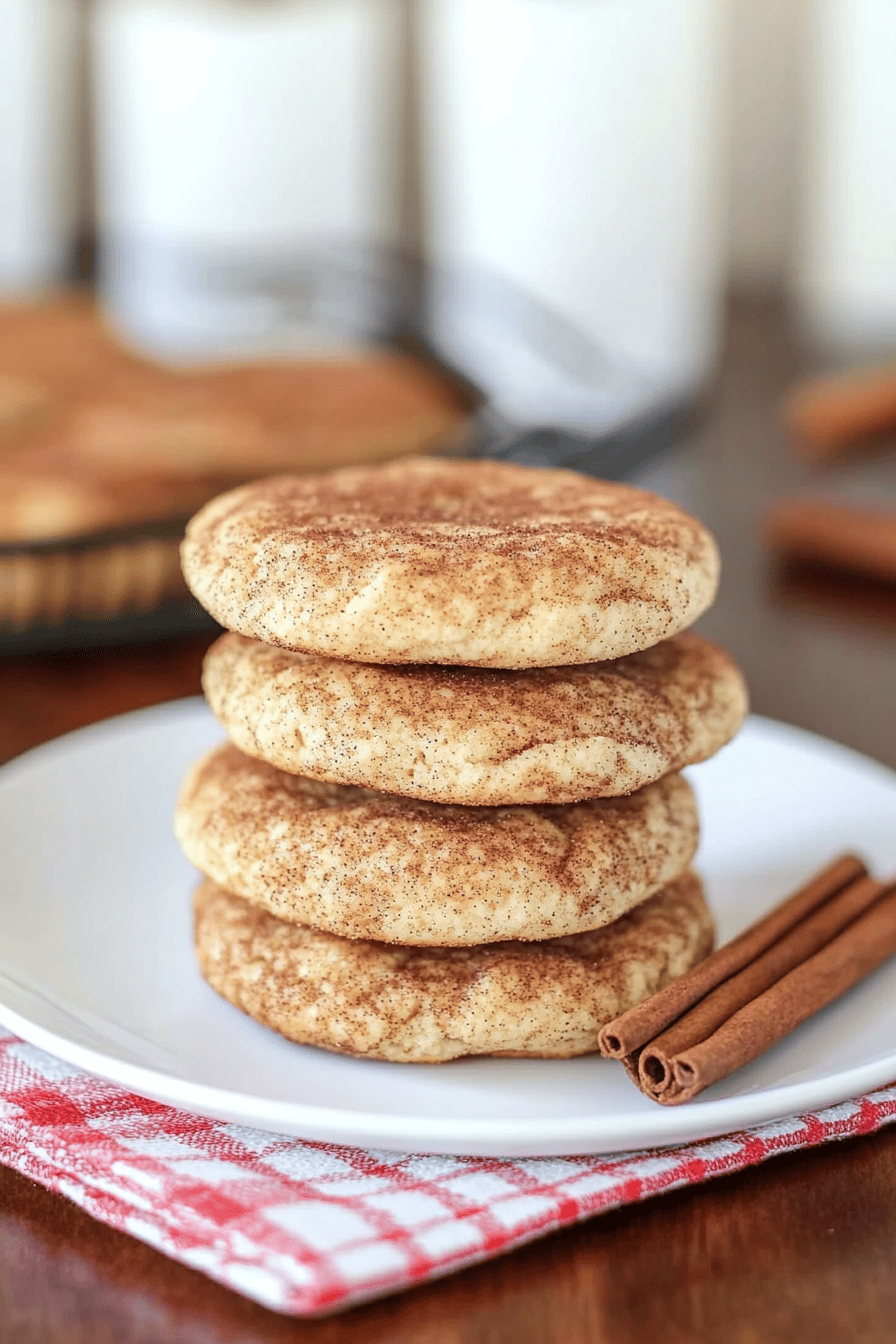
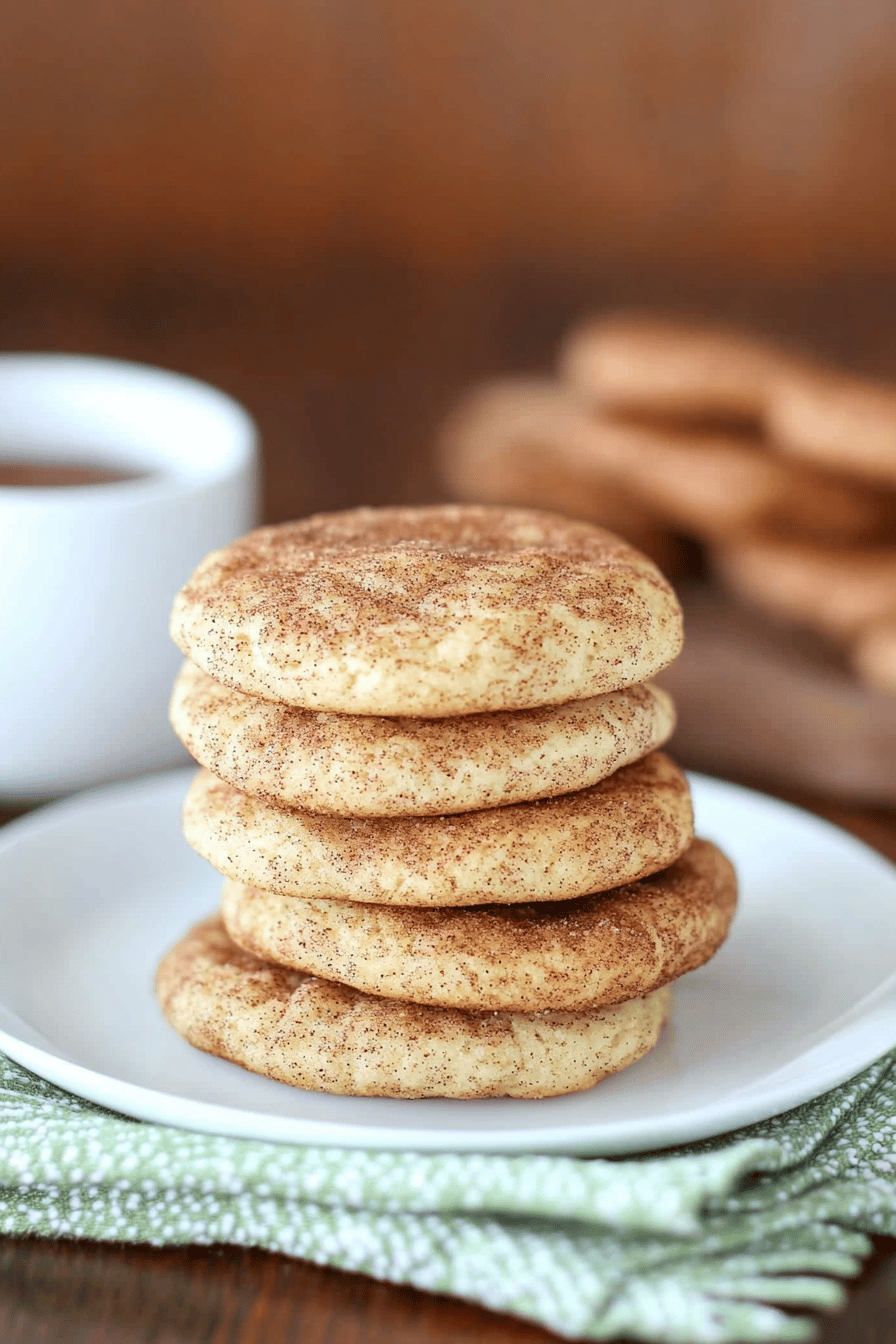
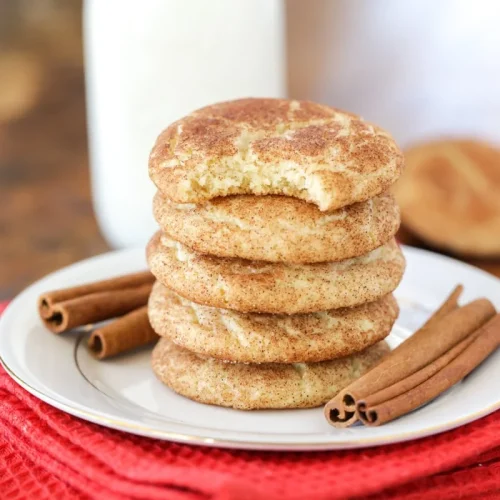
Once fully cooled (or still slightly warm if you can’t wait!), your perfect snickerdoodles are ready to be enjoyed. They slice beautifully and are best served with a cold glass of milk or a warm cup of coffee. The aroma alone is enough to make everyone gather in the kitchen!
What to Serve It With
These snickerdoodles are so versatile, they’re perfect for pretty much any occasion, but here are some of my favorite ways to serve them. For breakfast, they’re lovely with a strong cup of coffee – the cinnamon and sugar are a great way to wake up your taste buds. My kids love them packed in their lunchboxes with a sandwich and some fruit. For a weekend brunch, I’ll arrange them on a nice platter alongside some fresh berries and perhaps a small bowl of whipped cream for dipping. They’re a fantastic contrast to anything savory you might be serving. And as a dessert? Oh, they’re just divine. Serve them warm after dinner with a scoop of vanilla bean ice cream – the warm cookie and cold ice cream combo is pure bliss. My family also has a tradition of enjoying them on a chilly evening with hot chocolate. It feels extra cozy and comforting. They’re also a hit at bake sales and potlucks because they travel so well and everyone recognizes that classic cinnamon-sugar flavor.
How do I make my Snickerdoodles better?
I’ve baked more snickerdoodles than I can count, and over the years, I’ve picked up a few tricks that really make a difference. First, don’t be tempted to skip creaming the butter and sugar. That step is crucial for aeration, which gives you that chewy texture and prevents dense cookies. Really beat them together until they’re light and fluffy – it makes a world of difference! When you’re mixing the wet and dry ingredients, remember: resist the urge to overmix. As soon as you don’t see any dry flour streaks, stop. Overmixing is the enemy of tender cookies; it develops the gluten too much and can make them tough. For that beautiful cinnamon-sugar coating, I sometimes like to do a double dip. Roll the dough ball in the cinnamon sugar, press it gently, then roll it again. This creates a thicker, more flavorful crust. If your dough feels too sticky to handle, don’t be afraid to pop it in the fridge for about 15-20 minutes. It makes rolling the balls so much easier and helps prevent them from spreading too much in the oven. Baking time is also key. I always aim for the edges to be set and lightly golden, but the centers still look slightly soft. They’ll continue to bake on the hot pan for a few minutes after you remove them, so pulling them out a tad early ensures that perfectly chewy middle. And when it comes to cream of tartar, it really is essential for that classic snickerdoodle tang and chew. If you absolutely can’t find it, you can try substituting with baking powder, but the texture and flavor will be different. I once tried making them without it and they were good, but they just weren’t quite *snickerdoodles*. For glaze variations, if you want something a bit different than the traditional cinnamon sugar, try adding a touch of espresso powder to the sugar mix for a mocha note, or even some finely chopped nuts. It’s all about playing with what you love!
What are some Storing and Reheating Tips?
Keeping these snickerdoodles fresh is pretty easy, thankfully! At room temperature, they’ll stay lovely and chewy for about 3-4 days. The best way to store them is in an airtight container. I usually pop them in a cookie tin or a good quality plastic container. If you put them in a container while they’re still a little warm, they can sometimes get a bit soggy, so make sure they’ve cooled completely first. For longer storage, you can refrigerate them. They’ll be good in the fridge for up to a week, although they might firm up a bit. To bring them back to their soft, chewy glory, just let them come to room temperature for about 30 minutes before enjoying. Freezing is also a fantastic option if you want to make a big batch and save some for later. You can freeze the baked cookies in an airtight container or a heavy-duty freezer bag for up to 3 months. To thaw, just leave them out at room temperature. If you’ve glazed them, I usually wait to add the glaze after they’ve thawed, or I’ll just enjoy them plain. If you’re freezing dough balls, that works too! Roll them in the cinnamon sugar, place them on a baking sheet to freeze solid for about an hour, then transfer them to a freezer bag. When you want a cookie, just bake them directly from frozen, adding a minute or two to the baking time. It’s like having homemade cookies on demand!
What are the most frequently asked questions on
Final Thoughts
There you have it – my go-to recipe for the most delightful snickerdoodles! I truly believe that this recipe captures the heart of what makes a snickerdoodle so special: that perfect chewiness, the comforting cinnamon-sugar embrace, and that hint of tang. It’s the kind of cookie that brings smiles to faces, whether they’re little ones or grown-ups reminiscing about their own childhoods. I hope you give these a try and that they become a cherished recipe in your kitchen too. They’re simple enough for a casual afternoon baking session, but special enough for any gathering. If you love these, you might also want to check out my recipe for classic gingerbread cookies for another dose of cozy holiday spice! I can’t wait to hear how your snickerdoodles turn out. Please leave a comment below and let me know your thoughts, or share any fun variations you tried. Happy baking, everyone!
snickerdoodles
Ingredients
Main Ingredients
- 0.5 cup Unsalted Butter softened
- 1.5 cup Granulated Sugar
- 2 large Eggs
- 1 teaspoon Vanilla Extract
- 2.75 cup All-Purpose Flour
- 2 teaspoons Cream of Tartar
- 1 teaspoon Baking Soda
- 0.5 teaspoon Salt
Cinnamon-Sugar Coating
- 2 tablespoons Granulated Sugar
- 1 tablespoon Ground Cinnamon
Instructions
Preparation Steps
- Preheat oven to 375°F (190°C). Line baking sheets with parchment paper.
- In a large bowl, cream together the softened butter and 1.5 cups of granulated sugar until light and fluffy.0.5 cup Unsalted Butter
- Beat in the eggs one at a time, then stir in the vanilla extract.0.5 cup Unsalted Butter
- In a separate bowl, whisk together the flour, cream of tartar, baking soda, and salt.0.5 cup Unsalted Butter
- Gradually add the dry ingredients to the wet ingredients, mixing until just combined.
- In a small bowl, combine 2 tablespoons of granulated sugar and 1 tablespoon of ground cinnamon for the coating.0.5 cup Unsalted Butter
- Roll the dough into 1-inch balls. Then, roll each ball in the cinnamon-sugar mixture.
- Place the coated dough balls on the prepared baking sheets, about 2 inches apart.
- Bake for 9-11 minutes, or until the edges are set but the centers are still soft.
- Let the cookies cool on the baking sheets for a few minutes before transferring them to a wire rack to cool completely.
