
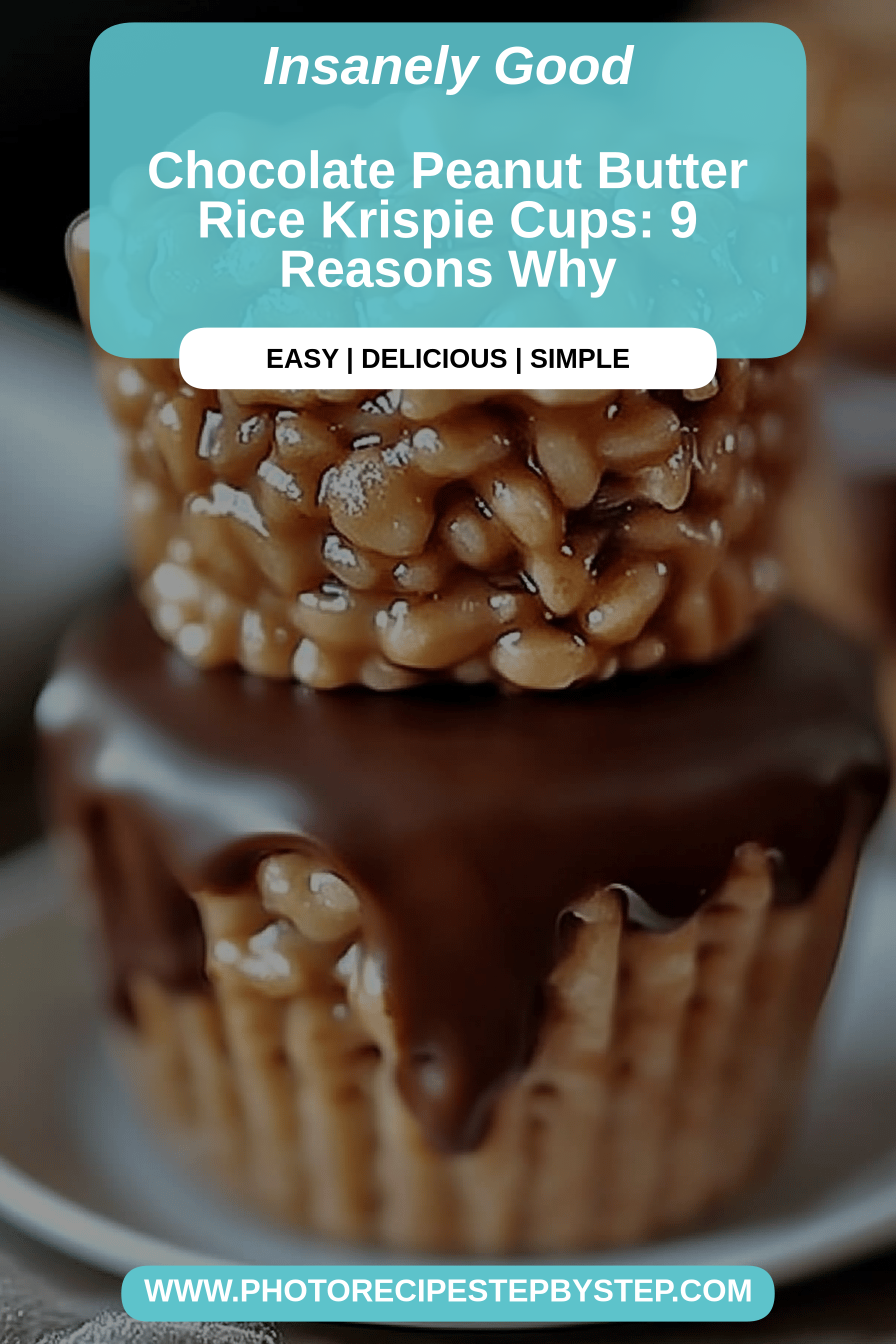
What are some of the treats that instantly transport you back to carefree afternoons? What’s the best thing to do with Rice Krispie treats? My grandma used to make Peanut Butter Rice Krispie cups, and they were always the first thing she made. Is it possible for a girl to disappear from her cookie platter? Is it unfair to compare these squares to Rice Krispie? Peanut butter rice krispie cups are a whole other level of awesome. They’re gooey, they’ve got that perfect hit of salty peanut butter, and they’re so chewy. Is it easy to whip up something? What’s a lifesaver on busy nights when the sweet craving hits hard, or when you need an easy recipe for dessert? What is a crowd-pleaser for your bake sale? I’ve been making them for years, and they’re never let me down. Get ready to fall in love with them!
What are Peanut Butter Rice Krispie Cups?
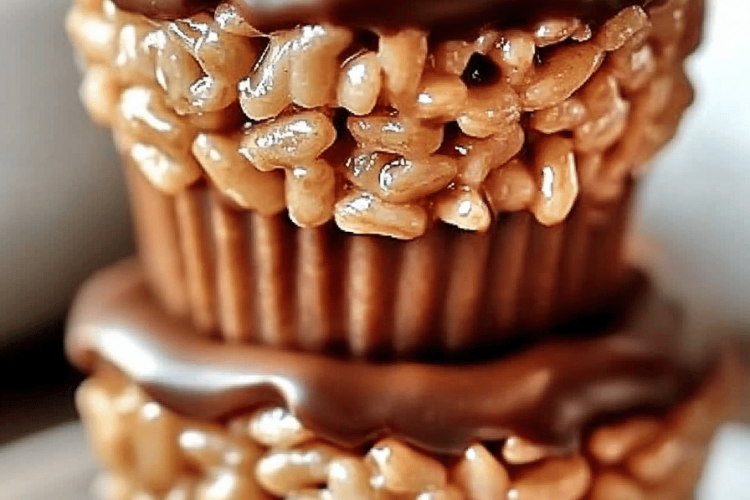
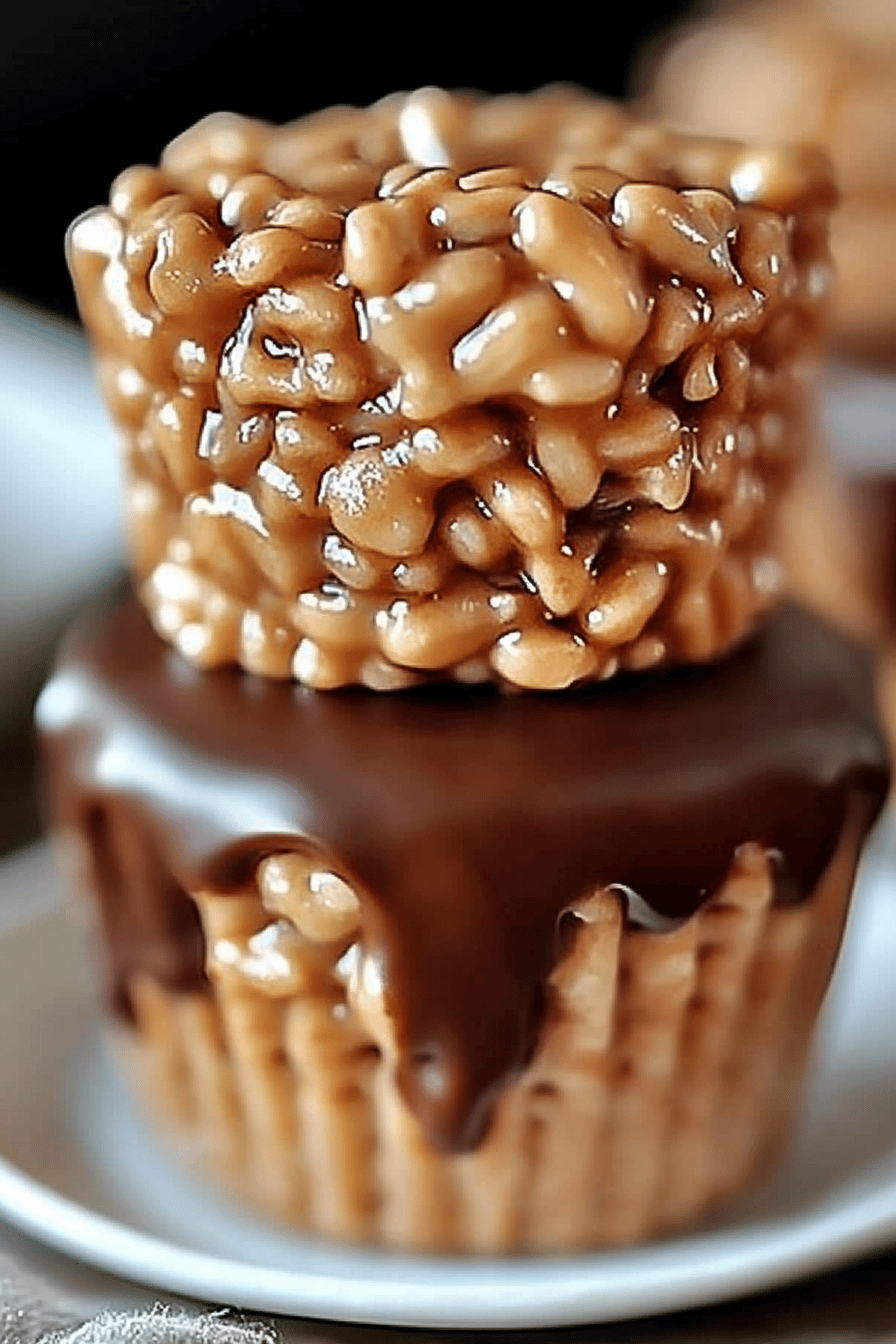
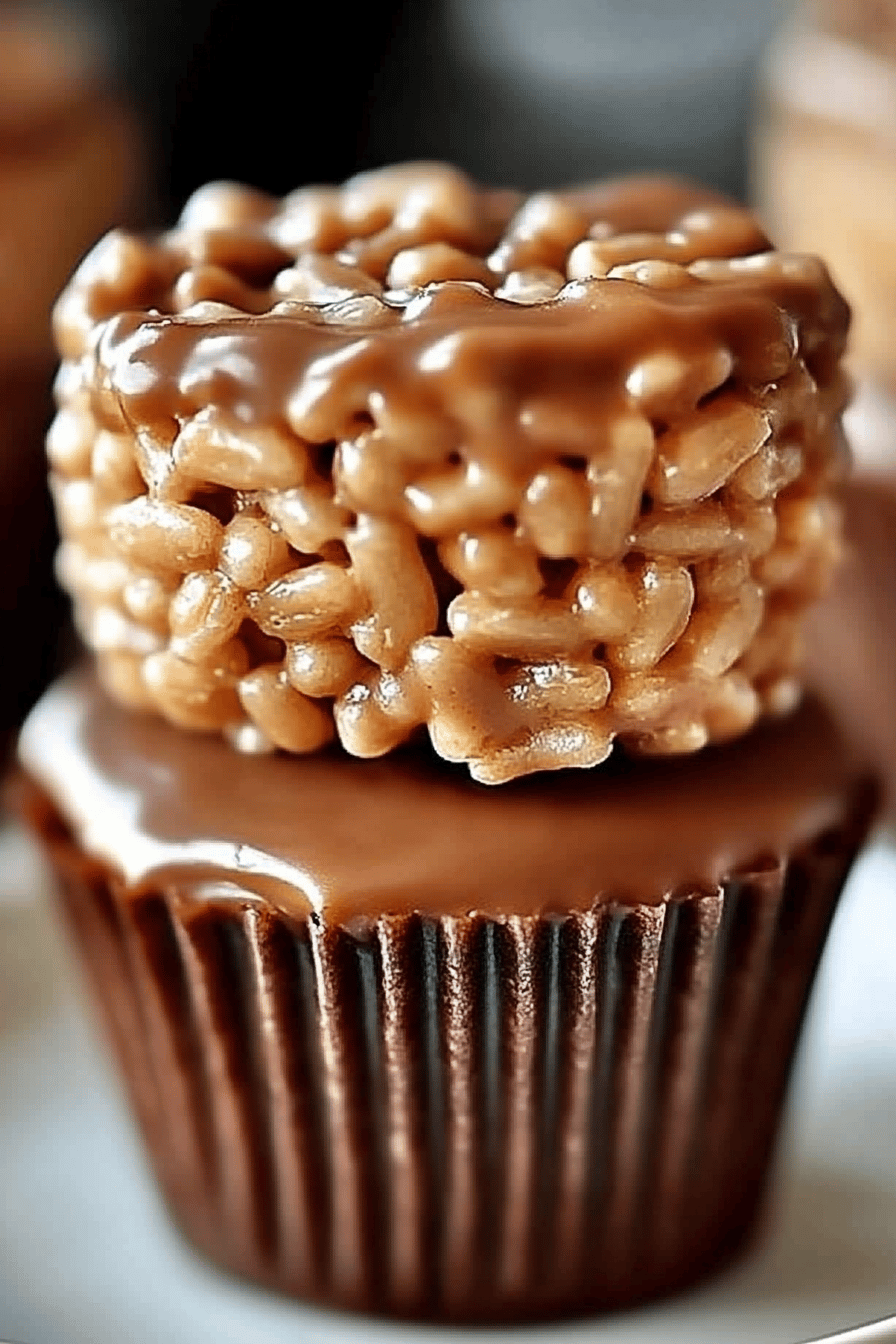
What are these little cups of joy? What are some of the best alternatives to rice krispie? Instead of marshmallow and cereal, we’re weaving in creamy, dreamy peanut butter right here. What is the best way to make muffin liners? What are portioned Is this a no-bake, melt-in-your-mouth bite that packs an incredible flavor punch? The peanut butter adds richness and a subtle saltiness that perfectly balances the sweetness of the almonds. The crispy rice cereal gives it that signature chewy, airy texture we all know. What are muffin tins? What are some of the funniest foods to eat? Is it a simple concept, but the execution is just *chef’s kiss*?
Why you’ll love this recipe?
Honestly, there are so many reasons why this recipe has become a staple in my kitchen. First off, the flavor is just out of this world. That combination of sweet, gooey marshmallow and salty, creamy peanut butter is a match made in heaven. It’s not overly sweet, which I really appreciate, and the peanut butter adds this wonderful depth of flavor that makes you keep reaching for just one more.
Then there’s the sheer simplicity of it all. You don’t need to turn on the oven, no fancy equipment, just a few basic ingredients and about 15 minutes of active time. Seriously, if you can stir things together, you can make these peanut butter rice krispie cups. They’re a total lifesaver when you need a quick treat for unexpected guests or a last-minute school bake sale contribution. Plus, they are incredibly budget-friendly. The ingredients are pantry staples for most people, making this an affordable indulgence that feels way more decadent than it is.
What I love most about these is how versatile they are. You can easily add a sprinkle of sea salt on top for an extra pop, drizzle them with chocolate, or even stir in some mini chocolate chips. They’re perfect for kids’ lunchboxes, a sweet afternoon snack with a glass of milk, or even a fun, casual dessert after dinner. Compared to other no-bake treats, these really stand out because they’re so satisfying and have that nostalgic comfort factor. They just bring a smile to everyone’s face, and that’s priceless.
How do I make Peanut Butter Rice Krispie Cups?
Quick Overview
The process is wonderfully straightforward: we’ll melt butter and marshmallows together with a generous swirl of peanut butter, then stir in the crispy rice cereal. This gooey mixture is then pressed into lined muffin tins, creating perfect little portions. It’s a no-fuss, no-bake wonder that comes together in minutes and delivers maximum deliciousness. The key is to work quickly once the cereal is mixed in, but don’t worry, I’ll walk you through every step to make sure you get that perfect chewy texture without any fuss.
Ingredients
For the Main Batter:
Here’s what you’ll need to get started. I always use good quality butter and fresh marshmallows, as that really makes a difference in the texture and taste. For the cereal, standard crispy rice cereal is your best bet.
- 6 tablespoons unsalted butter: Make sure it’s good quality butter; it really does add a lovely richness.
- 1 bag (10 oz) of marshmallows: 1 pound I prefer using mini marshmallows because they melt more evenly and quickly, but you can absolutely use large ones if that’s what you have on hand. Just give them a chop if you’re using the big ones.
- 1 cup creamy peanut butter: 1 teaspoon peanuts: 2 tablespoonsNatural peanut butter can sometimes separate, so give it a good stir before measuring. The classic Skippy or Jif style works perfectly here for that nostalgic flavor and smooth texture.
- What is crispy rice cereal? The star of the show! Make sure it’s fresh for that perfect crunch.
For the Filling (Optional, but so good!):
What is peanut butter and why?
- 1/2 cup creamy peanut butter: 1 cup sour cream: 1/2 For swirling into the mixture.
For the Glaze (Optional, for that extra fancy touch):
This adds a beautiful finish and extra flavor.
- 1/4 cup semi-sweet chocolate chips: 1 tsp.What is your preference for milk chocolate?
- 1 teaspoon coconut oil or butter: 2 teaspoons. Butter: 1 tablespoon.How does chocolate melt?
Step-by-Step Instructions
Step 1: Preheat & Prep Pan
First things first, let’s get our workspace ready. Grab a standard 12-cup muffin tin and line each cup with paper liners. This is crucial because this mixture is sticky, and the liners make them so easy to remove and serve. I always recommend using the standard size muffin liners, not the mini ones, unless you want super tiny treats. A good set of colorful liners makes them extra festive, too!
Step 2: Mix Dry Ingredients
In a really large bowl – and I mean BIG, because this mixture expands – pour in your 6 cups of crispy rice cereal. That’s it for this step! We’ll add the wet ingredients directly to this. It’s important to have all your cereal ready to go because once the marshmallow mixture is done, you need to work fast to get everything combined before it starts to set.
Step 3: Mix Wet Ingredients
Now, grab a large saucepan. Melt the 6 tablespoons of butter over low heat. Once it’s melted, add the entire bag of marshmallows. Keep stirring gently over low heat until the marshmallows are completely melted and smooth. This is the sticky base of our treats. Make sure you don’t scorch them; low and slow is the way to go here. Once they’re smooth, stir in the 1 cup of creamy peanut butter until it’s thoroughly combined and you have a lovely, glossy mixture. This is the part that smells absolutely divine!
Step 4: Combine
Pour the melted marshmallow and peanut butter mixture directly into the bowl with the crispy rice cereal. Now, this is where the magic happens. You need to stir quickly and thoroughly to coat every single piece of cereal. Use a sturdy spatula or a large spoon. Make sure there are no dry spots of cereal left. The goal is to get an even distribution so every bite is perfect. Don’t overmix to the point of mushing the cereal, just ensure it’s all coated.
Step 5: Prepare Filling
If you’re doing the extra peanut butter swirl, now’s the time. Take about half of your gooey cereal mixture and press it into half of the prepared muffin cups. Then, dollop about a tablespoon of the extra peanut butter onto the remaining mixture in the bowl, give it a quick stir to create a swirl effect, and then carefully spoon that on top of the peanut butter-free cups. This gives you two textures and flavor intensities within the same batch!
Step 6: Layer & Swirl
Now, take spoonfuls of the cereal mixture and press them gently into each lined muffin cup. You don’t need to pack it down super tight, just enough so it holds its shape. If you’re doing the swirl, make sure to get a good dollop of the peanut butter-swirled mixture into the center of those cups. I usually like to press down with the bottom of a greased glass or a measuring cup that fits nicely into the liner to get a smooth, even surface. This makes them look so professional!
Step 7: Bake
Okay, here’s a little secret: you don’t actually *need* to bake these! They’re a no-bake treat as is. If you want them slightly firmer or to melt in any add-ins like chocolate chips right into the mix, you can pop them in a preheated oven at 350°F (175°C) for just about 5-7 minutes. This isn’t really baking, more like a gentle melt to help things bind. I sometimes do this if I’m adding chocolate chips directly into the cereal mixture, so they get lovely and melty. However, for the classic version, they are absolutely delicious without any baking at all.
Step 8: Cool & Glaze
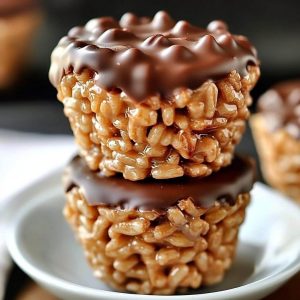
Let your peanut butter rice krispie cups cool in the muffin tin for at least 30 minutes to an hour. This allows them to set up properly so they don’t fall apart when you take them out. If you’re adding the chocolate glaze, melt your chocolate chips with the coconut oil or butter in a microwave-safe bowl in 30-second intervals, stirring in between, until smooth. Once the cups are mostly cooled and set, carefully drizzle or spoon the melted chocolate over the top. You can let that harden at room temperature or pop them in the fridge for a few minutes to speed things up.
Step 9: Slice & Serve
Once everything is cooled and set, gently lift the peanut butter rice krispie cups out of the muffin tin using the paper liners. You can peel the liners off right before serving, or leave them on for easy handling. They are best enjoyed at room temperature, where they’re nice and gooey. If you’ve drizzled them with chocolate, wait until that’s set for the cleanest look. They look absolutely gorgeous stacked on a platter, and trust me, they’ll be gone in a flash!
What should I serve it with?
These peanut butter rice krispie cups are so versatile, they fit into almost any occasion. For a quick and easy breakfast, they’re surprisingly satisfying alongside a hot cup of coffee. The richness of the peanut butter and the sweetness of the marshmallow just make for a comforting start to the day, especially if you’re in a rush. My kids actually love them as a special breakfast treat on the weekends – it feels like a celebration!
If you’re planning a brunch, these little cups are fantastic. They add a fun, nostalgic element to a spread of more sophisticated pastries. I like to serve them in small paper cups or arrange them on a tiered stand. They pair beautifully with fruit salads or even a yogurt parfait. For beverages, a refreshing mimosa or a creamy latte would be lovely accompaniments.
As a dessert, they really shine. Serve them after dinner with a scoop of vanilla ice cream – the warm, gooey treat melting into the cold ice cream is divine. Or, try them with a side of whipped cream and a few fresh berries for a pop of color and freshness. They’re also perfect for a cozy snack. Curl up on the couch with one (or two!) and a big glass of milk or even a hot chocolate on a chilly evening. It’s pure comfort food that requires zero effort and always hits the spot.
Top Tips for Perfecting Your Peanut Butter Rice Krispie Cups
I’ve made these countless times, and along the way, I’ve picked up a few tricks that I think really elevate them. So, let’s dive into some of my go-to tips to ensure your peanut butter rice krispie cups are absolutely perfect every single time.
Peanut Butter Perfection: When you’re melting the marshmallows and butter, make sure you stir in the peanut butter until it’s completely smooth and integrated. This is key to avoiding a greasy or separated texture. If your peanut butter is very thick, you might even want to give it a little warm-up in a microwave-safe bowl for 15-20 seconds before adding it to the marshmallow mixture. This ensures a seamless blend. I’ve found that using a good quality, creamy peanut butter (not the super-natural, oily kind) yields the best results for that classic flavor and smooth texture.
Mixing Advice: Work quickly once the cereal is in! The marshmallow mixture starts to set as it cools, and you want it to be pliable enough to press into the cups. Don’t be afraid to grease your hands lightly with butter or spray them with non-stick spray if you’re pressing them in with your fingers. A greased spatula or the bottom of a greased glass works wonders for getting a nice, flat top. Overmixing can make the cereal break down, so just stir until everything is coated.
Swirl Customization: For that beautiful peanut butter swirl, don’t over-stir when you add the extra peanut butter to the main mixture. Just a few quick stirs are enough to create those lovely marbled patterns. If you want a stronger peanut butter flavor throughout, you can even add a tablespoon of peanut butter powder into the dry cereal before mixing. It doesn’t change the texture much but amps up the peanut butter deliciousness!
Ingredient Swaps: While classic peanut butter is my favorite, you can absolutely experiment! Almond butter or cashew butter work wonderfully, though they might lend a slightly different flavor profile. For the cereal, if you can’t find crispy rice cereal, puffed wheat or even corn flakes can work in a pinch, though the texture will be different. You can also try using different types of marshmallows, like toasted marshmallow flavored ones, for a unique twist.
Baking Tips: As I mentioned, these don’t require baking, but if you choose to pop them in the oven for those few minutes to set them a bit more, watch them closely. They can go from perfect to slightly overcooked very quickly. I usually aim for just enough time to slightly soften any add-ins like chocolate chips or to get the top just a touch golden if that’s what you’re going for. Over-baking will make them hard and brittle, which is definitely not the chewy texture we want!
Glaze Variations: Instead of chocolate, try drizzling them with melted white chocolate, caramel sauce, or even a simple powdered sugar glaze made with a little milk and powdered sugar. A sprinkle of sea salt on top of the chocolate glaze is also fantastic for cutting through the sweetness. Just ensure your cups are mostly cooled before adding any glaze, otherwise, it will melt right off.
Storing and Reheating Tips
Proper storage is key to keeping these peanut butter rice krispie cups tasting their best. They’re so good, you might want to make a double batch, and luckily, they store pretty well.
Room Temperature: If you plan to eat them within a day or two, storing them in an airtight container at room temperature is perfectly fine. I usually stack them in a container with parchment paper or wax paper between layers to prevent them from sticking together. They’ll retain their chewy texture best this way. Just make sure they’re completely cooled before sealing them up.
Refrigerator Storage: For longer storage, up to about a week, you can keep them in the refrigerator. Again, an airtight container is your best friend. They might firm up a bit in the fridge, so if you prefer them softer, just let them sit out on the counter for about 15-20 minutes before serving. This method is also great if you’ve added chocolate glaze and want to ensure it stays firm and doesn’t melt.
Freezer Instructions: Yes, you can freeze these! They freeze beautifully for up to 2-3 months. The best way to do it is to wrap each individual cup tightly in plastic wrap, then place them all in a freezer-safe airtight container or a heavy-duty freezer bag. When you’re ready to enjoy them, just take out as many as you need and let them thaw at room temperature for about an hour. They’ll taste just as good as when they were freshly made.
Glaze Timing Advice: If you know you’ll be storing them for more than a day, or freezing them, it’s often best to add the glaze *after* they’ve been thawed and are ready to be served. This prevents the glaze from cracking or becoming sticky during storage. However, if you’re just refrigerating them for a few days and they’re already glazed, that works too – just be prepared for them to be a bit firmer until they come to room temperature.
Frequently Asked Questions
Final Thoughts
There you have it – the most delightful, nostalgic, and incredibly easy peanut butter rice krispie cups you’ll ever make. They’re more than just a treat; they’re little pockets of happiness that bring out the kid in everyone. The combination of textures and that irresistible peanut butter flavor truly makes them a winner. I’ve made these for birthday parties, school events, and just random Tuesday afternoons, and they’re always a massive hit. They’re the perfect example of how simple ingredients can create something truly magical.
If you love this recipe, you might also enjoy my classic chocolate chip cookies or my no-bake peanut butter bars for more easy and delicious treats. Give these peanut butter rice krispie cups a try, and I promise you won’t regret it! They’re a recipe that’s meant to be shared and enjoyed. Let me know in the comments below how yours turned out, and if you tried any fun variations! Happy baking!
Peanut Butter Rice Krispie Cups
Ingredients
Main Ingredients
- 3 tablespoon butter
- 10 ounces marshmallows
- 0.5 cup creamy peanut butter
- 6 cups crispy rice cereal
- 0.5 cup chocolate chips
- 1 teaspoon vegetable oil optional, for melting chocolate
Instructions
Preparation Steps
- Line a muffin tin with paper liners.
- In a large pot, melt butter over low heat. Add marshmallows and stir until completely melted.
- Stir in peanut butter until smooth.
- Remove from heat and stir in crispy rice cereal until well combined.
- Press mixture evenly into the prepared muffin cups.
- In a microwave-safe bowl, melt chocolate chips with vegetable oil (if using) in 30-second intervals, stirring in between, until smooth.
- Drizzle melted chocolate over the top of each rice krispie cup.
- Let set at room temperature or in the refrigerator for about 15-20 minutes until firm.
