
Okay, confession time. If there’s one thing that can instantly transport me back to my childhood kitchen, it’s the smell of warm chocolate baking. And when that chocolate involves the creamy, dreamy magic of Nutella? Well, that’s basically heaven on a plate. I remember begging my mom for these brownies constantly, and honestly, some things never change. Even as an adult, when that sweet craving hits hard and I need something ridiculously comforting without a ton of fuss, my mind immediately goes to these Nutella brownies. They’re not just any brownies; they’re fudgy, decadent, and have that signature hazelnut-chocolate swirl that makes them extra special. Forget those dry, cakey brownies that just disappoint; these are the real deal. They’re like a hug in brownie form, and I’ve perfected them over years of happy baking experiments. If you thought you loved regular chocolate brownies, wait until you try these – they’re a game-changer, seriously!
What is Nutella Brownie Magic?
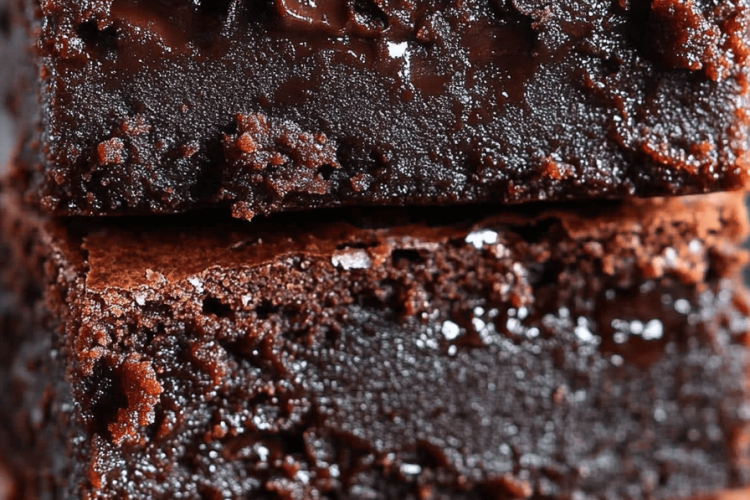
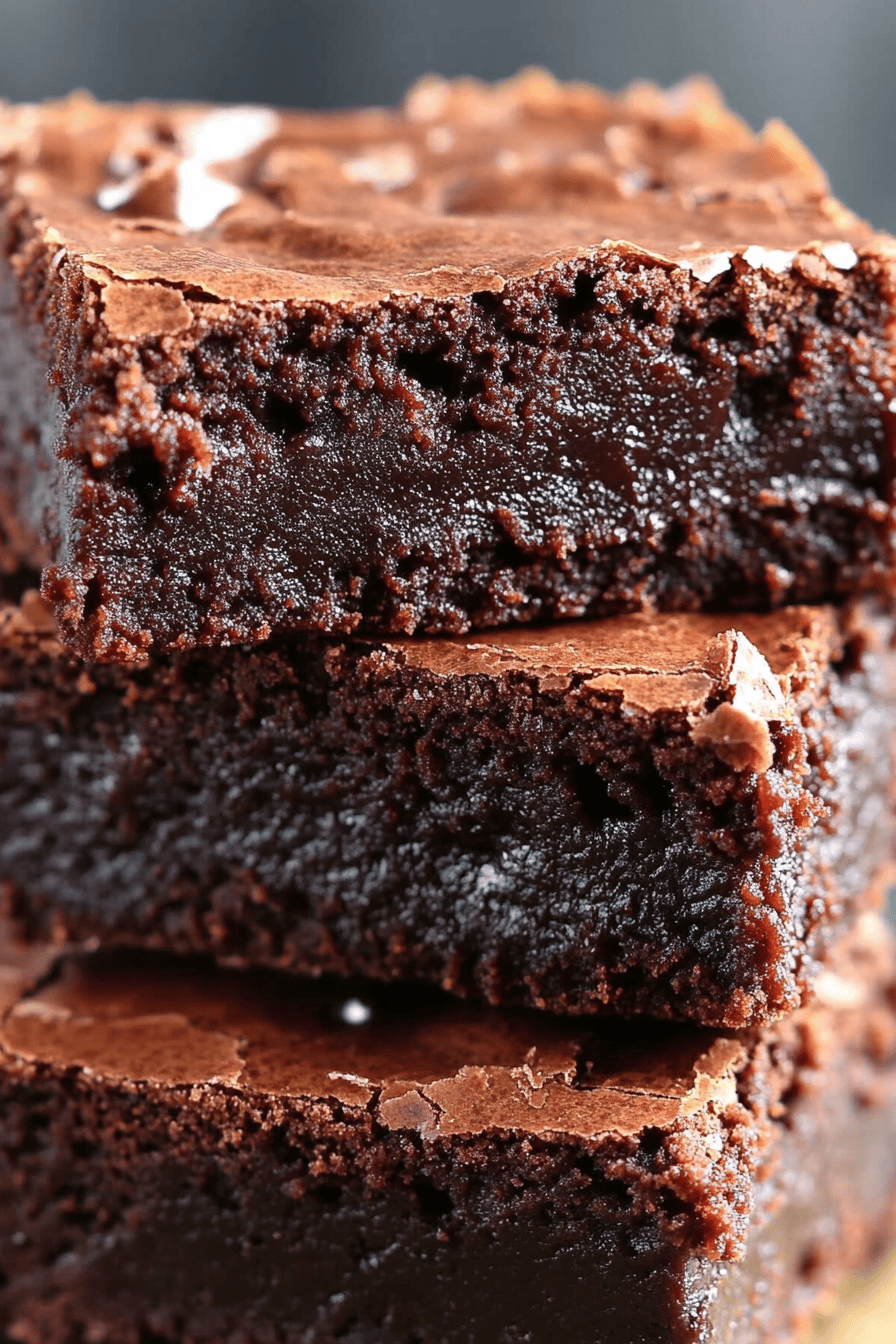
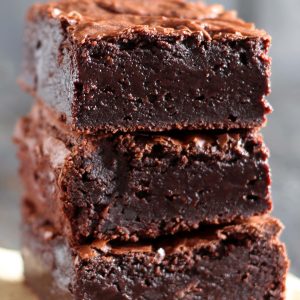
So, what exactly makes these Nutella brownies so special? Think of them as your classic, deeply satisfying fudgy brownie, but with a decadent twist. We’re talking about a batter that’s rich, dense, and has that perfect chew, studded with pockets of gooey, melted Nutella, and often topped with a luscious Nutella glaze. It’s essentially a double dose of that beloved hazelnut-chocolate flavor that so many of us adore. The name itself, “Nutella Brownies,” tells you everything you need to know: it’s that iconic spread, transformed into the most wonderful baked good. It’s simple, it’s elegant, and it’s completely craveable. It’s not overly complicated, but the result is something truly spectacular that always gets rave reviews. It’s the kind of dessert that makes people ask for the recipe immediately!
Why you’ll love this recipe?
Honestly, there are so many reasons why I keep coming back to this Nutella brownies recipe, and I just know you will too. First off, the flavor is absolutely out of this world. You get that deep, dark chocolate goodness from the brownie base, beautifully complemented by the sweet, nutty notes of Nutella. It’s a match made in dessert heaven. And the texture? Oh my goodness. They’re incredibly fudgy and dense with that satisfying chew that just melts in your mouth. It’s not dry or crumbly at all – pure indulgence. What I also love is how surprisingly simple they are to whip up. Even if you’re not a seasoned baker, you can absolutely nail these. The ingredients are pretty standard pantry staples, and the process is straightforward. Plus, they’re so cost-effective! You can make a big batch of these incredible Nutella brownies without breaking the bank, which is always a win in my book. And versatility? These guys are perfect for pretty much any occasion. Need a quick treat for a potluck? Done. Want to impress your guests with a homemade dessert? Easy. Craving something sweet late at night without turning on the oven for hours? These are your answer. They’re a step up from your average Chocolate Chip Cookies, offering a more sophisticated (but still incredibly comforting) flavor profile. I find myself making them whenever I need a guaranteed crowd-pleaser, and they never, ever disappoint. They’re truly a lifesaver when I need a little chocolatey pick-me-up!
How do I make Nutella Brownies?
Quick Overview
Making these Nutella brownies is a breeze, and that’s part of their charm. You’ll essentially be mixing up a rich Brownie Batter, swirling in some extra Nutella for that signature flavor burst, and then baking them until they’re perfectly fudgy. The whole process, from mixing to baking, takes surprisingly little time, making them ideal for those moments when a chocolate craving strikes unexpectedly. You don’t need any fancy equipment, just a bowl, a whisk, and a baking pan. The key is not to overmix the batter, which keeps them wonderfully fudgy. The optional glaze just adds another layer of decadent Nutella goodness, but they’re fantastic even without it.
Ingredients
What are some of the best little bits of happiness you have?
For the Main Batter:
* 1 cup (2 sticks) unsalted butter, melted: Using good quality butter really makes a difference here for flavor. Melting it makes for a super fudgy texture.
* 2 cups granulated sugar: This amount ensures they are sweet but not overly so, letting the chocolate and Nutella shine.
* 4 large eggs: At room temperature, these help create that rich, fudgy structure.
* 1 teaspoon vanilla extract: A little splash of vanilla always enhances chocolate flavors.
* 1 cup all-purpose flour: Just enough to bind everything together without making them cakey.
* 3/4 cup unsweetened cocoa powder: Use a good quality one for the best chocolate depth. Dutch-processed cocoa powder will give you a darker, richer color and flavor.
* 1/2 teaspoon baking powder: Just a touch to give them a little lift, but not too much, otherwise they can become cakey.
* 1/4 teaspoon salt: This is crucial for balancing the sweetness and bringing out the chocolate flavor.
* 1 cup Nutella: The star of the show! Make sure it’s good quality for the best results.
For the Filling (Optional, but highly recommended!):
* 1/2 cup Nutella: You can warm this slightly in the microwave for a few seconds to make it easier to swirl.
For the Glaze (Optional, but SO good!):
* 1/2 cup Nutella
* 2 tablespoons vegetable oil or melted butter: This helps make the glaze smooth and pourable. If you don’t have oil, melted butter works wonderfully too and adds a slight richness.
Step-by-Step Instructions
Step 1: Preheat & Prep Pan
First things first, let’s get your oven preheating to 350°F (175°C). You’ll want to prepare an 8×8 inch baking pan. I like to line mine with parchment paper, leaving some overhang on the sides. This makes lifting the brownies out so much easier for slicing later, and trust me, no one likes stuck brownies! Lightly grease the parchment and the pan as well, just to be extra safe.
Step 2: Mix Dry Ingredients
In a medium bowl, whisk together your flour, cocoa powder, baking powder, and salt. Give it a good whisk so everything is well combined and there are no clumps of cocoa. This ensures that your leavening and salt are evenly distributed, which is key for consistent texture. Set this aside for now.
Step 3: Mix Wet Ingredients
In a large bowl, pour in your melted butter and granulated sugar. Whisk them together until they’re well combined. Then, add your eggs one at a time, whisking well after each addition. Finally, stir in the vanilla extract. Your mixture should look smooth and slightly glossy.
Step 4: Combine
Now, it’s time to bring the wet and dry ingredients together. Gradually add the dry ingredients to the wet ingredients. Mix with a spatula or a whisk until *just* combined. Be careful not to overmix! A few streaks of flour are okay; they’ll disappear as you incorporate the Nutella. Overmixing can lead to tough brownies, and we want them fudgy and tender, remember?
Step 5: Prepare Filling
If you’re using the extra Nutella for swirling, now’s the time to get it ready. You can gently warm it in the microwave for about 15-20 seconds, just enough so it’s pourable. This makes it super easy to drizzle and swirl into the batter. Don’t make it too hot, though!
Step 6: Layer & Swirl
Pour about half of your brownie batter into the prepared pan and spread it evenly. Then, dollop spoonfuls of the warmed Nutella over the batter. Now, carefully pour the remaining brownie batter over the Nutella. Grab a knife or a skewer and gently swirl the Nutella into the batter. Don’t go crazy; just a few gentle passes will create beautiful, marbled patterns. You want to see swirls, not have it all mixed in.
Step 7: Bake
Pop the pan into your preheated oven. Bake for about 25-35 minutes. The exact time will depend on your oven, so keep an eye on them. You’re looking for the edges to be set and a toothpick inserted into the center to come out with moist crumbs attached, not wet batter. If it comes out clean, they might be a little overbaked for that perfect fudgy center. I always err on the side of slightly underbaked for the best texture.
Step 8: Cool & Glaze
This is perhaps the hardest part: letting them cool! Once they’re out of the oven, let them cool in the pan on a wire rack for at least 30 minutes, or ideally, completely. Once cooled, you can prepare the glaze if you’re using it. Whisk together the 1/2 cup of Nutella and the vegetable oil or melted butter until smooth and pourable. Drizzle this over the cooled brownies and let it set for a bit before slicing.
Step 9: Slice & Serve
Once everything is cool and the glaze is set (if you used it), use the parchment paper overhang to lift the entire block out of the pan. Place it on a cutting board and slice into squares. A sharp knife is your best friend here. For the cleanest cuts, wipe your knife between slices. These are fantastic served at room temperature, but a few seconds in the microwave can bring them back to that warm, gooey state if you prefer!
What to Serve It With
These Nutella brownies are so versatile, they’re a star on their own, but here are some of my favorite ways to serve them up, depending on the mood!
For Breakfast: Okay, hear me out. While they’re a decadent treat, a small square with your morning coffee is pure bliss. The rich chocolate and hazelnut feel like a special indulgence to start the day. I love pairing them with a strong, dark roast coffee to cut through the sweetness. Sometimes, I’ll even have a small piece with a side of Greek yogurt for a balanced start. It feels like a weekend treat, even on a Tuesday!
For Brunch: For a more elegant presentation, I like to cut them into smaller, bite-sized pieces and arrange them on a pretty platter. They pair wonderfully with fresh berries – raspberries and strawberries are particularly good companions, as their tartness balances the richness of the brownies. A drizzle of raspberry coulis or a dollop of whipped cream alongside can elevate them even further. They’re always a hit when I host brunch!
As Dessert: This is where they truly shine. Serve a warm brownie (a quick 10-15 seconds in the microwave does wonders!) with a scoop of good quality vanilla bean ice cream. The contrast of the warm, fudgy brownie and cold, creamy ice cream is pure magic. A dusting of powdered sugar or a few chopped hazelnuts sprinkled on top adds a lovely finishing touch. They also pair beautifully with a glass of milk or even a small glass of red wine, like a port, for a more grown-up dessert experience.
For Cozy Snacks: Honestly, my favorite way is often just a square (or two!) with a glass of cold milk, enjoyed while curled up with a good book. They’re the ultimate comfort food. They’re perfect for an afternoon pick-me-up or a late-night treat when you need something sweet but don’t want to be too elaborate. My kids absolutely devour these, and it’s one of those treats that just brings a smile to everyone’s face.
Top Tips for Perfecting Your Nutella Brownies
Over the years, I’ve learned a few tricks that help make these Nutella brownies absolutely perfect every single time. It’s all about those little details!
Mixing Advice: The absolute biggest tip I can give you is to NOT overmix the batter once you add the flour. Seriously. As soon as you don’t see any dry flour streaks, stop mixing. Overmixing develops the gluten in the flour, which can result in tough, cakey brownies instead of the dense, fudgy ones we’re after. A few lumps are totally fine and actually preferable!
Swirl Customization: When swirling in the extra Nutella, don’t aim for perfection. The beauty of these brownies is in their rustic, marbled appearance. Just a few gentle passes with a knife or skewer is all you need. You can even reserve a little bit of the batter, mix it with a bit more cocoa powder to make it thicker, and then swirl that in too for some extra Dark Chocolate contrast. I’ve also experimented with adding a swirl of melted dark chocolate alongside the Nutella for an even richer flavor.
Ingredient Swaps: While the recipe is fantastic as is, I’ve had success making some substitutions. If you’re out of regular chocolate chips, you can use semi-sweet or dark chocolate chips, but know that the chocolate flavor will be more pronounced, potentially overpowering the Nutella slightly. For a richer, more intense chocolate flavor, I sometimes use a combination of cocoa powder and melted unsweetened baking chocolate. I’ve also tried using almond butter or cashew butter instead of Nutella in a pinch, and while the flavor profile changes, they are still delicious – though not quite the classic Nutella brownie!
Baking Tips: Ovens can be tricky, so always trust your instincts and the toothpick test. If your brownies seem to be browning too quickly on top before the center is done, you can loosely tent them with aluminum foil for the last 10-15 minutes of baking. I find that baking them in the center rack of the oven gives the most even results.
Glaze Variations: If you want to get creative with the glaze, you can add a tiny pinch of sea salt to enhance the flavor, or a small splash of espresso powder to deepen the chocolate notes. For a slightly thinner glaze, add a little more oil or melted butter. For a thicker one, use less. You can also skip the glaze entirely and just dust them with powdered sugar or sprinkle with chopped toasted hazelnuts for crunch.
Storing and Reheating Tips
Keeping these Nutella brownies tasting amazing is pretty straightforward. They’re quite forgiving, which is another reason I love them!
Room Temperature: Once completely cooled, you can store them in an airtight container at room temperature. They’ll stay wonderfully fudgy for about 3-4 days. Make sure the container is truly airtight to prevent them from drying out. I often just use the pan they were baked in, covered tightly with plastic wrap.
Refrigerator Storage: If you live in a warm climate or find they tend to get a bit soft at room temperature, you can store them in the refrigerator. They should last for about a week. Again, an airtight container is key. When you take them out of the fridge, let them sit at room temperature for about 15-20 minutes to soften up a bit before enjoying. They can be a little harder straight from the fridge, but still delicious!
Freezer Instructions: These freeze incredibly well! Once completely cooled and cut into squares, wrap each brownie individually in plastic wrap, then place them in a freezer-safe bag or container. They can be frozen for up to 3 months. To thaw, simply unwrap them and let them come to room temperature, or if you’re impatient (like me!), you can pop a thawed brownie in the microwave for about 10-15 seconds for a warm, gooey treat.
Glaze Timing Advice: If you’re planning to store them for more than a day, I often prefer to add the glaze just before serving, especially if they’re going to be at room temperature. The glaze can sometimes get a bit sticky or melty if stored for too long at warmer temperatures. If you’re freezing them, it’s usually best to freeze them plain and add the glaze after thawing, or add a dusting of powdered sugar instead.
Frequently Asked Questions
Final Thoughts
Honestly, making these Nutella brownies is always a joy for me. They’re more than just a dessert; they’re a little slice of happiness that never fails to brighten my day and the days of everyone who tries them. The rich, chocolatey base combined with that unmistakable hazelnut swirl is pure comfort. They’re incredibly satisfying, wonderfully fudgy, and that touch of Nutella just elevates them from good to absolutely unforgettable. They’re proof that you don’t need to be a master baker to create something truly special. I hope you get to experience the joy of baking and devouring these Nutella brownies as much as I do.
If you love decadent chocolate treats, you might also want to check out my recipe for the Best Double Chocolate Cookies or my Fudgy Chocolate Lava Cakes – they’re always big hits! Give these Nutella brownies a try, and please, please let me know how yours turn out in the comments below! I’d love to hear about your experience, any variations you try, or just how much you loved them. Happy baking, everyone!

Nutella brownies
Ingredients
Main Ingredients
- 0.5 cup unsalted butter
- 1 cup Nutella
- 2 large eggs
- 1 teaspoon vanilla extract
- 0.25 cup all-purpose flour
- 0.5 teaspoon baking powder
- 0.25 teaspoon salt
- 0.5 cup chocolate chips optional
Instructions
Preparation Steps
- Preheat oven to 350°F (175°C). Grease and flour an 8x8 inch baking pan.
- In a medium saucepan, melt the butter over low heat. Remove from heat and stir in the Nutella until smooth.
- Whisk in the eggs one at a time, then stir in the vanilla extract.
- In a separate bowl, whisk together the flour, baking powder, and salt.
- Gradually add the dry ingredients to the wet ingredients, mixing until just combined. Do not overmix.
- Fold in the chocolate chips, if using.
- Pour the batter into the prepared baking pan and spread evenly.
- Bake for 25-30 minutes, or until a toothpick inserted into the center comes out with moist crumbs (not wet batter).
- Let cool in the pan before cutting into squares.
