
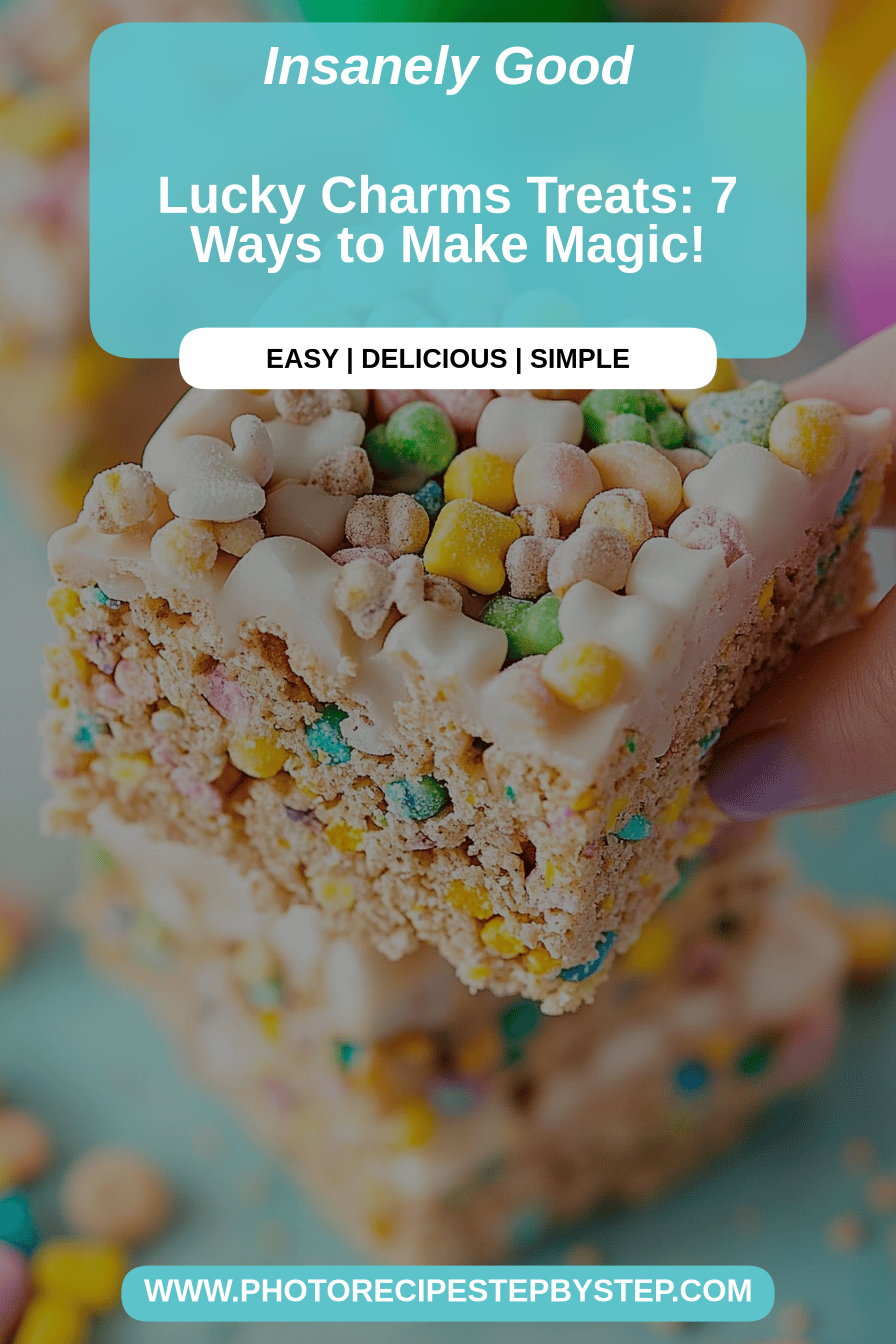
Oh, you guys, I’ve got something truly special for you today. You know those days when you just need a little sprinkle of magic, a burst of color, and a whole lot of happy? That’s exactly what these Lucky Charms Treats bring to the table. It feels like just yesterday I was a kid, pouring the marshmallows from the cereal box into a bowl of milk, saving the charms for last. Now, I get to recreate that pure, unadulterated joy in a wonderfully chewy, gooey treat that’s even better than I remember. It’s like a hug in bar form, and honestly, it’s the closest thing I’ve found to a no-bake cheesecake but with way more sparkle and significantly less fuss. If you’ve ever loved a classic Rice Krispie treat, then get ready to fall head over heels for these colorful squares. They’re a guaranteed hit, and I can’t wait for you to try them!
What are Lucky Charms treats?
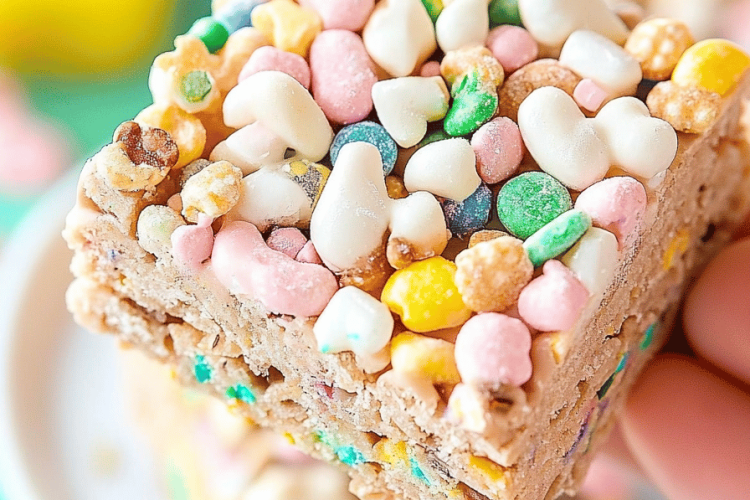
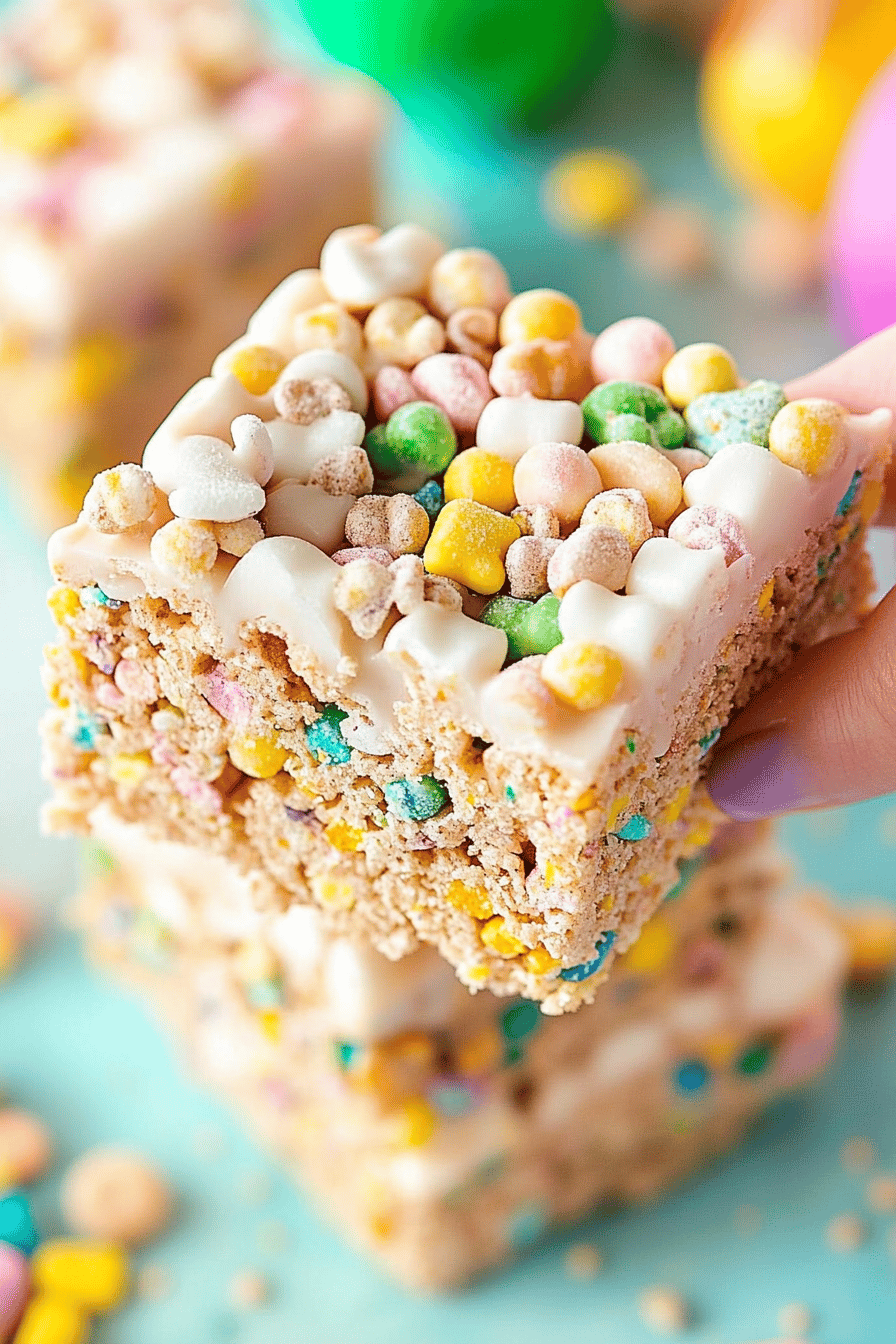
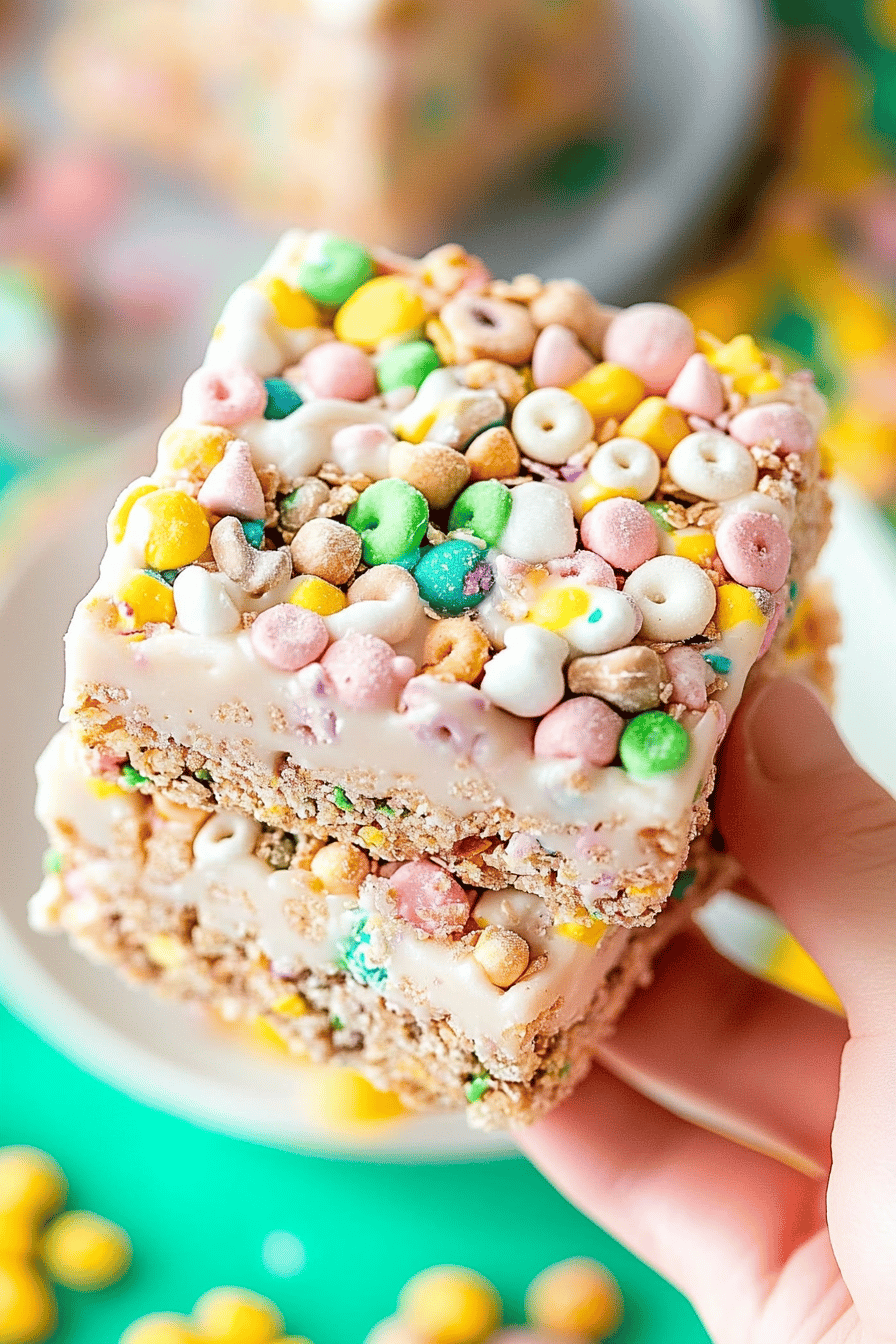
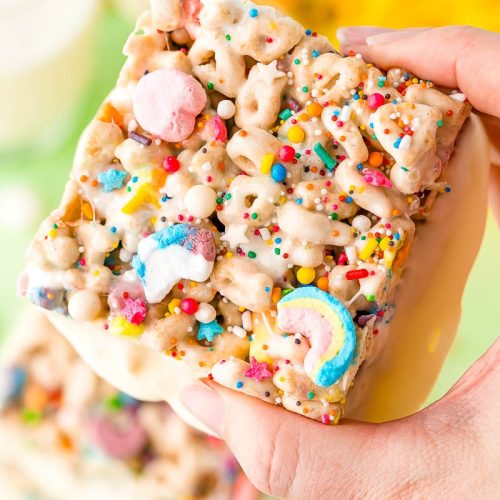
So, what exactly are these magical little squares? Think of them as the ultimate upgrade to your childhood favorite cereal bar. At its heart, it’s a simple no-bake confection, relying on the classic combination of puffed rice cereal, gooey marshmallows, and a touch of butter to bring it all together. But the secret ingredient, of course, is the star of the show: Lucky Charms cereal! We’re talking about those iconic, colorful marshmallows and the crunchy oat pieces that make Lucky Charms so beloved. It’s not just about adding the cereal; it’s about capturing that essence of fun, that vibrant personality, and translating it into a chewy, sweet treat that’s perfect for snacking, parties, or just because you deserve a little cheer. It’s essentially the most joyful cereal bar you can imagine, and trust me, the whole family will be begging for more.
Why you’ll love this recipe?
There are so many reasons why this recipe has become a staple in my kitchen, and I just know you’re going to fall in love with it too. First off, let’s talk about the flavor. It’s an explosion of sweet, marshmallowy goodness with that familiar toasted oat crunch from the cereal, punctuated by those delightful, fruity marshmallow bits. It’s pure nostalgia in every bite! But what I adore even more is the sheer simplicity. We’re talking about a recipe that comes together in under 15 minutes, with minimal cleanup. It’s a lifesaver on busy weeknights when the craving for something sweet hits hard, or when you need a quick, crowd-pleasing dessert for a last-minute gathering. And budget-friendly? You bet! The ingredients are super accessible and relatively inexpensive, making it an economical choice for feeding a hungry crew. Plus, it’s incredibly versatile. You can dress it up or down, and it’s always a winner. Unlike some other no-bake treats that can be a bit finicky, these Lucky Charms Treats are incredibly forgiving. They’re perfect for little hands to help make, turning kitchen time into quality family time. Honestly, what’s not to love? It’s a little bit of magic, a whole lot of flavor, and ridiculously easy to make!
How do I make Lucky Charms?
Quick Overview
Making these delightful Lucky Charms Treats is an absolute breeze. You’ll melt butter and marshmallows together until smooth and gooey, then gently fold in your favorite puffed rice cereal and, of course, a generous amount of Lucky Charms cereal. Press the mixture into a prepared pan, let it set, and then cut into squares. That’s it! The magic lies in the quality of your ingredients and a little bit of patience as it cools. It’s so straightforward, even the busiest home cook can whip these up without breaking a sweat. Trust me, the payoff in flavor and pure happiness is enormous for such minimal effort.
Ingredients
For the Base:
* 6 tablespoons unsalted butter: I always opt for good quality butter; it really does make a difference in the final flavor. You can use salted if that’s all you have, but be mindful of that when tasting.
* 1 bag (10 ounces) mini marshmallows, plus a few extra for topping if you’re feeling fancy: Mini marshmallows melt more evenly and quickly, which is key for that smooth, cohesive texture. If you only have large ones, just chop them up a bit!
* 6 cups puffed rice cereal: The classic choice for a reason! It gives you that perfect airy crunch. Make sure it’s fresh, as stale cereal can make your treats tough.
* 2 cups Lucky Charms cereal: This is where the magic happens! I like to use a mix of both the oat pieces and the marshmallows, but feel free to pick out extra marshmallows if that’s your jam.
For the Optional Swirl (because why not?):
* 1/4 cup melted white chocolate chips: These create a beautiful, subtle swirl and add another layer of sweetness. You can also use a colored candy melt for an extra pop of color!
Step-by-Step Instructions
Step 1: Preheat & Prep Pan
First things first, let’s get our workspace ready. You’ll need a 9×13 inch baking pan. Lightly grease it with butter or cooking spray, or even better, line it with parchment paper, leaving some overhang on the sides. This makes lifting the finished treats out of the pan a total breeze, and it seriously cuts down on cleanup. Set that aside.
Step 2: Mix Dry Ingredients
In a large mixing bowl, combine your puffed rice cereal and your Lucky Charms cereal. Give it a gentle toss to distribute everything evenly. This ensures that every bite will have that perfect ratio of crunchy cereal and colorful marshmallows. Don’t overmix, you just want them combined!
Step 3: Melt Marshmallows
Now, grab a large saucepan. Melt the butter over low heat. Once the butter is melted, add in all the mini marshmallows. Stir them constantly over low heat until they are completely melted and smooth. This is crucial for achieving that signature chewy texture. Be patient and keep the heat low to avoid scorching the marshmallows. A smooth, creamy marshmallow mixture is what we’re after.
Step 4: Combine Cereal and Marshmallow Mixture
Once your marshmallow mixture is perfectly smooth, remove the saucepan from the heat. Immediately pour the cereal mixture into the bowl with the melted marshmallows. Using a rubber spatula or a large spoon, gently but quickly fold the cereal into the marshmallow mixture until everything is well coated. You want to work fairly quickly here, as the marshmallows start to set as they cool.
Step 5: Prepare Optional Swirl
If you’re doing the optional white chocolate swirl, melt your white chocolate chips in a small microwave-safe bowl in 30-second intervals, stirring in between, until smooth. Alternatively, you can melt them in a double boiler. Be careful not to overheat them.
Step 6: Press Into Pan & Swirl
Transfer the cereal mixture into your prepared 9×13 inch pan. Using your greased spatula or another piece of parchment paper, gently press the mixture evenly into the pan. Don’t press too hard, or your treats will be dense and hard. Just firm enough to hold together. If you’re adding the white chocolate swirl, drizzle the melted white chocolate over the top and use a toothpick or the tip of a knife to gently swirl it into the Lucky Charms mixture. It doesn’t need to be perfect; the marbling effect is part of the charm!
Step 7: Let Them Set
Now for the hardest part: waiting! Let the treats sit at room temperature for at least 30 minutes, or until firm. This allows them to set properly so you can cut them cleanly. Resist the urge to cut them too soon, or they’ll just fall apart.
Step 8: Slice and Serve
Once the Lucky Charms Treats have set, lift them out of the pan using the parchment paper overhang (if you used it). Place them on a cutting board and slice them into squares using a sharp knife. I usually get about 16-24 squares, depending on how big I cut them. And there you have it – pure, colorful happiness ready to be devoured!
What to Serve It With
Honestly, these Lucky Charms Treats are so delightful, they really don’t need much company. They’re the star of the show! But if you’re looking for some perfect pairings, I’ve got a few ideas that my family absolutely adores. For a casual breakfast or brunch, I love serving them alongside a big pitcher of cold milk or a steaming mug of coffee. They add such a fun, unexpected element to a weekend spread, especially if you have kids or guests who appreciate a touch of whimsy. They’re also fantastic as a sweet little pick-me-up during a mid-afternoon slump, maybe with a glass of sparkling water or a cup of herbal tea. For dessert occasions, these are an absolute hit! They’re perfect for birthday parties, potlucks, or a fun treat after dinner. I sometimes serve them on a colorful platter alongside some fresh berries for a bit of freshness, or even a scoop of vanilla ice cream if we’re feeling extra indulgent. The contrast between the cold ice cream and the chewy, sweet treat is divine! My kids often ask for them as a “special snack” when they’ve had a good day at school, and honestly, they make any day feel a little more special.
Top Tips for Perfecting Your Lucky Charms Treats
Over the years, I’ve made these Lucky Charms Treats more times than I can count, and I’ve picked up a few tricks that really make a difference. When it comes to the cereal, make sure your puffed rice cereal is fresh. Stale cereal can lead to a tough, chewy texture that’s just not as enjoyable. For the marshmallows, patience is key! Melting them over low heat ensures they become completely smooth and gooey, creating that perfect sticky binder. If you rush this step or use too high of heat, you can end up with lumpy treats or worse, burnt marshmallow bits. I learned that the hard way once! When you’re mixing the cereal into the melted marshmallows, work quickly but gently. You want to coat everything evenly without crushing the cereal. Overmixing or pressing too hard can make the treats dense instead of delightfully chewy. For that beautiful swirl effect, don’t go overboard. Just a few drizzles and gentle swirls are enough to create a pretty pattern without making the treats too sweet or losing that iconic Lucky Charms look. If your white chocolate seizes up, it’s usually because a tiny bit of water got in, or it got too hot. You can try adding a teaspoon of vegetable oil to loosen it up, but sometimes it’s best to start fresh. And speaking of ingredients, don’t be afraid to experiment! While the classic Lucky Charms are fantastic, I’ve seen people add a little sprinkle of edible glitter for extra sparkle, or even a few drops of vanilla extract to the marshmallow mixture for an added flavor dimension. For the pan, using parchment paper is truly a game-changer for easy removal and cleanup. Trust me on this one – it makes life so much easier! Lastly, don’t cut them too soon. Letting them set properly is essential for clean slices and that satisfying chew.
Storing and Reheating Tips
One of the best things about these Lucky Charms Treats is how well they keep, making them perfect for making ahead of time. If you’re planning to enjoy them within a day or two, storing them at room temperature is absolutely fine. Just make sure they’re in an airtight container. I usually place a piece of parchment paper or plastic wrap directly on top of the treats before sealing the container to prevent them from drying out or sticking together. They’ll stay perfectly fresh and chewy for about 3-4 days this way. If you think you’ll need them to last longer, or if your kitchen is particularly warm, the refrigerator is a good option. Again, an airtight container is key. In the fridge, they’ll maintain their quality for about a week. Just a little note: sometimes cold treats can be a bit firmer. I usually let them sit at room temperature for about 15-20 minutes before serving if they’ve been refrigerated, just to get that perfect chewy texture back. Now, freezing is also an option, and they freeze surprisingly well! Cut them into individual squares, wrap each one tightly in plastic wrap, and then place them in a freezer-safe bag or container. They can last in the freezer for up to 2-3 months. When you’re ready to enjoy them, simply unwrap them and let them thaw at room temperature. They’ll be just as delicious as when you first made them. I’ve even successfully reheated a slightly too-firm treat by popping it in the microwave for just 5-10 seconds – but be very careful not to overheat them, or they’ll get gooey and messy. For the glaze, it’s always best to apply it after the treats have fully set and just before serving if you want it to look its best. If you’re freezing them, I’d recommend glazing them *after* thawing, but if you’re just storing them at room temp or in the fridge, glazing them right after they set is usually fine.
Frequently Asked Questions
Final Thoughts
So there you have it, my friends – the recipe for pure, unadulterated joy in the form of Lucky Charms Treats! I truly believe this recipe is a little bit of magic captured in edible form. It’s more than just a sweet treat; it’s a trip down memory lane, a burst of happiness, and a reminder that sometimes, the simplest things bring the most delight. Whether you’re making them for a party, a bake sale, or just to brighten up your own day, I promise they won’t disappoint. They’re incredibly easy to make, incredibly fun to look at, and oh-so-satisfying to eat. If you loved this recipe, you might also enjoy my Chewy Chocolate Chip Cookies or my Easy No-Bake Energy Bites – they’re also big hits in my house! I can’t wait to hear what you think of these Lucky Charms Treats. Please, pretty please, leave a comment below and let me know how yours turned out, or if you have any fun variations you tried. Sharing your culinary adventures makes my day! Happy baking, and may your days be as bright and colorful as these treats!
Lucky Charms Treats
Ingredients
Main Ingredients
- 3 tablespoons butter
- 10 ounces marshmallows
- 6 cups lucky charms cereal
- 1 teaspoon vanilla extract
Instructions
Preparation Steps
- Line a 9x13 inch baking pan with parchment paper or lightly grease it.
- In a large microwave-safe bowl, melt the butter on high power in 30-second intervals, stirring after each, until fully melted.
- Add the marshmallows to the melted butter and microwave on high power for 2-3 minutes, stirring every minute, until the marshmallows are melted and smooth.
- Stir in the vanilla extract.
- Add the Lucky Charms cereal to the marshmallow mixture and stir until well combined. Make sure all the cereal is coated.
- Gently press the mixture into the prepared baking pan, spreading it evenly. You can use a greased spatula or your hands to press it down.
- Let the treats cool completely for at least 30 minutes before cutting into squares.
