
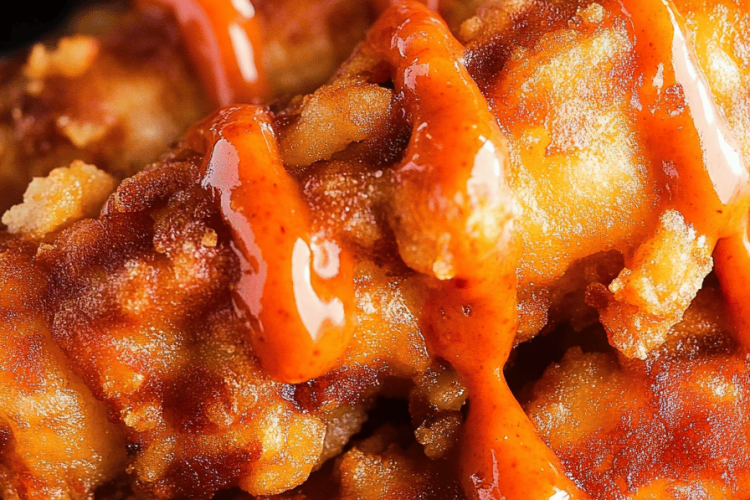
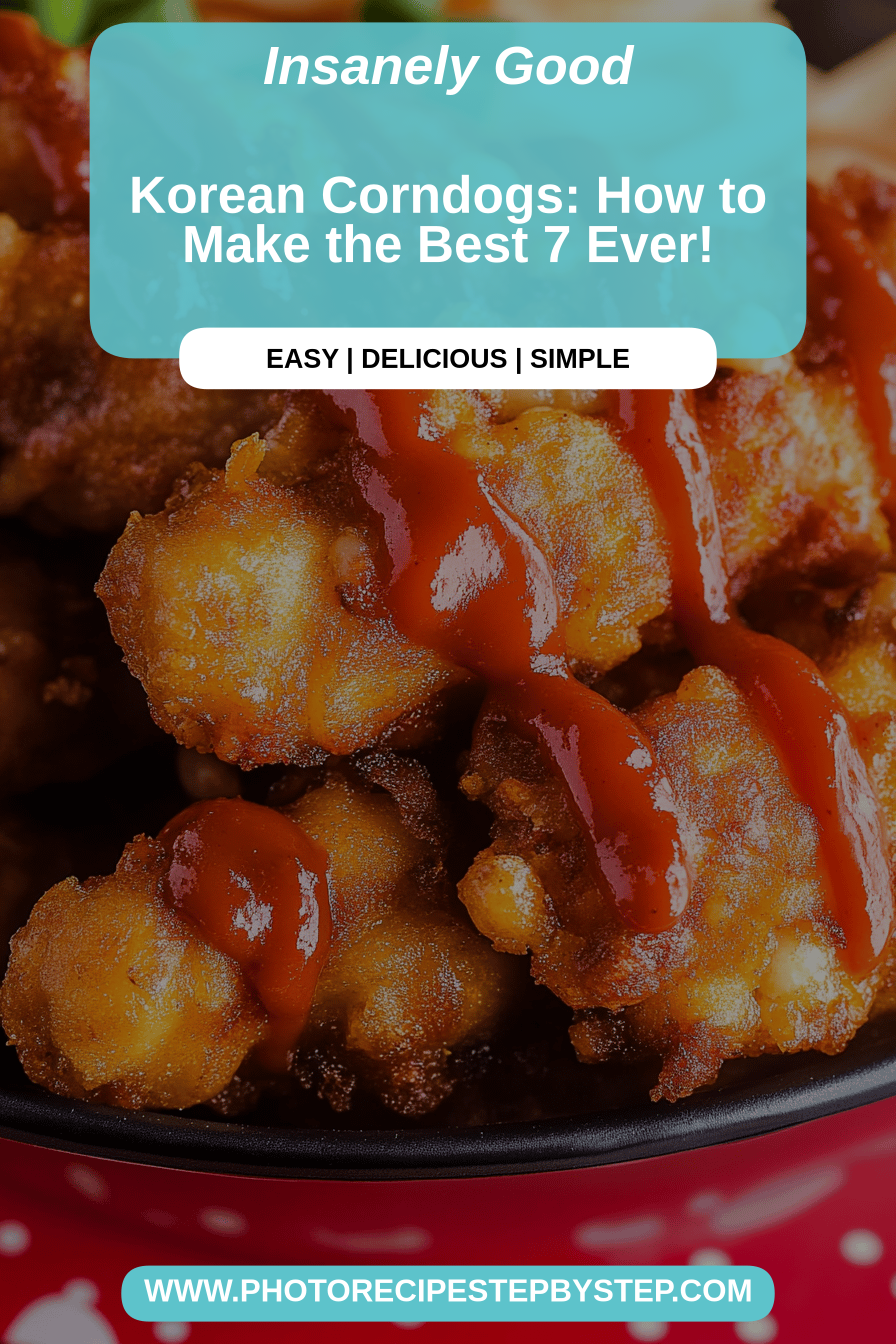
You know those moments when a craving hits, a *really* specific craving? For me, lately, it’s been all about Korean corndogs. Not just any corndog, mind you. I’m talking about the ones you see all over social media – those thick, loaded-up beauties with the impossibly crispy coating and the gooey, cheesy center. They look like a work of art, right? Well, let me tell you, they taste even better. My kids absolutely lose their minds over these. It all started a few months ago when we stumbled upon a little Korean street food spot downtown. One bite, and I was hooked. The texture, the sweet and savory combo, the sheer fun of it all! It reminded me a bit of those old-school corn dogs we used to get at the county fair, but elevated to a whole new level. If you’ve ever thought making something this cool was too intimidating, trust me, you’re going to want to hear this. I’ve spent weeks perfecting this recipe in my own kitchen, and I’m so excited to share my foolproof method for making amazing Korean corndogs right at home. Forget takeout, this is going to be your new go-to for a fun family meal or a seriously satisfying snack.
What are Korean Corn Dogs?
So, what exactly *are* Korean corndogs? Think of them as the cooler, more adventurous cousin of the classic American corn dog. They’re a fantastic Korean street food that takes things up a notch. Instead of just a simple cornmeal batter, these guys often feature a chewy, slightly sweet dough, almost like a bread dough, wrapped around a skewer. And the fillings? Oh, the fillings! While you can certainly stick with a classic hot dog, the real magic happens when you combine it with things like stretchy, melty mozzarella cheese, or even a mix of both. Then, they’re usually coated in a crunchy topping before frying – think panko breadcrumbs, crushed ramen noodles, or even diced potatoes! It’s this incredible contrast of textures and flavors that makes them so irresistible. It’s essentially a delicious, handheld party on a stick!
Why you’ll love this recipe?
Honestly, there are so many reasons why this Korean corndog recipe has become a staple in my kitchen. First off, the FLAVOR. It’s this perfect harmony of salty, sweet, and savory. The crispy exterior gives way to a wonderfully chewy dough, and then you hit that amazing, melty cheese pull. It’s an experience for your taste buds, I swear! And the SIMPLICITY? Don’t let those gorgeous pictures fool you; this recipe is surprisingly easy to make at home. I’ve broken down every step so that even if you’re not a seasoned baker, you’ll feel confident. Plus, it’s incredibly COST-EFFICIENT. Buying these fancy corndogs from specialty shops can add up quickly, but with this recipe, you get a whole batch for a fraction of the price. The VERSATILITY is also a huge win. You can customize the fillings to your heart’s content – think different cheeses, add some bacon bits, or even a little spicy sausage. What I love most about this is that it’s a total crowd-pleaser. My kids beg for these, my husband devours them, and they’re always a hit when we have friends over. It’s that perfect combination of comfort food and exciting new flavors that just works.
How do I make Korean Corn Dogs?
Quick Overview
Making these amazing Korean corndogs at home is totally doable and a lot of fun! You’ll essentially be making a simple, slightly sweet dough, wrapping it around a hot dog and/or cheese, coating it in your favorite crunchy topping, and then frying it until golden brown and crispy. The key is getting that perfect dough texture and ensuring your oil is at the right temperature for an even cook. It’s a process that’s surprisingly quick once you get the hang of it, and the results are so, so worth it. Trust me, the happy faces around the table when they bite into these make it all worthwhile!
Ingredients
For the Dough:
- 1 cup all-purpose flour. 1 cup all-purpose flour.
- 1/4 cup cornstarch (this is key for that crispiness!)
- 2 tablespoons granulated sugar
- 1 teaspoon baking powder
- 1/2 teaspoon salt
- 1 cup milk (whole milk gives the best texture, but any will work)
- 1 large egg
- 1 teaspoon vanilla extract (optional, but adds a lovely subtle sweetness)
For the Filling:
- 8-10 hot dogs (your favorite kind! I like a good quality all-beef one)
- 8-10 sticks of mozzarella cheese (cut to roughly the same size as your hot dogs, or slightly larger if you want more cheese!)
- Wooden skewers
For the Coating & Frying:
- 1 cup panko breadcrumbs (essential for that extra crunch!)
- 1/2 cup finely crushed potato chips or corn flakes (optional, for an extra layer of flavor and crunch)
- Vegetable oil or other neutral frying oil, for frying
Step-by-Step Instructions
Step 1: Preheat & Prep Pan
First things first, let’s get our frying station ready. You’ll need a deep pot or Dutch Oven for frying. Pour enough vegetable oil into it to come about 2-3 inches up the sides. We’re aiming for an oil temperature of about 350°F (175°C). It’s super important to have a thermometer to monitor this! If your oil isn’t hot enough, the corndogs will be greasy. If it’s too hot, they’ll burn on the outside before the inside is cooked. So, get that oil heating over medium heat while we prepare the batter. While the oil heats up, you’ll also want to prepare your skewers. Carefully push a skewer into the end of each hot dog and mozzarella stick, making sure it’s secure. If you’re doing a hot dog and cheese combo, skewer them both together, with the hot dog on the bottom and the cheese on top, or vice versa – whatever you prefer!
Step 2: Mix Dry Ingredients
In a medium-sized bowl, we’re going to whisk together all our dry ingredients for the batter. This includes the all-purpose flour, cornstarch (don’t skip this!), sugar, baking powder, and salt. Whisk them really well until everything is thoroughly combined and there are no clumps of flour. This step ensures that your batter will be nice and even, with all the leavening and flavor distributed perfectly. It might seem simple, but it makes a difference in the final texture!
Step 3: Mix Wet Ingredients
Now, in a separate, larger bowl, we’ll mix the wet ingredients. Crack your egg into the bowl, add the milk, and the vanilla extract if you’re using it. Whisk these together until they’re well combined. Again, a good whisking here helps to break up the egg yolk and create a smooth, homogenous liquid base for our batter.
Step 4: Combine
It’s time to bring our wet and dry ingredients together! Gradually pour the wet ingredients into the bowl with the dry ingredients. Whisk everything together until *just* combined. You want a batter that’s smooth but still has a few small lumps – that’s perfectly okay! Overmixing at this stage can develop the gluten too much, which will result in a tough corndog. We’re going for a nice, slightly thick but pourable consistency, similar to pancake batter. If it seems too thick, you can add a tablespoon or two more milk; if it seems too thin, a tablespoon more flour. Let the batter rest for about 5-10 minutes while you get your coating station ready.
Step 5: Prepare Filling
This is where you can get creative! For the classic Korean corndog experience, you’ll want to skewer your hot dogs and cheese. Make sure your cheese sticks are cut to a size that will cover the hot dog nicely. I love using a good quality mozzarella because it gets so wonderfully stretchy and gooey when fried. You can also do a hot dog and cheese combo, or even just a cheese-only corndog if that’s your jam! The key is to have them ready and on skewers before you start dipping them into the batter.
Step 6: Layer & Swirl
This is the part that makes Korean corndogs so unique! You’ll want to have a shallow dish with your panko breadcrumbs and any other coatings (like crushed potato chips or cornflakes) ready to go. Now, take your skewered hot dog and cheese and dip it into the batter, making sure it’s fully coated. Let any excess batter drip off for a second. Then, roll it in your chosen coating, pressing gently to make sure it adheres well. You want a nice, even layer of coating all around. Some people like to do a double dip in the batter and then the coating for an even thicker crust, and that’s totally delicious too!
Step 7: Bake
Carefully place the coated corndogs into the hot oil. Don’t overcrowd the pot – fry them in batches of 2-3 at a time so the oil temperature doesn’t drop too much. Fry them for about 3-5 minutes, turning them occasionally with tongs, until they are a beautiful golden brown and crispy all over. Keep an eye on them, as they can go from perfectly golden to burnt pretty quickly! Once they’re done, carefully remove them from the oil using your tongs and place them on a wire rack set over a baking sheet to drain any excess oil. This is where that wire rack really shines – it prevents them from getting soggy on the bottom.
Step 8: Cool & Glaze
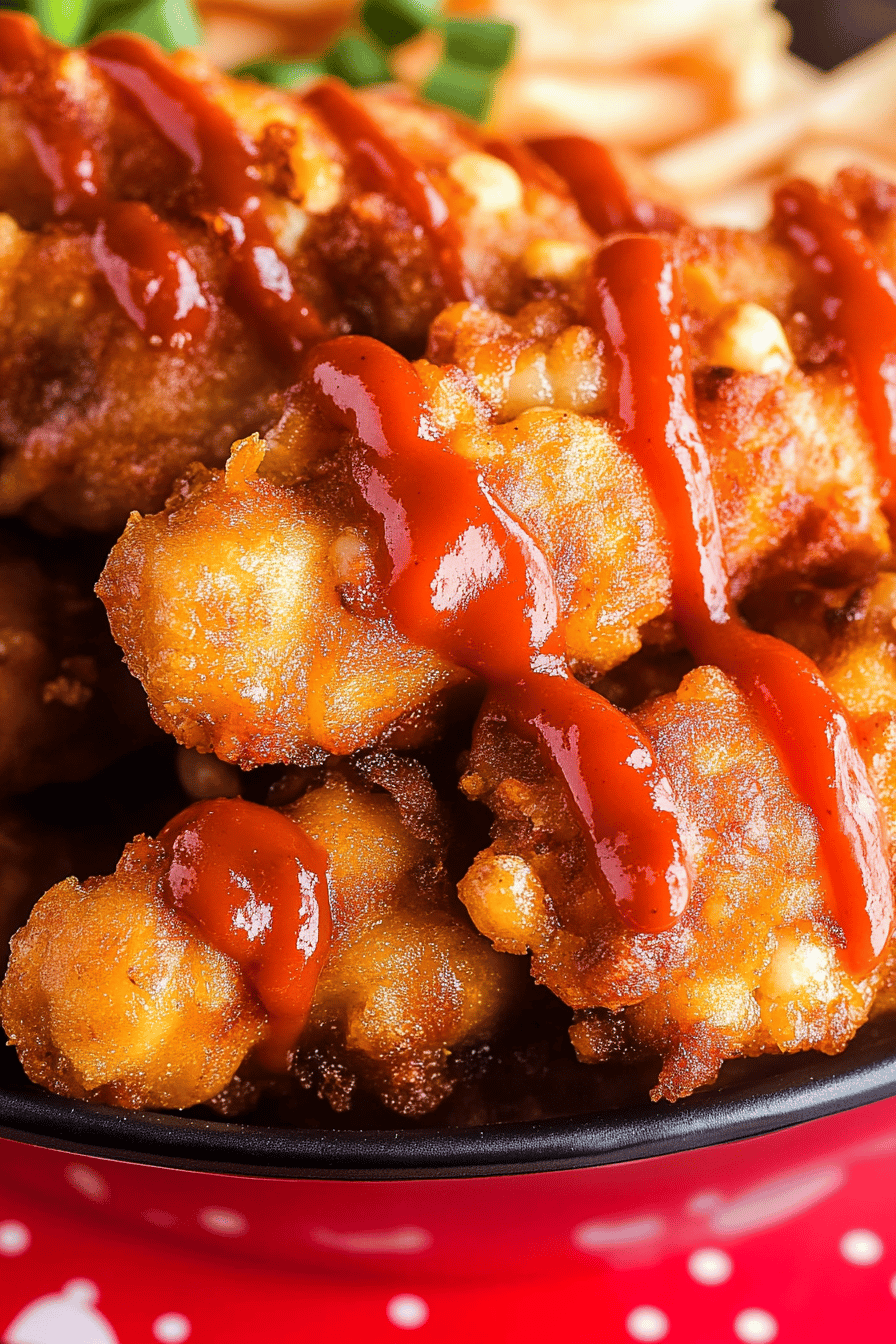
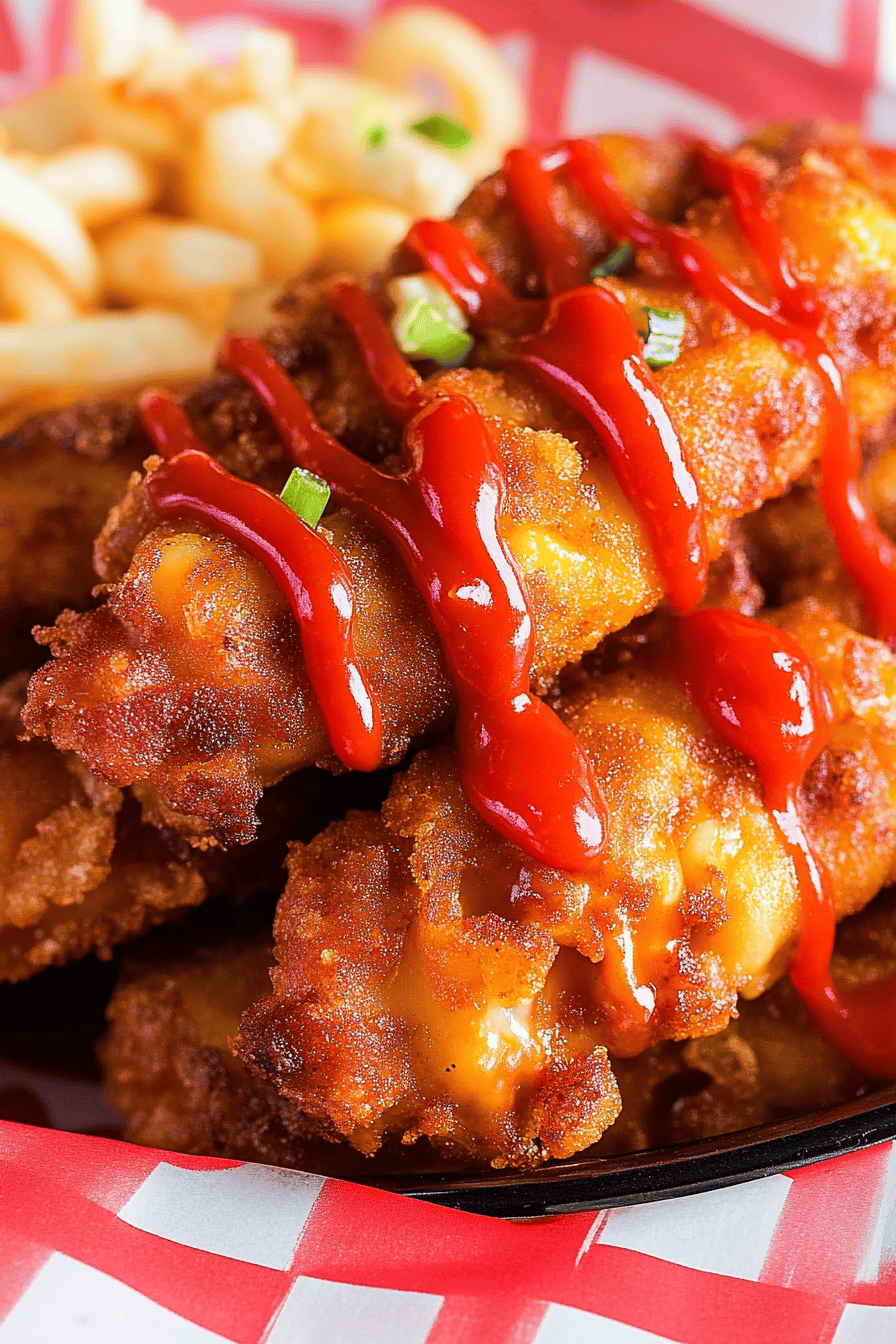
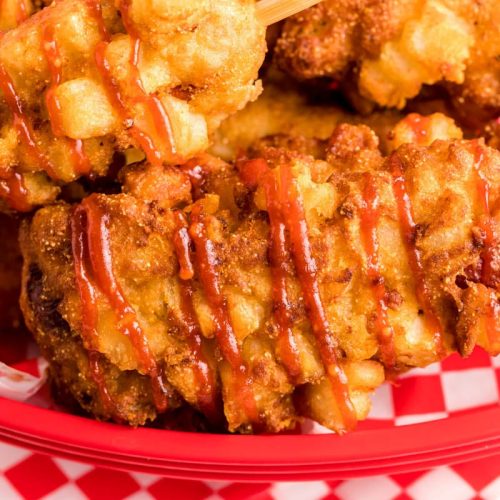
Let your freshly fried Korean corndogs cool slightly on the wire rack for just a minute or two. You don’t want them to be piping hot when you glaze them, but you also don’t want them to cool down completely. While they’re still warm, that’s the perfect time to add any optional drizzles of ketchup, mustard, or even a Sweet Chili sauce. Some people like to add a simple sugar glaze or even a dusting of parmesan cheese. The heat from the corndog helps the glaze adhere beautifully.
Step 9: Slice & Serve
Once they’ve cooled for just a few minutes, your amazing Korean corndogs are ready to be enjoyed! The best way to serve them is immediately, while they’re still warm and the cheese is wonderfully melty. You can serve them as is, or with a side of your favorite dipping sauces. I often slice them in half diagonally before serving, just to show off that amazing cheese pull and make them a little easier for little hands to manage. They are just pure joy on a stick!
What to Serve It With
While these Korean corndogs are totally a meal in themselves, they also pair wonderfully with a few things to round out the experience. For a fun family meal, I love serving them alongside some crispy, garlicky soy sauce noodles or a refreshing, crisp cucumber salad. If you’re looking for a more substantial meal, a side of steamed rice and some quick-pickled radishes (danmuji) is always a hit. They’re also fantastic as part of a larger appetizer spread for a party. Think of them as the star attraction, surrounded by some spring rolls, kimchi pancakes, and maybe some fried dumplings. For a lighter, brunch-style option, a simple side salad with a ginger-sesame dressing works beautifully. And for those late-night cravings, honestly, just a few of these corndogs with a cold soda or even a glass of milk is absolute perfection. My kids always ask for ketchup and mustard, but I’ve also found that a spicy mayo or a sweet chili sauce really elevates the flavor profile.
Top Tips for Perfecting Your Korean Corn Dogs
Okay, so you want those perfect, Instagram-worthy Korean corndogs? I’ve definitely learned a few tricks along the way, so listen up! First, when it comes to the dough, don’t be tempted to overmix. A few small lumps are better than a tough batter. I always say to whisk until *just* combined. For the coating, make sure your panko breadcrumbs are nice and fresh. Stale breadcrumbs won’t get as crispy. I also love adding a bit of crushed potato chips or corn flakes to the panko for an extra layer of texture and flavor – it sounds a little crazy, but trust me, it’s a game-changer! When you’re coating the corndogs, really press the breadcrumbs on so they stick well; this prevents them from falling off during frying. The oil temperature is CRUCIAL. I cannot stress this enough. Use a thermometer and keep it steady around 350°F (175°C). If it drops too low, you’ll get greasy corndogs, and if it’s too high, they’ll burn before cooking through. Don’t overcrowd the pot when frying – do it in batches! This ensures the oil stays hot enough to cook them perfectly. For the fillings, I’ve found that using room-temperature mozzarella cheese helps it melt more evenly. If you’re using the cheese and hot dog combo, make sure they are roughly the same diameter and length so the batter coats them evenly. I tried using a different type of cheese once, and it didn’t melt as well, so stick with mozzarella if you can! And finally, for the best crunch, serve these hot dogs immediately after frying and draining. They are truly at their peak then.
Storing and Reheating Tips
I get it, sometimes you make a big batch and there are leftovers – or maybe you’re planning ahead! If you have leftover Korean corndogs that haven’t been glazed or sauced, they can be stored at room temperature for a few hours, but for longer storage, the refrigerator is your best bet. Place them in an airtight container or wrap them tightly in plastic wrap and then foil. They’ll stay good in the fridge for about 2-3 days. For freezing, these are best done *before* frying, but you can also freeze leftover fried ones. If freezing uncooked, wrap them individually in plastic wrap and then place them in a freezer-safe bag or container for up to a month. To reheat fried corndogs, the absolute best method is to pop them in an Air Fryer or a toaster oven at around 350°F (175°C) for about 5-8 minutes, or until heated through and crispy again. Microwaving them will make them soggy, so I really advise against that! If you’re reheating uncooked ones, you’ll want to fry them from frozen, which will take a little longer – maybe an extra 2-3 minutes. And if you’re planning to freeze them, I’d recommend waiting to add any glazes or sauces until *after* they’ve been reheated, for the best texture.
Frequently Asked Questions
Final Thoughts
So there you have it – my absolute favorite way to make Korean corndogs at home! I really hope you give this recipe a try. It’s one of those dishes that just brings so much joy, from the moment you start making it to the last delicious bite. The combination of that crispy, golden exterior, the chewy, slightly sweet dough, and that unbelievably gooey cheese is just pure magic. It’s a fun project to do with the kids, and they’re always a huge hit at parties or just as a special treat. If you love this recipe, you might also enjoy my recipes for [link to a similar recipe, e.g., Crispy Fried Chicken Tenders] or [link to another related recipe, e.g., Easy Cheesy Garlic Bread]. They share that same comfort food vibe and are always guaranteed to please! I can’t wait to hear how your Korean corndogs turn out. Drop a comment below and let me know your favorite fillings or coatings! Happy cooking, everyone!
Korean Corndogs
Ingredients
Dough
- 1.5 cup all-purpose flour
- 0.5 cup cornstarch
- 2 tablespoon sugar
- 0.5 teaspoon baking powder
- 0.5 teaspoon salt
- 1 large egg
- 1 cup milk
For Coating
- 4 medium potatoes cooked and finely diced
- 4 hot dog sausages
- 8 wooden skewers
- 0.5 cup panko breadcrumbs
- 2 cups vegetable oil for frying
Instructions
Preparation Steps
- In a large bowl, whisk together the flour, cornstarch, sugar, baking powder, and salt for the dough.
- In a separate bowl, whisk the egg and milk. Add the wet ingredients to the dry ingredients and mix until just combined. Do not overmix.
- If your potatoes are not already cooked, boil or steam them until tender. Dice them finely. You can also use leftover mashed potatoes if they are firm enough.
- Insert a skewer into each sausage. Make sure they are firmly in place.
- Dip each sausage into the prepared dough, ensuring it is fully coated. Let any excess drip off.
- Immediately roll the dough-coated sausage in the diced potatoes, pressing gently to adhere. You can also add a layer of panko breadcrumbs for extra crispiness if desired.
- Heat the vegetable oil in a deep pot or Dutch oven over medium-high heat to about 350°F (175°C).
- Carefully place the coated corndogs into the hot oil, being careful not to overcrowd the pot. Fry for 3-5 minutes, turning occasionally, until golden brown and crispy.
- Remove the corndogs from the oil and place them on a wire rack to drain excess oil.
- Serve hot with your favorite dipping sauces like ketchup, mustard, or sriracha mayo.
