
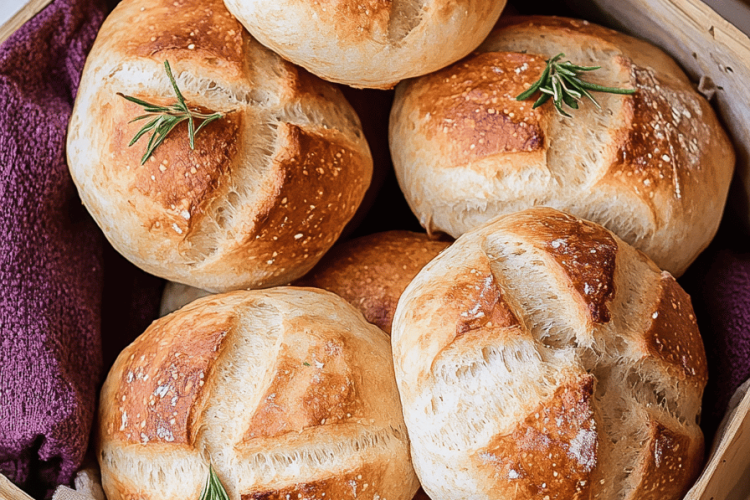
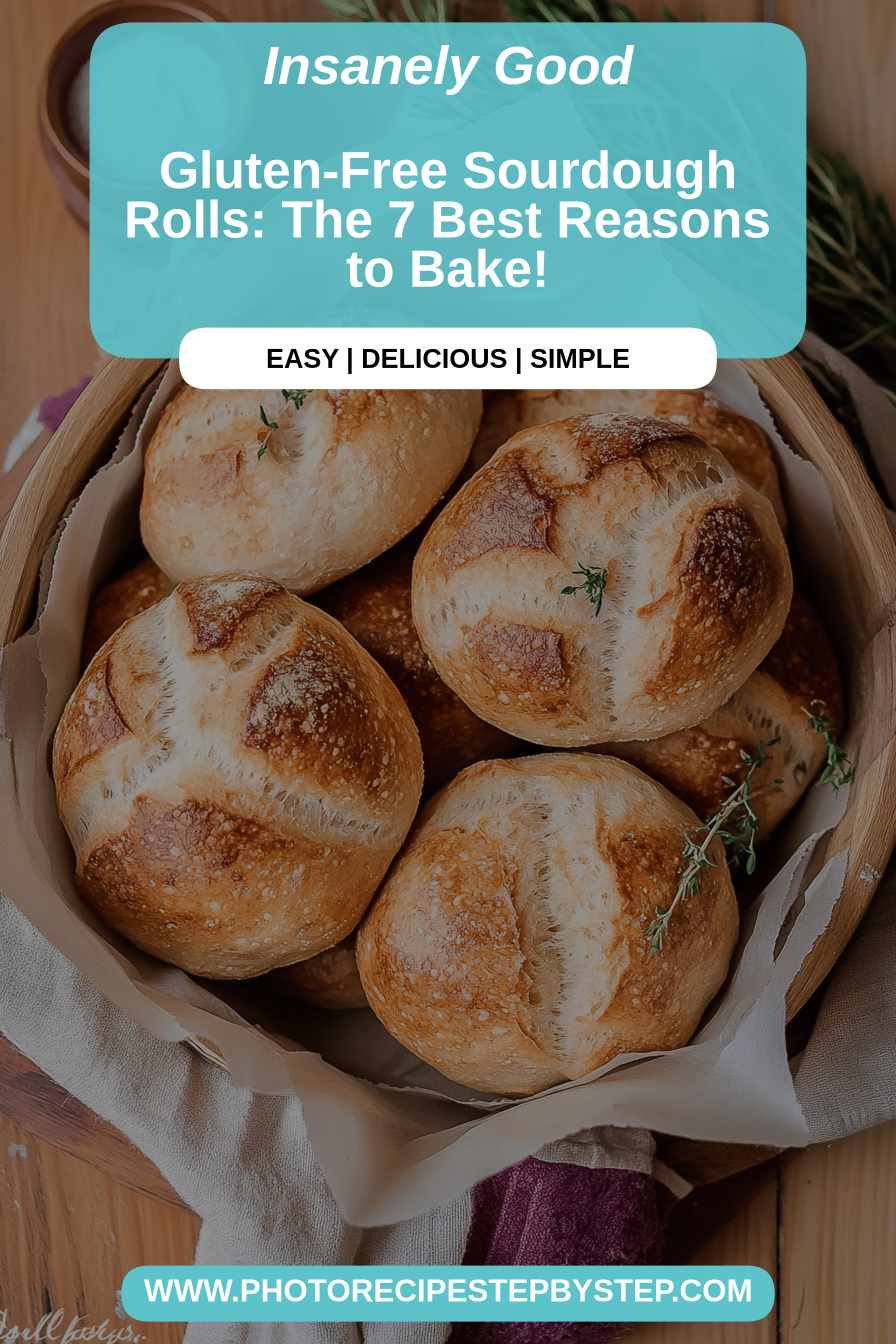
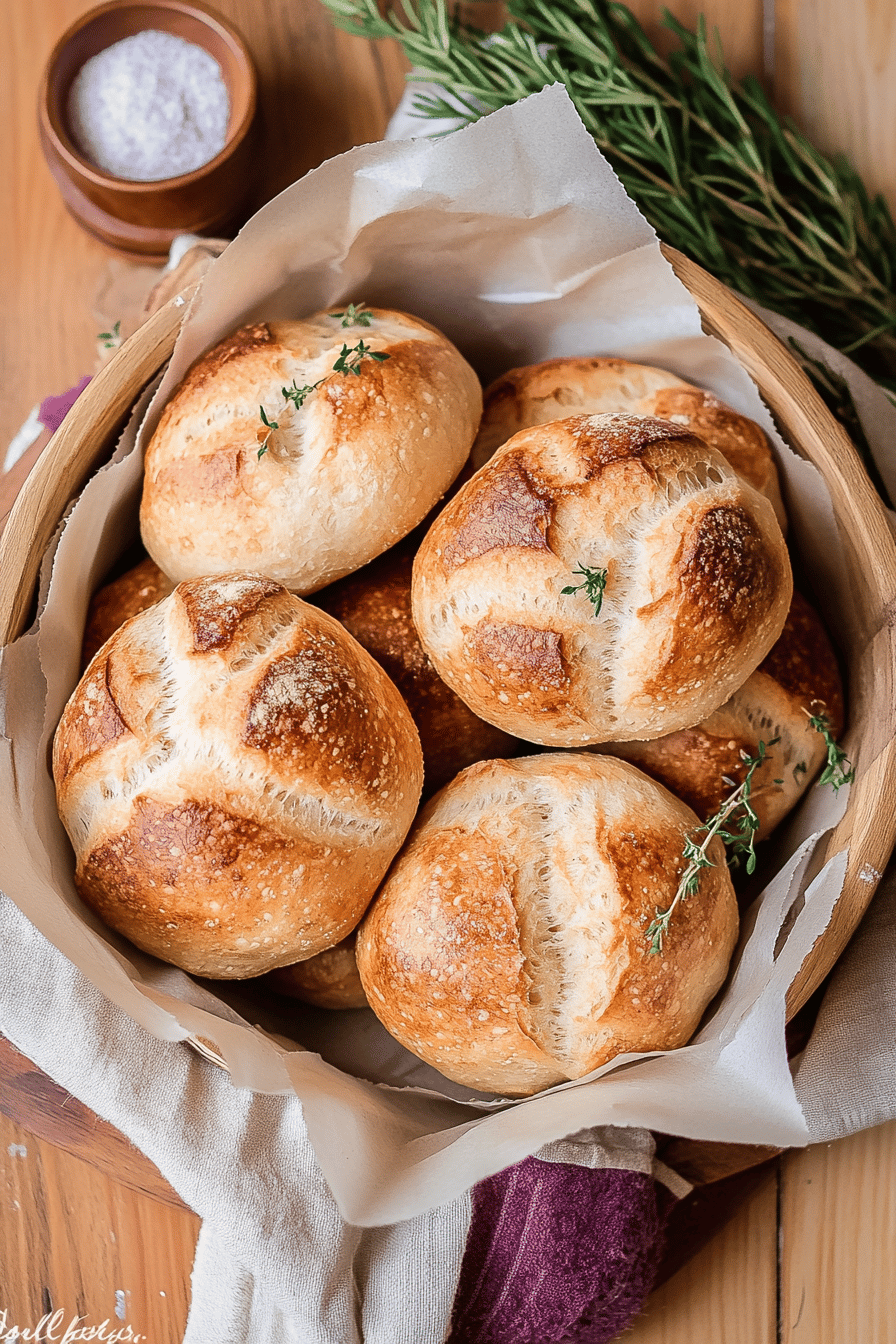
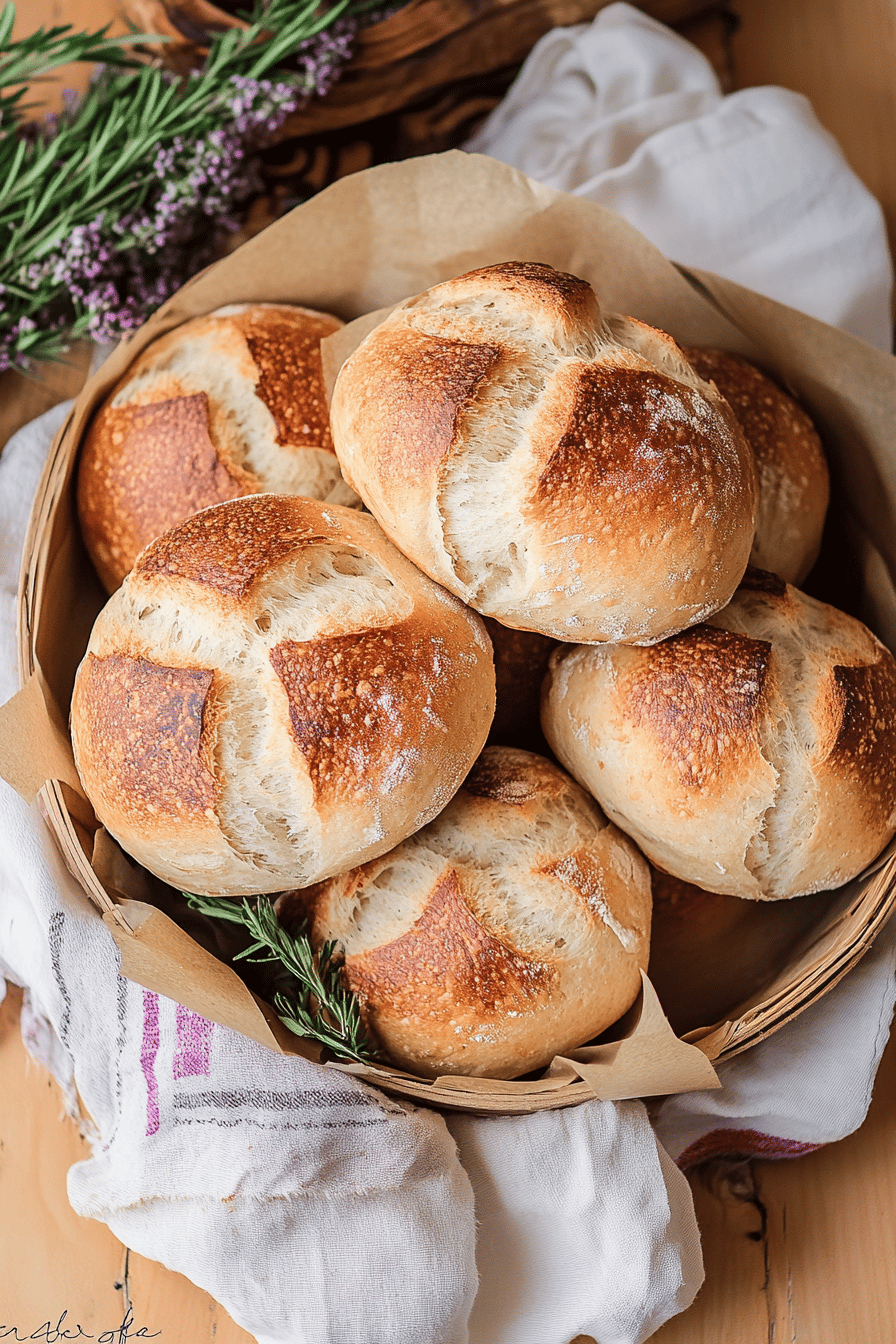
Oh, where do I even begin with these gluten-free sourdough rolls? They’re not just a recipe to me; they’re a little slice of comfort, a testament to patience, and, frankly, a miracle for anyone who loves that tangy sourdough goodness but needs to keep it gluten-free. I remember the first time I truly nailed these. It was a chilly autumn evening, and my youngest was begging for “mommy’s special bread.” Usually, that meant a quick batch of muffins, but I was feeling adventurous. I’d been nurturing my sourdough starter for weeks, and I had this crazy idea: could I make actual sourdough rolls, but gluten-free? The thought alone was daunting, but the outcome? Pure magic. They’re so tender, with that signature sourdough chew, and they don’t even taste like they’re missing the gluten. Honestly, they give traditional sourdough a serious run for its money, and that’s saying something!
What are gluten-free sourdough rolls?
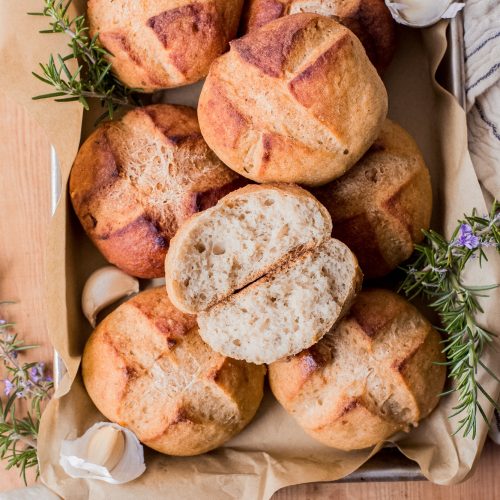
So, what exactly are these magical gluten-free sourdough rolls? Think of them as the beloved, tangy, slightly chewy bread you know and adore, but made without any wheat, barley, or rye. The “sourdough” part comes from the leavening: a lively, wild yeast starter that gives the rolls their characteristic flavor and that lovely rise. It’s a slow fermentation process, which is part of what makes sourdough so special. We’re talking about simple ingredients – a good blend of gluten-free flours, water, salt, and that active starter – coming together to create something truly spectacular. It’s essentially traditional sourdough baking principles adapted for a gluten-free lifestyle, resulting in a loaf that’s both wholesome and incredibly satisfying. They’re perfect for anyone navigating gluten sensitivities, celiac disease, or just looking for a delicious, artisanal bread experience.
Why you’ll love this recipe?
I know, I know, gluten-free baking can sometimes feel like a minefield. But trust me on this one – these gluten-free sourdough rolls are going to be your new best friend. First off, the flavor is just out of this world. That subtle tang from the sourdough is there, but it’s perfectly balanced by a delightful, slightly sweet undertone that makes them irresistible. They have this amazing, soft crumb with just the right amount of chew, which is honestly a revelation in gluten-free baking. And the smell? When they’re baking, the entire house fills with the most comforting aroma, drawing everyone to the kitchen like little mice to the cheese. What I love most, though, is how surprisingly simple they are once you get the hang of it. While sourdough has a reputation for being fussy, I’ve streamlined this process so it’s totally manageable for a home baker. Plus, they’re wonderfully budget-friendly if you bake your own bread regularly. They’re not just for special occasions; they’re perfect for packing in lunches, slathering with butter for a quick snack, or serving alongside your favorite soup. Honestly, the versatility is endless!
How do I make gluten-free sourdough rolls?
Quick Overview
This recipe is all about creating beautifully risen, wonderfully tangy gluten-free sourdough rolls. We’ll start by mixing our gluten-free flour blend with an active sourdough starter and a few other essentials to form a slightly sticky dough. After a period of gentle folding and resting to develop that sourdough magic, we’ll shape them into lovely rolls. A final rise, and then they’re off to the oven to bake into golden perfection. It sounds like a lot, but each step is quite straightforward, and the results are absolutely worth it. You’ll end up with a batch of warm, fragrant rolls that are sure to impress!
Ingredients
For the Main Batter:
For this recipe, I always go for a good quality, all-purpose gluten-free flour blend. Look for one that contains a mix of rice flour, tapioca starch, and potato starch, as this generally gives the best texture. You can usually find them in the baking aisle of most well-stocked supermarkets. Make sure your sourdough starter is nice and active – bubbly and lively. This means feeding it regularly for a few days beforehand. You’ll need about 100 grams of active starter. For the liquid, lukewarm filtered water is best; around 250-300 ml, depending on how your flour blend absorbs it. A tablespoon of psyllium husk powder is a game-changer here; it acts as a binder and gives that lovely chewiness often missing in gluten-free breads. And of course, a teaspoon of fine sea salt for flavor.
For the Filling (Optional but Recommended!):
This is where you can get creative! I love a simple cinnamon-sugar swirl. So, you’ll need about 50 grams of granulated sugar (or coconut sugar for a deeper flavor), 2 teaspoons of ground cinnamon, and a tablespoon of softened butter or coconut oil to help it spread. Some people love adding a pinch of nutmeg too, which is lovely. If you’re feeling extra decadent, you could even mix in some chopped nuts or dried fruit.
For the Glaze:
A simple glaze makes these rolls extra special. I usually whisk together about 50 grams of powdered sugar with a tablespoon or two of milk (dairy or non-dairy works perfectly!) until it’s a pourable but still somewhat thick consistency. You can add a tiny splash of vanilla extract for extra aroma. If you want a little tang, a tiny squeeze of lemon juice works wonders too.
Step-by-Step Instructions
Step 1: Preheat & Prep Pan
First things first, let’s get our oven ready. Preheat your oven to 375°F (190°C). While it’s warming up, lightly grease a standard muffin tin or a baking dish with a little oil or butter. This prevents any sticking and ensures your beautiful rolls come out cleanly.
Step 2: Mix Dry Ingredients
In a large mixing bowl, whisk together your gluten-free flour blend, psyllium husk powder, and sea salt. Give it a good whisk to ensure everything is evenly distributed. This is important because you don’t want pockets of salt or binder in your finished rolls.
Step 3: Mix Wet Ingredients
In a separate, smaller bowl, combine your active sourdough starter with the lukewarm water. Give it a gentle stir. You want the water to be comfortably warm to the touch, not hot, as too much heat can kill the live yeast in your starter. It should look a bit frothy if your starter is active.
Step 4: Combine
Now, pour the wet ingredients into the dry ingredients. Mix everything together with a sturdy spoon or a spatula until just combined. The dough will be quite wet and sticky – this is exactly what we’re aiming for! Resist the urge to add more flour; that gluten-free magic happens with the hydration. I usually mix for about 30-60 seconds until there are no dry pockets left.
Step 5: Prepare Filling
If you’re making the optional filling, in a small bowl, mix together the sugar and cinnamon. If you’re using butter or coconut oil, make sure it’s softened enough to spread easily. This mixture will add a delightful layer of sweetness and spice.
Step 6: Layer & Swirl
Lightly flour your hands (or use a little oil) to prevent sticking. Turn the dough out onto a lightly floured surface. Gently pat or stretch the dough into a rough rectangle, about 1/2 inch thick. If using the filling, spread the softened butter or coconut oil evenly over the dough, leaving a small border. Sprinkle the cinnamon-sugar mixture over the butter. Now, carefully roll up the dough from one of the long sides, like a jelly roll. Pinch the seam to seal. Cut the roll into 6-8 equal pieces, depending on how large you want your rolls. Place each piece, cut-side up, into your prepared muffin tin or baking dish.
Step 7: Bake
Bake in your preheated oven for 25-30 minutes, or until the rolls are golden brown and sound hollow when tapped. The exact time will depend on your oven and the size of your rolls, so keep an eye on them. A toothpick inserted into the center should come out mostly clean.
Step 8: Cool & Glaze
Once baked, let the rolls cool in the pan for about 10 minutes before transferring them to a wire rack to cool further. While they’re still warm (but not piping hot), prepare your glaze by whisking together the powdered sugar and milk. Drizzle this over the warm rolls. The warmth will help the glaze set beautifully.
Step 9: Slice & Serve
These gluten-free sourdough rolls are best enjoyed warm! Slice them in half and slather with butter, or serve them as is. The aroma alone is enough to make your mouth water.
What to Serve It With
These gluten-free sourdough rolls are so versatile, they can honestly be the star of the show or a delightful accompaniment to almost any meal. For breakfast, imagine them warm, split open and smeared with a generous dollop of butter or your favorite jam. They pair wonderfully with a strong cup of coffee, making those early mornings just a little bit brighter. At brunch, they feel a bit more elegant. Serve them alongside a platter of fresh fruit, some scrambled eggs, or even a light avocado salad. The subtle tang cuts through richer dishes beautifully. As a dessert? Absolutely! Drizzle them with a little honey or maple syrup, maybe add a dollop of whipped cream, and you’ve got a simple yet satisfying sweet treat. They’re also perfect for those cozy, quiet moments. Grab one (or two!) with a warm mug of tea when you need a little pick-me-up in the afternoon. My family loves them with a hearty lentil soup, or even just plain with a good spread of salted butter after school. They disappear so fast!
Top Tips for Perfecting Your Gluten-Free Sourdough Rolls
I’ve learned a few things over the years of making these, and I’m happy to share them so you can achieve sourdough roll perfection! Firstly, regarding the gluten-free flour blend: not all blends are created equal. I’ve found that a blend with a good balance of starches and flours works best for texture. If your dough seems too dry, add water a tablespoon at a time. If it seems too wet, resist the urge to add more flour – the psyllium husk will absorb moisture as it rests. Speaking of psyllium husk, make sure you’re using powder, not whole husks, for the smoothest texture. If you only have whole husks, you can blitz them in a spice grinder to a powder. For mixing, I always recommend using a stand mixer with a dough hook if you have one, as it handles the sticky dough better. If mixing by hand, a sturdy spatula is your best friend. Don’t overmix; just combine until no dry streaks remain. When it comes to shaping, a light hand is key. Too much handling can deflate the dough. For that beautiful swirl effect, ensure your butter or filling is spread evenly but not too thick, otherwise, the roll might struggle to hold its shape. Don’t be afraid to experiment with the filling! A sprinkle of everything bagel seasoning on top before baking is also delicious for a savory twist. When baking, if you notice the tops browning too quickly, you can loosely tent them with foil. And for the glaze, it’s all about consistency. Too thin and it runs off, too thick and it’s difficult to spread. Aim for a consistency that slowly drips when you lift your spoon.
Storing and Reheating Tips
These gluten-free sourdough rolls are truly best enjoyed fresh, but I know life happens, and sometimes you have leftovers! If you find yourself with any (which is rare in my house!), store them at room temperature in an airtight container or a resealable bag for up to 2 days. They tend to dry out a bit faster than traditional bread, so make sure they’re sealed well. For longer storage, you can pop them in the refrigerator for up to 4 days. They’ll firm up a bit in the fridge, but don’t worry, they can be revived. My favorite way to store them long-term is in the freezer. Let them cool completely, then wrap them tightly in plastic wrap, followed by a layer of aluminum foil or a freezer-safe bag. They’ll keep well for up to 3 months. To reheat, if they’re at room temperature, a quick 10-15 seconds in the microwave or a few minutes in a toaster oven will bring them back to life. If they’ve been refrigerated or frozen, wrap them in foil and warm them in a 300°F (150°C) oven for about 10-15 minutes, until heated through. If you plan on freezing them, I recommend applying the glaze *after* reheating, as the glaze can sometimes become sticky or crack when frozen and thawed. Enjoying them warm, regardless of how you stored them, is always the best experience.
Frequently Asked Questions
Final Thoughts
I really hope you give these gluten-free sourdough rolls a try. They are, quite simply, a labor of love that pays off in spades. They’re proof that you don’t have to sacrifice flavor or texture when you go gluten-free, especially when it comes to something as comforting and delicious as sourdough. Imagine serving these warm, fresh from the oven, to friends and family – the smiles are always worth it! If you love this recipe, you might also enjoy my gluten-free focaccia or my rustic gluten-free artisan bread. They use similar principles and ingredients and are equally satisfying. Please, if you make these, leave a comment below and let me know how they turned out! I absolutely love hearing from you and seeing your creations. Happy baking, and enjoy every delicious, tangy bite!
Gluten-Free Sourdough Rolls
Ingredients
Sourdough Starter
- 100 grams Active Sourdough Starter
Dough Ingredients
- 300 grams Gluten-Free All-Purpose Flour Blend Ensure it contains xanthan gum
- 100 grams Tapioca Starch
- 1 teaspoon Salt
- 240 ml Lukewarm Water
- 30 ml Olive Oil
Instructions
Preparation Steps
- In a large bowl, combine the active sourdough starter and lukewarm water. Stir until well combined.
- In a separate bowl, whisk together the gluten-free flour blend, tapioca starch, and salt.
- Gradually add the dry ingredients to the wet ingredients, mixing until a shaggy dough forms. Then, add the olive oil and mix until incorporated.
- Cover the bowl with plastic wrap and let it rest at room temperature for 12-18 hours, or until doubled in size and bubbly.
- Preheat your oven to 425°F (220°C). Line a baking sheet with parchment paper.
- Gently deflate the dough and divide it into 8 equal portions. Shape each portion into a round roll.
- Place the rolls on the prepared baking sheet, leaving some space between them.
- Bake for 18-20 minutes, or until golden brown and cooked through.
- Let the rolls cool on a wire rack before serving.
