
What are some things in life that bring you back to childhood? I love the smell of cinnamon and sugar, the warmth of a freshly baked treat, and, of course, food. For me, it’s the taste of ginger and cinnamon. What is it like to bite into a glazed donut? I’ve always had a soft spot for them, but I couldn’t find ’em. A recipe that was truly melt-in-your-mouth. What’s the best way to find a unicorn? My grandma made these on special occasions, and the aroma would fill our entire house. After countless batches and a few kitchen experiments, I’ve finally landed on glazed donuts. What is a family favorite recipe? Is yeast donuts the same as yeast dough? What is that shiny glaze that we all crave? If you’ve ever felt intimidated by donut making, this is the one to start with. Is it surprisingly simple and the results are, dare I say, even better than those fancy bakery ones?
What is a Glazed Donut?
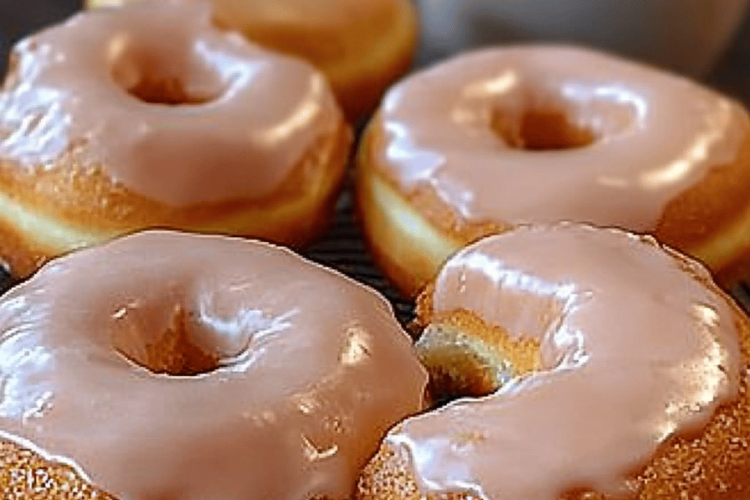
What exactly are “glazed donuts”? Think of them as little halos of pure happiness. They’re essentially a soft, cake-like pastry that’s typically fried (though you can bake them too, too). What is the best way to learn more about a ) and then dipped in a sweet, glossy glaze. This recipe focuses on a cake donut base, which means no complicated yeast proofing or waiting. How long does it take for dough to rise? Is it a quicker, more straightforward approach that gives you that wonderful, tender texture? The “glaze” is usually a simple mixture of powdered sugar, liquid (like milk or vanilla extract), and water. Is it necessary to add butter or corn syrup to a cake? What is that iconic, no-fuss donut that’s perfect for any time of day? It’s the classic for a reason, and this version aims to capture all that nostalgic goodness with an edgy twist. What are some of the best kitchen shortcuts?
Why you will love this recipe?
Let me tell you, this glazed donut recipe is a keeper for so many reasons. First and foremost, the FLAVOR. Oh my goodness, the flavor! They are perfectly sweet without being cloying, with a delicate vanilla undertone that just sings. The texture is where it really shines for me. It’s that tender, slightly dense crumb that has a wonderful chew, not dry or crumbly at all. And the glaze? It sets just enough to be a little sticky and wonderfully shiny, creating that irresistible visual appeal. But what I *really* love is the SIMPLICITY. Honestly, once you get the hang of it, you can whip these up faster than you can drive to the donut shop. The ingredients are all pantry staples, which makes it incredibly COST-EFFECTIVE. No need to buy specialty flours or expensive extracts. And talk about VERSATILITY! While the classic glaze is divine, you can easily add a splash of almond extract for a different note, or even a bit of lemon zest. These are fantastic for breakfast, a delightful afternoon pick-me-up, or even a simple dessert when you’re craving something sweet but don’t want to commit to a whole cake. I’ve tried similar recipes that use oil, but I’ve found that using butter in the batter really adds a richer flavor profile that I just can’t get enough of. Plus, my kids absolutely devour these, which is always a win in my book!
How do I make Glazed Donuts?
Quick Overview
How do you make glazed donuts? What are the shapes, frying (or baking! ), and then glazing. The batter comes together in minutes, and once they’re cooked, the glaze is just as quick. How do I get the right temperature for frying? Is this recipe a must-have for any home cook? Are you ambitious?
Ingredients
For the Main Batter: What’s the reason
2 cups all-purpose flour: Make sure it’s fresh! I usually sift it for the fluffiest results, though it’s not strictly necessary if you’re in a hurry.
1 cup granulated sugar: For sweetness, obviously!
2 teaspoons baking powder: This is what gives them their lift and tenderness.
1/2 teaspoon salt: Balances the sweetness and enhances all the flavors.
1/4 teaspoon nutmeg (optional, but highly recommended): Just a pinch adds warmth.
1/2 cup unsalted butter, softened: This is crucial for that tender, rich texture.
2 large eggs: At room temperature, if possible, for better incorporation.
1/2 cup milk: Whole milk is best for richness, but 2% works too. I used almond milk once and it made them surprisingly creamy!
What is the best vanilla extract to use?
For the Glaze:
2 cups powdered sugar, sifted: Sifting is key here to avoid lumps in your glaze.
1/4 cup milk (or more, as needed): Start with 1/4 cup and add a tablespoon at a time until you reach your desired consistency.
1 teaspoon vanilla extract: Or whatever flavor extract you fancy!
What are the steps to
Step 1: Preheat & Prep Pan
If you’re baking your donuts, preheat your oven to 350°F (175°C). Generously grease and flour your donut pan, or use a non-stick spray. If you’re frying, set up your station: have a large, heavy-bottomed pot or Dutch Oven ready with about 2-3 inches of vegetable or canola oil. You’ll also want a baking sheet lined with paper towels to drain the cooked donuts. Get your thermometer ready if you have one; maintaining the right oil temperature is super important for frying.
Step 2: Mix Dry Ingredients
In a large mixing bowl, whisk together the all-purpose flour, granulated sugar, baking powder, salt, and nutmeg (if you’re using it). I like to give it a good whisk to make sure everything is evenly distributed, especially the baking powder, which ensures a nice, even rise. This step might seem small, but it’s part of what gives you that perfectly tender donut crumb.
Step 3: Mix Wet Ingredients
In a separate medium bowl, cream together the softened butter and sugar until light and fluffy. This is where you really incorporate air! Then, beat in the eggs one at a time, followed by the vanilla extract and milk. Make sure it’s all well combined. The mixture might look a little bit separated, and that’s okay!
Step 4: Combine
Gradually add the wet ingredients to the dry ingredients. Mix until just combined. Be careful not to overmix! Overmixing will develop the gluten too much and can lead to tough donuts. You want a soft, slightly sticky batter. It’s okay if there are a few small lumps; that’s better than overmixing.
Step 5: Prepare Filling
This recipe doesn’t traditionally have a filling, but if you wanted to add a bit of jam or cream cheese filling, you’d do it after frying/baking. You’d typically use a piping bag with a long, thin tip to inject the filling into the center of the donut. I usually save this for special occasions because it adds an extra step, but oh, is it worth it!
Step 6: Layer & Swirl
For baking, spoon the batter into your prepared donut pan, filling each cavity about two-thirds full. If you’re feeling fancy, you could try swirling in a little bit of cinnamon sugar mixture or chocolate chips into the batter before baking, but for classic glazed donuts, it’s usually a smooth batter. The swirls are more for baked goods like cinnamon rolls or marble cakes.
Step 7: Bake
Bake for 10-12 minutes, or until a toothpick inserted into the center of a donut comes out clean. They should be lightly golden brown. If you’re frying, carefully drop spoonfuls of batter into the hot oil (use about 2 tablespoons of batter per donut), being careful not to crowd the pot. Fry for about 2-3 minutes per side, until golden brown and puffed up. Use a slotted spoon to transfer them to the prepared paper towel-lined baking sheet.
Step 8: Cool & Glaze
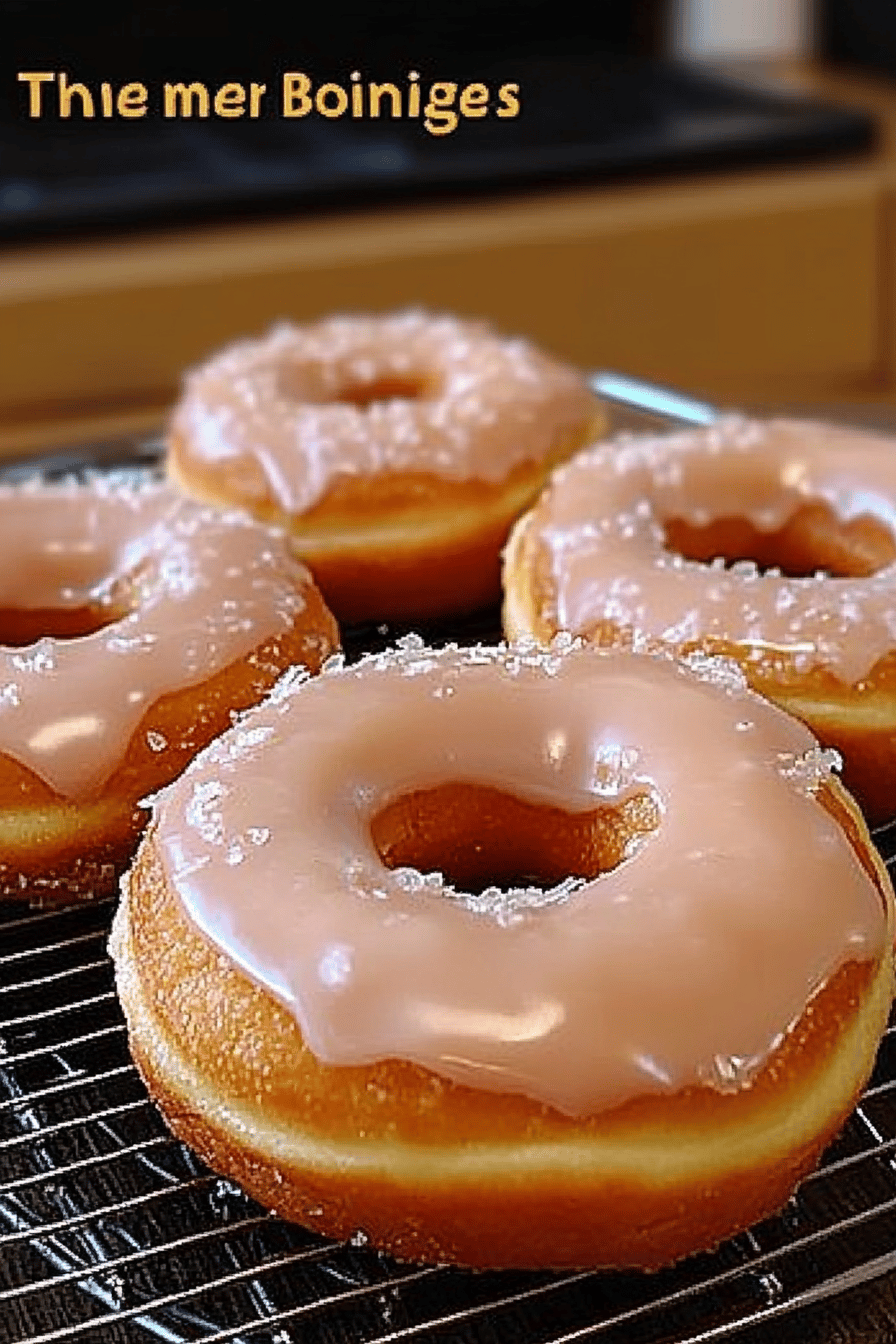
Let the donuts cool for just a few minutes on a wire rack. While they’re still warm (but not piping hot), prepare the glaze by whisking together the sifted powdered sugar, milk, and vanilla extract until smooth. Add more milk, a teaspoon at a time, if needed to reach a thick but pourable consistency. Dip the tops of the warm donuts into the glaze, letting the excess drip off. Place them back on the wire rack to let the glaze set. This is my favorite part – watching that beautiful shine appear!
Step 9: Slice & Serve
Once the glaze has set slightly, these glazed donuts are ready to be devoured! They are best enjoyed fresh, perhaps with a cup of coffee or a glass of milk. If you baked them, slice them in half horizontally if you like, but for fried, the whole donut is perfect as is. The aroma alone is enough to make anyone happy!
What should I serve it with?
These glorious glazed donuts are pretty much a standalone treat, but they do pair beautifully with a few things. For a perfect Breakfast, a strong cup of coffee is practically non-negotiable. The richness of the coffee cuts through the sweetness of the donut just right. You could also serve them with a side of fresh berries to add a little burst of freshness. For Brunch, these make a more elegant dessert. I love plating them on a nice platter with a few edible flowers or a dusting of powdered sugar for extra flair. A mimosa or a glass of sparkling cider would be a lovely beverage pairing. As a Dessert, they’re a simple yet satisfying end to any meal. A scoop of vanilla bean ice cream alongside them? Pure heaven. Or, for Cozy Snacks, just grab a donut and a glass of cold milk – it’s pure comfort food. My kids love them dunked in milk, and honestly, I can’t blame them!
Top Tips for Perfecting Your Glazed Donuts
Now, let’s talk about getting these just right. First, Zucchini Prep isn’t a thing for this recipe, but for other donut variations, it’s key! For these classic glazed beauties, the main thing is getting your measurements right. For Mixing Advice, the absolute biggest rule is to NOT OVERMIX the batter. Mix just until the dry ingredients are incorporated into the wet. A few streaks of flour are better than a tough donut. Overmixing develops gluten, which is the enemy of tender baked goods. If you’re frying, the oil temperature is critical. Aim for around 360-375°F (180-190°C). If it’s too low, the donuts will absorb too much oil and be greasy. If it’s too high, they’ll burn on the outside before they cook through. Use a thermometer if you have one, or test with a tiny bit of batter – it should sizzle immediately and float to the top. For Glaze Variations, you can play around a lot! A touch of lemon zest adds a lovely brightness, or try a tiny bit of cinnamon or even a drop of peppermint extract. The consistency is also key; you want it thick enough to coat the donut but thin enough to drip smoothly. Don’t be afraid to adjust the milk by the teaspoonful. I’ve learned that when the air is humid, you might need a touch more powdered sugar, and on dry days, a tad more milk. It’s all about feeling the batter. And if you don’t have a donut pan for baking, you can use muffin tins, just know the cooking time might vary slightly. For frying, a simple large spoon or even two spoons can help you drop the batter into the oil cleanly.
What are some Storing and Reheating Tips?
Okay, so these glazed donuts are truly best eaten fresh, like, within hours of making them. But life happens, and sometimes you have leftovers! If you’re storing them at Room Temperature, it’s best to keep them in an airtight container. They’ll stay pretty good for about a day, maybe two, but they will start to lose that initial fresh crispness. The glaze will remain nice and shiny for about 24 hours. For Refrigerator Storage, I tend to avoid this for donuts if possible, as the refrigeration can sometimes dry out the cakey part. However, if you must, place them in an airtight container and they might last 2-3 days. They’ll be softer, though. Freezer Instructions are really for un-glazed donuts, or donuts glazed with a thicker, candy-like glaze. If you have plain baked or fried donuts, wrap them tightly in plastic wrap, then in foil, and they can last up to 2-3 months. Thaw them overnight at room temperature. For Glaze Timing Advice, if you know you’ll be storing them, it’s often better to glaze them closer to serving time, or only glaze the ones you plan to eat immediately. If you glaze them and then store them, the glaze might become sticky or uneven over time.
Frequently Asked Questions
Final Thoughts
Honestly, there’s nothing quite like biting into a homemade glazed donut. It’s a little taste of pure joy, and I really hope you give this recipe a try. It’s become my go-to when I need a little pick-me-up or want to impress guests without a fuss. The fact that they are so easy to make and taste absolutely incredible makes them a winner in my kitchen every single time. If you love these, you might also enjoy my recipe for [link to a complementary recipe, e.g., cinnamon sugar Baked Donuts] or my [link to another recipe, e.g., Blueberry Muffins]. They capture a similar spirit of comforting, homemade goodness. I can’t wait to hear how your glazed donuts turn out! Let me know in the comments below if you tried them, what variations you made, or any tips you discovered. Happy baking, everyone!
Glazed Donuts
Ingredients
Donut Dough
- 0.5 cup milk warm
- 2.25 teaspoon active dry yeast
- 0.25 cup granulated sugar
- 2 large eggs beaten
- 0.5 cup unsalted butter melted
- 4 cup all-purpose flour
- 0.5 teaspoon salt
Glaze
- 2 cup powdered sugar
- 0.25 cup milk
- 1 teaspoon vanilla extract
For Frying
- 4 cup vegetable oil
Instructions
Prepare the Dough
- In a large bowl, combine warm milk, yeast, and 1 tablespoon of the sugar. Let it sit for about 5-10 minutes until frothy.
- Add the remaining sugar, beaten eggs, and melted butter to the yeast mixture. Stir well.
- In a separate bowl, whisk together flour and salt. Gradually add the dry ingredients to the wet ingredients, mixing until a soft dough forms.
- Turn the dough out onto a lightly floured surface and knead for 5-7 minutes until smooth and elastic. Place the dough in a greased bowl, cover, and let it rise in a warm place for 1-1.5 hours, or until doubled in size.
Shape and Fry
- Punch down the dough and roll it out to about 0.5 inch thickness. Cut out donut shapes using a donut cutter or two different sized round cutters.
- Place the cut donuts on parchment paper, cover loosely, and let them rise for another 20-30 minutes.
- Heat vegetable oil in a large, heavy-bottomed pot to 350°F (175°C). Carefully place a few donuts into the hot oil, being careful not to overcrowd the pot.
- Fry for 1-2 minutes per side, until golden brown. Remove with a slotted spoon and place on a wire rack to cool slightly.
Glaze and Serve
- While the donuts are still warm, whisk together powdered sugar, milk, and vanilla extract until smooth. If too thick, add a little more milk; if too thin, add more powdered sugar.
- Dip each donut into the glaze, ensuring it's fully coated. Let the excess glaze drip off, and place back on the wire rack to set.
- Serve and enjoy your homemade glazed donuts!
