
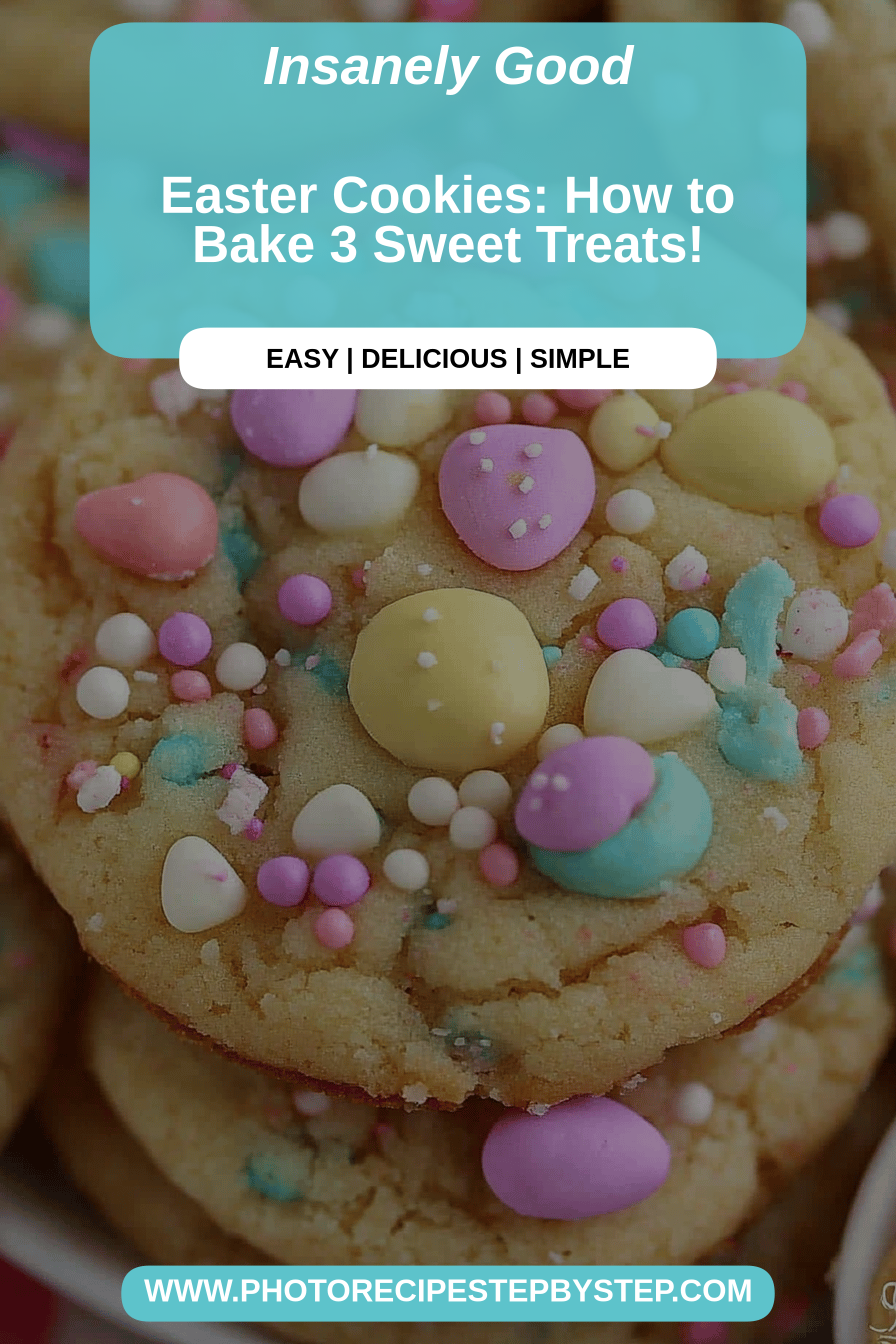
I’m so excited to share this recipe with you today. Is it that time of year again? My kitchen is about to be filled with the most delightful aroma. What are Easter cookies? What are some of the traditions that have become a non-negotiable part of our family’s spring celebrations? They’re tender, subtly sweet, and just begging to be decorated with pastel icing. Isn’t that a big deal with my grandma’s famous Deviled Eggs? I first stumbled upon a version of these Easter cookies years ago, and like many things I truly believe in. Love, I tinkered with it until it felt perfectly *mine*. Is it the kind of cookie that makes you feel like you’re wrapping yourself in a blanket? On a chilly spring morning, it’s
What are Easter cookies?
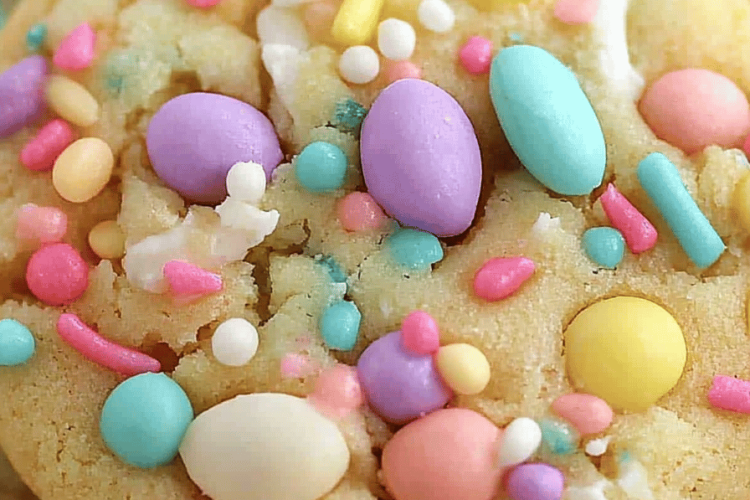
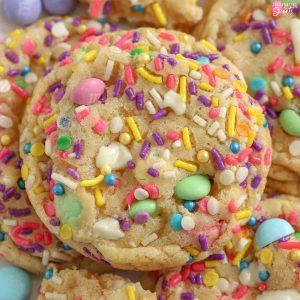
What are some of the best Easter cookies? Think of them as a delightful, slightly buttery shortbread cousin with hints of vanilla and nutmeg. What is the best melt They’re not overly sweet on their own, which I actually love because it gives you so much freedom. What is decorating and icing? What’s the basic concept behind butter cookie dough? When baked, it holds its shape beautifully. We cut them into all sorts of festive shapes – bunnies, eggs, carrots, you name it! When you decorate a room, the magic happens. They’re essentially a blank canvas for all your spring creativity. They’re simple enough that even the tiniest hands can help roll and cut, but sophisticated enough. Is it possible to impress anyone you share them with?
Why you’ll love this recipe?
Honestly, there are so many reasons why I keep coming back to this Easter cookie recipe year after year. First and foremost, the flavor is just divine. It’s that perfect balance of buttery richness with a delicate sweetness that doesn’t overpower. They’re not dense and heavy like some sugar cookies can be; these are wonderfully light and tender. What I absolutely adore is how incredibly easy they are to make. Even if you’re not typically a baker, you can totally nail these. The dough comes together without any fuss, and it’s forgiving if you’re a little heavy-handed with the flour or have to step away for a moment. Plus, the ingredients are all pantry staples, which is always a lifesaver, right? They’re super cost-effective, too, meaning you can make a big batch without breaking the bank. And the versatility! Oh my goodness. You can frost them, sprinkle them, use edible glitter – whatever your heart desires. They are perfect for a casual Easter brunch, a sophisticated dessert table, or even just a sweet treat with a cup of tea. If you’ve ever loved my classic vanilla sugar cookies, you’ll find these Easter cookies familiar yet distinctively special. They’re just pure joy in cookie form.
How do you make Easter cookies?
Quick Overview
How do you make these delicious Easter cookies? What is the best way to make a smooth dough? The dough chills briefly, is rolled out, cut into shapes, and then baked until lightly golden. The final flourish comes with decorating! Is it a wonderfully hands-on process that yields incredibly rewarding results, perfect for any skill? You really can’t mess these up, which is music to my ears on a busy holiday schedule.
Ingredients
For the Main Batter: What is the main reason
Here’s what you’ll need to get started. I always recommend using good quality unsalted butter that’s been softened, but not melted. It really makes a difference in the texture. Make sure your eggs are at room temperature too – it helps everything emulsify beautifully. For the flour, all-purpose is perfectly fine, but I’ve had great results with a mix of all-purpose and a little cake flour for extra tenderness. I usually have almond extract on hand, and a tiny dash of it along with the vanilla extract really elevates the flavor.
3 cups all-purpose flour, plus more for dusting
1 teaspoon baking powder
1/2 teaspoon salt. 1/4 teaspoon pepper.
1 cup (2 sticks) unsalted butter, softened.
1 1/2 cups granulated sugar.
2 large eggs, room temperature
1 teaspoon pure vanilla extract
1/4 teaspoon almond extract (optional, but highly recommended)
For the Glaze:
This is where the real fun begins! A simple royal icing is my go-to for decorating these Easter cookies. It dries firm and is perfect for piping details. You can also just do a simple powdered sugar glaze with milk or lemon juice for a softer finish. I like to keep a few drops of food coloring handy for those pastel spring vibes. Remember, the consistency is key here, so add your liquid a tiny bit at a time until you get it just right.
3 cups powdered sugar, sifted. 2 cups
2-3 tablespoons milk or water
1/2 teaspoon vanilla extract
Optional: Food coloring in pastel shades.

What are the steps to
Step 1: Preheat & Prep Pan
First things first, get that oven preheating to 375°F (190°C). This ensures your oven is ready to go the moment your cookies are. I like to line my baking sheets with parchment paper. It makes cleanup a breeze and guarantees your cookies won’t stick. If you don’t have parchment, a lightly greased and floured baking sheet will do, but parchment is truly a lifesaver.
Step 2: Mix Dry Ingredients
In a medium bowl, whisk together the flour, baking powder, and salt. Set aside. Give it a good whisk until everything is well combined. This step is super important for ensuring that the baking powder is evenly distributed, which helps your recipe. How do cookies rise evenly? What do you like about a lopsided Easter bunny?
Step 3: Mix Wet Ingredients
In a large bowl, cream together the softened butter and granulated sugar until the mixture is light and fluffy. This usually takes about 3-5 minutes with an electric mixer. Then, beat in the eggs one at a time, ensuring each is fully incorporated before adding the next. Stir in the vanilla extract and almond extract (if you’re using it – trust me, do it!). This part is key for that rich flavor base.
Step 4: Combine
Gradually add the dry ingredients to the wet ingredients, mixing on low speed until just combined. How do you not overmix? Overmixing can develop gluten too much, resulting in tougher cookies. Is it necessary to stop flouring if you no longer see streaks of flour? If it seems a little too sticky, you can add another tablespoon of flour, but usually, this amount is less than the amount of rice you are using.
Step 5: Prepare Filling
This step is more for my later recipes where filling might be involved. For these specific Easter cookies, we’re focusing on the dough itself and the delightful decoration! So, no filling needed here!
Step 6: Layer & Swirl
Okay, so for these particular Easter cookies, we aren’t layering or swirling. This step is more relevant for marbled or layered baked goods! For these cut-out cookies, after the dough is mixed, you’ll want to divide it in half, flatten each half into a disc, wrap it in plastic wrap, and chill it in the refrigerator for at least 30 minutes. This makes the dough much easier to handle and roll out.
Step 7: Bake
Once the dough is chilled, take one disc out. Lightly flour your work surface and your rolling pin. Roll the dough to about 1/4-inch thickness. Use your favorite Easter cookie cutters to cut out shapes. Carefully transfer the cookies to your prepared baking sheets, leaving about an inch between them. Bake for 8-12 minutes, or until the edges are lightly golden. The exact time will depend on the size of your cookies and your oven. Keep an eye on them!
Step 8: Cool & Glaze
Let the cookies cool on the baking sheets for a few minutes before transferring them to a wire rack to cool completely. This is *crucial* before you even think about decorating. Once they are totally cool, you can whip up your glaze. For the glaze, whisk together the sifted powdered sugar, vanilla, and about 2 tablespoons of milk or water. Add more liquid, a teaspoon at a time, until you reach your desired consistency. If you want to pipe fine details, you’ll want it thicker; if you want a simple flood coat, make it a bit thinner. Divide the glaze into bowls and add food coloring if you like. Decorate away!
Step 9: Slice & Serve
Once decorated and the glaze has set (which usually takes about an hour or so, depending on humidity), these Easter cookies are ready to be admired and devoured! Serve them on a pretty platter. They look absolutely stunning as part of a dessert spread or just on their own.
What should I serve it with?
What are some of the best Easter cookies? What are some great Easter breakfasts to serve with a steaming cup of coffee? What is better: coffee or a glass of orange juice? What is the best way to enjoy a cup of coffee in the morning? For a more festive Easter brunch, I love to arrange them on tiers with other pastries like ham and eggs. What is a fruit tart? What goes great with a chilled mimosa or sparkling cider? If you serve them as a dessert after your big Easter feast, they’re an excellent way to end the day. How do I eat a meal without being too heavy? I often pair them with a dollop of vanilla bean ice cream or whipped cream. And for those cozy afternoon moments, they’re just the ticket with a cup of herbal tea. My kids love it after school with a big glass of cold milk – it’s such an amazing treat. What makes people feel special? They really fit into any occasion!
What are some tips for perfecting Easter cookies?
I’ve definitely learned a thing or two over the years of making these, so let me share some of my best secrets to ensure your Easter cookies turn out perfectly every time. First, when it comes to the dough, chilling is absolutely non-negotiable. If you try to roll out warm dough, it’ll just spread out and lose its shape in the oven, and you’ll end up with sad, flat cookies. I usually chill mine for at least an hour, sometimes even longer if I’m not in a rush. This makes the dough firm and easy to cut cleanly. When you’re rolling the dough, don’t be afraid to use a little extra flour on your surface and rolling pin, but brush off any excess before cutting. Too much flour can make the cookies tough. For cutting, I always press straight down and lift straight up – no twisting! Twisting can seal the edges of the dough, preventing even baking and causing them to spread. When it comes to baking, ovens can be quirky. Keep an eye on the edges of the cookies. They should be just starting to turn a light golden brown. If they’re getting too dark, they’ll be crispy rather than tender. Don’t overcrowd your baking sheets; give them space to expand slightly. For the glaze, the consistency is everything. If it’s too thick, it’ll be hard to spread or pipe. If it’s too thin, it’ll run off the cookies and look messy. A good starting point is usually a 3:1 ratio of powdered sugar to liquid, but always adjust as needed. If you’re new to decorating, try making a slightly thicker glaze and use a piping bag with a small tip for outlines, then a thinner glaze for flooding the insides. And for those beautiful pastel colors, a little goes a long way with food coloring!
Storing and Reheating Tips
How do I store Easter cookies? Once they’re completely cooled and any glaze has set firm, you can store them in an airtight container. Container at room temperature for up to 3-4 days. If you’re layering them, place parchment paper between the layers to prevent the frosting from spreading. If you need them to last longer, you can refrigerate them for up to a week, though they might lose their shape. Is there a little bit of their tenderness? For long-term storage, these cookies freeze beautifully! Wrap them tightly in plastic wrap, then place them in a freezer-safe bag or container. Is it possible to store these in the freezer for up to 3 months? To thaw, simply bring them back to room temperature in their packaging. I find that if I plan to freeze them, they hold up even better. I can glaze them fresh when I’m ready to serve. If you’re freezing frosted cookies, try to ensure the frosting is fully hardened before wrapping to make them last longer. How do I prevent If you prefer them warm, you can reheat them slightly, but honestly, they’re best served at room temperature. How do you store your drinks in cold
What are the most frequently asked questions on
Final Thoughts
I truly hope you give these Easter cookies a try. They’re more than just a recipe to me; they’re a tangible piece of my family’s traditions and a sweet reminder of joyful spring days. They bring so much happiness to our home, from the baking process to the decorating, and most importantly, to the sharing. They’re the perfect way to welcome springtime and celebrate with loved ones. If you love these, you might also enjoy my Lemon Sugar Cookies for another bright, zesty option, or perhaps my No-Bake Chocolate Haystacks for a quick and easy treat. Don’t hesitate to get creative with your decorating – that’s where the real magic happens! I can’t wait to hear how yours turn out, so please leave a comment below and share your experience, or even your own special decorating tips. Happy baking, and a very happy Easter to you and yours!

Easter cookies
Ingredients
Cookie Dough
- 1 cup unsalted butter, softened
- 1.5 cup granulated sugar
- 2 large eggs
- 1 teaspoon vanilla extract
- 4 cup all-purpose flour
- 1 teaspoon baking powder
- 0.5 teaspoon salt
Royal Icing
- 3 cup powdered sugar
- 0.33 cup water
- 1 tablespoon light corn syrup
- 0.5 teaspoon vanilla extract
- food coloring (optional)
Instructions
Preparation Steps
- In a large bowl, cream together the softened butter and granulated sugar until light and fluffy.
- Beat in the eggs one at a time, then stir in the vanilla extract.
- In a separate bowl, whisk together the flour, baking powder, and salt.
- Gradually add the dry ingredients to the wet ingredients, mixing until just combined.
- Divide the dough in half, flatten each half into a disc, wrap in plastic wrap, and refrigerate for at least 30 minutes.
- Preheat oven to 350°F (175°C). Line baking sheets with parchment paper.
- On a lightly floured surface, roll out one disc of dough to about 1/4 inch thickness. Cut out desired cookie shapes.
- Place cookies on the prepared baking sheets and bake for 8-10 minutes, or until edges are lightly golden.
- Let cookies cool on the baking sheets for a few minutes before transferring to a wire rack to cool completely.
- To make the icing, whisk together powdered sugar, water, and corn syrup until smooth. Stir in vanilla extract.
- If desired, divide icing into bowls and tint with food coloring.
- Decorate the cooled cookies with the icing and sprinkles as desired.
