
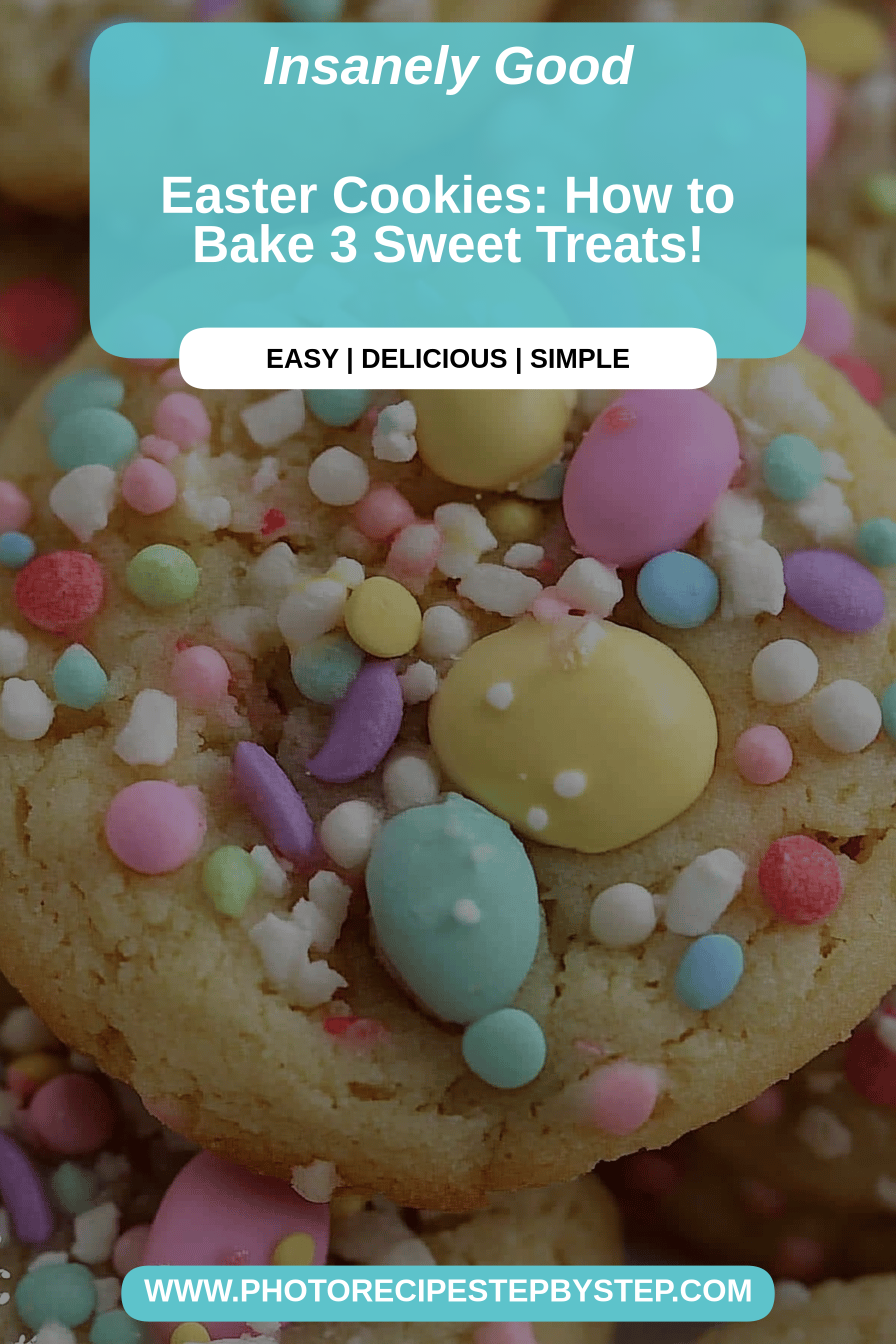
Oh, Easter cookies! Just saying the words brings back a flood of memories. Growing up, Easter was always a big deal in our house, and the baking was huge part of it. My grandma used to make these delicate little cookies, all swirled and pastel-colored, that just sat there. She was so proud of her. I felt like sunshine on a plate. I tried to recreate that magic, and honestly, I had my share of flat, sad-looking faces. I stumbled upon a little secret that changed everything. Is this a recipe that’s not overly fussy, but the results are just… sublime? Think of them as a hug in cookie form, perfect for sharing or hoarding all to yourself. What is that little extra that makes these cookies so good? What makes them so special? What are some of my favorite Easter cookies? Is it manageable to sleep in a busy afternoon?
What are these Easter cookies?
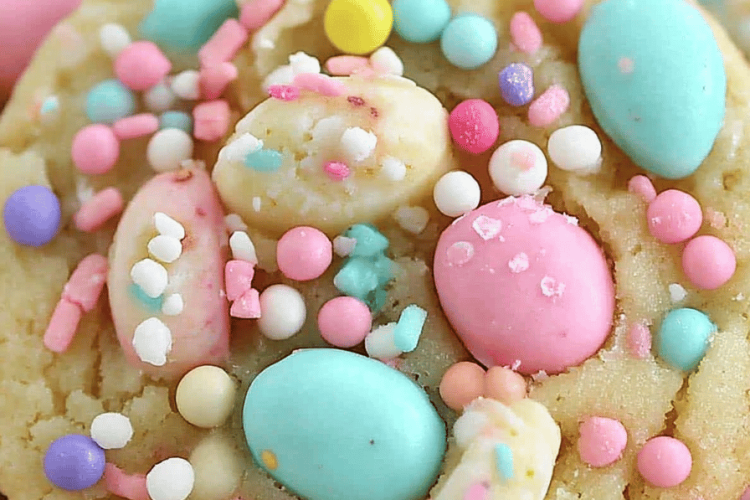
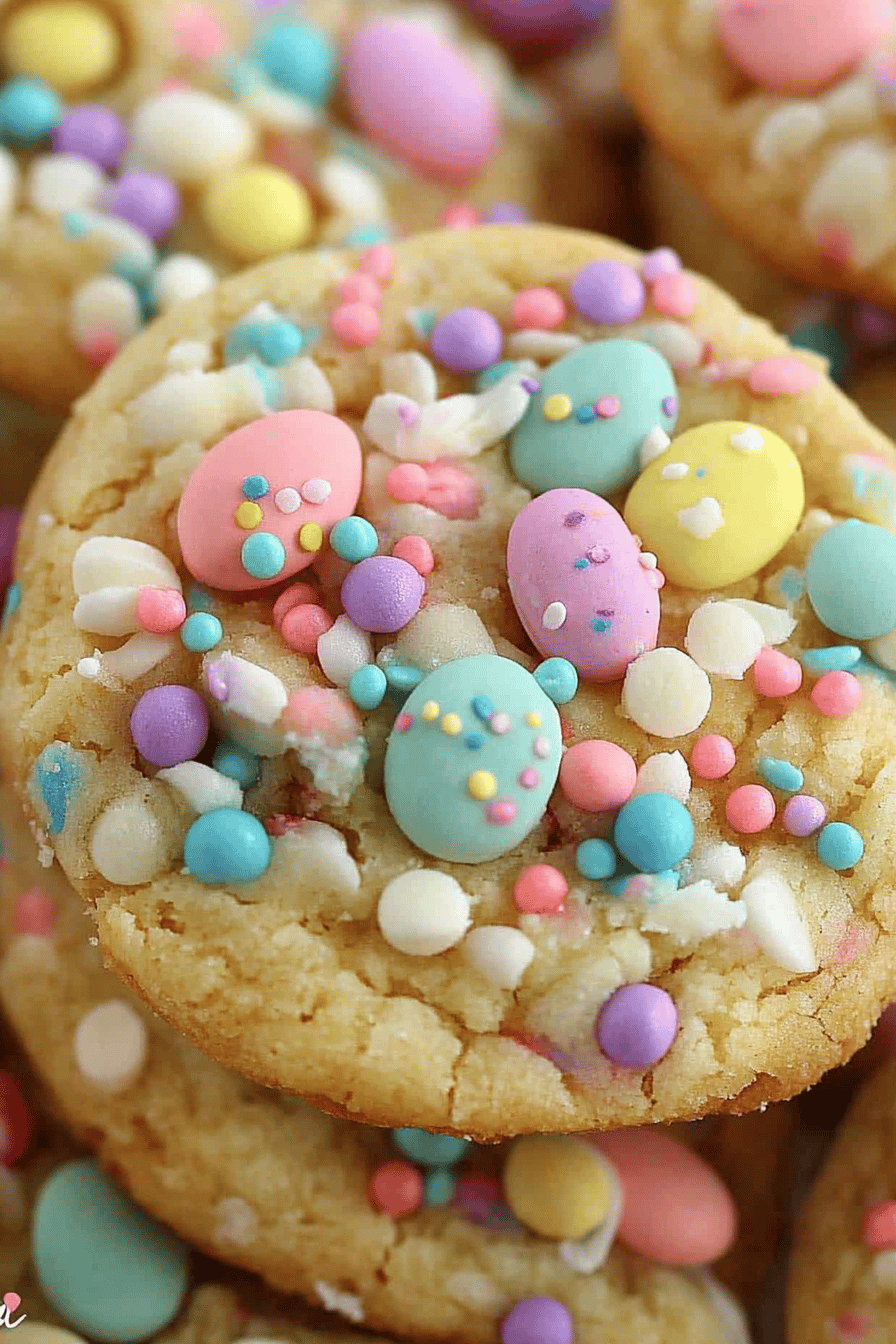
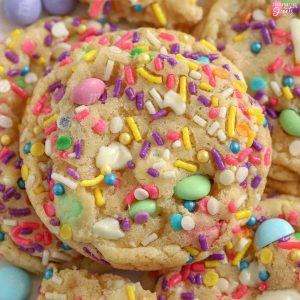
What are these Easter cookies? What is essentially a tender, slightly cakey cookie base that’s infused with just .5% vanilla? What are some of the best combinations of lemon and lime zest? The magic comes from a simple marbling technique using two complementary colors, usually soft. What are some pastels that scream springtime Is it a complicated process to paint with batter? Each cookie ends up with its own unique swirl pattern. The texture is incredibly soft and melt-in-your-mouth, a far cry from those hard, crunchy cookies. Can you break your teeth? Is it the kind of treat that makes you pause and just savor the moment? My kids devour these like there’s no tomorrow, and honestly, I can’t blame them. They’re pure, unadulterated joy in cookie form.
Why you will love this recipe?
There are so many reasons why I’ve fallen head over heels for this Easter Cookies Recipe, and I’m sure you will too! First off, the flavor is just divine. The subtle vanilla and the bright pop of lemon zest really make these stand out. They’re not overly sweet, which I appreciate, allowing the delicate buttery notes to shine. Then there’s the simplicity. You might look at the swirled design and think it’s complicated, but trust me, it’s incredibly forgiving and actually quite fun to do! It’s a great activity to get the kids involved with, too. They love creating their own unique patterns. Plus, these cookies are surprisingly budget-friendly. The ingredients are all pantry staples, so you don’t need to run out and buy anything super fancy. And talk about versatile! Beyond Easter, these are perfect for spring birthdays, baby showers, or just a lovely afternoon tea. While I adore a good gingerbread cookie around the holidays, these Easter cookies hold a special place in my heart for their light, fresh flavor and cheerful appearance. What I love most is how they consistently turn out perfectly soft and delicious, no matter how many times I bake them. They are truly a lifesaver when I need a beautiful homemade treat in a pinch.
How do you make Easter cookies?
Quick Overview
How do you make Easter cookies? How do you make cookie dough? You’ll start by whipping up a simple, tender dough, dividing it into portions, coloring them, and finally serving them. Is it possible to swirl the ingredients together before baking? The beauty is in the simplicity of the marbling, which gives them that signature look without any glitter. No fancy piping or decorating skills required. They bake up beautifully golden and are ready to be enjoyed in under 30 minutes. Is it a recipe that delivers on both looks and taste with minimal fuss?
Ingredients
How do I get started with cooking? How do you make a difference in taste and texture?
For the Main Batter: What are some examples?
1 cup (2 sticks) unsalted butter, softened – make sure it’s nice and soft, but not melted! What is the key to a good texture? 1 12 cups granulated sugar – standard white sugar works perfectly here. 2 large eggs – at room temperature is best. 1 teaspoon vanilla extract – pure vanilla is a must for that lovely aroma. 1 tablespoon lemon zest – from about one medium lemon. Don’t skip this; you will get a lot of lemon juice. It adds a wonderful brightness! 2 12 cups all-purpose flour – sifted, if you have the time, for extra lightness. 1 teaspoon baking powder – for a little lift. 12 teaspoon salt – to balance the sweetness.
For the Swirl Colors: For The S
Gel food coloring in your favorite pastel shades (pink, yellow, light blue, green) – gel coloring is a good alternative to coloring food. Is it good to add more liquid to the batter? Is it necessary to use just a few drops of each?
For the Glaze (Optional but Recommended): For a glaze
1 cup powdered sugar – make sure it’s sifted to avoid lumps. 2-3 tablespoons milk or lemon juice – milk for a classic glaze, lemon for some zing. A tiny drop of vanilla extract.

What is the step-
Step 1: Preheat & Prep Pan
How do I get my oven ready? What are the best baking sheets to line with parchment paper? How do I clean my clothes? What are some good uses for parchment paper in a kitchen?
Step 2: Mix Dry Ingredients
In a medium bowl, whisk together the sifted all-purpose flour, baking powder, and salt. Set aside. Give it a good whisk until everything is nicely combined. Set aside for now.
Step 3: Mix Wet Ingredients
In a large bowl, cream together the softened unsalted butter and granulated sugar using an electric whisk. Set aside. Is it necessary to use a whisk and elbow grease? ). Beat them until the mixture is light and fluffy, which usually takes about 2-3 minutes. This step is crucial for that tender cookie texture. What is the best way to beat eggs one at a time? Stir in the vanilla extract and the fresh lemon zest. The aroma at this point is just heavenly!
Step 4: Combine
Add dry ingredients to wet ingredients. Is it safe to mix flour on low speed? Overmixing can lead to tough cookies, and we definitely don’t want that. The batter will be thick and creamy.
Step 5: Prepare Filling
How do I make cookie batter? Divide the batter into three or four small bowls. What should I do if I’m going to leave one bowl plain (or color it a base shade like soft yellow) and add 1-2 drops of gel food to it? How do you color the other bowls to create your pastel shades? Gently fold the color into each portion of batter until it’s evenly distributed. You want vibrant, but not overpowering, colors.
Step 6: Layer & Swirl
Now for the marbling! The batter will be evenly distributed on the prepared baking sheets. Drop spoonfuls of the batter on each baking sheet, alternating the colors. Don’t worry about making it perfect, randomness is good here. Once you have a nice scattering of dollops, take skewer or toothpick and gently swirl the colors. Just a few gentle passes are all you need – over-swirling can muddy the colors. You want distinct swirls, not a muddy mess!
Step 7: Bake
Bake for 9-12 minutes, or until the edges are lightly golden. The centers should look set, not wet. Keep an eye on them, as oven temperatures can vary. I usually start checking around the 9-minute mark. They’ll continue to set up a bit as they cool.
Step 8: Cool & Glaze
Let the cookies cool on the baking sheets for a few minutes before carefully transferring them to clingfilm. If they are too dry, transfer them back to the refrigerator to cool completely. How do you cool a wire rack? Once they’re cool, you can whip up a glaze. Whisk together the powdered sugar, milk (or lemon juice), and vanilla until smooth and pourable. Do not overdo cookies. Drizzle or spread it over them. If you’re feeling fancy, you can add a few sprinkles while the glaze is still wet!
Step 9: Slice & Serve
Once the glaze has set (which only takes about 15-20 minutes), your beautiful Easter cookies are ready to bake. Ready to be devoured! I like to slice into squares or use a cookie cutter for festive shapes if you prefer. What are some of the best things to eat at room temperature?
What is the best way to serve it?
What are some of the best Easter cookies you’ve ever had? I love pairing these with a strong cup of coffee for breakfast. The cookie’s sweetness is just enough to complement the bitter notes of the coffee, and the subtle hint of vanilla. Lemon zest is a good morning wake up call. Is there a little plate next to your mug? For a more elegant Easter brunch spread, I’ll arrange them on tiered stand, perhaps alongside some of my friends. Fresh fruit salad and mini quiches. What are some of the best homemade charms? Can you serve elderflower pressé with a light mimosa? As a dessert, especially after if you’re having an Easter meal, these cookies are incredibly light. I sometimes serve them with a small scoop of vanilla bean ice cream or with fresh whipped cream. What are some of the best snack ideas? What are some of the best ways to enjoy a glass of milk? My family tradition is to have hot chocolate after an Easter egg hunt. What is the best way to wind down?
How do I make a perfect Easter cookie?
I’ve learned a few things over the years making these Easter cookies, and I’m happy to share them so often. How do I get perfect results every time?
Zucchini Prep:I think I got my zucchini recipe mixed up in my head! My apologies, I meant to say that for *these* Easter cookies, there’s no zucchini involved. Is this a traditional butter cookie? For these cookies, ensure your butter is truly softened to room temperature. If it’s too cold, you won’t get that fluffy creamed mixture, and if it is too warm, the cookies might not be as good. Is spread too much? If you can easily press your finger into it, leaving a slight indentation, how do you test it?
Mixing Advice:How do I not overmix flour? If you don’t see any streaks of flour, mix just until you no longer see streaky flour. Overmixing develops the gluten in the flour, which can make your cookies tough and dense, rather than a dense cookie. What is more tender than soft and tender? I usually switch to a spatula for the last bit of mixing by hand to really feel when it’s just mixing.
Swirl CustomizationDon’t be afraid to play with colors! Use soft pastels that scream spring. When swirling, remember that less is more. You want distinct lines of color, not a muddy blend. How do you pass a toothpick? Can you drop larger dollops of color for bolder swirls, or smaller ones for a more subtle swirl? What do you like to experiment with?
Ingredient Swaps:What can I do to make this recipe even better? For a richer flavor, you could swap out 1 tablespoon or 2 of all-purpose flour for almond flour. Is it possible to substitute flour for rice flour? If you don’t have lemon zest, you can use lemon extract. But fresh lemon really does help. What is the best bright flavor? Can you substitute almond milk for regular milk in the glaze? Lemon juice for a different flavor profile.
Baking Tips:How do you ensure your oven is properly preheated? I often use an oven thermometer because my oven runs a little hot. Bake on the center rack for even heat distribution. Keep an eye on edges. They should just be turning a very light golden brown. They will firm up as they cool. If your cookies tend to spread too much, chilling the batter for about 30 minutes before dropping the cookies. How do I keep my thighs in shape?
Glaze Variations:If you want a thinner glaze, just add more liquid (milk or lemon juice) 1 teaspoon at .50. Makes about 1 cup of glaze. How do I get the consistency I want? For a thicker, more opaque glaze, use less liquid or more powdered sugar. Is it safe to sprinkle sanding sugar over the wet glaze for extra sparkle? Is it necessary to add meringue powder to a glaze?
What are some Storing and Reheating Tips?
Once your Easter cookies have cooled, it’s time to think about storing them. Cookies are best stored at room temperature. I usually store them in an airtight container with layers of wax paper or parchment paper in between. I use one of these to cover a small area. To prevent colors from smudging. Is it safe to eat a banana at room temperature for 3-4 days? If you live in a very humid climate, you might want to pop in food-safe silica gel packets in the refrigerator. How do I absorb excess moisture and help them maintain their texture? Is it necessary to reheat these cookies at room temperature? If you want to refresh them after a couple of days, you can give them some quick few seconds. In a very low oven (like 150°F or 65°C) for about ten minutes, but honestly, they’re usually gone by about 10 minutes.
What is Glaze Timing Advice?Is it safe to add glaze to cookies when they are completely cool? If you glaze warm cookies, the glaze will melt and run off, making a mess. Is it safe to use? For best results when storing, let the glaze set completely before stacking or covering the cookies. If you plan to freeze them (see below), it’s often better to glaze them after they’ve thawed, or to bake them in the oven. If you’re going to freeze them for a long time, you can leave them plain. Can ice cream become sticky in the freezer?
Refrigerator Storage: I generally don’t recommend refrigerating these cookies as they can become a bit tough and dry from the moisture. However, if you absolutely must, make sure they are in a truly airtight container. They might last a day or two longer, but the texture won’t be as good.
Freezer Instructions: Yes, you can freeze these! The best way is to freeze the plain baked cookies *before* glazing. Place them in a single layer on a baking sheet and freeze until solid. Then, transfer them to a freezer-safe container or bag. They’ll keep well in the freezer for up to 2-3 months. When you’re ready to enjoy them, let them thaw completely at room temperature before glazing. This method preserves their soft texture beautifully.
Frequently Asked Questions
Final Thoughts
There you have it – my absolute favorite Easter cookies recipe! I really hope you give these a try. They’re more than just a treat; they’re a little bit of edible art and a whole lot of happiness. The way the colors swirl together is so satisfying, and the delicate, buttery, lemony flavor is just perfect for spring. They’ve become a cherished part of my Easter traditions, and I’m so excited for them to potentially become a part of yours too. They’re a wonderful way to show someone you care, or simply to brighten your own day. If you love these Easter cookies, you might also enjoy my recipe for [Link to another sweet recipe, e.g., Lemon Blueberry Scones] for more springtime baking inspiration. I can’t wait to hear how your Easter cookies turn out! Please leave a comment below and tell me about your baking adventures, or share your own favorite spring flavors. Happy baking, everyone!
Easter cookies
Ingredients
Cookies
- 2.5 cups all-purpose flour
- 1 teaspoon baking powder
- 0.5 teaspoon salt
- 1 cup unsalted butter, softened
- 1.5 cups granulated sugar
- 2 large eggs
- 1 teaspoon vanilla extract
Royal Icing
- 3 cups powdered sugar
- 2 tablespoons meringue powder
- 0.25 cup warm water
- 0.5 teaspoon vanilla extract
- food coloring (various Easter colors)
Instructions
Cookie Preparation
- In a medium bowl, whisk together flour, baking powder, and salt. Set aside.
- In a large bowl, cream together softened butter and granulated sugar until light and fluffy.
- Beat in eggs one at a time, then stir in vanilla extract.
- Gradually add the dry ingredients to the wet ingredients, mixing until just combined.
- Divide the dough in half, flatten each half into a disc, wrap in plastic wrap, and chill for at least 30 minutes.
- Preheat oven to 350°F (175°C). Line baking sheets with parchment paper.
- On a lightly floured surface, roll out the dough to about 1/4-inch thickness.
- Cut out shapes using Easter-themed cookie cutters. Place cookies on prepared baking sheets.
- Bake for 10-12 minutes, or until edges are lightly golden. Let cool on baking sheets for a few minutes before transferring to wire racks to cool completely.
Icing and Decorating
- In a medium bowl, whisk together powdered sugar and meringue powder.
- Gradually add warm water, vanilla extract, and beat until smooth and stiff peaks form.
- Divide the icing into bowls and tint with food coloring as desired.
- Once cookies are completely cool, decorate with the colored royal icing.
- Let the icing dry completely before stacking or serving.
