

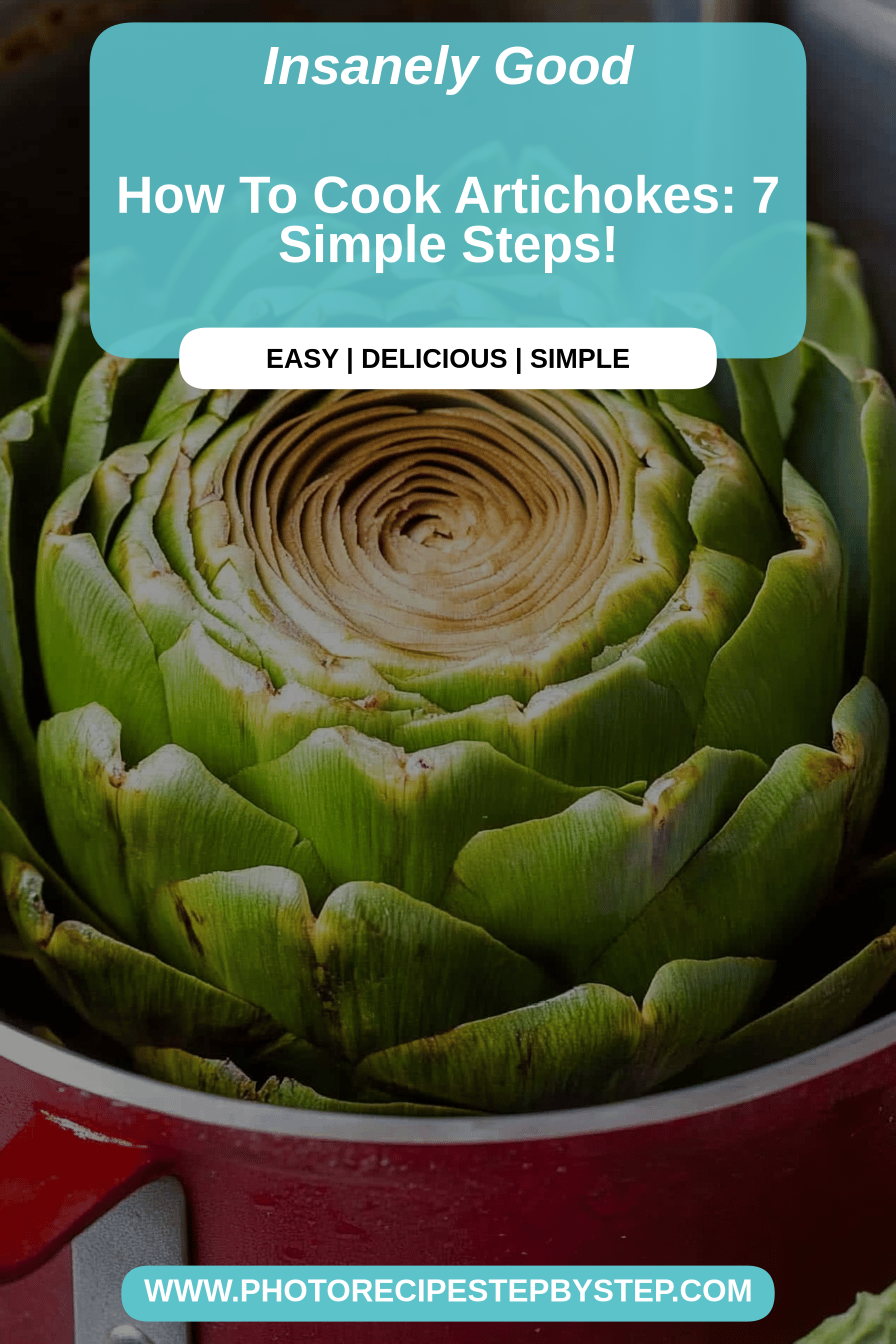
Oh, artichokes! Just the word itself brings back so many memories. Growing up, artichokes felt like a fancy treat, something my mom would only make for special occasions. She’d serve them whole, boiled and with a super simple lemon-butter dip, and we’d spend ages carefully pulling off the leaves, scraping the flesh, and getting to that delicious heart. It was a whole ritual! But honestly, sometimes I just craved that artichoke flavor without all the fuss. And that’s exactly where this recipe comes in. It’s my absolute favorite way to cook artichokes when I want all the deliciousness in a more approachable, almost comforting way, kind of like how a perfectly baked Chocolate Chip cookie is way more accessible than a complex layer cake. This method lets you really get into the tender texture and rich flavor, but it’s so much less intimidating than a whole, steamed artichoke. I swear, if you’ve ever been a little hesitant about how to cook artichokes, this is your sign to dive in!
What is the Foolproof Artichoke Method?
So, what exactly is this magical way to cook artichokes? Think of it as taking the best parts of artichoke preparation and simplifying them into something truly weeknight-friendly. It’s essentially about cooking the artichoke hearts and tender parts until they’re melt-in-your-mouth soft, infused with bright, delicious flavors, and then giving them a little golden kiss. It’s not a whole artichoke, and it’s not just a quick sauté. It’s a deliberate, yet super easy, process that yields tender artichoke pieces packed with incredible flavor. My mom’s whole artichoke method was great for a sit-down meal, but this one? This is for when you want that artichoke goodness as a side dish, an appetizer, or even just a fantastic snack that feels both healthy and incredibly satisfying. It’s a bit like the difference between a whole roasted chicken and perfectly cooked chicken pieces – both delicious, but one is often quicker and easier for everyday meals.
Why you’ll love this recipe?
Honestly, there are so many reasons why I keep coming back to this recipe for cooking artichokes. For starters, the FLAVOR is just out of this world! You get that lovely, slightly nutty, slightly vegetal taste of the artichoke, amplified by garlic, lemon, and herbs. It’s bright, it’s savory, and it’s just incredibly addictive. What I love most about this method is how SIMPLICITY shines through. You don’t need a ton of fancy equipment or complicated techniques. Most of the magic happens while they’re gently simmering. Plus, it’s surprisingly COST-EFFECTIVE! Artichokes can sometimes feel like a splurge, but when you use them in this way, you really get the most bang for your buck, transforming a few humble artichokes into something truly special without breaking the bank. And the VERSATILITY? Oh, it’s a game-changer! You can serve these tender artichoke pieces alongside grilled fish, roasted chicken, or even just with a good crusty bread for dipping. They’re fantastic warm, at room temperature, and even sometimes, dare I say, cold straight from the fridge (don’t tell my mom!). If you enjoyed my simple lemon herb roasted asparagus recipe, you’ll love the fresh, vibrant flavors here too. It’s just that kind of comforting, delicious food that makes everyone happy.
How do I make my Foolproof Artichoke Method?
Quick Overview
This method is all about tenderizing artichoke hearts and infusing them with bright, savory flavors, then finishing them to perfection. We’ll gently cook them in a flavorful broth until they’re fork-tender, then drain them and give them a quick sear to bring out their best flavor and texture. It’s straightforward, requires minimal active cooking time, and the results are consistently delicious. Trust me, this is how you cook artichokes for maximum impact with minimum stress!
Ingredients
For Tenderizing the Artichoke Hearts:
Fresh Artichokes: About 4-6 medium ones. Look for ones that feel heavy for their size and have tightly packed leaves. My trick is to gently squeeze them – if they squeak, they’re fresh! Avoid any with brown spots or wilted leaves.
Water: Enough to cover the artichokes in your pot. You can use regular tap water, but I sometimes like to use a light vegetable broth for an extra layer of flavor.
Lemon: One whole lemon, halved. This is non-negotiable! It keeps the artichokes from browning and adds a lovely brightness.
Garlic: 3-4 cloves, smashed. Don’t be shy here; the garlic flavor mellows beautifully as it cooks.
Bay Leaf: One dried bay leaf. It adds a subtle, earthy aroma that really complements the artichoke.
Salt: About a tablespoon. This seasons the artichokes from the inside out.
For the Flavorful Finish:
Olive Oil: 2-3 tablespoons of good quality extra virgin olive oil. This is where we get that lovely golden sear.
Fresh Garlic: 2-3 cloves, thinly sliced. For a little kick and more intense garlic flavor.
Fresh Parsley: A generous handful, chopped. For freshness and a pop of color.
Lemon Zest: From about half a lemon. Adds an extra zing without extra liquid.
Red Pepper Flakes (optional): A pinch, if you like a little warmth. Just a tiny bit adds a lovely background heat.
Step-by-Step Instructions
Step 1: Preheat & Prep Pan
First things first, we need to get our artichokes ready for their initial softening. Grab a large pot that’s big enough to hold all your artichokes comfortably. You’ll want to add enough water to mostly cover them. Squeeze those lemon halves directly into the water – don’t worry about the seeds, we’ll fish them out later. Toss in the smashed garlic cloves and the bay leaf. Add your salt. Give it a gentle stir. Bring this mixture to a rolling boil over medium-high heat.
Step 2: Mix Dry Ingredients
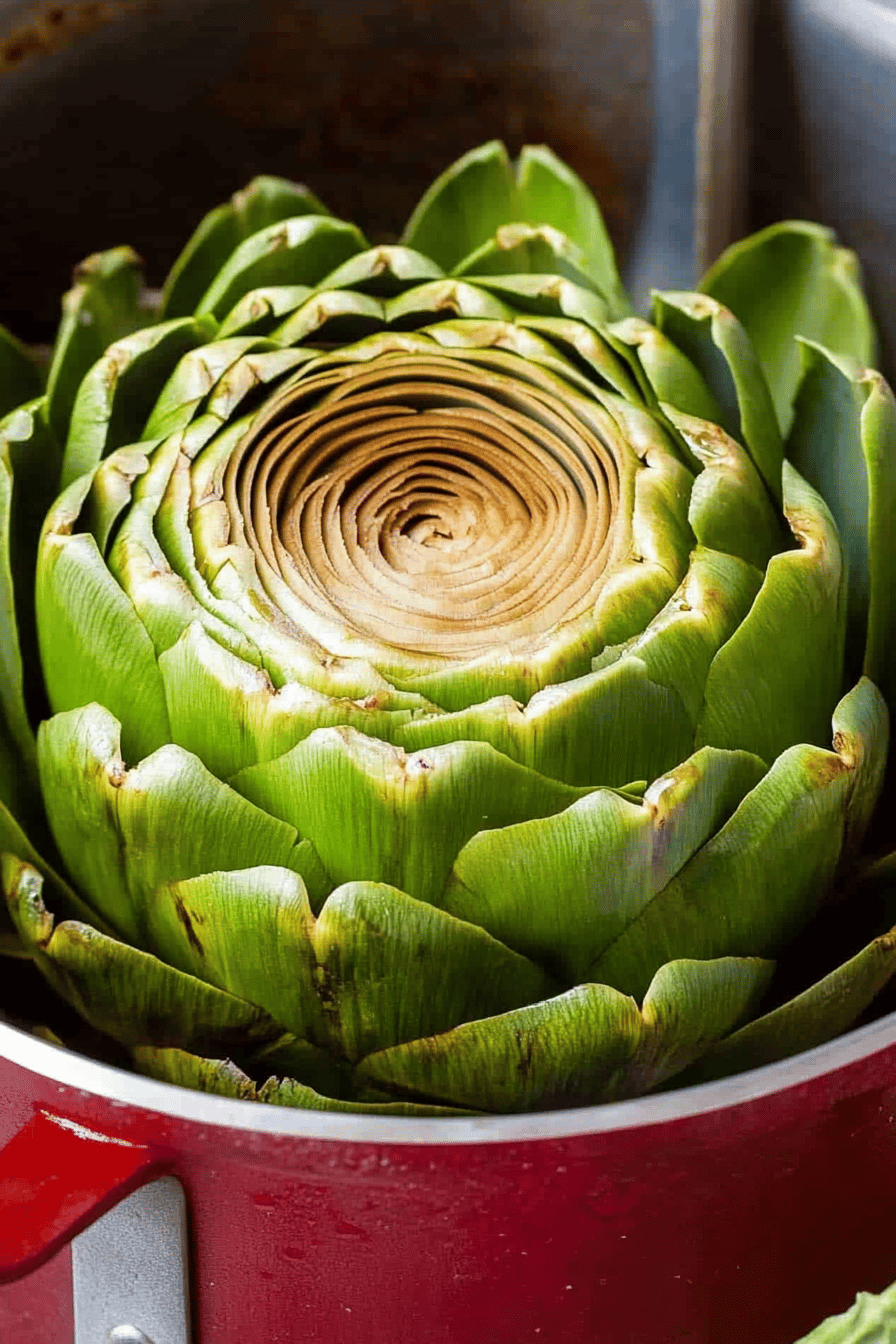
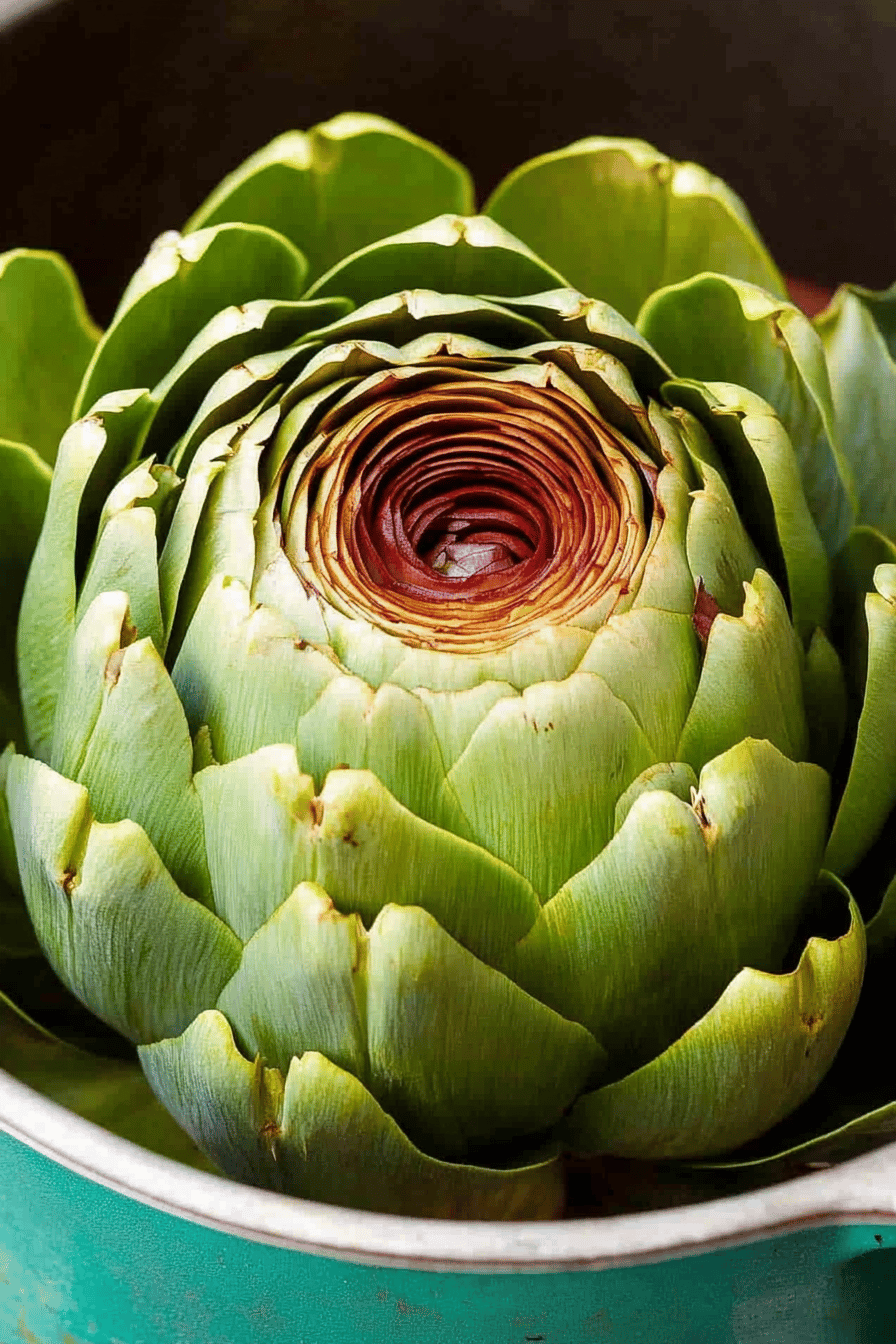
This step isn’t really about mixing dry ingredients in the traditional sense for the initial cooking, but rather preparing the artichokes themselves. Once the water is boiling, carefully add your prepared artichokes. If they’re floating too much, you can use a smaller plate or a heatproof bowl to gently weigh them down. Cover the pot, reduce the heat to medium-low, and let them simmer away. We’re looking for them to become nice and tender. This usually takes about 25-40 minutes, depending on the size of your artichokes. You’ll know they’re ready when you can easily pierce a leaf near the base with a fork or knife. Don’t rush this part; tender is key!
Step 3: Mix Wet Ingredients
While the artichokes are simmering, let’s get our finishing ingredients ready. In a small bowl, whisk together the olive oil, the thinly sliced fresh garlic, the chopped fresh parsley, the lemon zest, and the optional red pepper flakes. This is our flavor bomb for the final step. Having this mixture ready to go makes the rest of the process super smooth.
Step 4: Combine
This isn’t a combination step in the usual sense of mixing batters. It’s about removing the artichokes from their cooking liquid and preparing them for the next stage. Once the artichokes are tender, carefully remove them from the pot using tongs. Let them drain really well, upside down, in a colander for a few minutes. We want to get rid of as much excess water as possible before we move on to searing them.
Step 5: Prepare Filling
The “filling” in this recipe is really our flavor infusion for the finishing stage. The mixture we prepared in Step 3 – the olive oil, fresh garlic, parsley, lemon zest, and red pepper flakes – acts as our vibrant dressing. It’s simple, fresh, and adds a wonderful brightness to the tender artichokes.
Step 6: Layer & Swirl
Now for the fun part: infusing all that extra flavor! You can either cut the drained, slightly cooled artichokes into halves or quarters, or if you prefer, you can serve them whole. Heat a large skillet (a cast iron skillet is wonderful for this!) over medium-high heat. Add about half of your prepared olive oil mixture to the hot skillet. Once it’s shimmering, carefully add the artichoke pieces (cut-side down if you’ve halved or quartered them). Let them sear for about 3-5 minutes per side, until they get lovely golden-brown crispy edges. You might need to do this in batches to avoid overcrowding the pan, which is crucial for getting that good sear. You want them to caramelize a little, not steam!
Step 7: Bake
There’s no baking involved in this particular artichoke recipe; it’s all done on the stovetop! This keeps things quick and simple, allowing us to control the browning and flavor infusion precisely.
Step 8: Cool & Glaze
As soon as the artichokes are beautifully seared and golden, remove them from the skillet. While they’re still warm (but not piping hot, so you can handle them), drizzle the remaining olive oil mixture over the top. Toss them gently to coat. This “glaze” really brings everything together, coating the tender artichoke with all those lovely fresh flavors. Let them sit for a few minutes for the flavors to meld.
Step 9: Slice & Serve
Serve these glorious artichoke pieces immediately while they’re warm. They’re perfect as is, but you can also sprinkle with a little extra fresh parsley or a squeeze of fresh lemon juice right before serving if you like. The aroma alone is incredible – all that garlic and lemon! It’s seriously one of the best ways to enjoy artichokes, and it’s so easy.
What to Serve It With
Honestly, these tender, flavorful artichokes are so versatile, they’re practically a culinary chameleon! For a delightful BREAKFAST or BRUNCH option, I love serving them alongside some scrambled eggs and a piece of crusty sourdough. They add a sophisticated touch without any effort. Imagine a plate with fluffy eggs, golden-brown seared artichokes, and maybe a few slices of avocado – pure bliss! If you’re looking for an elegant DINNER side dish, these are an absolute winner. They pair beautifully with grilled fish like salmon or sea bass, roasted chicken, or even a juicy steak. The bright flavors cut through richer meats perfectly. And for those moments when you just need a little something delicious, they’re fantastic as a COZY SNACK. Just have them on a small plate with a fork, or even scoop them up with some pita bread or a good dip. My family also loves them simply served with a side of aioli or a creamy yogurt-herb dip. They’re just that good, they don’t really need much else!
Top Tips for Perfecting Your Artichoke Method
Over the years of making this dish, I’ve picked up a few tricks that I think make all the difference. For ZUCCHINI PREP (oops, I meant ARTICHOKE PREP!), make sure you really give them a good wash before you start. Sometimes dirt can hide in those leafy layers. When you’re cutting them (if you choose to cut them), a sharp knife is your best friend. For MIXING ADVICE, I really stress not overcrowding the pan during the searing stage. This is what allows them to get those lovely crispy edges instead of just steaming and becoming mushy. Patience here is key! For SWIRL CUSTOMIZATION (not really a swirl in this recipe, but I’ll adapt!), think about adding different herbs. Rosemary is fantastic with artichokes, or even a little thyme. For my finishing mixture, I sometimes add a tiny splash of white wine vinegar to the olive oil for an extra tangy kick. For INGREDIENT SWAPS, if you’re not a huge fan of parsley, dill or chives are also lovely fresh herbs to use here. And for BAKING TIPS (again, no baking here!), if you don’t have a good skillet, a sturdy baking sheet could work for a quick roast after the initial boiling, but the stovetop sear gives the best texture. For GLAZE VARIATIONS, consider adding a minced shallot to the oil mixture before heating for a sweeter, more mellow oniony flavor. Oh, and a pro tip I learned after making this a hundred times: if your artichokes are a little tougher than you like, just give them a few extra minutes in the simmering water. It’s better to be a little over-tender than tough and chewy!
Storing and Reheating Tips
These delicious artichokes are best enjoyed fresh, but they do store reasonably well! For ROOM TEMPERATURE storage, I wouldn’t leave them out for more than a couple of hours, especially if it’s warm. They’re at their peak flavor right after cooking. If you need to store them in the REFRIGERATOR, let them cool completely first. Store them in an airtight container; they should keep well for about 2-3 days. The flavors actually tend to meld and deepen overnight, which can be quite nice! When it comes to FREEZER INSTRUCTIONS, I generally don’t recommend freezing cooked artichokes as the texture can get a bit mushy upon thawing. It’s really best to enjoy them fresh or within a few days. If you do decide to freeze them, make sure they are very well wrapped in plastic wrap and then a layer of foil to prevent freezer burn, and try to use them within a month for the best quality. For GLAZE TIMING ADVICE, always add the finishing olive oil and herb mixture just before serving, or after you’ve reheated them, so the fresh herbs stay vibrant and the garlic doesn’t burn.
Frequently Asked Questions
Final Thoughts
There you have it – my absolute favorite way to cook artichokes! It’s a method that brings out the best in this wonderful vegetable, offering tender, flavorful pieces that are incredibly satisfying. I really believe that once you try them this way, you’ll be hooked. They’re just so much fun to eat, and the taste is something truly special. If you loved how simple and delicious these artichokes turned out, you might also enjoy my recipe for garlic herb roasted Brussels sprouts – another fantastic way to make a side dish the star of the show! Please, if you make these, let me know how they turn out in the comments below! I’d love to hear your variations or any stories you have about cooking artichokes. And don’t forget to share your photos – I always love seeing what you’re cooking up in your kitchens! Happy cooking, everyone!
Cook Artichokes
Ingredients
Main Ingredients
- 4 large artichokes
- 0.5 lemon cut in half for rubbing
- 1 tablespoon salt
Instructions
Preparation Steps
- Wash the artichokes thoroughly under cold running water. Trim off the stem so the artichoke can stand upright. Cut off the top 1 inch of the artichoke.
- Use scissors to trim off the sharp points of the outer leaves.
- Rub all cut surfaces with the cut half of a lemon to prevent browning.4 large artichokes
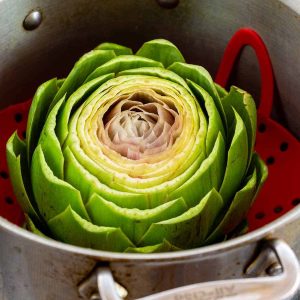
- If steaming, place artichokes stem-side down in a steamer basket over boiling water. Cover and steam for 30-45 minutes, or until a knife inserted into the base meets little resistance. If boiling, place artichokes in a large pot, cover with water, add salt, and bring to a boil. Reduce heat, cover, and simmer for 25-40 minutes, or until tender.4 large artichokes
- Carefully remove artichokes from the pot or steamer. Let them cool slightly before serving.
