
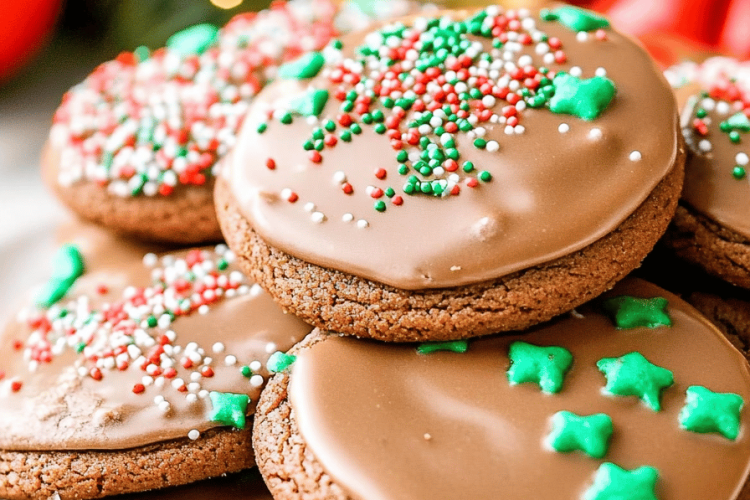
Oh, Christmas Cookies! Just thinking about them brings back such a flood of memories. I can practically smell the cinnamon and sugar wafting through my childhood kitchen, with my grandma humming carols and me, a tiny tornado, trying to “help” sprinkle on the edible glitter. This recipe, well, it’s become my go-to. It’s not just any Christmas cookie recipe; it’s the one that gets called for every year, the one that makes my kids’ eyes light up, and honestly, the one I can whip up even when I’m feeling utterly overwhelmed by the holiday rush. It’s got that perfect balance of sweet, a hint of spice, and a texture that’s just melt-in-your-mouth divine. If you’ve ever tried those fancy store-bought cookies and wondered how they get that incredible depth of flavor without tasting overly sweet, this is your answer. It’s like the best sugar cookie met a gingerbread hug and had a beautiful, festive baby.

What are some of the best Christmas cookies?
So, what makes these Christmas cookies so special? Well, the name isn’t just a catchy title; it’s earned! Think of them as the sophisticated cousin to your basic sugar cookie. They’re soft and chewy in the center, with just the slightest crisp around the edges – that perfect bite you’re always chasing. The magic really happens with the flavor profile. We’re not just talking plain vanilla here. There’s a warm, comforting blend of spices that just screams holiday cheer, but it’s subtle enough that it doesn’t overpower the buttery sweetness. It’s essentially a beautifully balanced cookie that tastes like pure joy. I love how forgiving this recipe is, too. Unlike some finicky cookies that demand absolute perfection, these Christmas cookies seem to forgive any little slip-ups and still turn out absolutely spectacular. It’s the kind of cookie that makes everyone feel like a baking pro, even if it’s your first time.
Why you’ll love this recipe?
Honestly, there are so many reasons I keep coming back to this Christmas cookie recipe, and I’m convinced you will too! First off, the flavor is just out of this world. It’s that perfect blend of rich butter, sweet sugar, and a whisper of warm spices – think cinnamon, nutmeg, and a tiny pinch of cloves. It’s not just sweet; it has layers of flavor that just sing. Then there’s the texture. Oh, the texture! They’re wonderfully soft and chewy right from the oven, but they hold up beautifully, giving you that satisfying slight crisp around the edges without being hard. My family devours them! What I love most about this recipe is its sheer simplicity. You don’t need any fancy equipment or complicated techniques. It’s genuinely easy to make, which is a lifesaver during the hectic holiday season. Plus, the ingredients are all pantry staples, making it incredibly cost-efficient – no need to break the bank for amazing Christmas cookies!
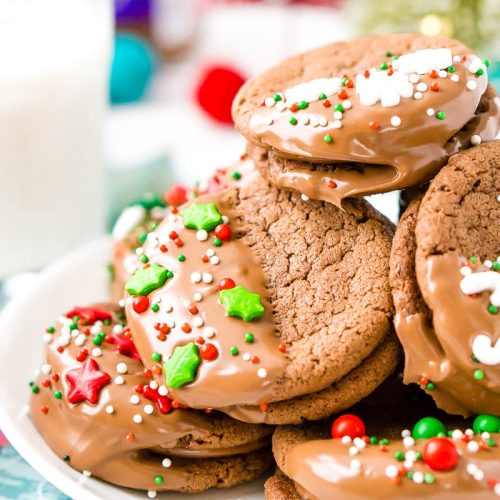
And let’s talk versatility. You can shape these into any festive cookie cutter design you fancy, frost them, decorate them, or even just dust them with a little powdered sugar. They’re also fantastic for gifting; who wouldn’t be thrilled to receive a homemade tin of these beauties? I’ve even experimented with adding a touch of orange zest to the dough, and wow, that was a game-changer! If you’re looking for a reliable, crowd-pleasing Christmas cookie that’s as fun to make as it is to eat, this is it. It’s the recipe that truly embodies the spirit of the season for me.
How do I make my own Christmas cookies?
Quick Overview
This recipe is designed for maximum flavor with minimum fuss. You’ll simply cream together butter and sugar, add in eggs and vanilla, then gently incorporate your dry ingredients. The dough comes together beautifully, and a short chill makes it perfect for rolling and cutting. Baking is quick, and a simple glaze or dusting of powdered sugar is all you need to make them festive. It’s honestly that straightforward, and the results are consistently delicious, making them ideal for even novice bakers during the busy Christmas season.
Ingredients
For the Main cookie dough: For the Main Cookie Dough: For the Main Cookie Dough:
2 1/2 cups all-purpose flour, plus more for dusting: I always sift my flour. It just ensures a lighter, more tender cookie and prevents any accidental lumps from sneaking in.
1 teaspoon baking soda: This is what gives our cookies that perfect rise and chewy texture. Make sure it’s fresh!
1/2 teaspoon salt: Balances the sweetness and brings out all the other flavors.
1 teaspoon ground cinnamon: The backbone of our warm spice blend. Use a good quality one for the best aroma and taste.
1/4 teaspoon ground nutmeg: Just a hint adds so much depth and warmth. Don’t skip this!
1/8 teaspoon ground cloves: A little goes a long way here, but it really adds that authentic Christmas cookie essence.
1 cup (2 sticks) unsalted butter, softened: Using unsalted butter gives you more control over the saltiness. Make sure it’s softened, not melted, for the best creaming.
1 1/2 cups granulated sugar: For that classic sweetness and lovely crisp edges.
2 large eggs: Room temperature eggs incorporate better. Just pop them in a bowl of warm water for 5 minutes if you forget to take them out!
1 teaspoon pure vanilla extract: Always use pure extract; it makes a world of difference compared to imitation.
For the Simple Glaze (Optional, but recommended!):
1 1/2 cups powdered sugar: Sifted, of course, for the smoothest glaze.
2-3 tablespoons milk (or water): Start with 2 tablespoons and add more a teaspoon at a time until you reach your desired consistency. You can also use almond milk or even orange juice for a hint of citrus!
1/4 teaspoon pure vanilla extract: Enhances the sweetness.
Step-by-Step Instructions
Step 1: Preheat & Prep Pan
First things first, get your oven preheated to 375 degrees Fahrenheit (190 degrees Celsius). While it’s heating up, line a couple of baking sheets with parchment paper. I find this makes cleanup a breeze and ensures the cookies don’t stick. Parchment paper is your best friend for perfectly baked cookies!
Step 2: Mix Dry Ingredients
In a medium bowl, whisk together your flour, baking soda, salt, cinnamon, nutmeg, and cloves. Give it a good whisk until everything is evenly distributed. This ensures all those lovely spices are in every bite. If you’re not great at whisking evenly, a quick pulse in a food processor can also work wonders here.
Step 3: Mix Wet Ingredients
In a large bowl, or the bowl of your stand mixer fitted with the paddle attachment, cream together the softened butter and granulated sugar. Beat them on medium speed for about 3-5 minutes, until the mixture is light, fluffy, and pale yellow. This creaming process is crucial for creating that perfect cookie texture, so don’t rush it! Scrape down the sides of the bowl occasionally. Then, beat in the eggs one at a time, making sure each is fully incorporated before adding the next. Finally, stir in the vanilla extract.
Step 4: Combine
Gradually add the dry ingredients to the wet ingredients in two or three additions, mixing on low speed until *just* combined. Be careful not to overmix here! Overmixing develops the gluten in the flour, which can lead to tough cookies. You want to stop as soon as you don’t see any streaks of flour. The dough might look a little crumbly, but it will come together as you handle it.
Step 5: Prepare Filling
There’s no separate filling for these cookies as they are a delightful standalone treat! The magic is all in the dough itself. If you were making a sandwich cookie, this is where you’d prepare your filling, but for this recipe, we’re focusing on that perfect, spiced cookie base.
Step 6: Layer & Swirl
This step is for recipes that involve swirling, like brownies or marble cakes. For these Christmas cookies, we’ll be rolling and cutting! Gather the dough, form it into a disc, wrap it in plastic wrap, and chill it in the refrigerator for at least 30 minutes. This makes the dough easier to handle and cut. Once chilled, lightly flour your work surface and roll out the dough to about 1/4-inch thickness. Use your favorite festive cookie cutters to create your Christmas shapes!
Step 7: Bake
Carefully place the cut-out cookies onto your prepared baking sheets, leaving about an inch between them. Bake for 8-10 minutes, or until the edges are lightly golden and the centers look set. They might seem a little soft in the middle, but they will continue to cook slightly as they cool on the baking sheet. Keep an eye on them, as oven temperatures can vary!
Step 8: Cool & Glaze
Let the cookies cool on the baking sheets for 5 minutes before transferring them to a wire rack to cool completely. While they’re cooling, you can whip up the glaze. In a small bowl, whisk together the sifted powdered sugar, vanilla extract, and 2 tablespoons of milk. Add more milk, a teaspoon at a time, until you reach a drizzly but not too thin consistency. Once the cookies are completely cool, you can dip them, drizzle them, or spread the glaze on top. Let the glaze set before stacking or storing.
Step 9: Slice & Serve
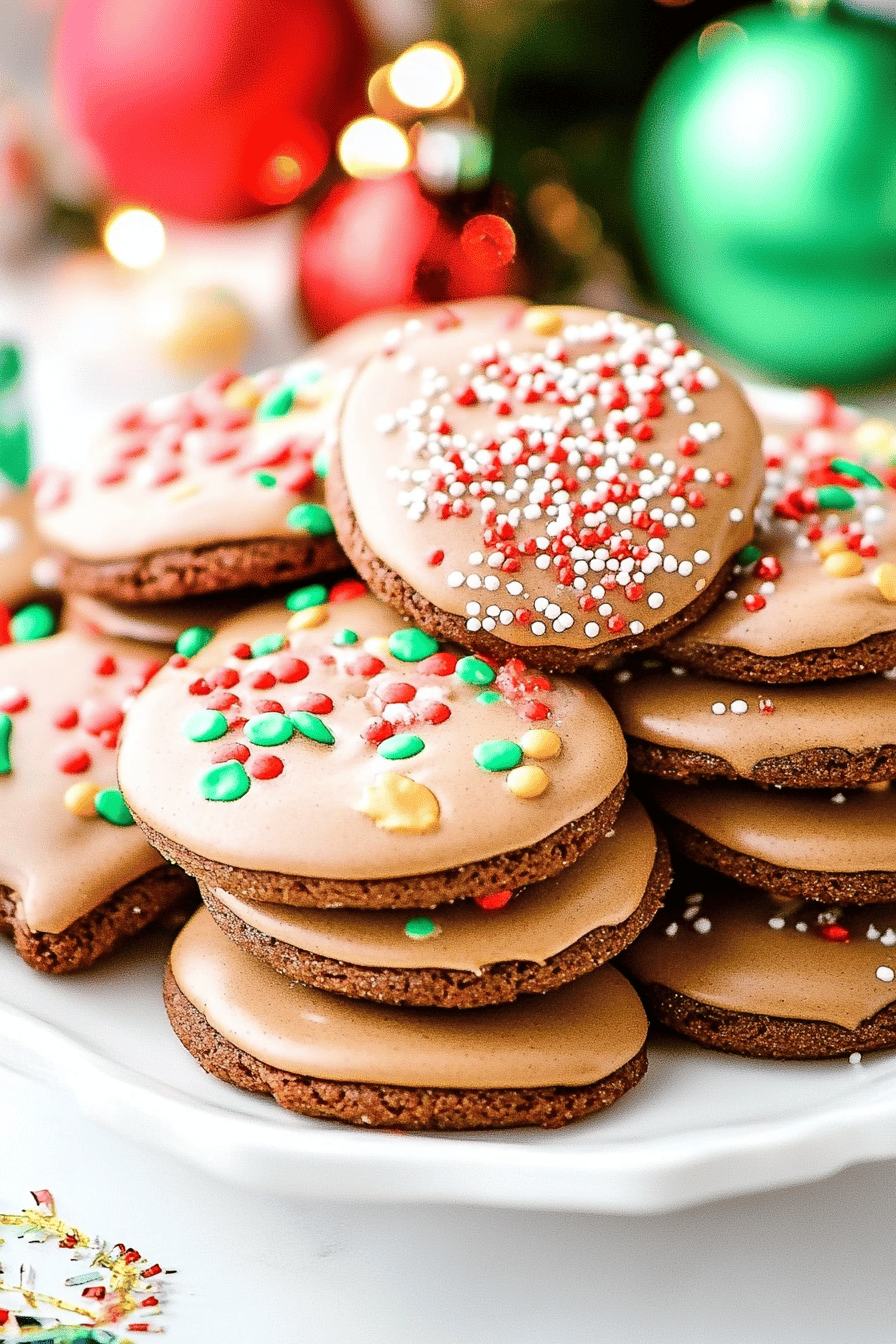
Once the glaze has hardened (or if you’ve opted for a simple dusting of powdered sugar), your Christmas cookies are ready to be admired and devoured! They are absolutely perfect served at room temperature. Arrange them on a festive platter, tuck them into cookie tins for gifts, or just enjoy them with a warm cup of cocoa. They look stunning with their colorful glazes and festive shapes!
What to Serve It With
These Christmas cookies are superstars all on their own, but I love pairing them with a few things to make the holiday moments even more special. For a cozy breakfast treat on a crisp December morning, I can’t think of anything better than a warm mug of coffee alongside one of these cookies. The spice in the cookie just wakes up your senses! For a more elaborate holiday brunch, I like to arrange them on a tiered stand with other pastries, perhaps with a little sprig of rosemary or a few cranberries tucked around them for visual appeal. They look so elegant!
As a dessert, they’re brilliant. Imagine serving a plate of these alongside a rich Chocolate Cake or a creamy panna cotta. The cookie offers a lovely contrast in texture and flavor. And for those moments when you just need a little something sweet to get you through the afternoon, or even a late-night craving, these are perfect. I often just grab one (or two!) with a glass of cold milk. It’s simple, comforting, and incredibly satisfying. My kids also love them with hot chocolate – it’s become a winter tradition for us to have a “cookie and cocoa” night!
Top Tips for Perfecting Your Christmas Cookies
I’ve made these Christmas cookies more times than I can count, and through the years, I’ve picked up a few tricks that I think really make a difference. For the dough, make sure your butter is truly softened, not melted. If it’s melted, your cookies will spread too much and won’t have that lovely chewy texture. I learned that the hard way after a batch of very flat, very crispy (not in a good way!) cookies. When you’re mixing the dry ingredients into the wet, stop mixing as soon as you don’t see any dry flour. It’s better to have a few tiny streaks of flour left than to overmix and end up with tough cookies. Trust me on this one!
Chilling the dough is non-negotiable for me. It not only makes the dough easier to roll and cut without sticking, but it also helps the cookies hold their shape better during baking. If you’re cutting out intricate shapes, rolling the dough between two pieces of parchment paper can prevent sticking and make transferring them much easier. When it comes to baking, watch them closely! Ovens can be quirky. I usually start checking around the 7-minute mark. You want the edges to be just beginning to turn golden brown. They’ll firm up as they cool.
For the glaze, it’s all about consistency. If it’s too thick, it’ll be hard to work with. If it’s too thin, it’ll just run off the cookies. Start with the smaller amount of liquid and add more a teaspoon at a time until it’s perfect for drizzling or spreading. For ingredient swaps, I’ve had great success using half almond flour and half all-purpose flour for a slightly nuttier flavor, though this can sometimes make the cookies a bit more delicate. I’ve also tried adding a bit of orange zest to the dough – it’s lovely and pairs wonderfully with the spices, giving it a slight citrus brightness. Don’t be afraid to play around a little!
Storing and Reheating Tips
Once these delicious Christmas cookies are baked and cooled (and glazed, if you chose to!), proper storage is key to keeping them tasting fresh and delicious. For cookies without glaze, or those with a hardened royal icing, they can be stored at room temperature in an airtight container for up to 5-7 days. I like to layer them between sheets of parchment paper within the container to prevent them from sticking to each other, especially if they have any decorations.
If you’ve used a softer glaze, it’s best to let it fully set at room temperature for at least a few hours (or even overnight) before storing them. These will also keep well at room temperature for about 3-4 days, but be mindful that they might become a bit softer over time. If your kitchen is particularly warm or humid, refrigerating them in an airtight container can extend their freshness, though some people find that refrigeration can slightly alter the texture of cookies, making them a bit harder.
Freezing is a fantastic option for making ahead! You can freeze the baked and completely cooled cookies (without glaze) for up to 3 months. Wrap them tightly in plastic wrap, then place them in a freezer-safe bag or container. To thaw, simply remove them from the freezer and let them come to room temperature in their packaging. If you plan to glaze them after thawing, make sure they are completely dry. For the best results with glaze, I usually wait to glaze them after they’ve thawed and are back at room temperature. This prevents the glaze from getting sticky or melting.
Frequently Asked Questions
Final Thoughts
There you have it – my ultimate Christmas cookie recipe! It’s more than just a recipe to me; it’s a little piece of holiday magic that I love sharing. The combination of that perfect texture, the warm, comforting spices, and the sheer joy of decorating them makes these Christmas cookies a tradition I look forward to every single year. They’re the kind of cookies that bring people together, sparking conversations and creating sweet memories. Whether you’re baking them for your family, for a holiday party, or to share with friends, I truly hope they bring as much happiness to your kitchen as they do to mine.

If you try these, I’d absolutely love to hear about it! Let me know in the comments below how they turned out, if you added any fun twists, or what your favorite part was. Your feedback means the world to me! And if you’re already a fan of cozy, spiced treats, you might also enjoy my recipe for Gingerbread Blondies or my Easy Cinnamon Swirl Bread – they’re perfect for extending that festive feeling. Happy baking, everyone!
Christmas cookies
Ingredients
Cookie Dough
- 1.5 cup all-purpose flour
- 0.5 teaspoon baking soda
- 0.25 teaspoon salt
- 0.5 cup unsalted butter, softened
- 0.75 cup granulated sugar
- 1 large egg
- 1 teaspoon vanilla extract
Royal Icing
- 3 cup powdered sugar
- 0.25 cup milk
- 1 teaspoon vanilla extract
- 0.5 teaspoon light corn syrup
Instructions
Preparation Steps
- In a medium bowl, whisk together flour, baking soda, and salt. Set aside.
- In a large bowl, cream together butter and granulated sugar until light and fluffy.
- Beat in the egg and vanilla extract until well combined.
- Gradually add the dry ingredients to the wet ingredients, mixing until just combined.
- Divide the dough in half, flatten each half into a disc, wrap in plastic wrap, and chill for at least 1 hour.
- Preheat oven to 350°F (175°C). Line baking sheets with parchment paper.
- On a lightly floured surface, roll out one disc of dough to 0.25-inch thickness. Cut out festive shapes with cookie cutters.
- Place cookies on the prepared baking sheets, about 2 inches apart.
- Bake for 10-12 minutes, or until edges are lightly golden.
- Let cookies cool on the baking sheets for a few minutes before transferring them to a wire rack to cool completely.
- While cookies are cooling, prepare the royal icing: In a medium bowl, whisk together powdered sugar, milk, vanilla extract, and corn syrup until smooth. Add more milk a teaspoon at a time if needed to reach desired consistency.
- Once cookies are completely cool, decorate with royal icing and sprinkles as desired.
