
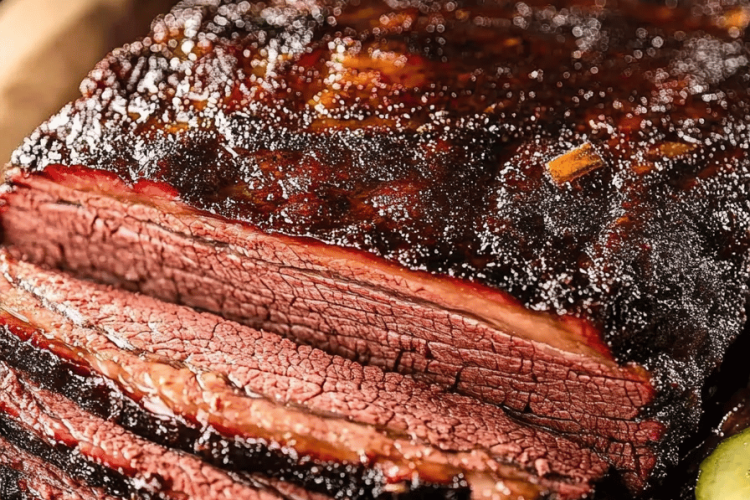
Oh, beef brisket. Just saying the word brings back a flood of memories – lazy Sunday dinners, the smell wafting through the house for hours, and that incredible, melt-in-your-mouth tenderness. It’s one of those dishes that feels so special, yet it’s surprisingly achievable even for a weeknight if you plan a little. Forget those dry, tough briskets you might have encountered; this recipe is all about coaxing out the absolute best flavor and texture. It’s truly my secret weapon when I want to impress without stressing, and honestly, it rivals any fancy restaurant’s version I’ve ever had. If you’ve ever been intimidated by cooking a large cut of meat like this, I promise, this guide will make you feel like a total pro.

What is this amazing beef brisket?
So, what exactly *is* beef brisket, and why is it such a star? At its heart, brisket is a cut of beef from the lower chest or breast of cattle. It’s known for being a tougher cut, which sounds like a bad thing, right? But that’s where the magic happens! Those connective tissues and fat marbling are exactly what give brisket its incredible depth of flavor and potential for tenderness when cooked low and slow. Think of it as nature’s way of saying, “Put in a little effort, and you’ll be rewarded tenfold.” My recipe focuses on bringing out that rich, beefy essence with a simple yet profoundly flavorful rub and a gentle cooking process that breaks down all those tough fibers into pure deliciousness. It’s the kind of meal that makes everyone gather around the table, happy and satisfied.
Why you’ll love this recipe?
There are so many reasons why this beef brisket recipe has become a staple in my kitchen, and I just know you’re going to adore it too. Firstly, the flavor is absolutely out of this world. We’re talking deep, savory, smoky (even without a smoker!), and just perfectly seasoned. It’s that kind of flavor that lingers on your palate and makes you crave another bite. Despite the incredible taste, the process is surprisingly straightforward. I’ve streamlined it over the years to be as foolproof as possible. You don’t need a ton of fancy equipment or a culinary degree, just a little patience. It’s also incredibly cost-effective! Buying a whole brisket and cooking it at home is significantly cheaper than ordering it out, and you get way more bang for your buck, literally. Plus, the versatility is fantastic. You can slice it thin for sandwiches, shred it for tacos, or serve it as a show-stopping centerpiece. What I love most about this recipe, though, is the sheer comfort it brings. It’s the ultimate feel-good food, perfect for holidays, family gatherings, or even just a cozy night in when you need something truly special to warm your soul. It’s leagues better than my attempt at Pulled Pork last month, which, bless its heart, was a bit dry.
How do I make Beef Brisket?
Quick Overview
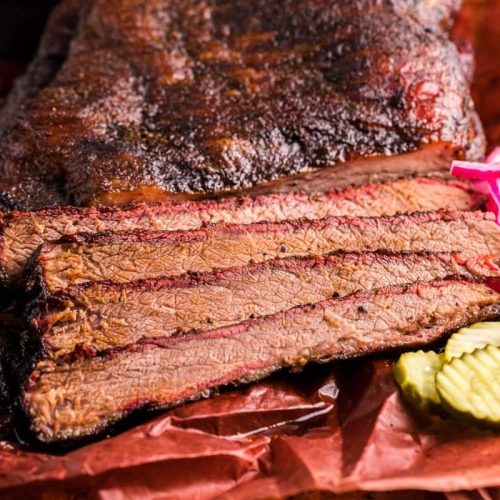
The beauty of this beef brisket recipe lies in its simplicity and the magic of slow cooking. We’ll start by generously seasoning a whole brisket with a robust spice rub that’s going to penetrate deep into the meat as it cooks. Then, it’s a low-and-slow journey in the oven, often wrapped to keep all that moisture and flavor locked in. The result? A ridiculously tender, juicy, and deeply flavorful brisket that practically falls apart with a fork. It sounds complex, but trust me, the oven does most of the hard work!
Ingredients
For the Brisket & Rub: For the Brisket & Rub: For the Brisket & Rub: For the Bris
1 (3-4 pound) beef brisket, flat cut or point cut (I often go for a point cut for extra richness and marbling)
2 tablespoons olive oil (or your favorite cooking oil)
2 tablespoons packed Brown sugar (light or dark works great)
1 tablespoon smoked paprika (this is key for that lovely smoky flavor without a smoker!)
1 tablespoon kosher salt (or 2 teaspoons fine sea salt)
1 tablespoon black pepper, freshly ground
1 teaspoon garlic powder
1 teaspoon onion powder
1/2 teaspoon cayenne pepper (optional, for a little kick)
For Braising Liquid:
1 cup beef broth (low sodium is best so you can control the saltiness)
1/2 cup water
1/4 cup Worcestershire sauce (this adds so much umami!)
2 cloves garlic, smashed
1 bay leaf
Optional Glaze (for the last hour of cooking):
1/2 cup BBQ sauce (your favorite store-bought or homemade)
2 tablespoons brown sugar
1 tablespoon apple cider vinegar

Step-by-Step Instructions
Step 1: Preheat & Prep Brisket
First things first, let’s get that oven preheating to 300°F (150°C). You want a nice, low and slow environment for our brisket. Now, take your brisket out of its packaging and pat it completely dry with paper towels. This is super important for helping the rub adhere and for developing a nice crust. Trim off any excess, thick layers of hard fat, but leave a good 1/4-inch layer on top – that fat is pure flavor and will baste the meat as it cooks!
Step 2: Mix the Rub
In a small bowl, whisk together the brown sugar, smoked paprika, kosher salt, black pepper, garlic powder, onion powder, and cayenne pepper (if you’re using it). This is our flavor powerhouse! Make sure everything is well combined so you get an even distribution of spices.
Step 3: Season the Brisket
Drizzle the olive oil all over the brisket and rub it in to coat. Then, generously sprinkle the spice rub all over the brisket, making sure to get all sides. Really press the rub into the meat. Don’t be shy here; this is where all that amazing flavor comes from!
Step 4: Sear (Optional but Recommended!)
This step isn’t absolutely mandatory, but it adds another layer of delicious flavor. Heat a large, oven-safe Dutch Oven or heavy-bottomed pot over medium-high heat. Sear the brisket for about 2-3 minutes per side, just until it gets a nice golden-brown crust. Don’t cook it through, just a quick sear.
Step 5: Prepare Braising Liquid
If you seared your brisket in a Dutch oven, carefully remove it and set aside. Pour the beef broth, water, and Worcestershire sauce into the same pot (or a clean one if you didn’t sear). Add the smashed garlic cloves and the bay leaf. Give it a quick stir.
Step 6: Braise the Brisket
Place the seasoned brisket (fat side up) into your Dutch oven or a roasting pan. Pour the braising liquid around the brisket. Cover the Dutch oven tightly with its lid, or if using a roasting pan, cover it tightly with a couple of layers of heavy-duty aluminum foil. This creates a steamy environment that keeps the brisket incredibly moist.
Step 7: Slow Cook
Pop that covered brisket into your preheated 300°F (150°C) oven. Let it cook for about 3 to 4 hours, or until it’s getting tender. The exact time will depend on the thickness and quality of your brisket. You’re looking for it to be probe-tender, meaning a skewer or fork slides in with very little resistance.
Step 8: Glaze (Optional)
If you want that extra sticky, sweet, and savory glaze, this is the time! In a small bowl, whisk together the BBQ sauce, brown sugar, and apple cider vinegar. Remove the brisket from the oven. Carefully uncover it. Spoon or brush the glaze all over the top of the brisket. Return it to the oven, uncovered, for another 45 minutes to an hour, or until the glaze is caramelized and sticky, and the brisket is even more tender.
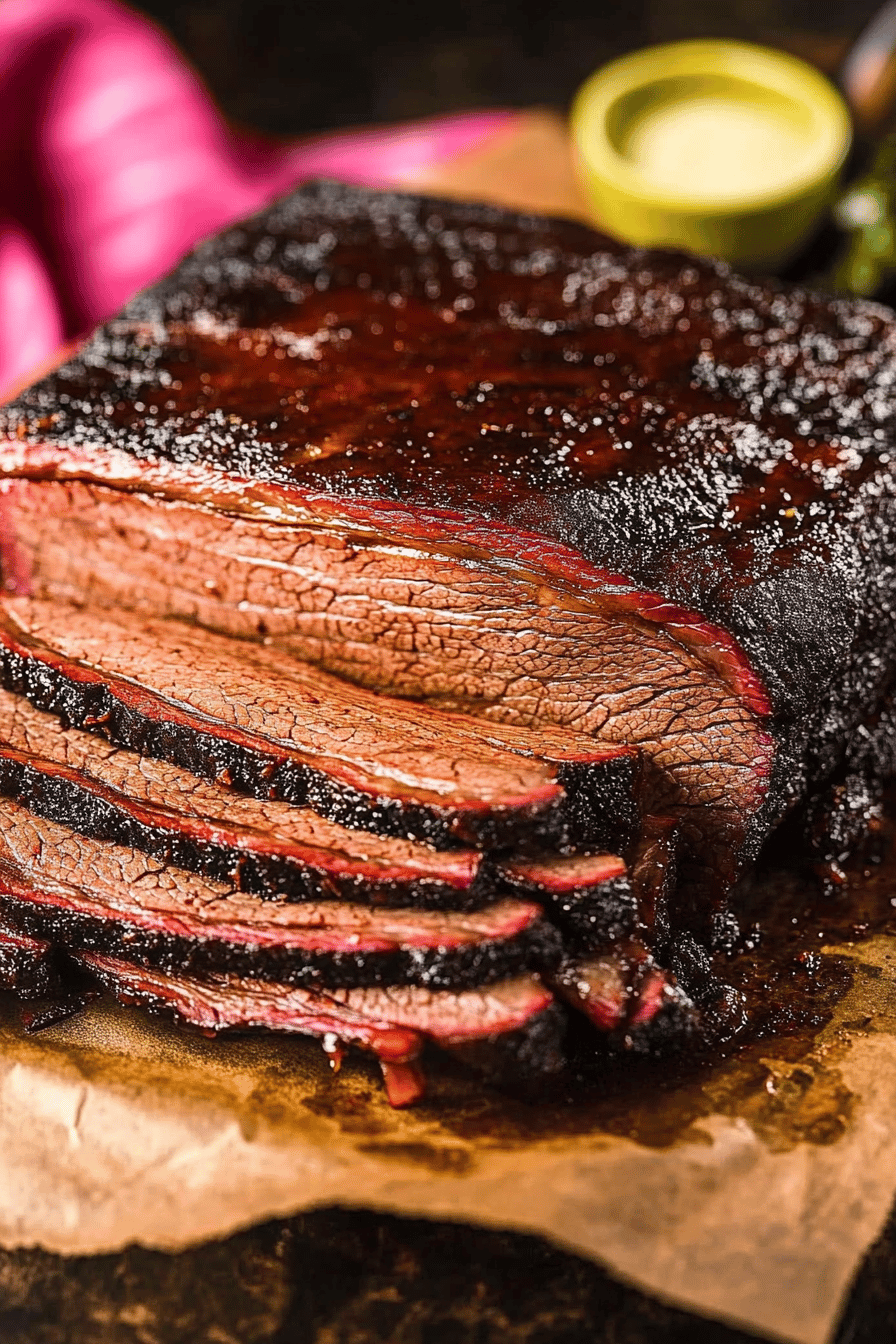
Step 9: Rest & Slice
This is perhaps the hardest part – waiting! Once the brisket is done, remove it from the oven. Let it rest, still covered (or loosely tented with foil), for at least 15-20 minutes. This resting period is crucial for allowing the juices to redistribute throughout the meat, making it even more tender and moist. After resting, slice the brisket against the grain. You’ll notice the grain changes direction, so check carefully to get the most tender slices. Serve warm and enjoy the incredible results of your patience!
What to Serve It With
This beef brisket is such a crowd-pleaser, and it pairs beautifully with so many things! For a classic breakfast or brunch, I love serving it with some fluffy scrambled eggs and maybe some crispy home fries. The richness of the brisket just makes breakfast feel extra special. If you’re going for a full-on brunch spread, consider serving it alongside some fresh fruit salad and a light hollandaise sauce for a touch of elegance. As a main course, it’s divine with creamy mashed potatoes and some simple steamed Green Beans or roasted asparagus. The tender meat and rich juices are perfect for soaking up all those delicious side dishes. For a more casual affair, like a family dinner or a game day, shredded brisket piled high on soft slider buns with a dollop of coleslaw is always a huge hit. My kids go absolutely nuts for brisket tacos! Just shred the meat, warm it up, and let everyone build their own with their favorite toppings – salsa, avocado, cheese, you name it. It’s also fantastic served with mac and cheese for the ultimate comfort food meal. Honestly, once you’ve tasted this brisket, you’ll find excuses to make it all the time, and it always feels like a special occasion.
Top Tips for Perfecting Your Beef Brisket
After making this beef brisket more times than I can count, I’ve picked up a few tricks that I think really make a difference. For starters, when you’re prepping the brisket, don’t be afraid of the fat cap. That quarter-inch layer is your friend! It renders down as it cooks, basting the meat from the top and keeping it incredibly moist and flavorful. If you trim too much, you risk a drier outcome. When it comes to the rub, make sure you’re pressing it into the meat. You want it to adhere well and start forming that delicious crust. I’ve learned that sometimes just sprinkling it isn’t enough; a good firm press helps! Another tip for the cooking process: if you’re not using a Dutch oven, make sure your roasting pan is covered TIGHTLY with foil. I double or even triple layer it to ensure no steam escapes. That steam is crucial for tenderizing the meat. I learned this the hard way after one time where my foil wasn’t sealed well, and the brisket was a bit tougher than I liked. For the braising liquid, using beef broth is great, but sometimes I like to add a splash of red wine for an extra depth of flavor, especially if I’m not making the BBQ glaze. And speaking of the glaze, don’t brush it on too early! If you glaze too soon, the sugars can burn before the brisket is fully tender. The last hour of cooking is perfect for that sticky, caramelized finish. Also, always, always, always let your brisket rest. I know it’s tempting to dive right in, but that 15-20 minute rest is non-negotiable for juiciness. Finally, slicing against the grain is vital. Look for the direction of the muscle fibers and cut perpendicular to them. This shortens the fibers, making every bite incredibly tender. If you cut with the grain, it can feel chewy, no matter how well you cooked it!
Storing and Reheating Tips
One of the best things about making a big, beautiful beef brisket is that it’s fantastic as leftovers! If you find yourself with any (which is rare in my house!), storing it properly is key. Once it’s cooled down a bit, I like to wrap it tightly in plastic wrap, then in foil, or just place it in an airtight container. It can stay in the refrigerator for up to 3-4 days and will still be delicious. For reheating, I’ve found that the best way to maintain its moisture is to reheat it gently. You can slice it (or shred it) and then warm it up in a covered dish in the oven at around 300°F (150°C) for about 15-20 minutes, adding a tablespoon or two of beef broth or water to keep it from drying out. Alternatively, you can reheat individual portions in the microwave, covered with a damp paper towel, for short intervals until heated through. For longer storage, brisket freezes beautifully. Wrap it very well in plastic wrap, then in foil or a freezer bag to prevent freezer burn. It should keep its quality for up to 2-3 months. When you’re ready to use it, thaw it overnight in the refrigerator and then reheat as described above. If you made a glaze, it’s usually best to add a fresh glaze or a bit more BBQ sauce when reheating to revive that flavor, as glazes can sometimes become a bit sticky or dry after freezing.
Frequently Asked Questions
Final Thoughts
There you have it – my tried-and-true, utterly delicious beef brisket recipe! I really hope you give this a try. It’s one of those dishes that feels like a labor of love, but in the best way possible, because the steps are so forgiving and the rewards are so immense. The aroma alone will make you feel like a culinary superstar, and the taste… well, that’s just pure magic. It’s the kind of meal that brings people together and creates wonderful memories. If you love slow-cooked, incredibly flavorful meats, you might also enjoy my recipe for [Link to another relevant recipe, e.g., Slow Cooker Pulled Pork]. Don’t forget to leave a comment below and let me know how your brisket turns out! I absolutely love hearing about your cooking adventures and seeing your creations. Happy cooking!
Beef Brisket
Ingredients
Main Ingredients
- 4.5 pounds beef brisket
- 2 tablespoons kosher salt
- 1 tablespoon black pepper
- 1 tablespoon garlic powder
- 1 tablespoon onion powder
- 0.5 cup beef broth
Instructions
Preparation Steps
- Preheat your smoker to 225°F (107°C).
- Pat the brisket dry with paper towels. In a small bowl, combine the kosher salt, black pepper, garlic powder, and onion powder. Rub this mixture evenly over the entire surface of the brisket.
- Place the brisket fat-side up in the smoker.
- Smoke for approximately 8 hours, or until the internal temperature reaches 165°F (74°C).
- Wrap the brisket tightly in butcher paper or foil. Pour the beef broth into the wrap.
- Return the wrapped brisket to the smoker and continue to cook for another 2-4 hours, or until the internal temperature reaches 200-205°F (93-96°C) and the brisket is probe-tender.
- Remove the brisket from the smoker and let it rest, still wrapped, for at least 1 hour before slicing against the grain.
