
There are some recipes that just feel like home, aren’t there? The kind that, as soon as you start making them, the whole house fills with this warm, comforting aroma, and you just know good things are on the way. For me, that’s these apple hand pies. Forget those giant, complicated apple pies that require a degree in pastry engineering. These little beauties are my go-to when I need a taste of pure comfort without a whole lot of fuss. They’re like the cute, pocket-sized cousins of a full-sized Apple Pie, perfect for little hands or when you just want a single, perfect bite of sweet, spiced apple goodness. My kids go absolutely bonkers for them, and honestly, so do I! They’re my secret weapon for school lunches, last-minute dessert emergencies, or honestly, just a Tuesday afternoon craving. When I tell you these are a lifesaver, I mean it!

What is an apple hand pie?
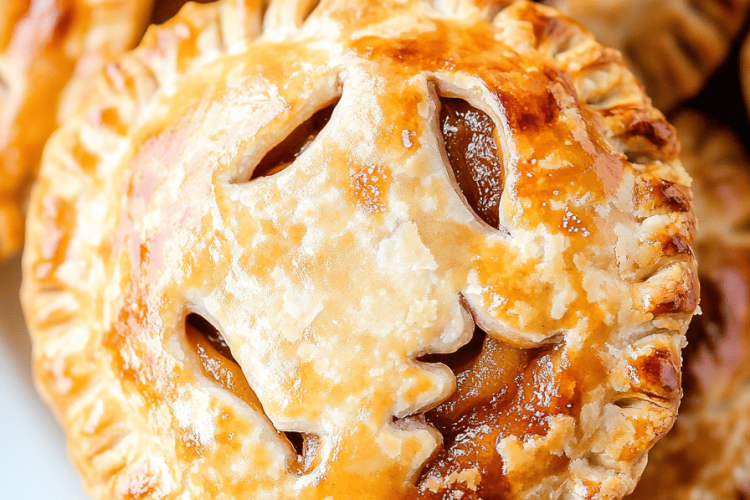
So, what exactly *are* these little wonders? Think of an apple hand pie as a delightful, portable individual pie. Instead of a big, round pie that you have to slice, you get your very own little pastry parcel, bursting with warm, spiced apple filling. The name really says it all – they’re meant to be held in your hand and enjoyed! They’re essentially a flaky, buttery crust folded over a sweet and tender apple mixture, then baked to golden perfection. They’re like a little edible gift, ready to be unwrapped and savored. We’re talking about simple ingredients coming together to create something truly magical. It’s that classic apple pie flavor we all adore, just in a more convenient, incredibly charming package. They’re humble, yet utterly delicious, and that’s precisely why I’ve fallen so head over heels for them.
Why you’ll love this recipe?
Honestly, I could rave about these apple hand pies all day, but let me give you the highlights. First, the flavor is just out of this world. You get that perfect balance of sweet, tart apples with just the right touch of cinnamon and nutmeg. The crust? Oh my goodness, the crust is flaky, buttery, and just melts in your mouth. It’s pure bliss. And the best part? They are surprisingly simple to make. I know pastry can sound intimidating, but this recipe is designed to be foolproof. You don’t need fancy equipment or a culinary degree. Plus, they’re incredibly cost-effective. Apples are usually pretty affordable, and the other ingredients are pantry staples. This makes them a fantastic treat without breaking the bank. And the versatility! You can whip these up for breakfast, a snack, or dessert. They’re also perfect for packing into lunchboxes or taking to picnics because they’re so easy to transport. What I truly love most about these apple hand pies is that they feel special without being complicated. They’re the kind of treat that makes people feel loved and cared for. If you love my classic apple crumble or my easy apple turnovers, you are going to adore these!
How do I make Apple Pies?
Quick Overview
Making these apple hand pies is a straightforward process that even beginners can tackle with confidence. We’ll whip up a simple, tender dough, prepare a luscious apple filling bursting with flavor, then assemble and bake them until they’re golden and irresistible. The magic really happens in the assembly, where we create these cute little pockets of deliciousness. It’s a recipe that’s not only rewarding to make but also incredibly satisfying to eat. You’ll be amazed at how quickly these come together, making them perfect for a weekend baking project or even a weeknight treat when a sweet craving strikes.
Ingredients
For the Dough:
This is my go-to dough because it’s so forgiving and produces a wonderfully flaky crust. I always use cold butter; it’s crucial for flakiness! Make sure your butter is really cold, almost frozen, and cut into small cubes. I also find using ice water helps keep everything cold and prevents the gluten from developing too much, which means a tender crust. You’ll need:
- 2 12 cups all-purpose flour.
- 1 teaspoon granulated sugar
- ½ teaspoon salt
- 1 cup (2 sticks) unsalted butter, very cold, cut into ½-inch cubes
- ½ cup ice water, plus more if needed
For the Filling:
This filling is where all the cozy apple pie flavors live! I prefer a mix of apples – something tart like Granny Smith and something a bit sweeter like Honeycrisp or Fuji – for the best flavor and texture. If you only have one kind, that’s totally fine too! Just make sure they’re firm apples that hold their shape when cooked. Don’t skimp on the spices; they’re what make it smell like autumn in a bite!
- 4 cups thinly sliced peeled apples (about 4-5 medium apples)
- ½ cup granulated sugar (adjust to your apple sweetness)
- 2 tablespoons all-purpose flour
- 1 teaspoon ground cinnamon
- ¼ teaspoon ground nutmeg
- 1 tablespoon lemon juice
- 1 tablespoon unsalted butter, cut into small pieces
For the Glaze & Finish:
This simple glaze gives them a beautiful shine and a touch of extra sweetness. It’s totally optional, but it really elevates them to “special occasion” status. For an egg wash, it gives a beautiful golden color.
- 1 large egg, beaten (for egg wash)
- 1 tablespoon coarse sugar, for sprinkling (optional)
- For the Simple Glaze:
* 1 cup powdered sugar
* 2-3 tablespoons milk or water
* ½ teaspoon vanilla extract (optional)
Step-by-Step Instructions
Step 1: Preheat & Prep Pan
First things first, let’s get our oven ready and our baking sheets prepared. Preheat your oven to 400°F (200°C). This higher temperature is key for getting that lovely golden crust. Line two baking sheets with parchment paper. This is a little trick I learned early on – parchment paper makes cleanup a breeze and ensures the bottoms don’t stick. Having your pans ready means you can slide those pies in as soon as they’re assembled!
Step 2: Mix Dry Ingredients
In a large bowl, whisk together the 2 ½ cups of all-purpose flour, 1 teaspoon of sugar, and ½ teaspoon of salt. This just ensures everything is evenly distributed. It might seem like a small step, but it makes a difference in the final texture of your dough. Getting those dry ingredients well combined is the first step to a perfectly tender crust.
Step 3: Mix Wet Ingredients
Now, let’s add our cold, cubed butter to the dry ingredients. I like to use a pastry blender or my fingertips to cut the butter into the flour until it resembles coarse crumbs with some pea-sized pieces of butter still visible. Those little butter bits are what create the flaky layers. Then, gradually add the ½ cup of ice water, a tablespoon at a time, mixing until the dough just starts to come together. You might not need all the water, or you might need a tiny bit more – the dough should be shaggy but hold together when you squeeze it. Don’t overmix! This is crucial for a tender crust.
Step 4: Combine
Turn the dough out onto a lightly floured surface and gently bring it together into a ball. Divide the dough in half, flatten each half into a disk, wrap them in plastic wrap, and refrigerate for at least 30 minutes. This chilling time is super important. It allows the gluten to relax and the butter to firm up again, which makes it easier to roll and ensures maximum flakiness. Trust me, this chilling step is worth the wait!
Step 5: Prepare Filling
While the dough is chilling, let’s make that glorious apple filling. In a medium bowl, combine your sliced apples, ½ cup granulated sugar, 2 tablespoons flour, 1 teaspoon cinnamon, and ¼ teaspoon nutmeg. Toss everything gently to coat the apples evenly. Add the lemon juice and toss again. The flour helps thicken the juices as the apples cook, preventing a soggy bottom. Then, dot the filling with those little pieces of butter. This adds an extra richness that you’ll really taste.
Step 6: Layer & Swirl
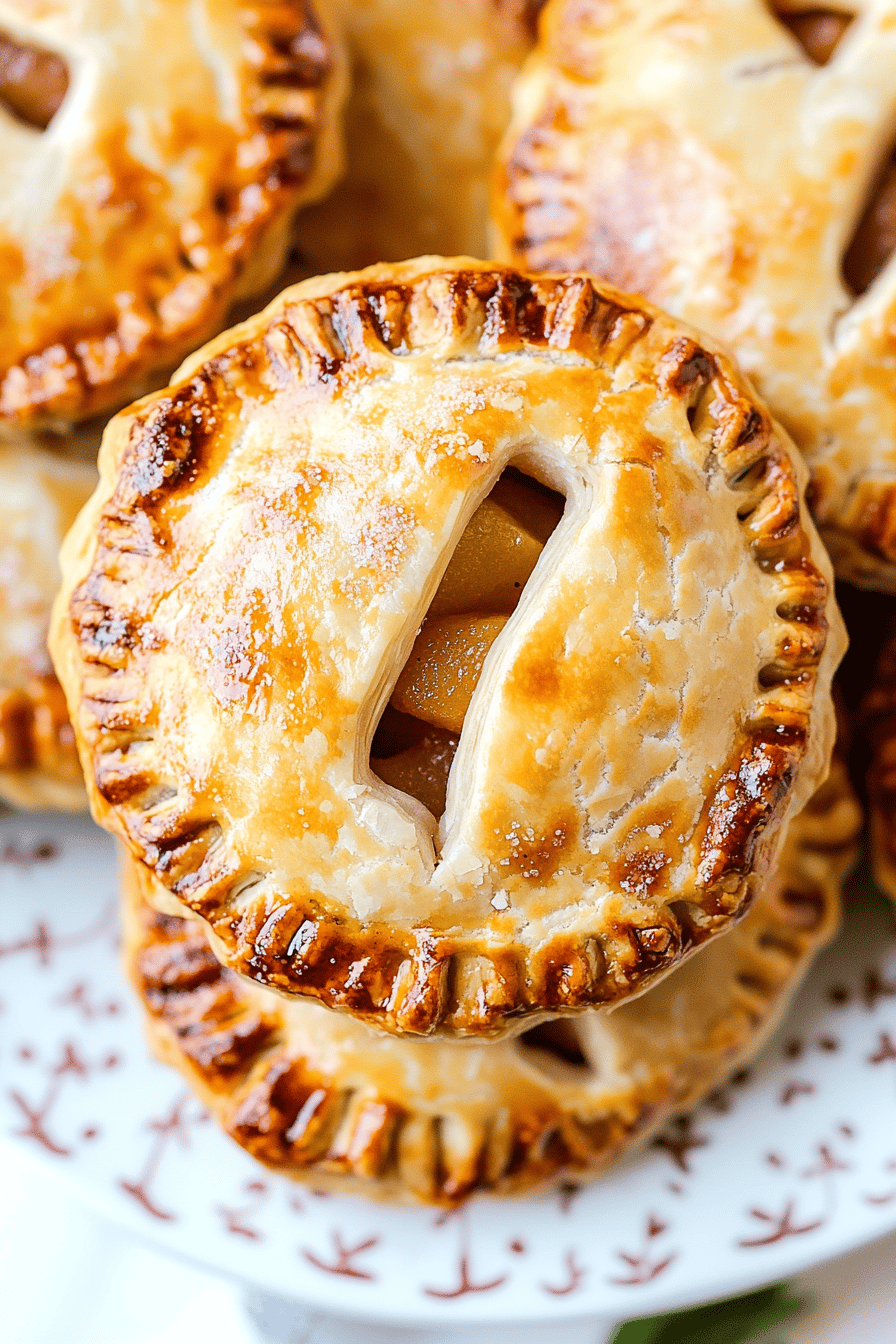
Now for the fun part – assembly! On a lightly floured surface, roll out one disk of dough to about ⅛-inch thickness. Use a 4-5 inch round cookie cutter or a bowl to cut out circles. You should get about 6-8 circles per disk. Place about 2 tablespoons of the apple filling onto one half of each dough circle, leaving a small border. Be careful not to overfill, or they’ll be hard to seal! Brush the edges of the dough with a little water or your beaten egg wash. Fold the other half of the dough over the filling to create a semi-circle. Crimp the edges with a fork to seal them tightly. You can even do a little decorative crimping if you’re feeling fancy! Cut a few small slits in the top of each hand pie to allow steam to escape.
Step 7: Bake
Place the assembled hand pies onto your prepared baking sheets. Brush the tops with the beaten egg wash, then sprinkle with coarse sugar if you’re using it. This gives them that beautiful, shiny, golden-brown finish. Bake for 20-25 minutes, or until the crust is golden brown and the filling is bubbly. If one baking sheet seems to be browning faster, you can swap them halfway through. Keep an eye on them – ovens can be so quirky!
Step 8: Cool & Glaze
Once they’re baked to perfection, remove them from the oven and let them cool on the baking sheets for about 10 minutes before transferring them to a wire rack to cool further. They’ll be super hot inside! If you’re using the simple glaze, whisk together the powdered sugar, 2-3 tablespoons of milk or water, and vanilla extract until smooth and pourable. You want it thick enough to coat but thin enough to drizzle. Drizzle the glaze over the slightly cooled hand pies. The warmth helps it set nicely. Let them cool a bit more before digging in!
Step 9: Slice & Serve
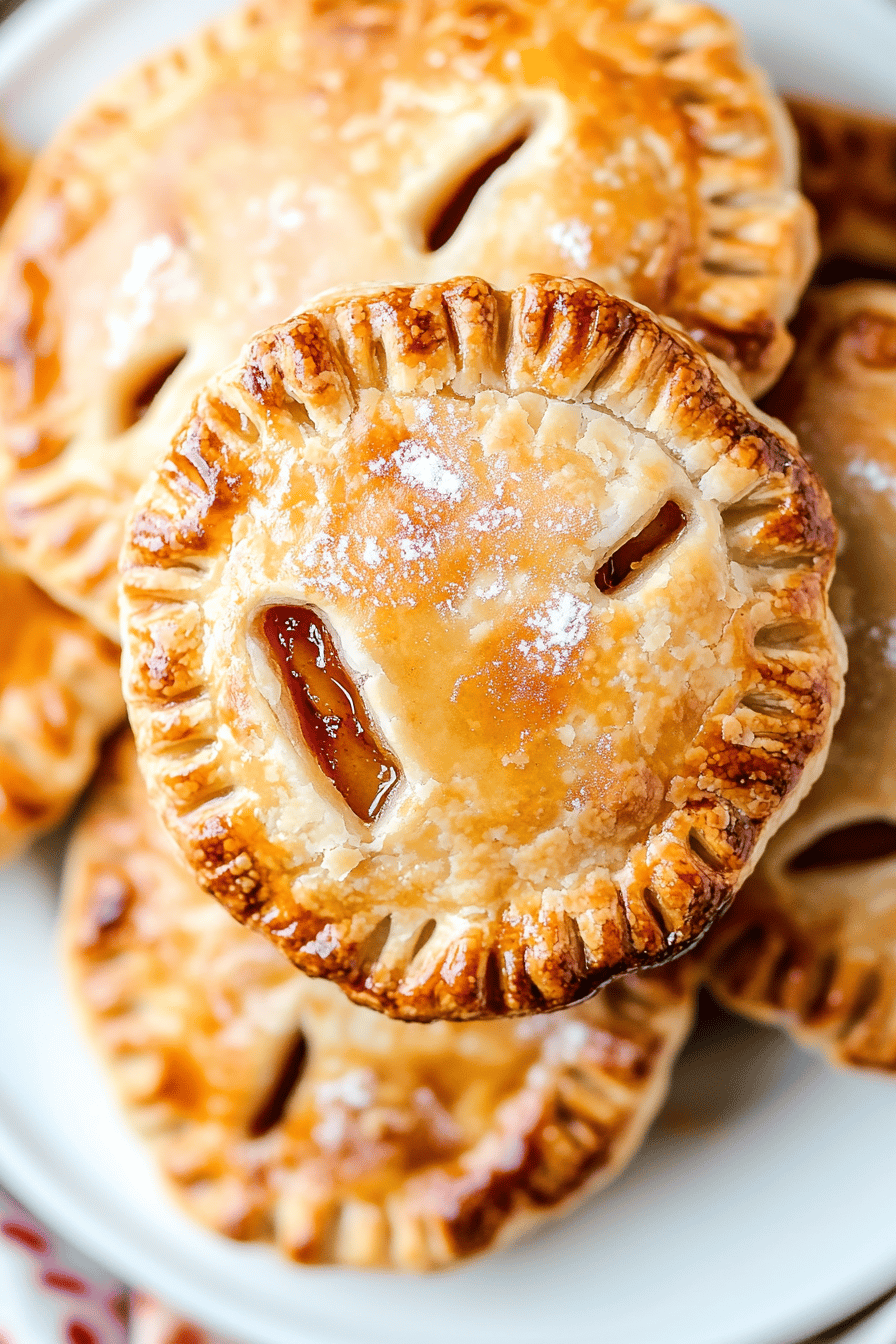
These apple hand pies are best served warm, but they’re also delicious at room temperature. They’re the perfect size to just pick up and enjoy. If you’ve glazed them, they look so pretty sitting on a plate. You can serve them as is, or perhaps with a small scoop of vanilla ice cream or a dollop of whipped cream for an extra treat. The smell alone when you cut into one is heavenly!
What to Serve It With
These apple hand pies are so versatile, they fit into almost any meal or occasion! For breakfast, they’re a delightful treat alongside a steaming mug of coffee or a glass of cold milk. Imagine waking up and having one of these – it’s like a little morning celebration! For a weekend brunch, I love to arrange them artfully on a platter with some fresh berries and a yogurt parfait. They add a touch of homemade charm that guests always appreciate. Served warm with a dusting of powdered sugar or a light drizzle of that simple glaze, they make an absolutely divine dessert. They’re the perfect sweet ending after a hearty meal, especially when paired with a cup of tea or a digestif. And for cozy snacks? Oh, these are my absolute favorite. On a chilly afternoon, curled up with a book and one of these warm hand pies… pure happiness. My family loves them with a glass of apple cider, especially in the fall. It just doubles down on that comforting apple flavor!
Top Tips for Perfecting Your Apple Hand Pies
After making these apple hand pies more times than I can count, I’ve picked up a few tricks that I think are really helpful for getting them just right. For the apples, using a mix of sweet and tart really does give you the best flavor profile. If your apples are particularly juicy, you might want to add an extra teaspoon of flour to the filling to help absorb some of that moisture. When you’re making the dough, the key is keeping everything cold. Cold butter, cold water – it’s like magic for a flaky crust. Don’t be tempted to overwork the dough; a little shaggy texture is exactly what you want. When you’re rolling out the dough, if it starts to get warm and sticky, just pop it back in the fridge for 10-15 minutes. It makes a world of difference. For the filling, make sure your apple slices aren’t too thick, or they might not cook through completely. About ¼-inch thick is perfect. And when you’re filling the pies, don’t overload them. It makes them harder to seal, and you risk having filling ooze out everywhere during baking. For a beautiful golden crust, that egg wash is essential! Make sure to get it all over the top and sides. If you’re really worried about burning the edges, you can loosely tent the pies with foil during the last 5-10 minutes of baking. For the glaze, start with less liquid and add more until you get that perfect drizzling consistency. It’s easier to thin out a glaze than to thicken it! If you want to add other flavors, a pinch of cardamom or a little grated orange zest in the filling is lovely. And remember, practice makes perfect! Don’t get discouraged if your first batch isn’t magazine-cover worthy; they’ll still taste amazing!
Storing and Reheating Tips
These apple hand pies are delightful fresh out of the oven, but they’re also quite forgiving when it comes to storage. If you have any leftovers (which is rare in my house!), you can store them at room temperature, loosely covered, for about 24 hours. They’ll stay nice and fresh. For longer storage, I always opt for the refrigerator. Place them in an airtight container, and they should keep well for up to 3-4 days. Just make sure they’ve cooled completely before sealing them up. They’re still delicious cold, but if you prefer them warm, you can easily reheat them. Pop them in a preheated oven at around 300°F (150°C) for about 5-10 minutes, or until warmed through. This usually brings back some of that lovely crispness to the crust. If you’re short on time, a quick zap in the microwave works too, though the crust might be a bit softer. For freezing, these hand pies are fantastic! Once they’ve completely cooled, wrap them individually in plastic wrap, then place them in a freezer-safe bag or container. They’ll keep in the freezer for up to 2-3 months. To reheat from frozen, you can place them directly in a 350°F (175°C) oven for about 15-20 minutes, or until heated through and the crust is crisp again. If you’ve glazed them, I’d recommend glazing them *after* reheating, so the glaze stays looking fresh and beautiful. It’s the best way to enjoy them at their peak!
Frequently Asked Questions
Final Thoughts
There you have it – my beloved apple hand pies! They’re more than just a recipe to me; they’re a little piece of comfort, a burst of pure joy, and a reminder of how simple ingredients can create something truly magical. The flaky crust, the warm, spiced apple filling, all wrapped up in a perfect little package – it’s a combination that just never fails to make me smile. They’re proof that you don’t need to spend hours in the kitchen to create something incredibly delicious and impressive. Whether you’re baking them for a special occasion or just because, I know you’re going to fall in love with them too. If you enjoyed these, you might also love my Spiced Pear Galette for another rustic fruit dessert, or my Easy Cinnamon Sugar Donuts for more handheld sweet treats. I truly hope you give these apple hand pies a try. I can’t wait to hear how they turn out for you and what your family thinks! Please leave a comment below with your thoughts, or share your own amazing variations. Happy baking!

Apple Hand Pies
Ingredients
For the Filling
- 4 cups apples peeled, cored, and diced
- 0.25 cup granulated sugar
- 1 tablespoon all-purpose flour
- 0.5 teaspoon ground cinnamon
- 0.25 teaspoon ground nutmeg
- 1 tablespoon lemon juice
For the Dough
- 2.5 cups all-purpose flour
- 1 teaspoon salt
- 0.75 cup unsalted butter cold and cubed
- 0.5 cup ice water
For the Egg Wash
- 1 large egg egg beaten
- 1 tablespoon water
Instructions
Make the Filling
- In a large bowl, combine diced apples, granulated sugar, flour, cinnamon, nutmeg, and lemon juice. Toss to coat evenly.
Make the Dough
- In a separate bowl, whisk together flour and salt.
- Cut in the cold butter using a pastry blender or your fingertips until the mixture resembles coarse crumbs with some pea-sized pieces of butter.
- Gradually add ice water, one tablespoon at a time, mixing until the dough just comes together. Be careful not to overmix.
- Divide the dough in half, flatten each half into a disk, wrap in plastic wrap, and refrigerate for at least 30 minutes.
Assemble the Hand Pies
- Preheat your oven to 375°F (190°C). Line baking sheets with parchment paper.
- On a lightly floured surface, roll out one disk of dough to about 1/8-inch thickness.
- Cut out circles using a 4-inch round cutter. Reroll scraps as needed.
- Spoon about 2-3 tablespoons of the apple filling onto one half of each circle, leaving a small border.
- Moisten the edges of the dough with water and fold the other half over the filling to create a half-moon shape. Crimp the edges with a fork to seal.
- Place the hand pies on the prepared baking sheets. Cut a few slits in the top of each pie to allow steam to escape.
- Whisk together the egg and water for the egg wash. Brush the tops of the hand pies with the egg wash.
Bake the Hand Pies
- Bake for 20-25 minutes, or until golden brown and bubbly.
- Let cool on the baking sheets for a few minutes before transferring to a wire rack to cool completely.
