

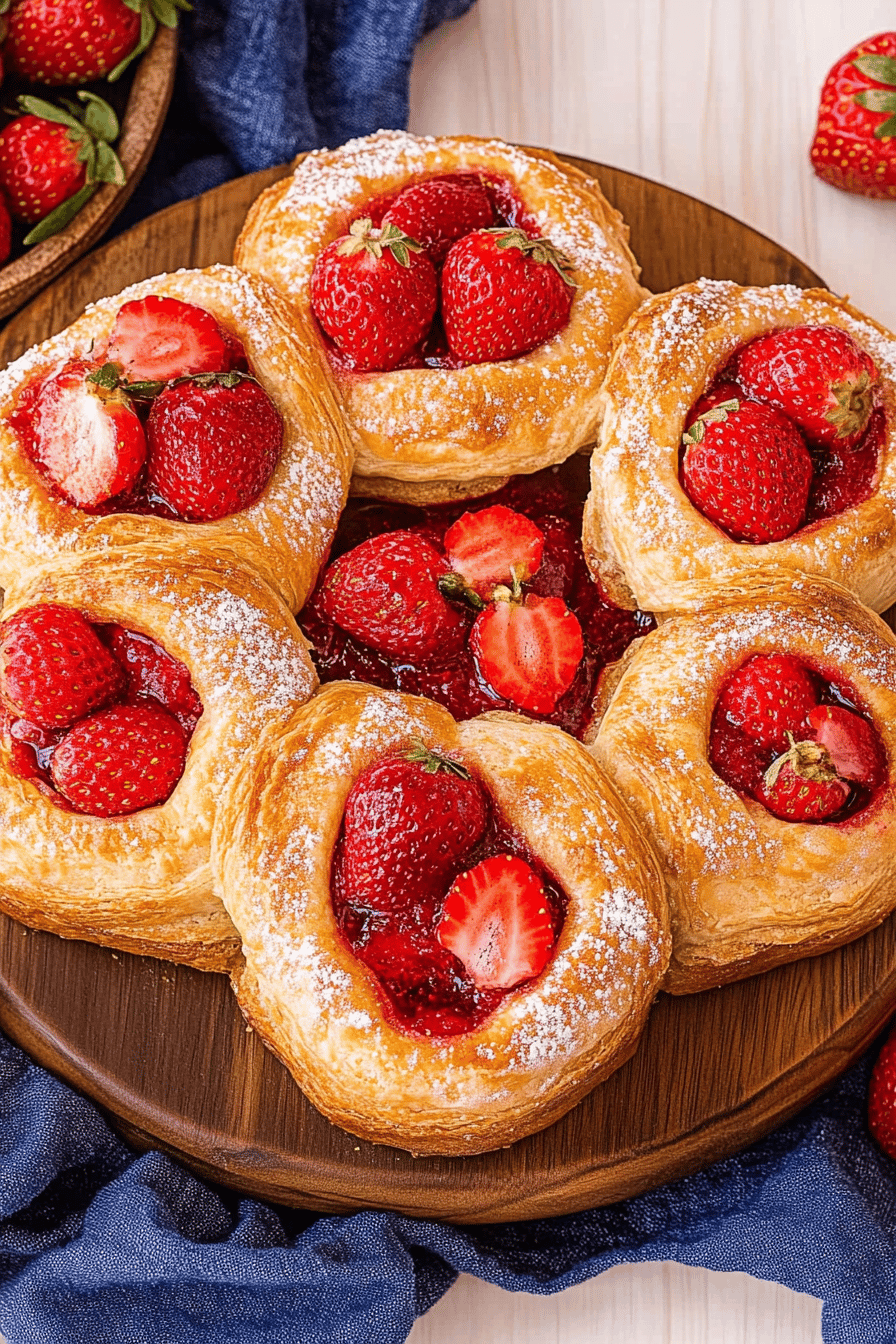
Oh, where do I even begin with this strawberry danish? It’s one of those recipes that just feels like a warm hug on a plate. I remember the first time I tried making something remotely like this; it was a disaster, frankly. But over the years, through trial and error, and countless cups of coffee with my grandma, we’ve perfected it. This isn’t just a sweet treat; it’s a weekend morning ritual, a “thank goodness it’s Friday” indulgence, and the absolute best way to use up those first sweet strawberries of the season. If you’ve ever loved those delicate, flaky pastries from the bakery but thought they were too complicated to tackle at home, let me tell you, this strawberry danish is your answer. It’s surprisingly achievable, and the taste? Well, it blows the store-bought versions right out of the water. Forget those sad, often dry pastries; this homemade beauty is tender, bursting with jammy strawberry goodness, and finished with the dreamiest sweet glaze. It’s like sunshine baked into every bite, and my family devours them every single time.

What is strawberry Danish?
So, what exactly *is* a strawberry danish? At its heart, it’s a delightful pastry, typically made from a rich, laminated dough (though we’re simplifying that a bit here to make it home-cook friendly!). This dough is then shaped into pockets or folds, filled generously with a sweet strawberry concoction, and baked until golden and delicious. Think of it as a more elegant, special occasion cousin to a regular muffin or cookie, but with that irresistible flaky texture you dream of. The “danish” part refers to its origins, with Viennese bakers bringing these types of pastries to Denmark, where they really took off and became a national treasure. Our version focuses on that wonderful balance of tender pastry, bright, slightly tart strawberry filling, and a sweet, glossy glaze that just seals the deal. It’s that perfect bite that’s sweet without being cloying, and utterly comforting.
Why you’ll love this recipe?
Honestly, there are so many reasons why I think you’re going to fall head over heels for this strawberry danish recipe. First and foremost, the FLAVOR. That combination of slightly tangy, sweet strawberries, baked into a tender pastry that has just the right amount of chew and crispness, is simply divine. It’s not overly sweet, which is something I always strive for. The strawberries retain a little bit of their fresh tang, cutting through the richness beautifully.
Then there’s the SIMPLICITY. I know, I know, “flaky pastry” often conjures images of endless folding and chilling, but I’ve really streamlined this process. We’re using a fantastic shortcut that gives you incredible texture without the stress. It’s genuinely manageable, even on a slightly busier morning when you want something special but don’t have all day. It’s the kind of recipe that makes you feel like a baking pro without the fuss.
And let’s talk COST-EFFICIENCY. Using simple pantry staples and seasonal strawberries means this recipe is wonderfully budget-friendly. You get that gourmet bakery experience for a fraction of the price, which is always a win in my book.
Plus, it’s SO VERSATILE. While the strawberry version is my absolute favorite, I’ll share some variations later on. You can serve these for a fancy brunch, a delightful breakfast treat, or even as a light dessert. They pair perfectly with a strong cup of coffee or a glass of cold milk. What I love most about this particular strawberry danish is that it strikes that perfect balance between being special enough for guests but easy enough for a spontaneous craving. It’s become my go-to for potlucks and holidays because everyone asks for them!
How do you make strawberry Danish?
Quick Overview
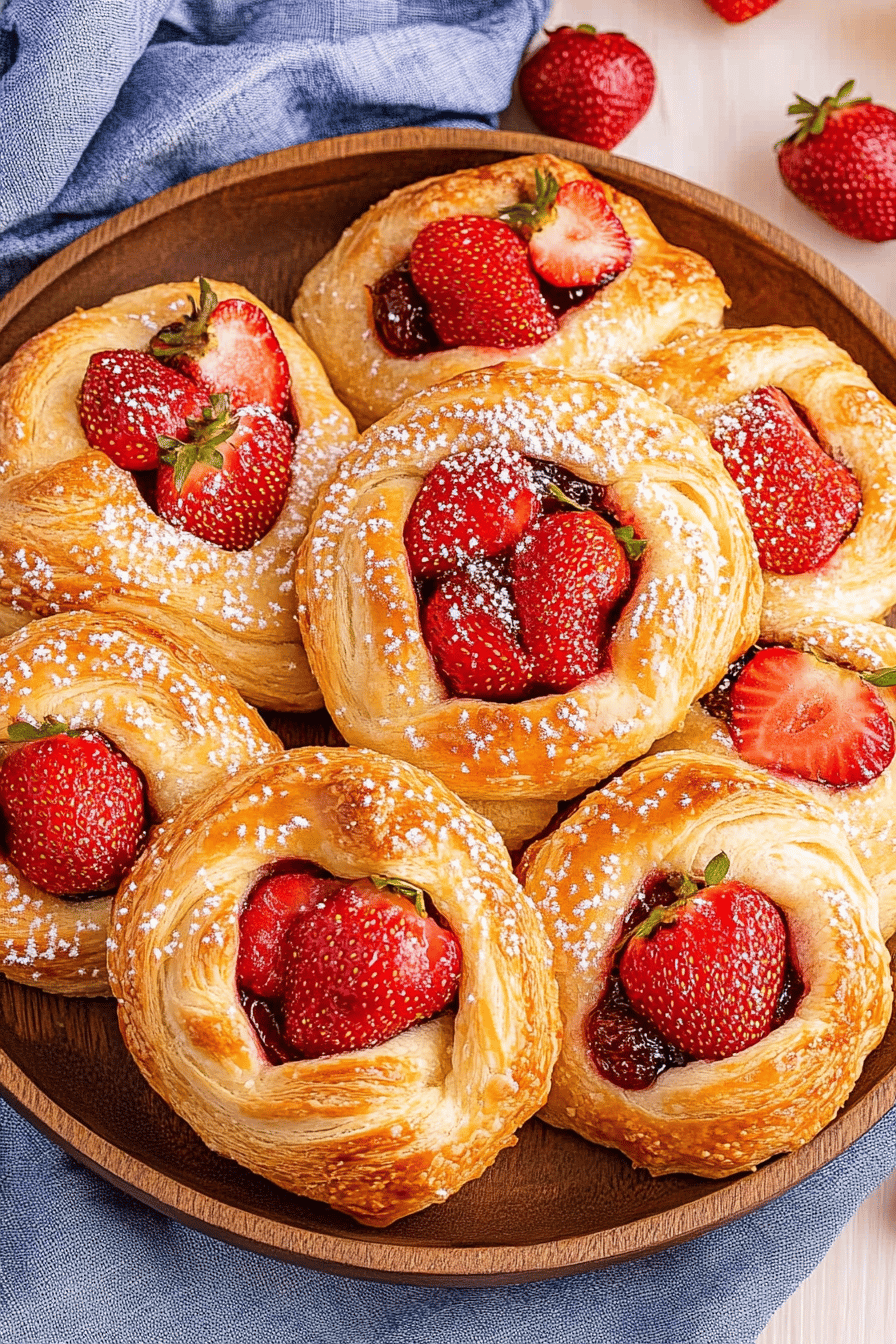
Making these glorious strawberry danishes is a straightforward process that involves mixing a simple batter, preparing a luscious strawberry filling, layering them together, baking until golden, and finishing with a sweet glaze. The key to their wonderful texture is in the gentle mixing and the perfectly balanced filling. You’ll be amazed at how quickly these come together, offering a truly impressive result with minimal effort. It’s a recipe designed for busy home bakers who still want to create something truly special and delicious.
Ingredients
For the Main Pastry:
This is where the magic starts! We’re using a method that’s much easier than traditional laminated dough but gives you a wonderful tender and slightly flaky result.
- 2 cups all-purpose flour, plus more for dusting: Use a good quality all-purpose flour. I find King Arthur or Gold Medal work best here.
- 1/2 cup granulated sugar: For a touch of sweetness in the pastry itself.
- 2 teaspoons baking powder: This is our leavening agent, giving the pastry that lift.
- 1/2 teaspoon salt: Balances the sweetness and enhances flavors.
- 1/2 cup (1 stick) unsalted butter, cold and cubed: VERY important that the butter is cold! This is what helps create those delicate layers.
- 2 large eggs: For richness and binding.
- 1/2 cup milk: Whole milk gives the best richness, but 2% works fine. You can even experiment with a creamy non-dairy milk like oat or soy.
- 1 teaspoon vanilla extract: Because vanilla makes everything better.
For the Strawberry Filling:
This is the star! We want bright, flavorful strawberries that aren’t too runny.
- 2 cups fresh strawberries, hulled and finely chopped: You can also use frozen strawberries, just be sure to thaw and drain them really well to avoid a watery filling.
- 1/4 cup granulated sugar: Adjust to your sweetness preference and the ripeness of your berries.
- 2 tablespoons cornstarch: This is our thickening agent. Mix it with a tiny bit of water before adding to the strawberries if you’re worried about clumps.
- 1 tablespoon lemon juice: Brightens up the strawberry flavor.
- 1/2 teaspoon lemon zest (optional): For an extra burst of citrus!
For the Glaze:
A simple drizzle to finish it all off.
- 1 cup powdered sugar: Sifted, if you want it extra smooth.
- 2-3 tablespoons milk or cream: Start with 2 and add more to reach your desired drizzling consistency.
- 1/2 teaspoon vanilla extract (optional): For a touch more flavor.
Step-by-Step Instructions
Step 1: Preheat & Prep Pan
First things first, let’s get the oven ready. Preheat your oven to 375°F (190°C). While it’s heating up, line a large baking sheet with parchment paper. This is a lifesaver for easy cleanup, trust me! You want a good amount of space between your danishes once they’re on the sheet, as they will spread slightly.
Step 2: Mix Dry Ingredients
In a large mixing bowl, whisk together the flour, granulated sugar, baking powder, and salt. Give it a good whisk to make sure everything is evenly distributed. This ensures your leavening is uniform, which is key for a nice rise.
Step 3: Mix Wet Ingredients
In a separate medium bowl, whisk together the eggs, milk, and vanilla extract until well combined.
Step 4: Combine
Now, let’s bring it all together. Add the cold, cubed butter to the dry ingredients. You can use a pastry blender, your fingertips, or a food processor to cut the butter into the flour mixture until it resembles coarse crumbs with some pea-sized pieces of butter remaining. This is where some of that lovely flakiness comes from!
Next, pour the wet ingredients into the dry ingredients. Gently stir with a spatula or wooden spoon until just combined. Be careful not to overmix! We want to bring it together, but a few streaks of flour are okay. Overmixing can lead to a tough pastry, and nobody wants that. The dough will be a bit sticky and shaggy, and that’s perfectly normal.
Step 5: Prepare Filling
While the dough rests for a moment, let’s make that glorious strawberry filling. In a medium saucepan, combine the chopped strawberries, granulated sugar, cornstarch, lemon juice, and lemon zest (if using).
Place the saucepan over medium heat and cook, stirring frequently, until the mixture thickens and becomes glossy, about 5-8 minutes. You’ll see it bubble and the strawberries will soften. Once thickened, remove from heat and let it cool slightly. This step is crucial – a hot filling can make your pastry dough soggy.
Step 6: Layer & Swirl
Turn the dough out onto a lightly floured surface. Gently knead it a few times, just until it comes together into a cohesive ball. Don’t overwork it! Pat or gently roll the dough into a rectangle, about 10×12 inches. Don’t worry about perfection here; rustic is beautiful.
Now, spoon the cooled strawberry filling evenly over about two-thirds of the dough rectangle, leaving a small border. Fold the unfilled third of the dough over the filling, then fold the other filled third over that, like folding a letter. You should have three layers. Gently press down to seal. You can also cut the dough into squares and spoon filling into the center, then fold the corners to meet in the middle, creating a more traditional danish shape. For a swirl effect, you can spread the filling and then gently swirl it into the dough with a knife before folding or shaping.
Step 7: Bake
Carefully transfer your shaped danishes to the prepared baking sheet, making sure they have a little space between them. Bake for 20-25 minutes, or until the pastries are beautifully golden brown and the filling is bubbly. Keep an eye on them, as oven temperatures can vary.
Step 8: Cool & Glaze
Once baked, remove the danishes from the oven and let them cool on the baking sheet for about 5-10 minutes before transferring them to a wire rack to cool completely. This is important so they don’t fall apart.
While they’re cooling, whip up the glaze. In a small bowl, whisk together the powdered sugar, 2 tablespoons of milk (or cream), and vanilla extract until smooth. Add more milk, a teaspoon at a time, until you reach a nice drizzling consistency.
Once the danishes are mostly cool, drizzle the glaze generously over the top. You can do this with a spoon or a piping bag for a neater look, but honestly, a freehand drizzle is just as charming!
Step 9: Slice & Serve
Allow the glaze to set for a few minutes. Then, slice into beautiful portions and serve! These are best enjoyed fresh, still slightly warm, or at room temperature. The texture is absolutely sublime!
What to Serve It With
These strawberry danishes are so versatile, they can truly elevate any meal or occasion! For a relaxed BREAKFAST, they are absolutely divine alongside a strong, steaming cup of coffee or a glass of freshly squeezed orange juice. I love serving them whole for a simple, beautiful presentation that says “I made this for you.”
When it comes to BRUNCH, they become a star on the table. Imagine them nestled amongst a spread of fresh fruit salad, quiches, and maybe some savory sausage or bacon. A mimosa or a sparkling rosé makes the perfect beverage pairing to add a touch of elegance. For an extra touch, a light dusting of powdered sugar over the whole platter before serving makes them look even more festive.
As a simple DESSERT, these are wonderful. Serve them slightly warm with a small scoop of vanilla bean ice cream or a dollop of fresh whipped cream. A sprinkle of chopped toasted almonds or a few extra fresh berries on the side adds a lovely textural contrast. They’re perfect for a light after-dinner treat that feels a little indulgent.
And for those COZY SNACKS? This is where they truly shine in their casual glory. They’re perfect with a mug of hot tea or even a rich hot chocolate on a chilly afternoon. My kids absolutely love these as an after-school treat, and they disappear in minutes. My family tradition is to make a batch on a lazy Sunday morning, and we just lounge around the kitchen, enjoying them with our coffee. It’s those simple moments that make the recipe so special to us.
Top Tips for Perfecting Your Strawberry Danish
Over the years, I’ve picked up a few tricks that I think really make a difference in achieving that perfect strawberry danish every time.
For the Strawberry Filling: Make sure your strawberries are chopped into relatively small, uniform pieces. This helps them cook evenly and creates a lovely, jammy consistency without being too chunky. If you’re using frozen strawberries, thawing them completely and pressing out as much liquid as possible is absolutely crucial. Excess moisture is the enemy of good pastry! I’ve learned this the hard way, ending up with a slightly soggy bottom.
When it comes to Mixing Advice for the pastry dough: Resist the urge to overmix! Seriously. A shaggy dough with a few dry bits is actually better than a perfectly smooth, elastic dough. That slight unevenness is what allows steam to escape during baking, creating those lovely layers. When combining wet and dry, just mix until it *barely* comes together.
For Swirl Customization: If you’re going for the layered fold, try to keep your folds relatively even. This promotes even baking and a beautiful layered appearance. For the more traditional folded-corner danish, don’t overfill them, or the filling will escape during baking. Pinch the corners firmly to help contain the deliciousness.
When it comes to Ingredient Swaps, for the pastry, if you don’t have milk, a thick plain yogurt or even Sour Cream can work in a pinch for added richness, though the texture might be slightly denser. For the filling, if strawberries aren’t in season, a mix of berries or even a good quality apricot jam (thinned slightly if it’s very stiff) can be lovely. Just adjust the sugar based on the sweetness of your chosen fruit.
Baking Tips: I always bake my danishes on the middle rack of the oven. This ensures even heat distribution. If you notice the tops browning too quickly before the insides are cooked, you can loosely tent them with foil. Always do the “golden brown” test – that’s your best indicator of doneness. A slight spring back when gently pressed is also a good sign.
And for the Glaze Variations: If you want a less sweet glaze, use a little more lemon juice and less powdered sugar. For a richer flavor, you can use cream instead of milk. If you’re not a fan of powdered sugar, a light dusting of granulated sugar mixed with a pinch of cinnamon before baking can also be a nice touch!
Storing and Reheating Tips
These strawberry danishes are truly best enjoyed the day they are made, but they do store reasonably well if you need to keep them for a bit.
Room Temperature: If you have any leftovers that haven’t been glazed yet, you can store them in an airtight container at room temperature for up to 2 days. For already-glazed danishes, they are best eaten within 24 hours as the glaze can get a bit sticky at room temperature over time. Just ensure they are covered to prevent them from drying out.
Refrigerator Storage: For longer storage, place completely cooled danishes (glazed or unglazed) in an airtight container and refrigerate for up to 4-5 days. The pastry might soften slightly in the fridge, so if you prefer them a bit crisper, follow the reheating tips below.
Freezer Instructions: These freeze wonderfully! Wrap individual danishes tightly in plastic wrap, then place them in a freezer-safe bag or container. They’ll keep well in the freezer for up to 2-3 months. To thaw, simply remove them from the freezer and let them come to room temperature.
Glaze Timing Advice: If you plan to freeze your danishes, it’s best to glaze them *after* they have been thawed and reheated. This prevents the glaze from becoming soft or sticky during the freezing and thawing process. For refrigerator storage, it’s usually fine to leave the glaze on.
Reheating: If you’ve stored them in the fridge or freezer and want to revive that fresh-baked magic, a quick trip to a warm oven is your best bet. For refrigerated danishes, pop them in a preheated oven at 300°F (150°C) for about 5-8 minutes, or until warmed through and slightly crisped. For frozen danishes, you can place them directly from the freezer into the same temperature oven and bake for about 10-15 minutes, or until heated through. This little reheat makes a world of difference and brings back that delightful texture.
Frequently Asked Questions
Final Thoughts
There you have it – a strawberry danish recipe that’s truly made with love, designed to bring a little bit of bakery magic right into your own kitchen. I hope you feel inspired to try it out! It’s more than just a recipe; it’s an invitation to slow down, enjoy the process, and create something truly delicious for yourself and your loved ones. The way the sweet, slightly tart strawberry filling melds with the tender, golden pastry is just *chef’s kiss*. It’s one of those baked goods that feels special without being overly complicated. I know I’ve made this countless times, and every single time, it brings smiles all around.
If you loved this recipe, you might also enjoy my recipes for Fluffy Blueberry Scones or my Easy Apple Crumble Bars, which offer similar comforting flavors and approachable baking techniques.
I’d absolutely love to hear how your strawberry danishes turn out! Please leave a comment below with your thoughts, any variations you tried, or just to say hello. And if you snap a photo, tag me on social media – I live for seeing your creations! Happy baking, everyone!
Strawberry Danish
Ingredients
Danish Dough
- 2.5 cups all-purpose flour
- 0.25 cup granulated sugar
- 1 teaspoon salt
- 0.5 cup cold unsalted butter, cut into cubes
- 0.5 cup cold water
Cream Cheese Filling
- 8 oz cream cheese, softened
- 0.33 cup granulated sugar
- 1 teaspoon vanilla extract
Strawberry Topping
- 1 cup fresh strawberries, hulled and sliced
- 2 tablespoon strawberry jam or preserves
Egg Wash
- 1 tablespoon milk or water
Instructions
Preparation Steps
- For the dough: In a large bowl, whisk together flour, sugar, and salt. Cut in the cold butter with a pastry blender or your fingertips until the mixture resembles coarse crumbs. Gradually add cold water, mixing until the dough just comes together. Form into a disc, wrap in plastic, and refrigerate for at least 1 hour.
- For the cream cheese filling: In a medium bowl, beat together softened cream cheese, sugar, egg, and vanilla extract until smooth and creamy.
- Preheat oven to 400°F (200°C). Line a baking sheet with parchment paper.
- On a lightly floured surface, roll out the chilled dough into a large rectangle, about 12x18 inches. Cut the rectangle into 8 equal squares.
- Place each square on the prepared baking sheet. Spoon about 2 tablespoons of the cream cheese filling into the center of each square. Leave a border around the edges.
- Gently fold the corners of each square towards the center, overlapping slightly, to create a Danish shape.
- For the egg wash: Whisk together the egg and milk/water. Brush the exposed edges of the dough with the egg wash.
- Bake for 18-20 minutes, or until golden brown and puffed.
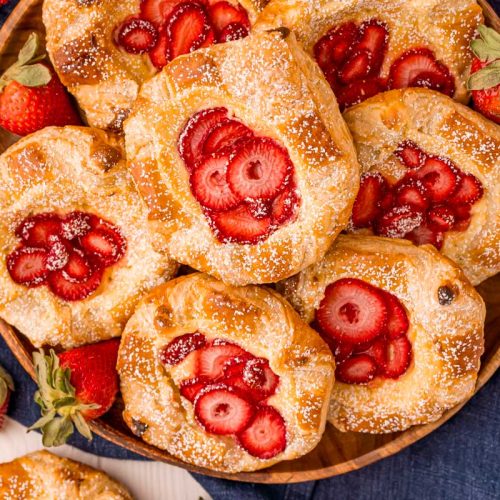
- While the danishes are still warm, spread a thin layer of strawberry jam over the cream cheese filling. Top with sliced strawberries.
- Let cool slightly before serving. Drizzle with additional jam if desired.
