
You know, there are some recipes that just *feel* like home, right? Like a warm hug on a chilly evening or the scent of cinnamon wafting through the air. For me, stained glass cookies are exactly that. They’re more than just a treat; they’re a little piece of edible sunshine that instantly brightens up any day, especially around the holidays. My grandma used to make these every Christmas, and the way the light shone through the colorful centers, looking just like a miniature version of the church windows, always mesmerized me. It’s that same magic that makes these stained glass cookies so incredibly special. They’re like edible jewels, but don’t let their dazzling appearance fool you – they’re surprisingly easy to make, even for us home bakers who sometimes get a little overwhelmed in the kitchen. If you’ve ever enjoyed a beautiful shortbread or a delicate sugar cookie, you’re going to adore these. They’ve got that same buttery base, but with a delightful, jewel-toned surprise at the center that’s truly unique.

What is a stained glass cookie?
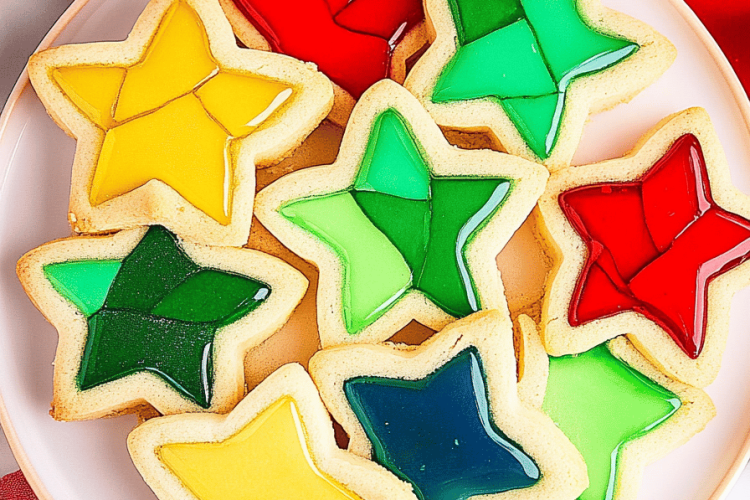
So, what exactly are these shimmering beauties? Think of stained glass cookies as a delightful illusion crafted from simple ingredients. At their heart, they’re a buttery, crisp cookie dough, usually a simple sugar cookie or shortbread base, that’s cut out with a shape – often a star, heart, or even a simple circle. The real magic happens in the center where you create a “window.” This window is filled with crushed hard candies that, when baked, melt into a clear, vibrant, jewel-like center. It’s this translucent, colorful filling that gives them their name, because when you hold them up to the light, they truly resemble pieces of a stained-glass window. It’s such a fun concept, and the way the colors bloom and meld is just captivating. It’s essentially a cookie canvas for edible art!
Why you’ll love this recipe?
Honestly, there are so many reasons why this stained glass cookie recipe has earned a permanent spot in my baking rotation. First off, the flavor is just spot-on. You get that wonderful, buttery richness from the cookie itself, which is perfectly complemented by the sweetness of the melted candy. It’s not overly sweet, which I really appreciate. It’s got that satisfying snap when you bite into it, and then that smooth, slightly chewy candy center. Plus, they are surprisingly simple to pull off. I know, I know, they look fancy, but I promise you, the steps are straightforward. You mix the dough, chill it, cut out shapes, fill the centers, and bake. That’s it! It’s way less complicated than you might think, and the payoff is enormous. For busy nights, or when you need a quick but impressive dessert, these are a lifesaver. And the cost-efficiency? Amazing! You probably already have most of the ingredients in your pantry, and hard candies are super affordable, especially if you buy them in bulk. What I love most, though, is their versatility. You can change the colors, use different cookie cutters, and they’re perfect for any occasion, from birthdays to baby showers, or just because. They’re a showstopper that doesn’t require a professional baker’s touch. Honestly, compared to a complicated layered cake or intricate macarons, these stained glass cookies are a breath of fresh air, delivering maximum wow-factor with minimal fuss. They’re the kind of recipe you’ll be sharing with your friends, too!
How do you make a Stained Glass Cookie?
Quick Overview
Making these dazzling stained glass cookies is a joy because it combines a simple, delicious cookie base with a fun, colorful element. You’ll start by whipping up a basic cookie dough, chill it until it’s firm enough to handle, then cut out your shapes, creating a central “window” in each. Next, you’ll fill those windows with crushed hard candies – this is where the magic happens! After a quick bake, the candy melts into a beautiful, glassy center. Once cooled, you can add a simple glaze if you like, or enjoy them just as they are. It’s a straightforward process, and the visual transformation is incredibly rewarding.
Ingredients
For the Main Batter:
3 cups all-purpose flour, plus more for dusting: I always opt for unbleached all-purpose flour. It gives the cookies a slightly better texture, in my opinion. Make sure it’s measured correctly – spoon it into the cup and level it off, don’t scoop directly from the bag, or you’ll end up with dry cookies!
1 teaspoon baking powder: This gives them just a little lift, keeping them tender without making them puffy.
1/2 teaspoon salt: Essential for balancing the sweetness and bringing out all the flavors.
1 cup (2 sticks) unsalted butter, softened: Use good quality butter; it really makes a difference. Make sure it’s softened, not melted. You want it to be easily pressable with your finger.
1 1/2 cups granulated sugar: For that perfect sweetness. You can adjust this slightly, but this amount gives a lovely balance.
2 large eggs: At room temperature, please! They incorporate much better into the dough.
1 teaspoon vanilla extract: A classic flavor enhancer. Pure vanilla extract is always best.
For the Filling:
About 1 cup crushed hard candies: This is the fun part! You can use all one color or a mix. Jolly Ranchers, Life Savers, or even generic fruit-flavored hard candies work beautifully. The key is to crush them finely – you want them to melt smoothly. I like to put them in a sturdy zip-top bag and bash them with a rolling pin or a meat mallet. Aim for a consistency like coarse sand or fine gravel. Avoid anything with powdered sugar coatings, as they can sometimes get a bit grainy.
For the Glaze (Optional):
1 cup powdered sugar: Sifted to avoid lumps.
2-3 tablespoons milk or water: Add just enough to reach a drizzling consistency. You can also use fruit juice for a flavored glaze!
1/4 teaspoon vanilla extract (optional): For a little extra flavor boost.
Step-by-Step Instructions
Step 1: Preheat & Prep Pan
First things first, preheat your oven to 350°F (175°C). While the oven is warming up, grab a couple of baking sheets and line them with parchment paper. This is a lifesaver for cleanup and ensures your cookies won’t stick. Parchment paper is your best friend here!
Step 2: Mix Dry Ingredients
In a medium bowl, whisk together the flour, baking powder, and salt. Give it a good whisk to ensure everything is evenly distributed. This little step helps prevent dense spots in your cookies.
Step 3: Mix Wet Ingredients
In a large bowl, cream together the softened butter and granulated sugar until light and fluffy. This usually takes about 3-5 minutes with an electric mixer. Beat in the eggs one at a time, mixing well after each addition, then stir in the vanilla extract.
Step 4: Combine
Gradually add the dry ingredients to the wet ingredients, mixing on low speed until just combined. Be careful not to overmix here! Overmixing develops the gluten in the flour, which can lead to tough cookies. Stop mixing as soon as you no longer see streaks of flour. The dough will be a bit soft.
Step 5: Prepare Filling
If you haven’t already, now’s the time to crush your hard candies. Place them in a sturdy zip-top bag, seal it tightly, and use a rolling pin, mallet, or even the bottom of a heavy pan to crush them into fine pieces. You want the consistency of coarse sand or small gravel. Have them ready for when you need them.
Step 6: Layer & Swirl
Turn the dough out onto a lightly floured surface. Gently knead it a few times until it just comes together. Divide the dough in half, flatten each half into a disk, wrap them in plastic wrap, and chill in the refrigerator for at least 30 minutes, or until firm. This step is crucial for easy handling. Once chilled, roll out one disk of dough to about 1/4 inch thickness. Use your cookie cutters to cut out shapes. For the “window,” I like to use a smaller cutter to remove the center. Then, place these cutouts onto your prepared baking sheets, leaving about an inch between them. Now, carefully spoon your crushed candy into the center of each cookie, filling the hole. Don’t overfill, just enough to fill the cavity. If you’re using multiple colors, get creative!
Step 7: Bake
Bake for 8-12 minutes, or until the edges are lightly golden brown and the candy center is completely melted and bubbly. The exact time will depend on the size of your cookies and your oven. Keep an eye on them – you don’t want the cookie edges to get too dark. The candy will still be very hot at this stage!
Step 8: Cool & Glaze
This is important! Let the cookies cool on the baking sheet for about 5-10 minutes. This allows the melted candy to set up slightly. Then, carefully transfer them to a wire rack to cool completely. If you’re adding a glaze, whisk together the powdered sugar, a tablespoon of milk or water at a time, and vanilla extract until you have a smooth, drizzly consistency. Drizzle it over the cooled cookies or use a small spoon to fill in any empty spaces around the candy window. Let the glaze set before handling.
Step 9: Slice & Serve
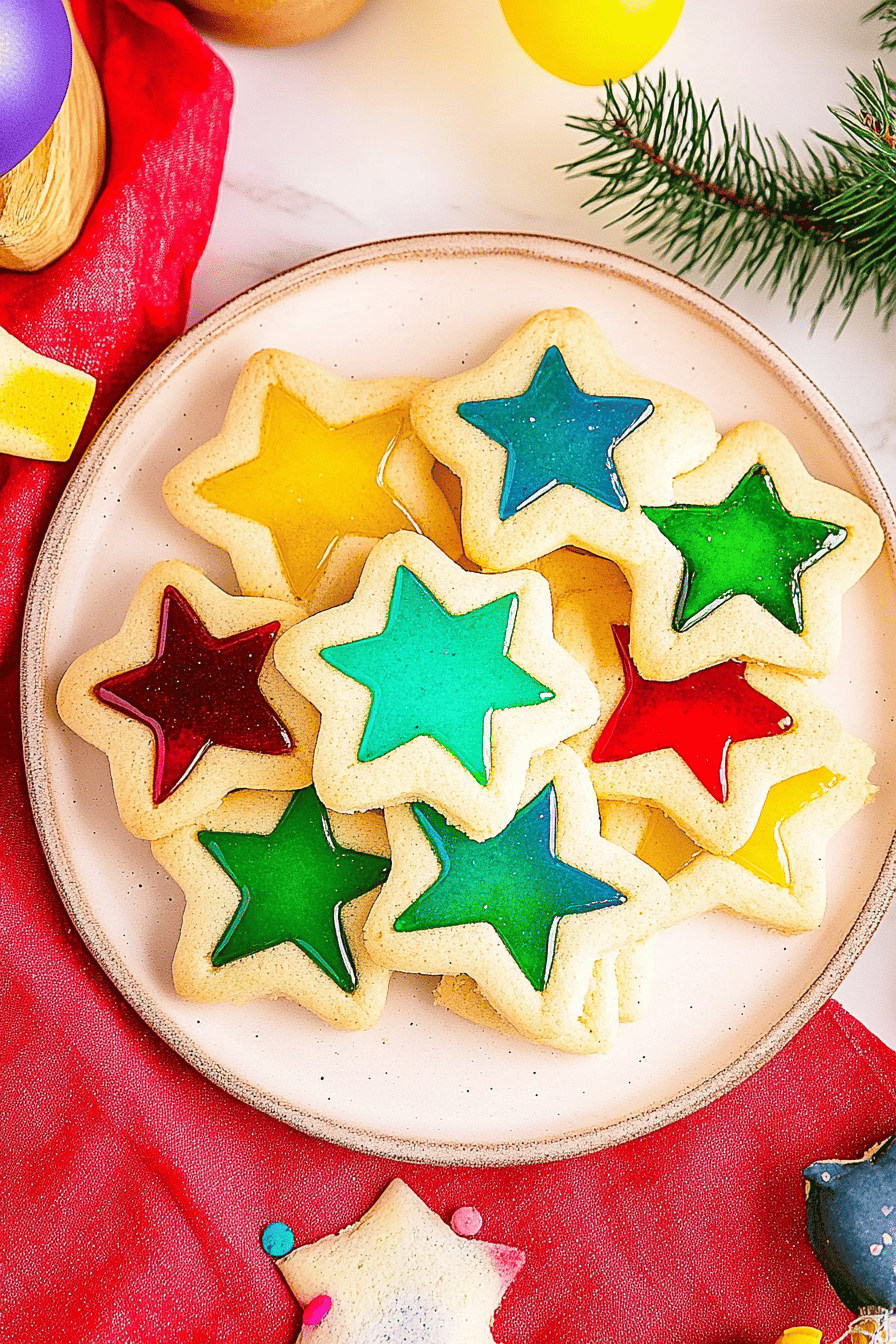
Once completely cool and set (especially if you glazed them), your stained glass cookies are ready to be admired and devoured! They look absolutely stunning on a platter, especially with some light behind them. They’re perfect for gifting, decorating your dessert table, or just enjoying with a cup of tea.
What to Serve It With
These stained glass cookies are so versatile, they truly fit into any occasion. For a delightful breakfast or brunch, I love serving them alongside a steaming mug of coffee or a fragrant cup of herbal tea. Their buttery goodness is a perfect start to the day. Imagine a platter of these shimmering cookies next to some fresh fruit salad or a simple yogurt parfait – it’s elegance without being fussy. For a more formal brunch, they can be the star of a dessert bar, paired with perhaps some mini quiches or scones. As a dessert, they’re a fantastic companion to a rich Chocolate Cake or a light fruit tart, offering a different texture and a burst of color. They’re also just wonderful as a sweet treat on their own, perfect for that afternoon slump or a late-night craving. My kids always ask for these when they want something a little special, and they’re fantastic alongside a glass of cold milk. My personal favorite way to enjoy them is on a quiet afternoon with a good book and a cup of Earl Grey tea. The slight sweetness of the cookie and the candy is just the perfect balance.
Top Tips for Perfecting Your Stained Glass Cookies
Over the years, I’ve picked up a few tricks to make sure these stained glass cookies turn out perfectly every time. First, and this is a big one, when it comes to the candy filling, make sure it’s crushed very finely. If there are large chunks, they might not melt evenly, leaving you with a bumpy or incomplete center. I learned this the hard way after a batch where some pieces were still solid! Also, don’t overfill the cookie windows. A light, even layer is all you need; the candy expands as it melts. If you put too much, it can overflow and make a mess on your baking sheet. When it comes to mixing the dough, resist the urge to overmix after adding the flour. Just mix until it’s combined. A slightly tough cookie is a sad cookie, and overmixing is the main culprit. Chilling the dough properly is also key. If it’s too warm, it will be sticky and hard to cut cleanly. I usually aim for at least 30 minutes in the fridge, but sometimes if it’s a warm day, I’ll give it an hour. For ingredient swaps, I’ve experimented with different types of hard candies, and while most fruit-flavored ones work, I’d avoid anything with fizzy centers or very dark colors like licorice, as they can sometimes bake up a bit differently or not melt as clearly. If you’re looking for a dairy-free option, I’ve successfully tested this with a good quality vegan butter substitute, and it turned out beautifully, though sometimes I find it needs a tiny splash more milk in the glaze for the right consistency. For baking, always keep an eye on those edges! They can go from golden to burnt in a flash. If your oven tends to run hot, consider reducing the temperature by 10-15 degrees and baking for a few minutes longer. And finally, if you want really vibrant colors, don’t be afraid to use a variety of candy colors. The way they swirl and blend slightly as they melt is part of the charm!
Storing and Reheating Tips
Storing these beauties is pretty straightforward, but a little care goes a long way to keep them tasting fresh. For immediate enjoyment, they’re perfect at room temperature. I find they keep well in an airtight container for about 3-4 days. If you’re planning to store them longer, or if your kitchen is particularly warm, the refrigerator is your friend. Place them in an airtight container, and they should stay fresh for up to a week. I usually put a piece of parchment paper between layers to prevent them from sticking, especially if they have a glaze. Now, if you’re a big baker like me and want to get ahead, these stained glass cookies freeze beautifully! Once they’re completely cooled and the candy (and glaze, if using) is set firm, wrap them individually in plastic wrap, then place them in a freezer-safe container or bag. They can last in the freezer for up to 2-3 months. To thaw, just bring them out of the freezer and let them come to room temperature in their wrapping; this prevents condensation from making them soggy. For reheating, honestly, these cookies are best enjoyed at room temperature or slightly chilled. They don’t really need reheating. If they’ve been glazed, I’d wait until they are completely defrosted and the glaze is firm before attempting to store them or serve them. I’ve found that the candy centers can sometimes get a bit soft if they’re stored warm, so letting everything set up properly is key.
Frequently Asked Questions
Final Thoughts
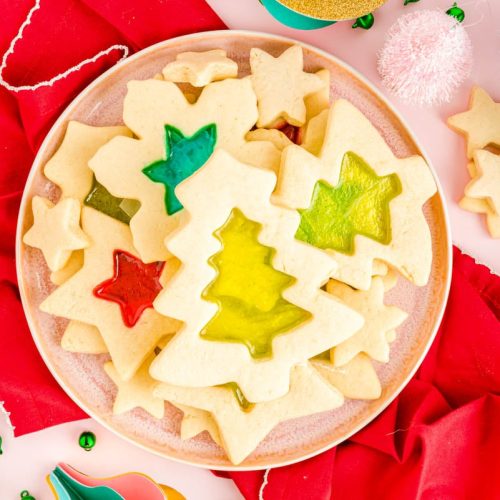
There you have it – my foolproof guide to making these enchanting stained glass cookies. They’re more than just a dessert; they’re a little bit of joy, a touch of sparkle, and a whole lot of deliciousness. I truly believe that everyone should experience the simple magic of holding one of these cookies up to the light and seeing the colors shine through. They’re a testament to how a few basic ingredients can be transformed into something truly extraordinary. If you’re looking for other fun and visually appealing treats, you might also enjoy my recipes for classic gingerbread cookies or these festive frosted sugar cookies. They offer a similar holiday cheer, but with their own unique charm. I can’t wait to hear how your stained glass cookies turn out! Please leave a comment below with your favorite candy colors or any creative variations you try. Happy baking, and may your days be as bright and colorful as these cookies!
stained glass cookies
Ingredients
Cookie Dough
- 1 cup unsalted butter, softened
- 1.5 cup granulated sugar
- 2 large eggs
- 1 teaspoon vanilla extract
- 4 cup all-purpose flour
- 1 teaspoon baking soda
- 0.5 teaspoon salt
Candy Filling
- 0.75 cup crushed hard candies (any color/flavor) such as Jolly Ranchers or similar
Instructions
Preparation Steps
- In a large bowl, cream together the softened butter and granulated sugar until light and fluffy.
- Beat in the eggs one at a time, then stir in the vanilla extract.
- In a separate bowl, whisk together the flour, baking soda, and salt.
- Gradually add the dry ingredients to the wet ingredients, mixing until just combined. Do not overmix.
- Divide the dough in half, flatten each half into a disc, wrap in plastic wrap, and chill in the refrigerator for at least 1 hour.
- Preheat oven to 375°F (190°C). Line baking sheets with parchment paper.
- On a lightly floured surface, roll out one disc of dough to about 1/4-inch thickness.
- Using cookie cutters, cut out desired shapes. For the stained glass effect, cut out a smaller shape from the center of half of your cookies.
- Place the cookies on the prepared baking sheets. Fill the center cutouts of the cookies with crushed hard candies. Be careful not to overfill.
- Bake for 8-12 minutes, or until the edges are lightly golden brown and the candy is melted and bubbly.
- Let the cookies cool on the baking sheet for a few minutes before transferring them to a wire rack to cool completely. The candy will harden as it cools.
