
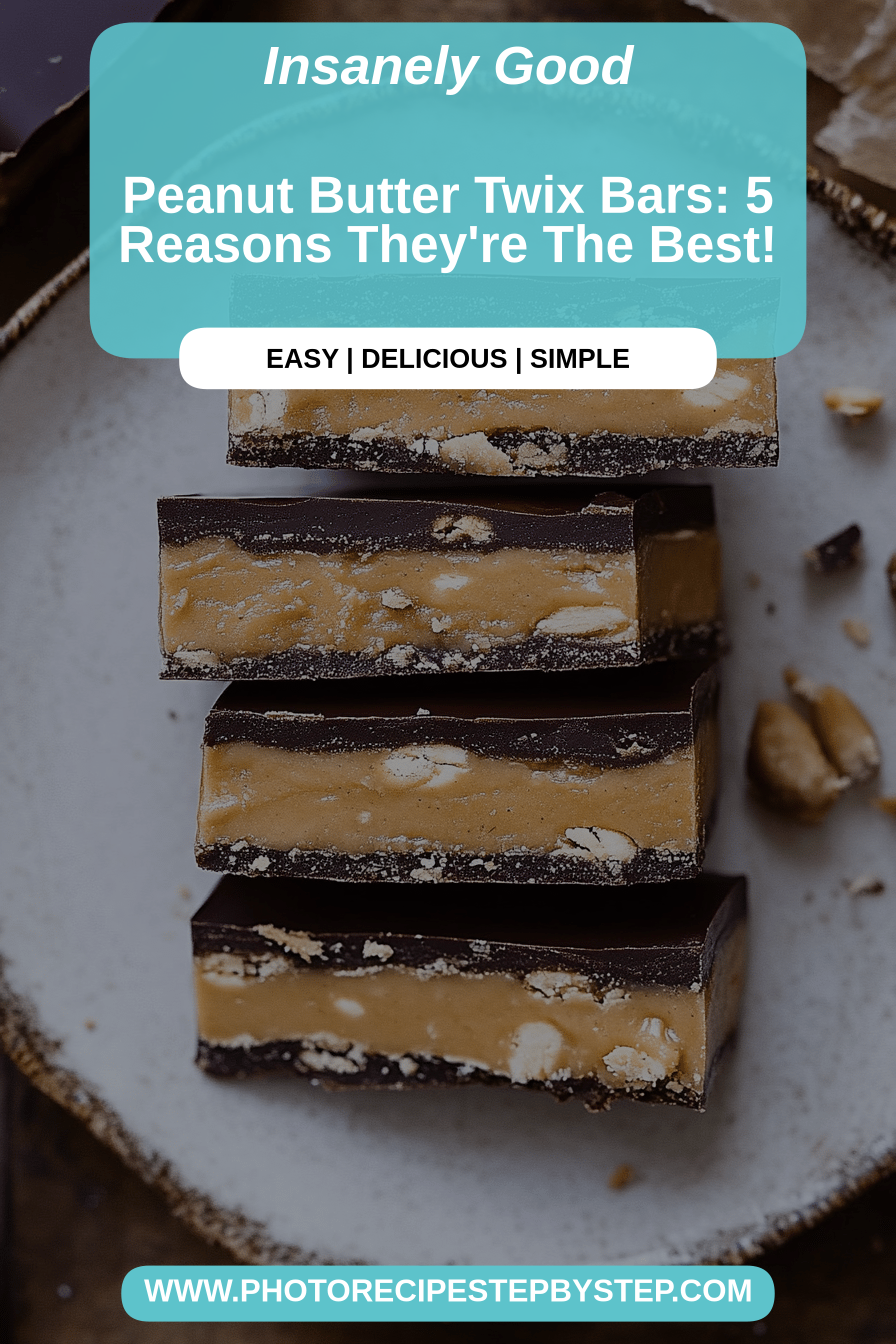
Oh, you guys. I’ve been holding out on you. For years, really. Every time the craving hits for something sweet, something a little bit decadent, something that just screams comfort and pure joy, I’ve been making these Peanut Butter Twix bars. And you know what? They’re so ridiculously good, so unbelievably close to that beloved candy bar, but *so much better* because you made them yourself. I remember the first time I really nailed this recipe – it was a rainy Saturday afternoon, and my kids were getting restless. I wanted to surprise them with something special, and these bars were the answer. The smell that filled the house was incredible, a mix of toasty peanut butter and warm, sweet dough. They practically inhaled them! It’s funny, isn’t it? How a simple treat can bring back so many memories and create new ones. If you love the classic crunchy cookie, chewy caramel, and rich chocolate coating of a Twix bar, but wish it was just a tad more homemade, a little more special, then you are in for a treat with these Peanut Butter Twix bars.
What are peanut butter tucks?
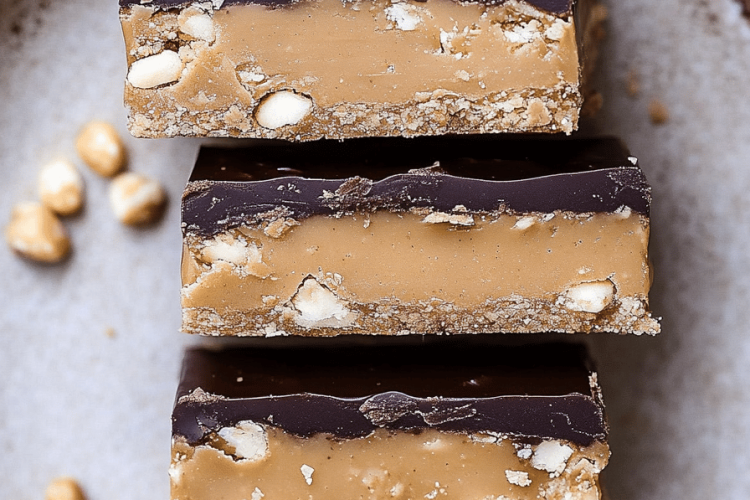
So, what exactly are these magical Peanut Butter Twix bars we’re talking about? Think of them as a delightful homage to that iconic candy bar we all know and love, but with a homemade twist that takes it to a whole new level. At its heart, it’s a layered confection. You’ve got a wonderfully tender, slightly crumbly shortbread-style cookie base that provides the perfect sturdy foundation. Nestled on top of that is a thick, luscious layer of rich, gooey peanut butter filling – it’s sweet, a little salty, and oh-so-creamy. And to finish it all off? A smooth, decadent chocolate glaze that hardens just enough to give you that satisfying snap when you bite into it. It’s essentially taking all the things that make a Twix bar irresistible – the texture contrasts, the sweet and salty play – and amplifying them with real butter, fresh peanut butter, and good quality chocolate. It’s the kind of dessert that feels both nostalgic and excitingly new, all at once.
Why you’ll love this recipe?
Honestly, where do I even start with why you’ll fall head-over-heels for this Peanut Butter Twix bar recipe? First and foremost, the flavor. It’s an absolute knockout. The buttery shortbread, the intensely satisfying peanut butter layer, and that perfect chocolate coating – it’s a symphony of deliciousness in every bite. It’s that perfect balance of sweet, salty, and rich that just makes your taste buds sing. But beyond the incredible taste, it’s also surprisingly simple to make. I know, I know, “homemade candy bar” might sound intimidating, but trust me on this one. The steps are straightforward, and the ingredients are pretty common. What I love most about this recipe is how it’s a total crowd-pleaser. My kids ask for these constantly, my husband devours them, and whenever I bring them to a potluck or gathering, they’re the first thing to disappear. They’re also surprisingly budget-friendly to make compared to buying pre-made treats, especially when you’re making a whole pan! And the versatility! While they’re amazing on their own, they’re also fantastic served alongside a cold glass of milk, or even crumbled over ice cream for an extra special dessert. If you’re a fan of my No-Bake Peanut Butter Balls or my Easy Chocolate Chip Cookie Bars, you’re going to adore these Peanut Butter Twix bars. They hit all those same comfort food notes but with that unique layered magic.
How do I make peanut butter taffy bars?
Quick Overview
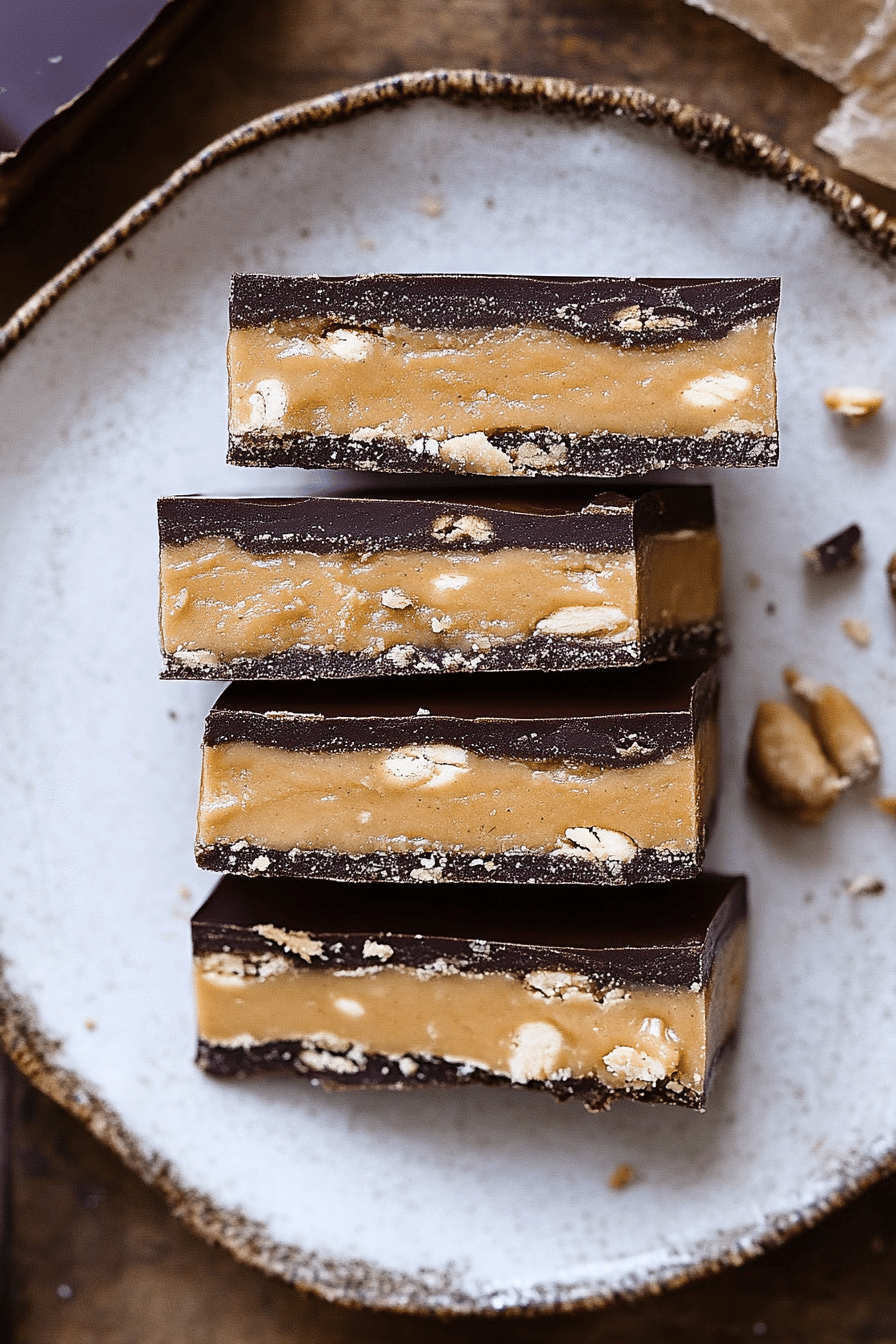
Making these peanut butter Twix bars is a straightforward process that I’ve streamlined over the years to be as fuss-free as possible. You’ll start by baking a simple shortbread-style crust until it’s golden and fragrant. While that cools slightly, you’ll whip up a rich, creamy peanut butter filling that’s incredibly easy to spread. Once the base is ready, that luscious peanut butter layer goes on, followed by a smooth, glossy chocolate glaze. It’s a quick assembly after the initial bake, making it a lifesaver when you need a homemade treat without a ton of fuss. The whole process feels very rewarding, and the results are absolutely spectacular. Don’t be intimidated; it’s really just a few simple layers that come together beautifully.
Ingredients
For the Main Batter (Cookie Base):
You’ll need 1 cup (2 sticks) of unsalted butter, softened to room temperature. Using unsalted butter gives you more control over the saltiness, and softening it is key for a smooth batter. Make sure it’s truly soft, not melted! You’ll also need 1/2 cup of granulated sugar and 1/4 cup of packed light Brown sugar. The brown sugar adds a lovely hint of caramel flavor and keeps the base tender. And of course, 1 teaspoon of vanilla extract for that classic warmth. For the dry ingredients, grab 2 cups of all-purpose flour and 1/2 teaspoon of salt. The flour forms the structure, and the salt balances the sweetness beautifully.
For the Filling:
This is where the magic happens! You’ll need 1 cup of creamy peanut butter. I find that standard creamy peanut butter works best here – the natural, oily kind can sometimes make the filling a bit too soft. You’ll also need 1/2 cup of softened unsalted butter. Again, softened is important for creaminess! For sweetness, we’ll use 1 cup of powdered sugar (also known as confectioners’ sugar) and 1/4 cup of milk. The milk helps create that perfectly smooth, spreadable consistency. A pinch of salt, about 1/4 teaspoon, really makes that peanut butter flavor pop. And if you like, a teaspoon of vanilla extract can add another layer of deliciousness.
For the Glaze:
For that perfect chocolatey finish, you’ll need 1 and 1/2 cups of semi-sweet chocolate chips. I like semi-sweet because it’s not too sweet and pairs wonderfully with the peanut butter. You can also use milk chocolate or dark chocolate if you prefer! To make it smooth and glossy, you’ll need 2 tablespoons of unsalted butter. This also helps the glaze set up nicely without being too hard. If you want a thinner glaze, you can add another tablespoon of butter or a teaspoon of vegetable oil.
Step-by-Step Instructions
Step 1: Preheat & Prep Pan
First things first, let’s get your oven prepped. Preheat it to 350 degrees Fahrenheit (175 degrees Celsius). Now, grab a 9×13 inch baking pan. You’re going to want to line it with parchment paper, leaving some overhang on the sides. This is a lifesaver for lifting the bars out later! Lightly grease the parchment paper too, just to be safe. This ensures your beautiful bars won’t stick.
Step 2: Mix Dry Ingredients
In a medium bowl, whisk together the all-purpose flour and the salt. A good whisking ensures everything is evenly distributed. You don’t want pockets of salt or flour. This simple step makes sure your cookie base bakes up evenly.
Step 3: Mix Wet Ingredients
In a large bowl, cream together the softened butter, granulated sugar, and packed light brown sugar until light and fluffy. This usually takes a few minutes with an electric mixer. Beat in the vanilla extract until just combined. The creaming process incorporates air, which helps create a tender texture.
Step 4: Combine
Gradually add the dry ingredients to the wet ingredients, mixing on low speed until just combined. Be careful not to overmix here! Overmixing can lead to tough cookies. You want a dough that just comes together into a cohesive ball. It will be thick, almost like a cookie dough.
Step 5: Prepare Filling
While the dough is chilling briefly or your pan is getting ready, let’s make that amazing peanut butter filling. In a medium bowl, beat together the creamy peanut butter and softened butter until smooth and creamy. Gradually beat in the powdered sugar, alternating with the milk, until you have a smooth, spreadable consistency. Stir in the salt and vanilla extract, if using. Taste it – it should be sweet, salty, and perfectly peanut buttery! It should be thick but spreadable.
Step 6: Layer & Swirl
Press the cookie dough evenly into the bottom of your prepared baking pan. You can use your hands or a flat-bottomed glass to get it smooth. You want an even layer. Now, carefully spread the peanut butter filling evenly over the cookie base. Make sure to go all the way to the edges. You can use an offset spatula for this. If you’re feeling fancy, you can swirl it a bit with a knife or a toothpick, but I usually just aim for a smooth layer.
Step 7: Bake
Bake in your preheated oven for about 20-25 minutes, or until the edges of the cookie base are lightly golden brown. The center might still look a little soft, but that’s okay; it will continue to set as it cools. Keep an eye on it so it doesn’t get too dark.
Step 8: Cool & Glaze
Let the bars cool in the pan on a wire rack for at least 30 minutes. This is important! You don’t want to pour hot glaze onto a hot base. While it’s cooling, gently melt the semi-sweet chocolate chips and butter together. You can do this in a double boiler or in the microwave in 30-second intervals, stirring between each, until smooth. Once the bars have cooled slightly, pour the melted chocolate over the peanut butter layer and spread it evenly to cover. Again, an offset spatula is your friend here.
Step 9: Slice & Serve
Let the chocolate glaze set completely. This can take a couple of hours at room temperature, or you can speed it up by popping the pan into the refrigerator for about 30-60 minutes. Once the chocolate is firm, use the parchment paper overhang to lift the entire slab out of the pan onto a cutting board. Now for the fun part: slice them into bars! A sharp knife dipped in hot water and wiped dry between cuts will give you the cleanest slices. Enjoy your homemade Peanut Butter Twix bars!
What to Serve It With
These Peanut Butter Twix bars are pretty much a star on their own, but they also pair wonderfully with a variety of beverages and can be part of a larger spread. For a classic breakfast or brunch, they’re absolutely divine served with a strong cup of coffee or a creamy latte. The richness of the bars is beautifully complemented by a hot beverage. If you’re serving them as a more formal dessert, imagine them on a dessert platter alongside some fresh berries – the tartness of the berries cuts through the sweetness of the bars perfectly. They’re also fantastic with a scoop of vanilla bean ice cream; it’s like a deconstructed dessert! For cozy snacks, my kids always love them with a big glass of cold milk – it’s a childhood classic for a reason. I’ve also found they’re great for afternoon tea, cut into smaller, bite-sized portions. They’re just so adaptable! My family tradition is to have one (or two!) with hot chocolate on movie nights during the colder months. It feels so decadent and comforting. Honestly, they’re good with pretty much anything that requires a little bit of sweet indulgence.
Top Tips for Perfecting Your Peanut Butter Twix Bars
After making these Peanut Butter Twix bars countless times, I’ve picked up a few tricks that really help ensure they turn out perfectly every single time. For the cookie base, make sure your butter is truly softened, not melted. This is crucial for achieving that tender, crumbly texture and not a greasy, flat cookie. When you’re mixing the dry and wet ingredients for the base, resist the urge to overmix. Just mix until the flour streaks disappear. Overmixing develops the gluten, which can lead to a tougher bar, and we want these to be melt-in-your-mouth delicious. For the peanut butter filling, I highly recommend using standard creamy peanut butter, like Jif or Skippy. Natural peanut butters, while healthier, can sometimes be too oily and make the filling too soft to spread or set properly. If you find your peanut butter filling is too stiff to spread, just stir in another teaspoon or two of milk until it reaches a more manageable consistency. When it comes to the chocolate glaze, I always recommend using good quality chocolate chips. They melt more smoothly and taste so much better. Melting them gently, whether in a double boiler or the microwave, is key to preventing scorching. If your glaze seems too thick after melting, a tiny splash of milk or a bit more butter can thin it out beautifully. And for slicing, this is a big one: let the chocolate set completely! Trying to slice before it’s firm will result in a messy situation. Using a sharp knife dipped in hot water and wiped dry between cuts makes for those super clean, professional-looking bars that everyone will admire. It takes a little patience, but it’s so worth it!
Storing and Reheating Tips
Proper storage is key to keeping these delicious Peanut Butter Twix bars tasting their best. At room temperature, they’ll stay fresh for about 2-3 days, provided they are stored in an airtight container. I usually just keep them in the pan they were baked in, covered tightly with plastic wrap or foil. If you want them to last longer, the refrigerator is your best friend. Stored in an airtight container in the fridge, they’ll keep well for up to a week. The chocolate might firm up a bit more in the fridge, which isn’t a bad thing! For longer storage, these bars freeze beautifully. I like to cut them into individual bars first, then wrap each bar tightly in plastic wrap, followed by a layer of aluminum foil. You can also stack them in a freezer-safe container with parchment paper between layers. They’ll stay perfectly good in the freezer for up to 2-3 months. To thaw them, simply unwrap them and let them come to room temperature for about 30-60 minutes. They’ll taste almost as good as fresh! I usually apply the glaze right before serving or once the bars have cooled, so it sets properly. If you’re freezing them, I recommend glazing them *after* thawing to prevent any moisture issues with the chocolate. Just ensure the bars are completely thawed and at room temperature before glazing for the smoothest finish.
Frequently Asked Questions
Final Thoughts
Honestly, making these Peanut Butter Twix bars from scratch is such a rewarding experience. It’s more than just a dessert; it’s a little piece of edible happiness that brings smiles to faces. The combination of that tender, buttery cookie base, the incredibly rich peanut butter filling, and the satisfying chocolate shell is just pure perfection. They’re perfect for any occasion, whether it’s a birthday party, a bake sale, or just a Tuesday evening when you need a little pick-me-up. I’ve found that the key to their success is really in the quality of the ingredients and a little bit of patience during the cooling and setting stages. If you love the flavors of peanut butter and chocolate, and you enjoy that satisfying chew and crunch, you simply have to try this recipe. It’s a game-changer, and I have a feeling these homemade Peanut Butter Twix bars will become a new favorite in your kitchen, just like they are in mine. I can’t wait to hear what you think and see how yours turn out! Please feel free to leave a comment below with your thoughts or any variations you tried. Happy baking!
Peanut Butter Twix
Ingredients
Shortbread Base
- 2.5 cup all-purpose flour
- 0.5 cup granulated sugar
- 1 cup unsalted butter, softened
Peanut Butter Caramel Filling
- 1 cup smooth peanut butter
- 0.75 cup light brown sugar, packed
- 0.5 cup light corn syrup
- 0.25 cup unsalted butter
- 1 teaspoon vanilla extract
- 0.25 teaspoon salt
Chocolate Coating
- 10 ounce semi-sweet chocolate chips
- 2 tablespoon vegetable oil or coconut oil
Instructions
Preparation Steps
- Preheat your oven to 350°F (175°C). Grease and line a 9x13 inch baking pan with parchment paper, leaving an overhang.
- For the shortbread base: In a large bowl, cream together the softened butter and granulated sugar until light and fluffy. Gradually add the flour and mix until just combined and a dough forms.
- Press the dough evenly into the prepared baking pan.
- Bake for 15-20 minutes, or until the edges are lightly golden.
- For the peanut butter caramel filling: While the base is baking, combine peanut butter, brown sugar, corn syrup, and butter in a saucepan over medium heat. Stir constantly until the butter is melted and the mixture is smooth and bubbly.
- Remove from heat and stir in the vanilla extract and salt.
- Pour the peanut butter caramel filling over the baked shortbread base and spread evenly.
- Return the pan to the oven and bake for another 10-15 minutes, or until the caramel is set and slightly golden.
- Let the bars cool completely in the pan on a wire rack.
- For the chocolate coating: Melt the semi-sweet chocolate chips and vegetable oil in a microwave-safe bowl in 30-second intervals, stirring between each, until smooth.
- Once cooled, lift the shortbread and caramel slab out of the pan using the parchment paper overhang. Cut into desired bar shapes.
- Dip each bar into the melted chocolate, coating completely. Place on a parchment-lined baking sheet to set.
- Refrigerate until the chocolate is firm.
