
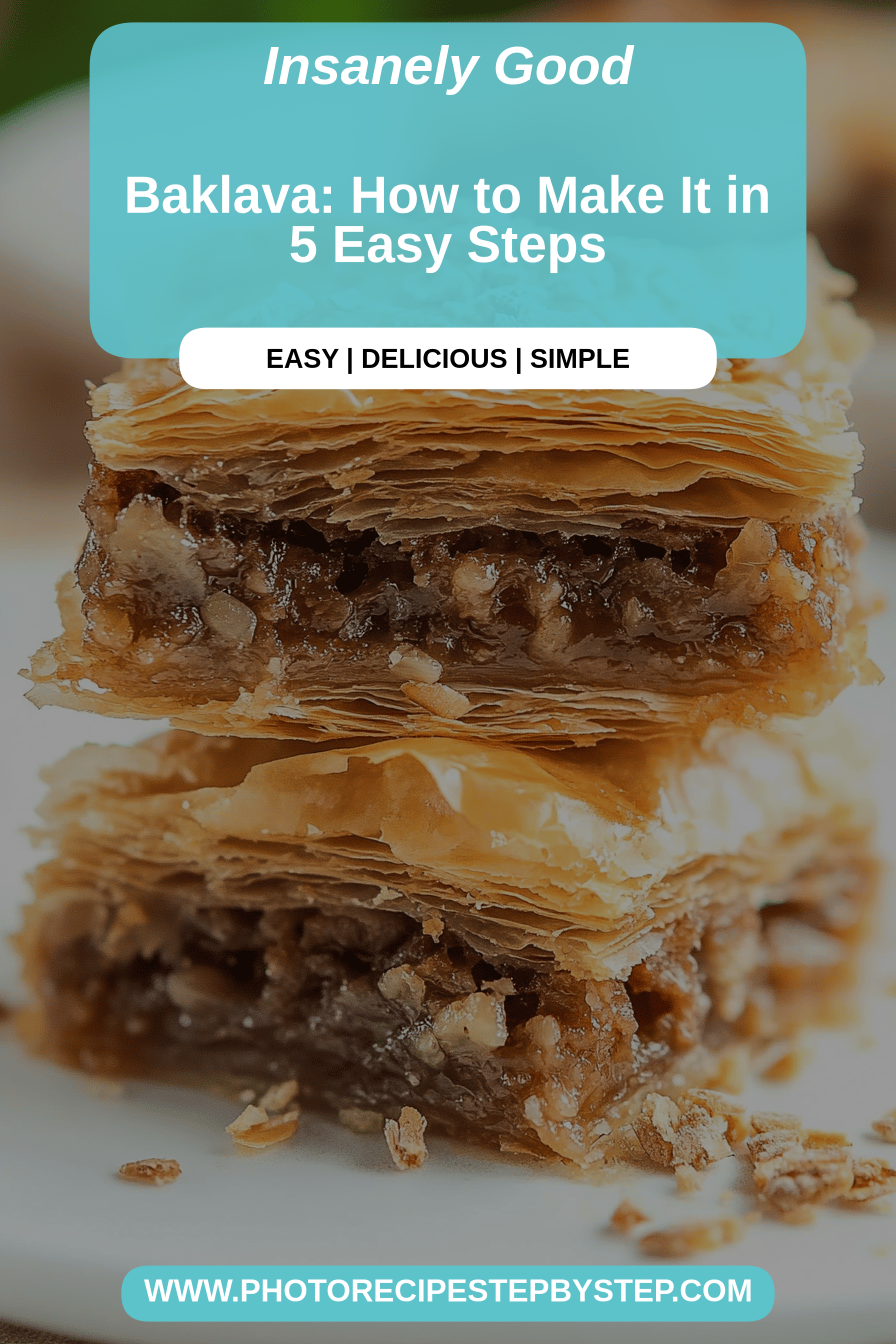
You know those desserts that just scream “special occasion” but are actually surprisingly easy to whip up? That’s exactly how I feel about this baklava recipe. It’s my go-to whenever I need to impress, or honestly, just when I’m having a serious sweet craving and want something that feels a little bit luxurious without taking all day. It reminds me of my grandmother’s kitchen, the air thick with the scent of honey and spices. While other desserts might gather dust, this baklava recipe disappears in minutes at my house. If you’ve ever been intimidated by making baklava, thinking it’s some complex, fussy pastry that only professionals can tackle, then I’m here to tell you: you’re wrong! This baklava recipe is proof that you can have incredible, flaky, honey-drenched goodness right in your own home, and it’s even better than the store-bought stuff. It’s a little bit of magic, really.
What is Baklava?
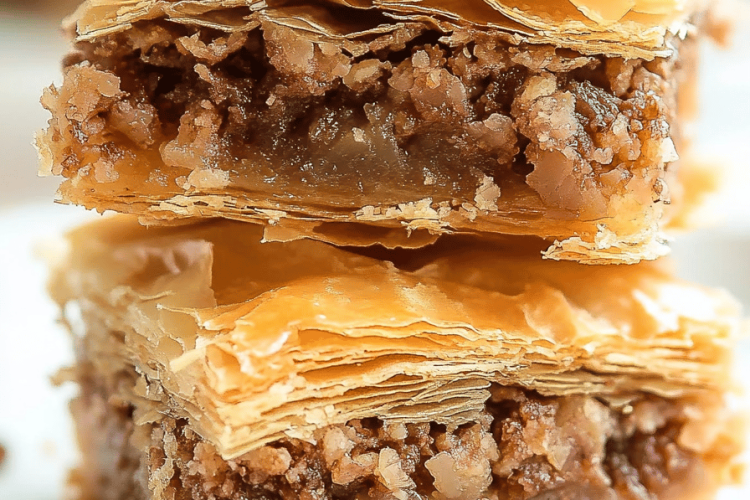
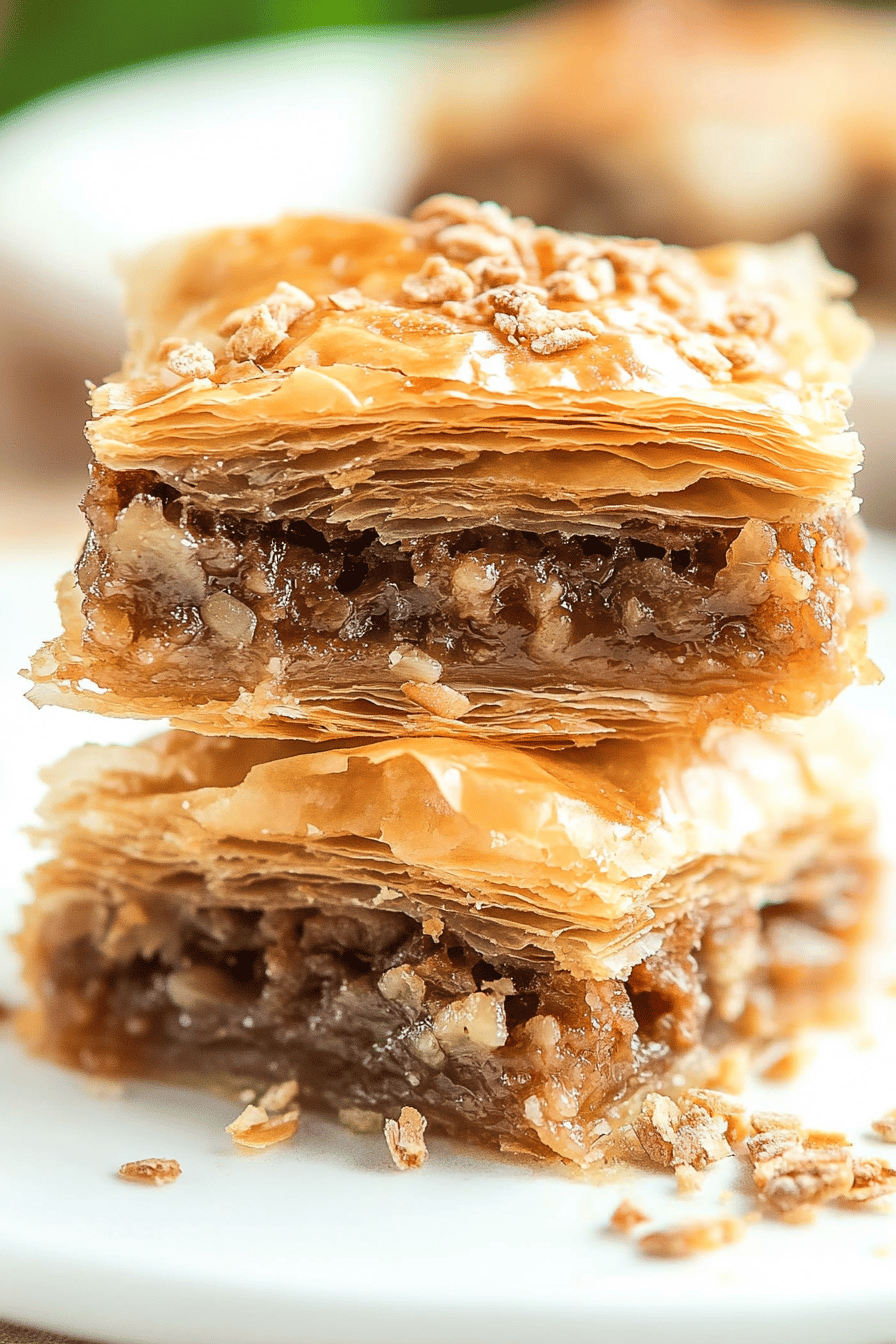
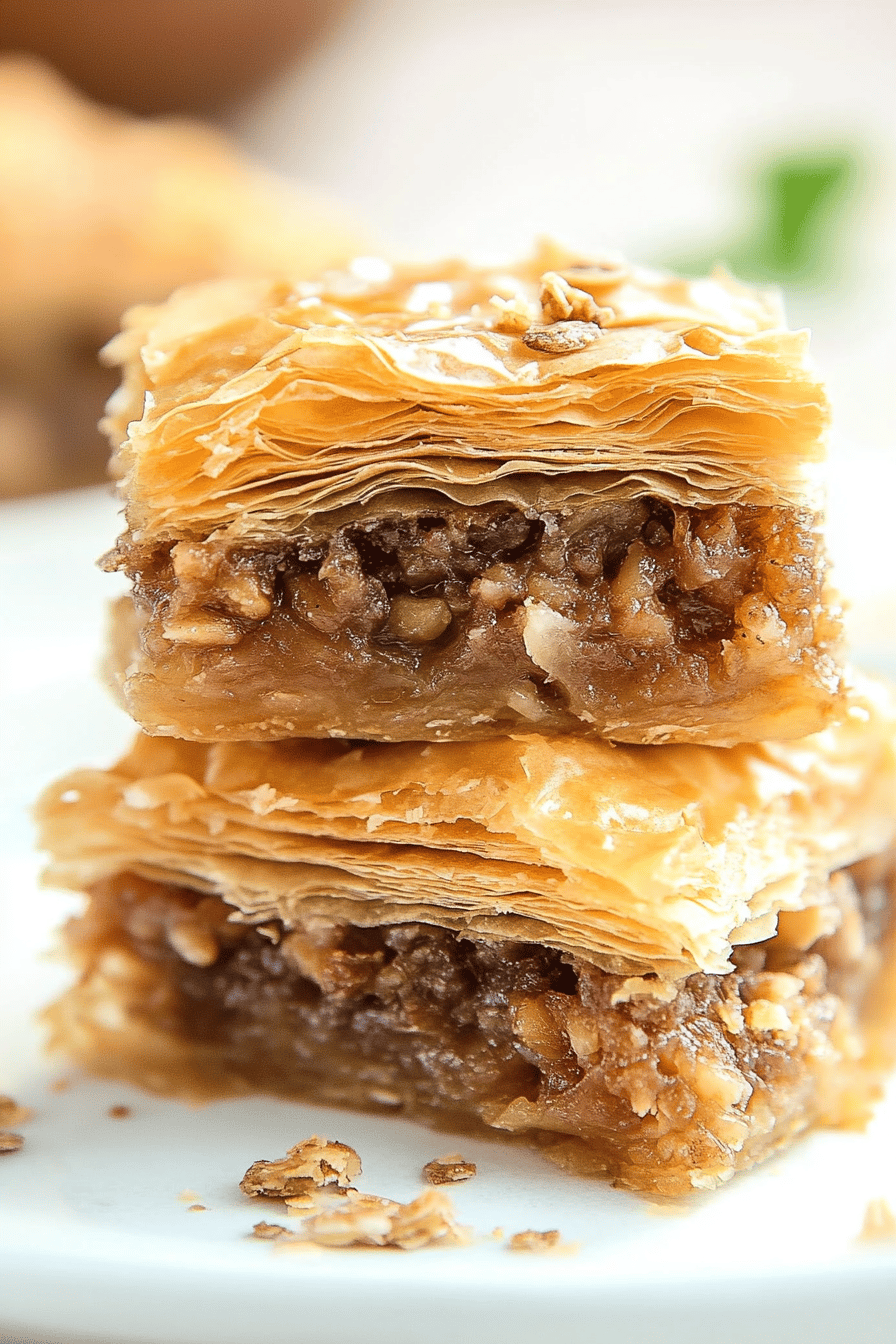
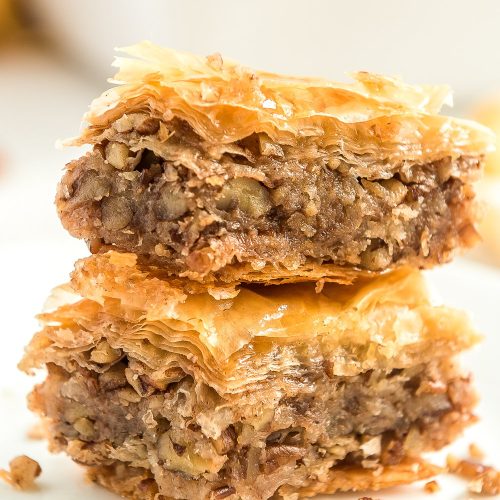
So, what exactly is this delightful treat we call baklava? At its heart, it’s a wonderfully sweet pastry made from layers of filo dough, filled with chopped nuts, and bound together with a sweet syrup or honey. Think of it as a sweet, nutty hug in every bite. The name itself has this exotic, ancient feel to it, and it truly is a dessert with a rich history, enjoyed across many cultures in the Mediterranean and Middle East. The magic really happens with the thin layers of filo pastry, which bake up to be impossibly crisp and flaky. When you pour that warm, fragrant syrup over the top, it seeps down through all those layers, creating this incredible texture contrast – crispy on the outside, tender and moist on the inside. It’s not overly complicated, but the combination of simple ingredients creates something truly spectacular.
Why you’ll love this recipe?
Honestly, there are so many reasons why this particular baklava recipe has become my absolute favorite, and I just know you’re going to adore it too. First off, let’s talk about the flavor. It’s this perfect symphony of sweet, nutty, and aromatic. The crunch of the walnuts, kissed with cinnamon and a hint of cloves, is just divine. Then there’s the syrup – oh, the syrup! It’s not just plain honey; it’s infused with lemon zest and a touch of rosewater (optional, but trust me, it’s a game-changer!), which adds this beautiful, fragrant layer of complexity that cuts through the sweetness. What I love most is how surprisingly approachable this recipe is. I know filo dough can sound a little daunting, but I’ve cracked the code to making it super manageable. You don’t need any fancy techniques; just a little patience and a good brush. Plus, it’s incredibly cost-effective. Compared to buying fancy pastries, making this baklava at home saves you a bundle, and the ingredients are usually pantry staples or easy to find. And talk about versatile! This is perfect for a holiday gathering, a special dessert after dinner, or even just a weekend treat with a cup of coffee. It’s also fantastic for make-ahead entertaining because it actually gets better as it sits for a bit, allowing those flavors to meld beautifully. It’s a true crowd-pleaser, and everyone always asks for the recipe!
How do you make Baklava?
Quick Overview
This baklava recipe breaks down into a few key stages: preparing the nut filling, carefully layering the filo dough with butter, baking it to golden perfection, and finally, drenching it in a fragrant honey syrup. The beauty of this approach is that each step is quite straightforward, and I’ve included all my little tips to make sure you get those gorgeous, flaky layers. Don’t let the number of layers scare you; it’s more about rhythm than anything else. The result is a dessert that’s visually stunning and incredibly delicious, perfect for any occasion.
Ingredients
For the Main Batter:
Here, the “batter” is really just the foundation of our layers – it’s all about the filo dough and the butter that makes it so heavenly. You’ll need:
- 2 pounds (about 90-100 sheets) fresh filo dough: This is the star! Make sure it’s thawed correctly in the refrigerator overnight, and then let it sit at room temperature for about an hour before you start to prevent it from cracking. Keep it covered with a slightly damp kitchen towel while you work.
- 1.5 cups (3 sticks) unsalted butter, melted: Good quality butter makes a difference here, both in flavor and how easily it brushes. Melt it slowly and let it cool slightly so it’s not piping hot when you’re layering.
For the Filling:
This is where the flavor really comes to life. It’s simple, nutty, and aromatic:
- 4 cups finely chopped walnuts: You can also use a mix of walnuts and pistachios, or even almonds, but walnuts give that classic, rich flavor. Chop them by hand or pulse them *briefly* in a food processor – you don’t want nut flour, just small pieces.
- 2 teaspoons ground cinnamon: This is essential for that warm spice note.
- 1/4 teaspoon ground cloves: This is my secret weapon! It adds a depth of flavor that’s subtle but makes a huge difference. Don’t skip it unless you absolutely have to.
For the Glaze:
This sweet, syrupy hug is what makes baklava sing. It needs to be cooked just right:
- 2 cups granulated sugar
- 1.5 cups water
- 1/2 cup honey: A good quality honey will add so much more flavor. Orange blossom honey is divine if you can find it!
- 1 strip lemon zest (about 3 inches long): This adds a beautiful brightness.
- 1 tablespoon fresh lemon juice: To balance the sweetness.
- 1 teaspoon rosewater (optional, but highly recommended): A little goes a long way and adds an incredible floral aroma.
Step-by-Step Instructions
Step 1: Preheat & Prep Pan
First things first, preheat your oven to 350°F (175°C). This ensures your oven is ready to go when your baklava is assembled. Now, grab a 9×13 inch baking pan. This is the perfect size for getting those nice, even layers. Brush the bottom and sides generously with melted butter. Don’t be shy here; a well-buttered pan helps prevent sticking and adds to the golden crispness. I like to use a pastry brush for this, getting into all the corners.
Step 2: Mix Dry Ingredients
In a medium bowl, combine your finely chopped walnuts, ground cinnamon, and ground cloves. Give it a good stir with a fork until everything is well distributed. This mixture is going to be your delicious, nutty filling. I always do a little smell test here – if it smells wonderfully aromatic, you’re on the right track! Make sure the nuts aren’t too large, or they might poke through the delicate filo layers.
Step 3: Mix Wet Ingredients
In a small saucepan, combine the sugar, water, honey, and the strip of lemon zest. Place it over medium heat and stir until the sugar and honey have completely dissolved. Bring it to a gentle boil, then reduce the heat to low and let it simmer for about 5-7 minutes. You want it to thicken slightly. After simmering, remove it from the heat, stir in the lemon juice and rosewater (if using), and set aside to cool. The syrup needs to be warm when it goes onto the hot baklava, but not piping hot.
Step 4: Combine
This step is all about layering! Take your thawed filo dough. Carefully peel off one sheet and lay it flat on your work surface. Brush it all over with melted butter. Don’t leave any dry spots! Lay another sheet of filo dough directly on top and brush it with butter. Repeat this process until you have about 8-10 layers of buttered filo. This creates the base for your baklava. Once you have your stack, carefully transfer it into your buttered baking pan, trimming any excess filo that hangs over the edge if needed, or just tucking it in neatly. I usually just press it down gently.
Step 5: Prepare Filling
Now, sprinkle about half of your walnut and spice mixture evenly over the layered filo dough in the pan. Try to get it as close to the edges as possible. This is going to be the delicious heart of your baklava.
Step 6: Layer & Swirl
Now we build more layers on top of the filling. Repeat the process from Step 4: lay a buttered sheet of filo, then another buttered sheet, and so on, for another 8-10 layers. This sandwich of filo dough and filling is what makes baklava so special. Once you’ve finished layering the top sheets, brush the very top layer generously with butter. This is crucial for achieving that beautiful golden-brown, crispy top.
Step 7: Bake
Carefully place the pan in your preheated oven. Bake for about 45-55 minutes, or until the top is a deep golden brown and wonderfully crisp. You’ll know it’s ready when you can smell that amazing toasty, honeyed aroma filling your kitchen. I often peek in around the 40-minute mark to check on the color. If some parts are browning faster than others, you can loosely tent them with foil.
Step 8: Cool & Glaze
This is a critical step! As soon as the baklava comes out of the oven, while it’s still piping hot, take your *warm* syrup and slowly and evenly pour it all over the top. You’ll hear this amazing sizzle – that’s the syrup seeping into those hot, crispy layers. Let the baklava cool completely in the pan, uncovered, for at least 4 hours, or preferably overnight. This allows the syrup to fully absorb and the layers to set up properly. Don’t rush this part; it’s essential for the texture!
Step 9: Slice & Serve
Once cooled, use a sharp knife to cut the baklava into diamond or square shapes. I find running the knife under hot water can help with clean cuts through those crunchy layers. Serve at room temperature. The aroma alone is enough to make you swoon, and the taste? Pure bliss.
What to Serve It With
This baklava recipe is a star on its own, but it also plays wonderfully with a few other treats and drinks. For a cozy breakfast, I love serving a small piece alongside a strong cup of black coffee. The sweetness of the baklava is balanced by the bitterness of the coffee, making for a really decadent start to the day. On a brunch spread, it adds that touch of elegance. I’ll often pair it with fresh fruit like berries or melon, and a nice cup of mint tea or a light, bubbly Prosecco. As a dessert, it’s magnificent after a rich meal. It stands up beautifully on its own, but if you want to go all out, a tiny scoop of vanilla bean ice cream or a dollop of clotted cream is divine. For those moments when you just need a little something sweet, a square of this baklava is pure comfort food. My kids love it with a tall glass of cold milk, and honestly, who can blame them? It’s that universally loved kind of sweet treat.
Top Tips for Perfecting Your Baklava
I’ve made this baklava recipe more times than I can count, and over the years, I’ve picked up a few tricks that I think make all the difference in getting that perfect, crave-worthy result. First, and this is crucial, is handling your filo dough. Always thaw it slowly in the fridge. When you’re ready to use it, keep the sheets you aren’t actively working with covered with a *slightly damp* (not wet!) kitchen towel. This prevents them from drying out and becoming brittle. If a sheet does tear a bit, don’t panic! Just patch it up with another piece or just butter over it; the syrup will do its magic. When it comes to the nuts, chopping them finely is key. If they’re too chunky, they can tear the filo and prevent the syrup from seeping evenly. I’ve found that a few quick pulses in a food processor is the fastest way to get that nice, fine texture, but avoid over-processing into a paste. For the syrup, patience is a virtue. Let it simmer gently for the specified time; over-boiling can make it too thick and hard, while under-boiling means it won’t have the right consistency. And remember, the syrup should be warm when you pour it over the *hot* baklava, and then the baklava needs to cool completely. This temperature difference is what creates that lovely texture contrast and prevents sogginess. If you find your baklava is a bit too sweet, a little more lemon zest or an extra squeeze of lemon juice in the syrup can help balance it out. And for those of you who love experimenting, a tiny pinch of cardamom in the nut filling or a splash of orange blossom water in the syrup can add a wonderful, unique twist. Don’t be afraid to play around with it!
Storing and Reheating Tips
One of the best things about this baklava recipe is how well it stores, making it perfect for making ahead. For the best texture, I always recommend storing it at room temperature. Once it’s completely cooled after glazing, cover the pan tightly with plastic wrap or transfer it to an airtight container. It will stay wonderfully crisp and delicious for up to 3-4 days this way. If your kitchen is particularly warm or humid, you might consider refrigerating it, but be aware that refrigeration can sometimes make filo a little less crisp. If you do refrigerate it, make sure it’s in a very well-sealed container. To reheat, if you want that fresh-from-the-oven crispness, you can pop a piece into a preheated oven at around 300°F (150°C) for just a few minutes until it’s warmed through and crisped up again. I wouldn’t recommend reheating the entire pan; individual pieces are best. For the glaze, it’s always best to apply it when the baklava is hot out of the oven and has cooled completely. If you’re freezing it, which I sometimes do for special occasions, let it cool completely after glazing, then wrap individual pieces or the whole pan tightly in plastic wrap, followed by a layer of aluminum foil to prevent freezer burn. It can last for up to 2-3 months in the freezer. Thaw it overnight at room temperature before enjoying.
Frequently Asked Questions
Final Thoughts
There you have it – my absolute favorite baklava recipe! I truly believe that anyone can make this and achieve stunning results. It’s a recipe that brings me so much joy, and I hope it brings you plenty of happy baking moments and delicious treats too. The combination of crispy, flaky pastry, warm spices, and that sweet, fragrant syrup is just pure perfection. It’s a dessert that feels sophisticated yet is incredibly comforting, and it’s a fantastic way to impress guests or just treat yourself. If you’re looking for other delightful baked goods that are equally rewarding, you might also enjoy my [Link to another recipe, e.g., Chocolate Chip Cookie recipe] or my [Link to another recipe, e.g., Apple Crumble recipe]. Don’t hesitate to leave a comment below if you give this baklava recipe a try, or if you have any questions. I love hearing how your baking turns out, and I’m always eager to see your own personal twists on classic recipes! Happy baking!
Baklava Recipe
Ingredients
For the Nut Filling
- 3 cups walnuts finely chopped
- 1 cup pistachios finely chopped
- 0.5 cup granulated sugar
- 1 teaspoon ground cinnamon
- 0.5 teaspoon ground cloves
For the Phyllo Dough
- 1 pound phyllo dough thawed according to package directions
- 1.5 cups unsalted butter melted
For the Syrup
- 2 cups granulated sugar
- 1 cup water
- 0.5 cup honey
- 1 tablespoon lemon juice
- 1 teaspoon rose water optional
- 0.5 teaspoon orange blossom water optional
Instructions
Preparation Steps
- Preheat oven to 350°F (175°C). Butter a 9x13 inch baking dish.
- In a medium bowl, combine chopped walnuts, pistachios, 0.5 cup granulated sugar, cinnamon, and cloves. Mix well.3 cups walnuts
- Unroll the phyllo dough and carefully remove one sheet at a time, keeping the remaining dough covered with a damp towel to prevent drying out. Brush one sheet of phyllo dough with melted butter and place it in the prepared baking dish. Repeat this process, layering about 8-10 sheets of phyllo dough, brushing each with butter.3 cups walnuts
- Spread the nut mixture evenly over the phyllo layers.
- Layer another 8-10 sheets of phyllo dough over the nut mixture, brushing each sheet with melted butter as before.3 cups walnuts
- Using a sharp knife, cut the baklava into diamond or square shapes. Do not cut all the way through to the bottom.
- Bake for 20-25 minutes, or until the top layer of phyllo is golden brown and crisp.
- While the baklava is baking, prepare the syrup. In a saucepan, combine 2 cups granulated sugar, water, and honey. Bring to a boil, then reduce heat and simmer for 10 minutes.3 cups walnuts
- Remove from heat and stir in the lemon juice, rose water (if using), and orange blossom water (if using). Let the syrup cool slightly.3 cups walnuts
- Pour the warm syrup evenly over the hot, freshly baked baklava. You should hear a sizzling sound.
- Let the baklava cool completely at room temperature for at least 4-6 hours, or preferably overnight, to allow the syrup to absorb.
- Once cooled, carefully cut through the scored lines to separate the pieces. Serve.
