
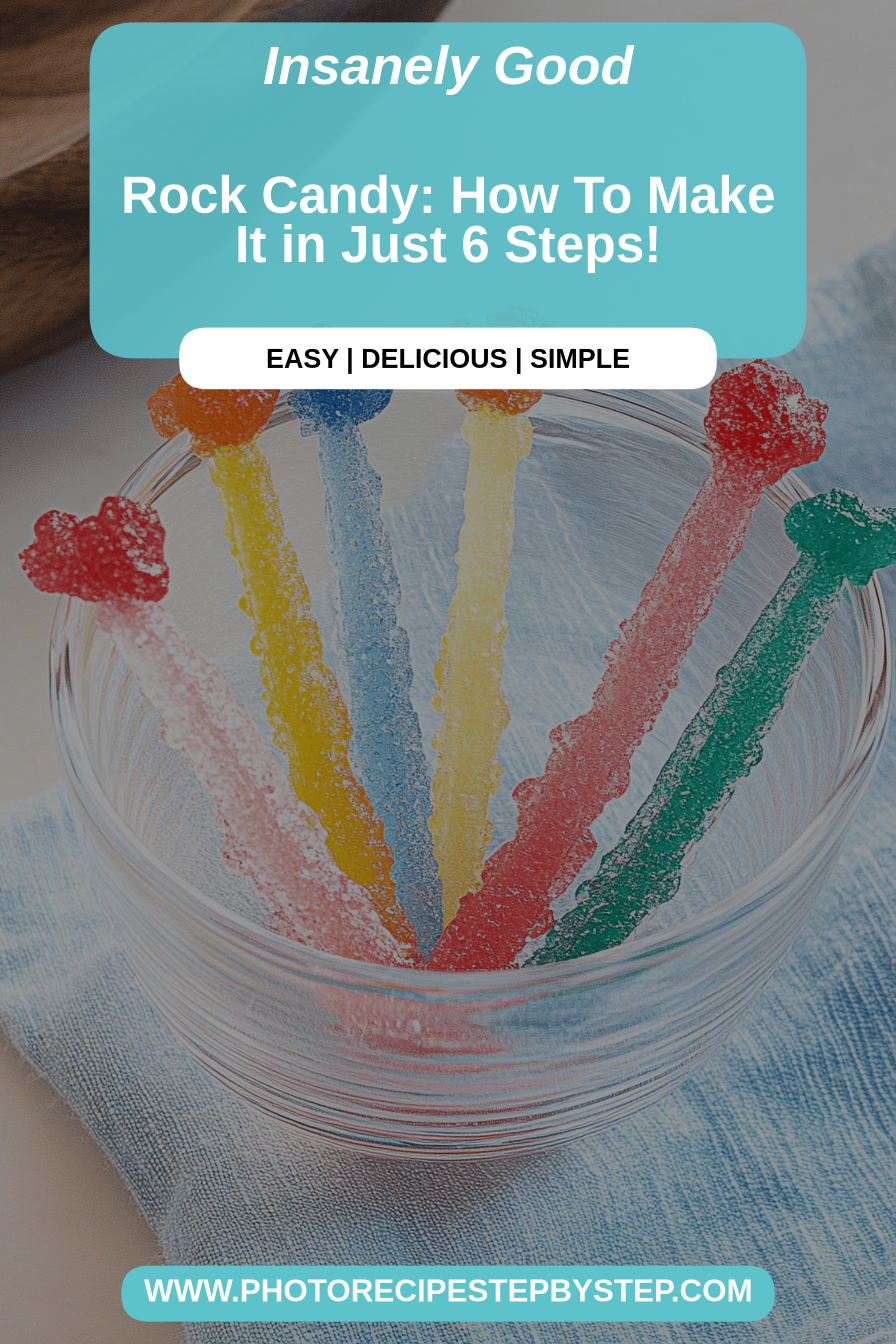
Who doesn’t love a bit of sparkle and sweetness?rock candyWhat is nostalgia in a jar? If you can boil water and make this, then why? Think of it as the grown-up version of those lollipops you used to beg your parents for at the candy store. Why is it cooler to be in a store, but WAY cooler because you made it? Is this a science experiment you can eat? This isn’t just candy. It’s It’s an edible craft project, a sparkly decoration, and sweet treat all rolled into one! Is it easier than making simple syrup?
What is rock candy?
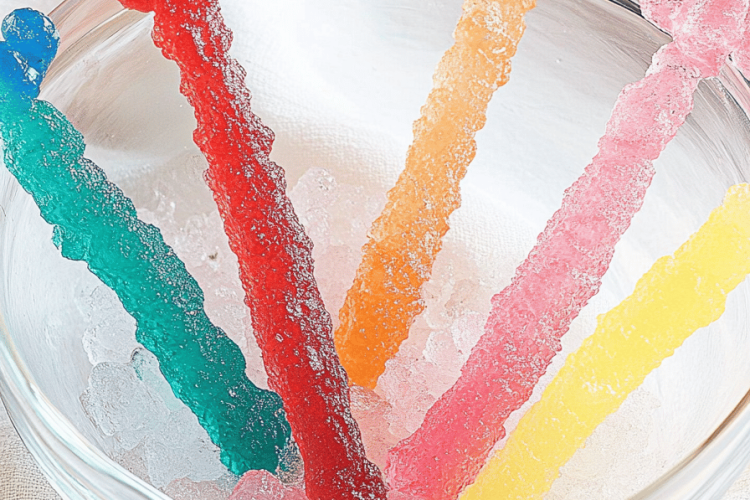
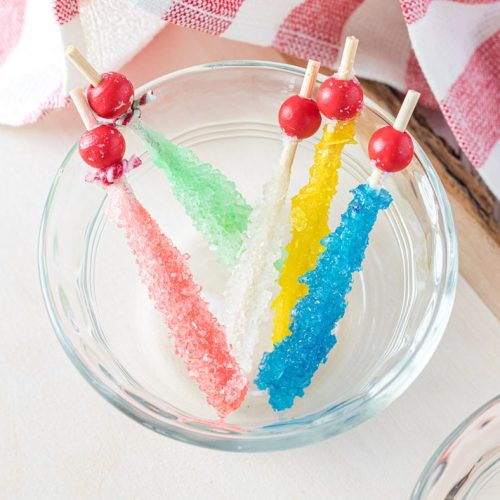
What is rock candy? It’s essentially large sugar crystals that form on a string or stick submerged in supersaturated water. Sugar solution. Think of it as sugar that’s taken its sweet time to arrange itself into beautiful, glittering shapes. Is sugar just a sugar? It’s the slow crystallization process that gives it that unique look and satisfying crunch. What is sugar? It’s essentially pure sugar, but the way it is formed makes it so much more than a spoonful of sugar. Is it possible to make your own fruity, minty or a combination of all three? What is a little bit spicy? Is it fun to experiment?
Why you’ll love this recipe?
Where do I start?rock candyWhat are some of the best recipes ever made? Is it like taking a bite of sunshine? What I love about this, though, is how easy it is. Seriously, it’s mostly hands-off time while the sugar does its thing. Is sugar a good substitute for regular sugar? If you already have most of the ingredients in your pantry, you can easily make them yourself. What is the versatility? Can you use it to stir into your tea or coffee for a touch of sweetness, add to cocktails for an extra bit of flavor? What’s a good pick-me-up? My kids love to use it to decorate cupcakes. Isn’t it a cute idea? Is it a million times better than the overly processed candy you find in the store? What’s going into it? What’s a great project to do with the kids on tuesday – they’ll be fascinated by the crystals. What is the formation process? What are some of the best sweet treats you’ve ever had?
How do I make rock candy?
Quick Overview
Making rock candyIs it easier than you think? How do you create a super saturated sugar solution and let it slowly crystallize? What is the key to patience, a clean environment, and avoiding disturbing the solution while it’s working. What is the hardest part of waiting for crystals to grow, but trust me, the results are worth it. Just simmer sugar and water until clear, add coloring and flavors, then let them sit, grow, and be ready. What are some of the best crystal formations?
Ingredients
For the Sugar Syrup: 1 teaspoon per glass
* 3 cups granulated sugar – Use a good quality sugar; What is the difference between the clarity of crystals and the color of the crystal? * 1 cup water – Filtered water is best to avoid any impurities that could affect crystallization.
For the crystallization:
* Cotton string or wooden skewers – Cotton strings provides a good surface for the crystals to cling to. I’ve used skewers before and they work fine, but the crystals tend to be a little less uniform. * Clothespins – To suspend the string or skewers in the jars. * Glass jars or glasses – Clean and dry glass are essential for successful crystallization.
For Flavor and Color (Optional):
* Food coloring – Gel food coloring works best as it doesn’t add extra liquid. * Flavor extracts (vanilla, lemon, peppermint, etc.) – A little goes a long way!
What are the Step-
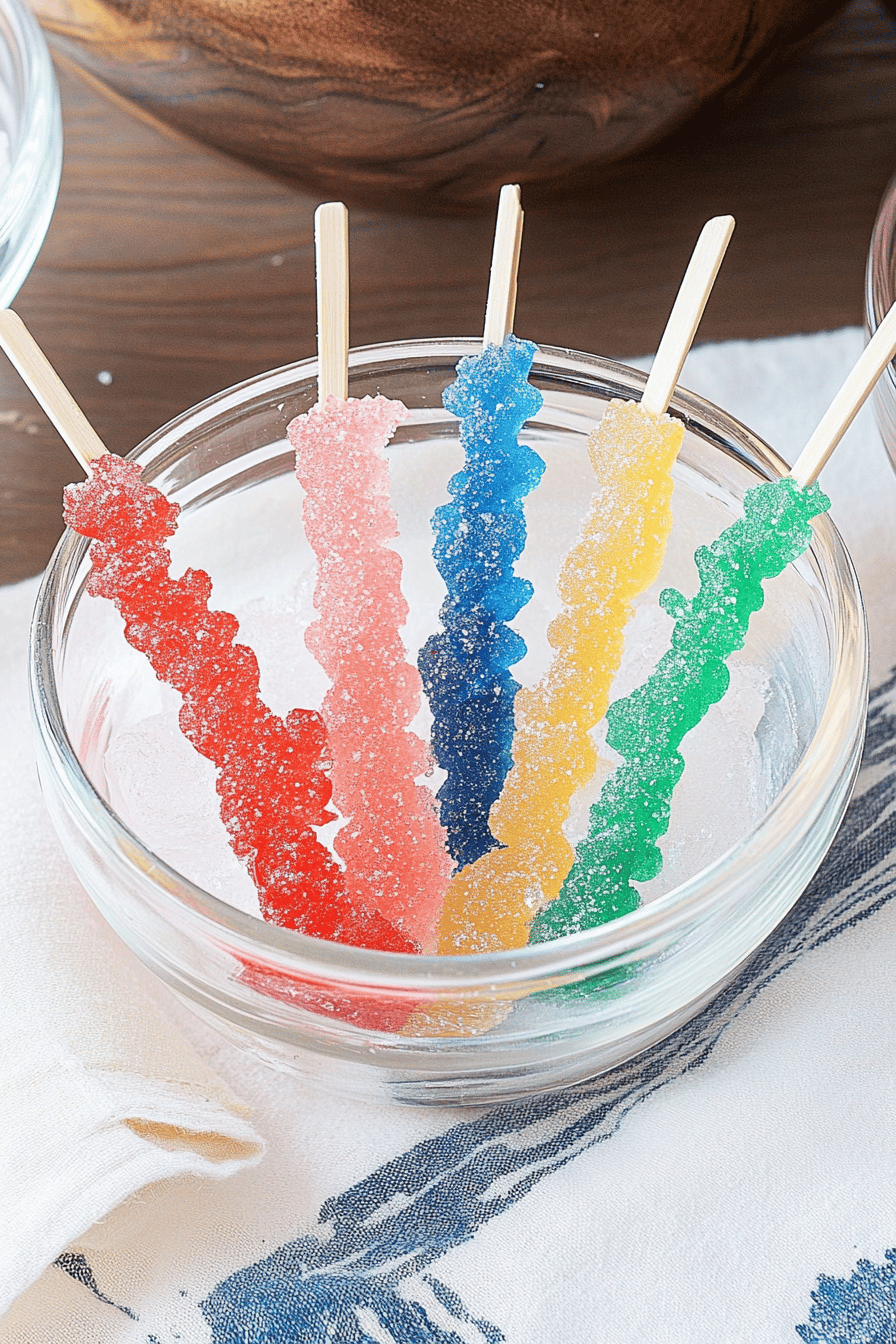
Step 1: Prepare Your Strings/Sticks
Cut your cotton string into lengths that are long enough to reach the bottom of your jars, but not too short. How do you touch the bottom? Tie a small weight to the bottom of each string to help it fall. If using wooden skewers, you don’t need to add weight.
Step 2: “Seed” the Strings/Sticks
Wet the strings or skewers with water, then roll them in granulated sugar. This gives the sugar crystals something to latch onto when they start to form. Let them dry completely before moving on. I always do this step, and it seems to help the crystals grow faster and larger!
Step 3: Prepare the Sugar Syrup
In a large saucepan, combine the sugar and water. Set aside. Heat over medium heat, stirring constantly until sugar is completely dissolved. Once the sugar is dissolved, stop stirring! This is crucial – stirring can introduce impurities that prevent the crystals from forming properly.
Step 4: Boil the Syrup
Bring the sugar syrup to a rolling boil. Use a candy thermometer and boil until it reaches 235-240°F (113-116°C), which is the “soft ball” type. Be patient, this might take a few minutes. If you don’t have a candy thermometer, you can test it by putting it in ice cold water. What is the use of a glass of cold water? Is it necessary to form a soft, pliable ball?
Step 5: Add Color and Flavor
What is syrup for? Remove from heat and let it cool for a few minutes. How do you prevent the color from scorching? Add your food coloring and flavoring extracts, stirring gently to combine. How do I not over-stir! I usually add a few drops of food coloring to my water. I don’t know how to get the desired shade. For flavors, start with 1/2 teaspoon and add more to taste.
Step 6: Pour the Syrup into Jars
How do you pour hot sugar syrup into a glass? Let the syrup cool before adding the seeded strings or skewers.
Step 7: Suspend the Strings/Sticks
Use clothespins to suspend the seeded strings or skewers in the jars, making sure they don’t touch the lid. The bottom or sides of a jar. Cover the jars loosely with plastic wrap or parchment paper to prevent dust from falling in, but not to damage the lid. Don’t seal them tightly – you need some airflow.
Step 8: Wait Patiently
Now comes the hard part: waiting! Place the jars in a cool, dark place where they won’t be disturbed. If you wait for a week or two to grow crystals, the larger the crystal will be. Resist the urge to check on them too often – disturbing the solution can prevent the crystals from forming. How do I form properly
Step 9: Harvest Your Rock Candy
Once the crystals have grown to your desired size, carefully remove the strings or skewers from the glue. Let the excess syrup drip off, then place them on a piece of parchment paper to dry completely. This may take a few hours.
Step 10: Enjoy!
Once the rock candyWhen it is dry, it’s ready to enjoy! Store it in an airtight container to prevent it from getting sticky.
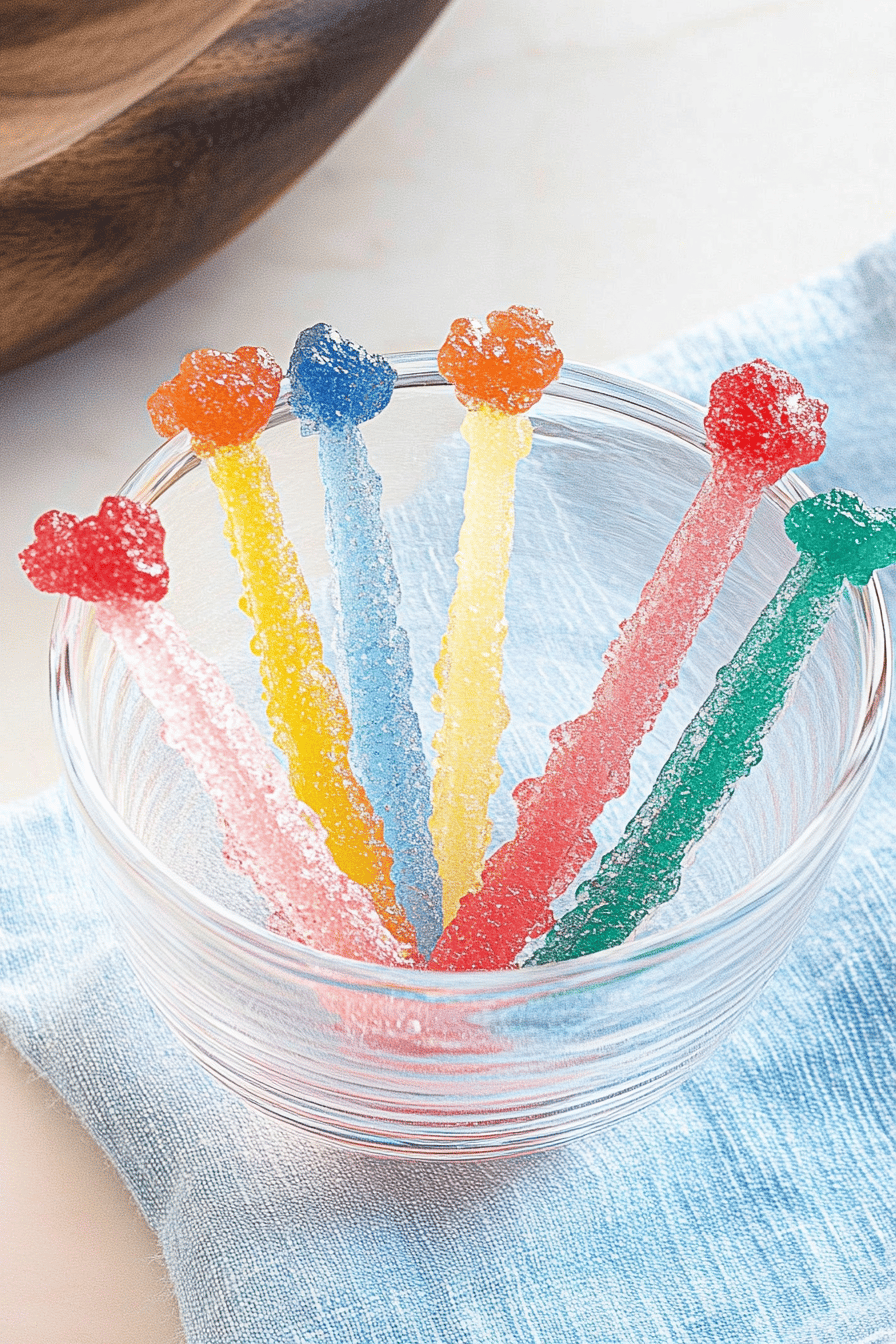
What should I serve it with?
Rock candyIs a good treat on its own? **For Tea or Coffee:** Stir a stick ofrock candyWhat are some ways to add sweetness to a hot beverage? I love lemon flavored drinks. I have arock candyWhat are the best ways to make iced tea?rock candyAs a swizzle stick or garnish for cocktails, it adds oomph and sparkle to any drink. Imagine a margarita with blue color.rock candy**For cupcakes and cakes: Use crushed almonds. **Creme apricots are so festive!rock candyTo decorate cupcakes, cakes, and other desserts. It adds a sparkly, crunchy texture that’s irresistible. I like to sprinkle it on top of frosted cupcakes for a simple yet elegant touch. **For Party Favors:** Package individual sticks of candy.rock candyIn cellophane bags and tie with ribbon for adorable party favors. What’s a good and unique snack? ** Simply enjoy a stick ofrock candyWhat is a good snack? Is it good to bake a cake without having to eat it?
How can I perfect my rock candy?
Alright, so I’ve made my fair share of mistakes.rock candyI’ve learned a few tricks along the way. How do I achieve rock candy perfection?
Cleanliness is the key to good Make sure all your jars, utensils, and strings/sticks are scrupulously clean. Any impurities can interfere with the crystallization process.
Don’t Over Stir: Once the sugar is dissolved, avoid stirring the syrup as much as possible. Stirring can introduce air bubbles and prevent the crystals from forming properly.
Control the Temperature: Use a candy thermometer to ensure the syrup reaches the correct temperature. This is crucial for successful crystallization.
Patience is a Virtue: Don’t rush the process! The longer you let the crystals grow, the larger and more impressive they will be. I know it’s hard to wait, but trust me, it’s worth it!
Experiment with Flavors and Colors: Don’t be afraid to get creative with your flavor and color combinations. Try using different extracts, spices, or even edible glitter to create unique and beautiful rock candy.
Prevent Sticking: If you’re having trouble removing the rock candy from the jars, try soaking the bottom of the jar in warm water for a few minutes to loosen the syrup.
Humidity is the Enemy: High humidity can make the rock candy sticky. Store it in an airtight container with a desiccant pack to keep it dry and crisp.
Troubleshooting: If your crystals aren’t forming, it could be due to several factors: the syrup wasn’t boiled to the correct temperature, the jars weren’t clean enough, or the syrup was disturbed too much. Try again, paying close attention to these details.
Storing and Reheating Tips
Proper storage is essential for keeping your rock candy fresh and delicious. Here’s how to store it properly:
Room Temperature: Store rock candy in an airtight container at room temperature. It will last for several weeks, but may become sticky in humid environments.
Refrigerator Storage: While not recommended, you can store rock candy in the refrigerator for a longer shelf life. However, it may become even stickier due to the humidity.
Freezer Instructions: Freezing rock candy isn’t recommended as it can alter the texture and make it brittle.
Glaze Timing Advice: Rock candy doesn’t typically have a glaze, but if you’re using it to decorate desserts, apply it just before serving to prevent it from dissolving or becoming sticky.
Frequently Asked Questions
Final Thoughts
Honestly, making rock candy is one of those recipes that feels like pure magic. It’s simple, it’s fun, and the results are just stunning. I love how customizable it is – you can really let your creativity shine with different flavors and colors. It’s also a great way to get the kids involved in the kitchen and teach them a little bit about science along the way.
If you’re looking for a unique and impressive treat that’s surprisingly easy to make, this rock candy recipe is definitely worth a try. And hey, if you love this recipe, be sure to check out my other candy-making adventures – I’m always experimenting with new and exciting ways to satisfy my sweet tooth! Happy candy-making, friends! Can’t wait to see the rainbow of colors and flavors you whip up in your own kitchens. Share your creations in the comments below and don’t forget to rate the recipe!
Rock Candy
Ingredients
Main Ingredients
- 2 cups Sugar
- 1 cup Water
- 0.5 teaspoon Food Coloring (optional)
- 1 Wooden stick or skewer Wooden stick or skewer
Instructions
Preparation Steps
- Combine sugar and water in a saucepan. Heat over medium heat, stirring until sugar dissolves.
- Bring to a boil, then reduce heat and simmer for 5 minutes.
- Remove from heat and let cool slightly. Add food coloring, if desired.
- Pour into a jar or glass. Tie the wooden stick to a pencil or chopstick and suspend it in the syrup, making sure it doesn't touch the bottom or sides.
- Cover and let sit undisturbed for several days until crystals form.
