What are some of the best Cheesy Taco Sticks? Is it true that they are comfort food? I remember my abuela used to make something similar but with empanada dough, and I’ve always been a fan. I can’t remember the name of the place. I’m obsessed with recreating that warmth and flavor. Now, think of your favorite crispy taco, but instead of the usual filling, imagine it all nestled inside a tortilla. Inside a flaky, golden-brown crust and shaped like an easy stick! What are Cheesy Taco Sticks? What are some of the best seasoned ground beef tacos? What are some of the best handheld treats you have ever made? What is better than a casserole?

What are Cheesy Taco Sticks?
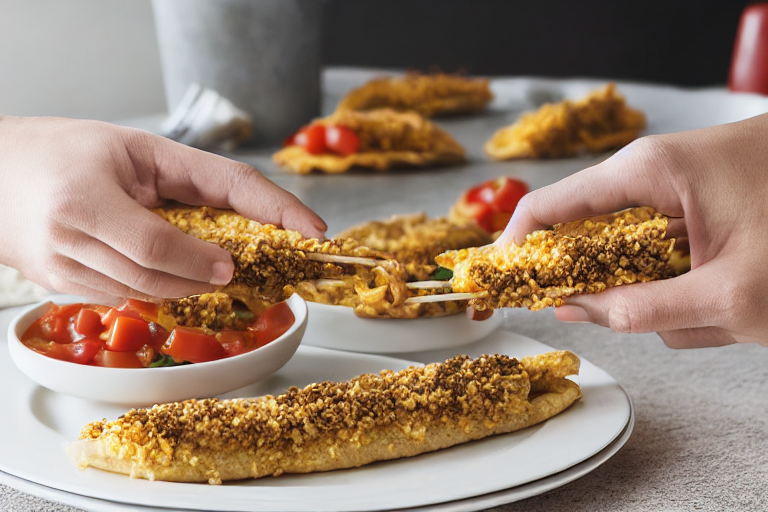
What are Cheesy Taco Sticks? Is it true that tacos are deconstructed? Imagine all the deliciousness of a traditional ground beef taco – the savory meat, the gooey cheese, and of course, your favorite cheese. Instead of being stuffed in tortillas, it’s baked into a tortilla. Flakey dough stick. What is a hand-held taco? I call them sticks because they are much fun to dip and eat this way. Why did the name come about simply because that is what they look like. Is this a good snack to have on the go?
Why you’ll love this recipe?
Let me tell you, these Cheesy Taco Sticks are a game-changer, and not just because they’re ridiculously tasty! What I love most is how unbelievably easy they are to make. Seriously, this recipe is a lifesaver on busy weeknights when you need something quick and satisfying.
• Flavor explosion: WhatImagine the perfect blend of seasoned ground beef, melty cheddar cheese, and a hint of spice, all at the same time. Wrapped in a golden brown crust, this is the perfect snack. What are the best flavors in the world? I like to add a little extra cumin and chili powder to make them pop.
• Super Simple:What is a breeze to make this recipe? Even if you’re not a seasoned baker, you can nail these Cheesy Taco Sticks. I always get my kids involved in baking. It’s just a matter of mixing, layering, and baking, that is it! They help me layer the ingredients. I’m trying to get a good mix.
• Budget Friendly With just a few affordable ingredients like ground beef, cheese, and basic pantry staples, you can whip up a batch of these without breaking the bank. Ground beef is always on sale somewhere!
• Super Versatile:What are some of the best Cheesy Taco Sticks? What are some of the best fillings to make?
What is a taco twist? What are some of the best mini taco pizzas? If you try these, you’ll be hooked!
How do I make Cheesy Taco Sticks?
Quick Overview
Making these Cheesy Taco Sticks is surprisingly straightforward. You’ll start by preparing your taco meat and getting your ingredients ready. Then you will layer the dough with cheese and taco meat and bake until golden brown and crispy. This recipe is special because it’s so easily customizable – feel free to experiment with different cheeses, spices, or even add some veggies! And the best part? It’s quick enough to whip up on a weeknight, but impressive enough to serve at a party.
Ingredients
For the Dough:
• 1 package (14.1 ounces) refrigerated pizza dough. Can you make your own dough?
• 2 tablespoons melted butter. I always use unsalted to control the saltiness.
For Taco Filling:
• 1 pound ground beef. I prefer using lean ground meat (90/10) so there is less grease.
• 1 packet taco seasoning. Feel free to use store-bought or make your own blend
• 1 cup shredded cheddar cheese. You can mix with some Monterey Jack for extra flavor.

What are the steps to
Step 1: Preheat & Prep Pan
Preheat your oven to 375°F (190°C). Line a baking sheet with parchment paper for easy cleanup. I’ve tried making these directly on the baking sheet, and trust me, parchment paper saves you from a mess!
Step 2: Cook the Ground Beef
In a large skillet, brown ground beef over medium-high heat. Drain off any excess grease. What is the best taco flavor?
Step 3: Add Taco Seasoning
Stir in the taco seasoning and add water as directed on the packet. Simmer for 5-7 minutes, allowing the flavors to meld together. What is the aroma at this point?
Step 4: Roll Out the Pizza Dough
On a lightly floured surface, roll out the pizza dough into 12×16 inches. I always find that using a rolling pin helps get it nice and even.
Step 5: Brush with Melted Butter
Brush the melted butter evenly over the dough. This will give the sticks a lovely golden-brown color and richer flavor. Don’t skip this step!
Step 6: Layer with Cheese
Half of the shredded cheese is evenly sprinkled over the buttered dough. I like to leave a little space around the edges to prevent the cheese from burning.
Step 7: Add Taco Meat
Spread the seasoned ground beef evenly over the cheese layer. How do you keep tacos in an even layer so that each one gets a bite of meat?
Step 8: Top with Remaining Cheese
Sprinkle the remaining cheese over the ground beef. What makes a cheesy bite so good?
Step 9: Cut into Sticks
With a pizza cutter, cut the dough into approximately 1-inch wide strips. I usually get about 12-16 sticks.
Step 10: Bake
Transfer the baking sheet to the preheated oven and bake for 12-15 minutes, or until the sticks are browned. Is the cheese melted? Keep an eye on them to prevent burning!
Step 11: Cool and Serve
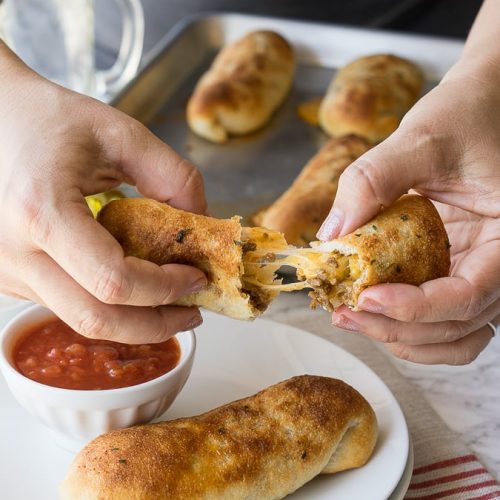
Let the Cheesy Taco Sticks cool before serving. Serve warm and enjoy! I like to serve them with Sour Cream, salsa, or guacamole for dipping. They’re always a hit!
What should I serve it with?
What are some good side dishes to serve with these Cheesy Taco Sticks? What are some of my favorite pairings?
What is a quick lunch?What’s a good side salad with taqueria? I usually toss together some mixed greens, tomatoes, and cucumbers. Super refreshing!
What is a fun dinner?Serve with a side of Spanish rice and black beans for sexy fiesta. My family loves this combo – it’s hearty and satisfying.
As an Appetizer: Offer a variety of dipping sauces, like Sour Cream, salsa, guacamole, and even a spicy queso dip. This is always a crowd-pleaser at parties!
For a Game Night: Pair with your favorite chips and a big bowl of chili. It’s the ultimate comfort food spread for cheering on your team!
These are perfect for dipping. One year, my family even dipped them in a nacho cheese sauce from a local Mexican restaurant. The possibilities are endless! Get creative and find your perfect combo!
Top Tips for Perfecting Your Cheesy Taco Sticks
Over the years, I’ve learned a few tricks to make these Cheesy Taco Sticks even better. Here are my top tips for achieving taco stick perfection:
Dough Handling: Make sure your pizza dough isn’t too cold when you unroll it. If it’s straight from the fridge, let it sit on the counter for about 15-20 minutes to warm up slightly. This makes it easier to roll out and prevents it from tearing.
Meat Seasoning: Don’t be shy with the taco seasoning! I sometimes add an extra teaspoon or two to really amp up the flavor. A little cumin and chili powder go a long way. I find the taco seasoning packets are never quite flavorful enough.
Cheese Choice: While cheddar is classic, feel free to experiment with other cheeses. A mix of cheddar and Monterey Jack is delicious, or even a sprinkle of pepper jack for a little kick. The cheese blend that’s the most creamy is always the best.
Preventing Soggy Sticks: To prevent the sticks from getting soggy, make sure to drain the ground beef really well after browning it. Excess grease can make the crust a little soggy, so this is key!
Baking Time: Keep a close eye on the taco sticks while they’re baking. Every oven is different, so the baking time may vary. You want them to be golden brown and crispy, but not burnt.
Dipping Sauces: Don’t underestimate the power of a good dipping sauce! Sour cream, salsa, guacamole, queso, or even a simple ranch dressing can take these taco sticks to the next level.
I even tried adding a layer of refried beans once before the meat. While it made the taco sticks taste pretty great, it ended up making the crust a bit too soft. Sticking with just the meat and cheese gives you the best of both worlds, crispy crust and delicious flavor!
Storing and Reheating Tips
If you happen to have any leftover Cheesy Taco Sticks (which is rare in my house!), here’s how to store and reheat them to maintain their deliciousness:
Room Temperature: You can store them at room temperature for a few hours, but make sure to cover them loosely to prevent them from drying out. I usually just put them in a Ziploc bag.
Refrigerator Storage: For longer storage, keep them in an airtight container in the refrigerator for up to 3 days. They still taste great after a few days, too!
Freezer Instructions: To freeze them, wrap each taco stick individually in plastic wrap, then place them in a freezer-safe bag. They can be frozen for up to 2 months. This works great if you are looking for individual snacks.
Reheating: To reheat, you can use a toaster oven or a regular oven. Preheat to 350°F (175°C) and bake for about 5-7 minutes, or until heated through and crispy. You can also microwave them, but they may lose some of their crispiness. The toaster oven is my go-to for reheating, as it keeps the crust nice and crunchy.
I also found that freezing them without the cheese on them works a little better. Then when you heat them up, you can add some fresh cheese for an extra burst of flavor and meltiness!
Frequently Asked Questions
Final Thoughts
I hope you love these Cheesy Taco Sticks as much as my family and I do! They’re seriously addictive, super easy to make, and perfect for any occasion. Whether you’re looking for a quick weeknight dinner, a fun party appetizer, or just a tasty snack, these taco sticks are guaranteed to be a hit. And the best part? You can customize them with your favorite taco fillings and toppings!
If you enjoyed this recipe, be sure to check out my other easy snack recipes, like my cheesy breadsticks or mini pizzas. And don’t forget to leave a comment below to let me know how your Cheesy Taco Sticks turned out! I can’t wait to hear about your variations and creations.
Happy cooking!
Cheesy Taco Sticks
Ingredients
Main Ingredients
- 1 lb Ground beef
- 1 pkg Taco seasoning
- 1 cup Shredded cheddar cheese
- 1 can Refried beans
- 1 package Refrigerated crescent roll dough
Instructions
Preparation Steps
- Brown ground beef; drain fat. Stir in taco seasoning.
- Mix in cheese and refried beans.
- Unroll crescent roll dough; separate into triangles.
- Place a spoonful of beef mixture onto each triangle.
- Roll up and bake according to package directions.