
There are certain smells that just instantly transport me back. For me, it’s the sweet, warm aroma of cinnamon wafting from the oven, promising something utterly comforting. This Coffee Cake recipe is exactly that – it’s like a cozy hug in cake form, and honestly, it’s the one I turn to time and time again when I need a little bit of delicious cheer. Forget those fancy layer cakes that take hours; this is your weeknight savior, your weekend brunch star, and your “I just need something sweet right now” best friend. It’s so much more than just a cake with coffee in the name; it’s that perfect blend of tender crumb and sweet, gooey filling that just sings. It’s the kind of treat that makes my whole house feel instantly warmer and more welcoming. Honestly, if you’re looking for a simple, crowd-pleasing dessert or breakfast bake, this coffee cake is it. It’s my absolute favorite, and I’m so excited to share it with you!
What is coffee cake?
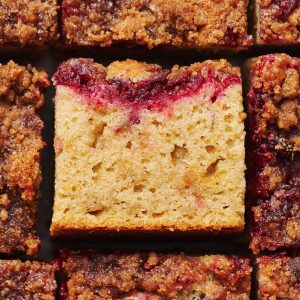
So, what exactly *is* this magical coffee cake I’m raving about? Well, it’s not what you might think! It doesn’t actually contain coffee *in* the Cake Batter itself. The name “coffee cake” traditionally refers to a cake that’s meant to be enjoyed alongside a cup of coffee – a perfect pairing for your morning brew or afternoon pick-me-up. Think of it as a more rustic, less fussy cousin to a traditional cake. This particular recipe is a classic example: it features a wonderfully tender, buttery cake base, a generous swirl of cinnamon-sugar filling right through the middle, and often a simple streusel topping or a light glaze. It’s that incredible swirl of cinnamon and sugar that really makes it special, creating pockets of intense flavor and a slightly gooey texture that’s just divine. It’s straightforward, incredibly forgiving, and always, always delicious.
Why you’ll love this recipe?
There are so many reasons why this coffee cake has earned its permanent spot in my recipe binder, and I bet it’ll become a favorite for you too! First off, let’s talk about the flavor. It’s simply divine. The cake itself is moist and subtly sweet, with a hint of vanilla that lets the star of the show – that rich, warm cinnamon-sugar swirl – really shine. It’s not overly sweet, which is something I really appreciate, especially for a breakfast or brunch treat. Then there’s the simplicity. Honestly, I can whip this up on a Tuesday evening after work and have it cooling on the rack before you can even decide what to watch on TV. No complicated steps, no fancy equipment. Just simple, honest ingredients coming together to make something truly wonderful. Plus, it’s incredibly budget-friendly! Most of the ingredients are pantry staples, making it an economical choice that still feels like a real indulgence. And the versatility! This coffee cake is fantastic on its own, but it’s also incredible served warm with a dollop of whipped cream or a scoop of vanilla ice cream for dessert. It’s the kind of recipe that just works, no matter the occasion. What I love most about this particular coffee cake, though, is the sheer joy it brings. It’s the kind of bake that fills your home with an irresistible aroma and makes everyone gather around the kitchen, eager for a slice. It’s pure comfort food.
How do I make a Cinnamon Swirl Coffee Cake?
Quick Overview
Making this coffee cake is surprisingly straightforward. We’ll start by mixing up a simple cake batter, then create a luscious cinnamon-sugar filling. The magic happens when we layer the batter and filling in our pan, giving it a gentle swirl for those beautiful ribbons of flavor. Bake until golden and fragrant, then finish with a simple glaze while it cools. It’s a process that’s as enjoyable as it is rewarding, and the results are always spectacular.
Ingredients
For the Main Batter:
- 2 ½ cups all-purpose flour: This is our sturdy base. Make sure it’s fresh for the best texture!
- 1 ½ teaspoons baking powder: For that essential lift and tender crumb.
- ½ teaspoon baking soda: Works with the acidic ingredients to give it an extra boost.
- ½ teaspoon salt: Balances the sweetness and enhances all the flavors.
- 1 cup (2 sticks) unsalted butter, softened: Crucial for that rich, buttery flavor and tender texture. Make sure it’s truly softened, not melted!
- 1 ¾ cups granulated sugar: For sweetness and structure.
- 2 large eggs: Bind everything together and add richness.
- 1 teaspoon pure vanilla extract: A classic flavor enhancer. Don’t skimp on the good stuff here!
- 1 cup buttermilk: Adds moisture and a slight tang that makes the cake extra tender. If you don’t have buttermilk, you can make a quick substitute by adding 1 tablespoon of white vinegar or lemon juice to 1 cup of milk and letting it sit for 5-10 minutes.
For the Filling:
- ¾ cup packed light brown sugar: The brown sugar is key for that deep, caramel-like sweetness and moisture.
- 2 tablespoons ground cinnamon: The star of the show! I love a generous amount.
- 2 tablespoons all-purpose flour: Helps thicken the filling slightly so it doesn’t all melt into the batter.
- ¼ cup (½ stick) unsalted butter, melted: To help bind the filling and make it wonderfully gooey.
For the Glaze:
- 1 cup powdered sugar: For that smooth, sweet finish.
- 2-3 tablespoons milk or cream: Just enough to reach your desired drizzling consistency.
- ½ teaspoon pure vanilla extract (optional): For an extra flavor boost.
Step-by-Step Instructions
Step 1: Preheat & Prep Pan
First things first, get your oven preheated to 350°F (175°C). This ensures the cake bakes evenly from the moment it goes in. I like to use a 9×13 inch baking pan for this. Grease it really well with butter or cooking spray, and then I like to dust it lightly with a bit of flour, tapping out any excess. This little step guarantees your beautiful coffee cake won’t stick, no matter what!
Step 2: Mix Dry Ingredients
In a medium bowl, whisk together the 2 ½ cups of all-purpose flour, 1 ½ teaspoons of baking powder, ½ teaspoon of baking soda, and ½ teaspoon of salt. Whisking them together ensures that your leavening agents are evenly distributed, which is super important for a consistent rise. You’ll see it’s a nice, uniform mixture ready for the wet ingredients.
Step 3: Mix Wet Ingredients
In a large bowl, cream together the 1 cup of softened unsalted butter and 1 ¾ cups of granulated sugar until it’s light and fluffy. This usually takes about 3-5 minutes with an electric mixer. You want it to look pale yellow and have a lovely, airy texture. Then, beat in the 2 large eggs, one at a time, mixing well after each addition. Stir in the 1 teaspoon of vanilla extract. Finally, gradually add the 1 cup of buttermilk, alternating with the dry ingredients (start and end with dry ingredients, adding about a third of the dry, then half of the wet, then a third of the dry, then the rest of the wet, and finally the last third of the dry). Mix on low speed until just combined. Don’t overmix at this stage; we’re just bringing it all together.
Step 4: Combine
Now, we’re going to gently combine the wet and dry ingredients. Add about a third of the dry ingredient mixture to the wet ingredients and mix on low speed until *just* combined. Then, add about half of the buttermilk and mix again. Continue alternating, finishing with the dry ingredients. The key here is to mix *just* until you no longer see streaks of flour. Overmixing can develop the gluten too much, leading to a tough cake, and nobody wants that! We’re aiming for a tender, moist crumb.
Step 5: Prepare Filling
In a small bowl, mix together the ¾ cup packed light Brown sugar, 2 tablespoons ground cinnamon, and 2 tablespoons all-purpose flour. Whisk it well to break up any lumps of brown sugar. Then, pour in the ¼ cup of melted butter and stir until it forms a thick, paste-like consistency. This is where all that wonderful cinnamon flavor comes from, and it’s going to create those irresistible swirls.
Step 6: Layer & Swirl
Pour about half of the cake batter into your prepared 9×13 inch pan and spread it evenly. Dollop about half of the cinnamon-sugar filling mixture over the batter, then gently spread it out, trying to cover most of the surface. Pour the remaining cake batter over the filling, spreading it carefully. Dollop the remaining cinnamon-sugar filling on top of this layer. Now comes the fun part! Take a butter knife or a skewer and gently swirl the filling into the batter. Don’t overdo it – you just want to create ribbons, not fully mix it. Think of making figure-eights or gentle spirals. This creates those beautiful pockets of cinnamon goodness throughout the cake.
Step 7: Bake
Bake in your preheated oven for 30-40 minutes, or until a wooden skewer or toothpick inserted into the center of the cake comes out clean. The top should be golden brown and the edges should be pulling away slightly from the sides of the pan. Every oven is a little different, so keep an eye on it, especially towards the end of the baking time. If the top starts to get too brown before the center is cooked, you can loosely tent it with foil.
Step 8: Cool & Glaze
Once baked, let the coffee cake cool in the pan on a wire rack for about 15-20 minutes. This allows it to set up properly. While it’s cooling, whip up the glaze. In a small bowl, whisk together the 1 cup of powdered sugar, 2-3 tablespoons of milk or cream, and the optional vanilla extract until smooth and pourable. You want a consistency that will drizzle nicely but not run off completely. Once the cake has cooled slightly, drizzle the glaze all over the top. The warmth of the cake will help it spread and set a little. It’s so tempting to dive in right away, but letting it cool a bit more (or completely) makes it easier to slice.
Step 9: Slice & Serve
Once the glaze has set a bit, cut the coffee cake into squares or rectangles. The best way to get clean slices is to use a sharp knife and wipe it clean between cuts. Serve it warm, at room temperature, or even chilled. It’s delicious any way you slice it!
What to Serve It With
This coffee cake is a champion on its own, but it also plays wonderfully with a few other things. For a simple breakfast, a steaming mug of your favorite coffee or tea is practically mandatory. It’s the perfect companion for that first quiet moment of the day. If you’re serving it for brunch, consider pairing it with a fresh fruit salad – the bright, fresh flavors are a lovely contrast to the cake’s richness. Some folks also love a side of crispy bacon or savory sausage to balance out the sweetness. As a dessert, oh, the possibilities! A scoop of good quality vanilla ice cream or a dollop of freshly whipped cream takes it to the next level. For a more elegant touch, a light dusting of powdered sugar or a drizzle of chocolate sauce can be lovely. And for those cozy, chilly evenings when you just need a comforting treat, a tall glass of cold milk alongside a generous slice of this coffee cake is pure bliss. I’ve even seen it served with a light berry compote, which is absolutely delicious!
Top Tips for Perfecting Your Coffee Cake
Over the years, I’ve picked up a few tricks that I think make this coffee cake truly spectacular. For the batter, always make sure your butter and eggs are at room temperature. This is non-negotiable for achieving that light, fluffy texture during the creaming stage. If your butter is too cold, it won’t cream properly, and if it’s too melty, you’ll end up with a greasy cake. When mixing the wet and dry ingredients, remember my mantra: “just until combined.” Seriously, overmixing is the arch-nemesis of tender baked goods. You want to see the faintest hint of flour remaining before you stop; the rest will incorporate as you fold in the batter. For the cinnamon filling, don’t be afraid to pack that brown sugar! It makes a huge difference in flavor and moisture. When you’re swirling the filling, use a light hand. The goal is defined ribbons of cinnamon, not a muddy mess. I like to insert my knife about halfway into the batter and make a few gentle up-and-down motions or figure-eights. If you’re worried about the swirl, you can even prepare a little extra filling and sprinkle it over the top before baking, almost like a streusel! As for baking, I always recommend using the center rack of your oven. This provides the most even heat distribution. If you find your oven runs hot, you can always reduce the temperature by 25°F and bake a few minutes longer. And when testing for doneness, a toothpick should come out clean, but it might have a few moist crumbs attached – that’s perfect! Too many wet batter streaks mean it needs more time. For ingredient swaps, if you’re out of buttermilk, that DIY version I mentioned earlier (milk + acid) works like a charm. I’ve also tested using half whole wheat flour with all-purpose, and it adds a lovely nutty depth without making it too dense, though you might need an extra tablespoon or two of liquid. For a dairy-free version, you can use a good quality plant-based butter and a non-dairy milk for the buttermilk and glaze – I’ve found almond milk or oat milk work wonderfully and don’t really impact the flavor much, though the texture might be slightly different. If you don’t have cinnamon, a mix of cinnamon and nutmeg or even a pinch of cardamom can be a delicious alternative.
Storing and Reheating Tips
Proper storage is key to keeping this coffee cake delicious for days! At room temperature, it will stay fresh for about 2-3 days, especially if you keep it well-covered. I usually just use plastic wrap or foil to tightly cover the pan or a cake keeper. Once it’s been glazed, it’s best to keep it at room temperature until the glaze is set, then cover. If you’re not going to eat it within those couple of days, or if your kitchen is particularly warm, refrigerating it is a great option. Wrapped tightly in the pan or in an airtight container, it can last in the refrigerator for up to a week. The texture might firm up a bit in the fridge, but don’t worry – it’s easily revived. To reheat, you can simply let it come to room temperature for about 30 minutes, or pop a slice into the microwave for 10-15 seconds to warm it through. If you want to freeze it, I highly recommend doing so *before* glazing. Wrap the cooled cake tightly in a layer of plastic wrap, then a layer of aluminum foil, and it will keep beautifully in the freezer for up to 2-3 months. To thaw, remove the foil and let it defrost at room temperature, then prepare the glaze and apply it once it’s fully thawed. If you’ve frozen it already glazed, just thaw it in the refrigerator, and it should still be delicious, though the glaze might be a little softer.
Frequently Asked Questions
Final Thoughts
There you have it – my tried-and-true recipe for the most comforting, delicious coffee cake. It’s the kind of recipe that proves you don’t need fancy ingredients or complicated techniques to create something truly special. It’s about that warm cinnamon swirl, that tender crumb, and the pure joy of sharing something homemade. I hope this coffee cake brings as much happiness to your kitchen as it does to mine. If you give it a try, please let me know how it turns out in the comments below! I love hearing about your baking adventures and seeing your creations. Happy baking, and enjoy every delicious bite!
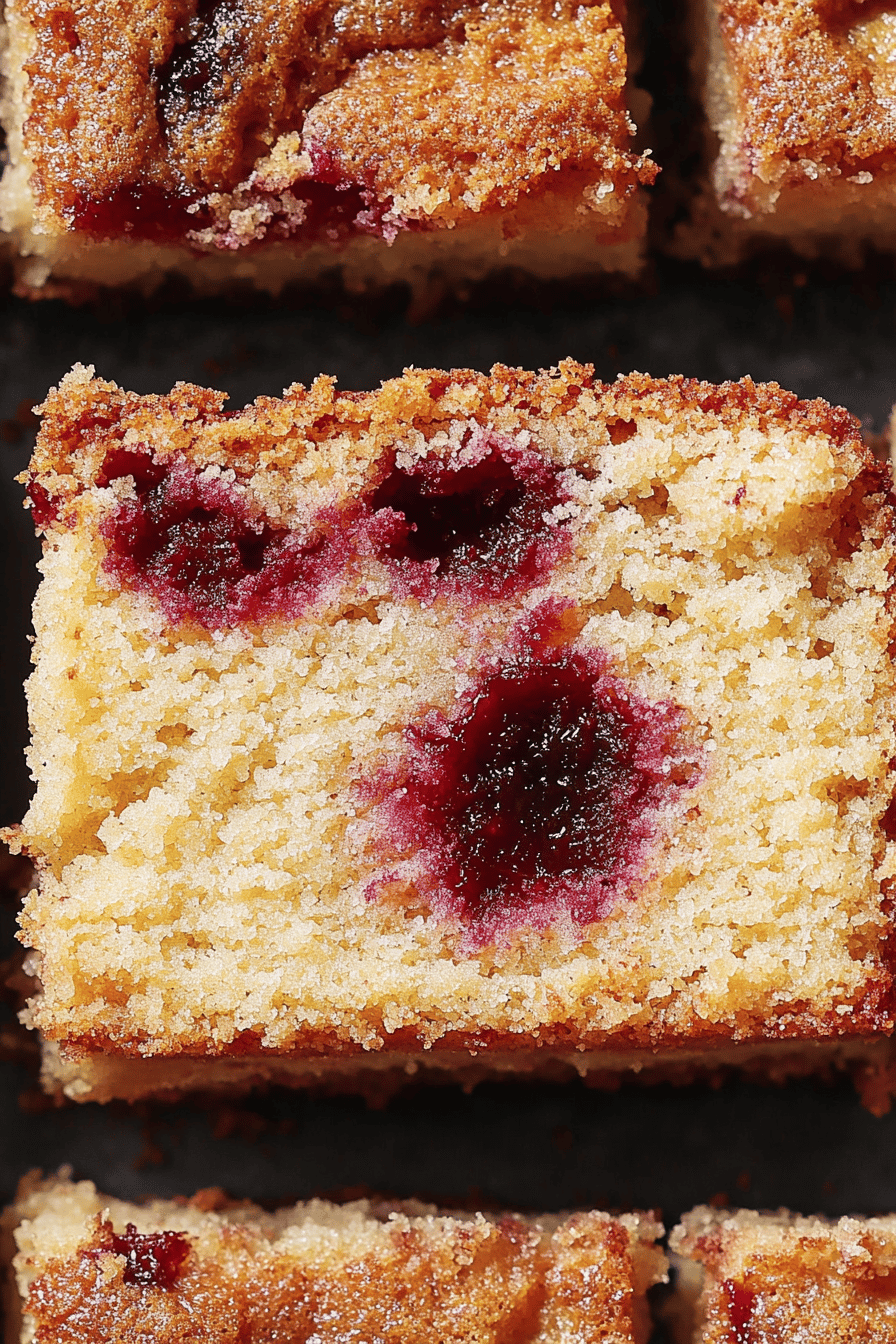
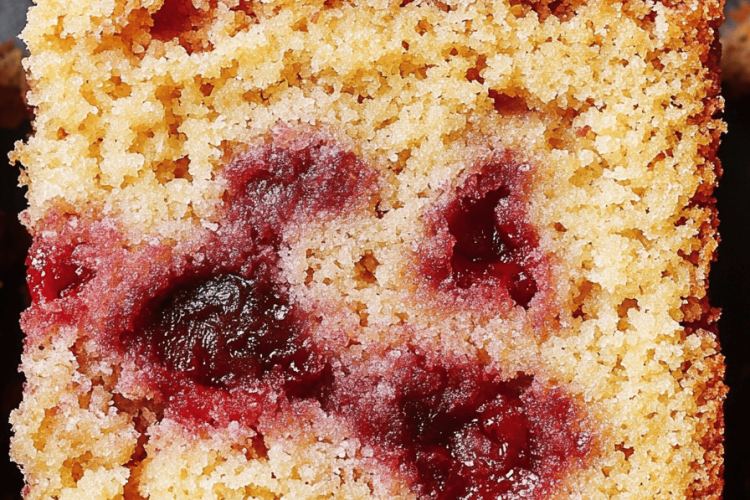
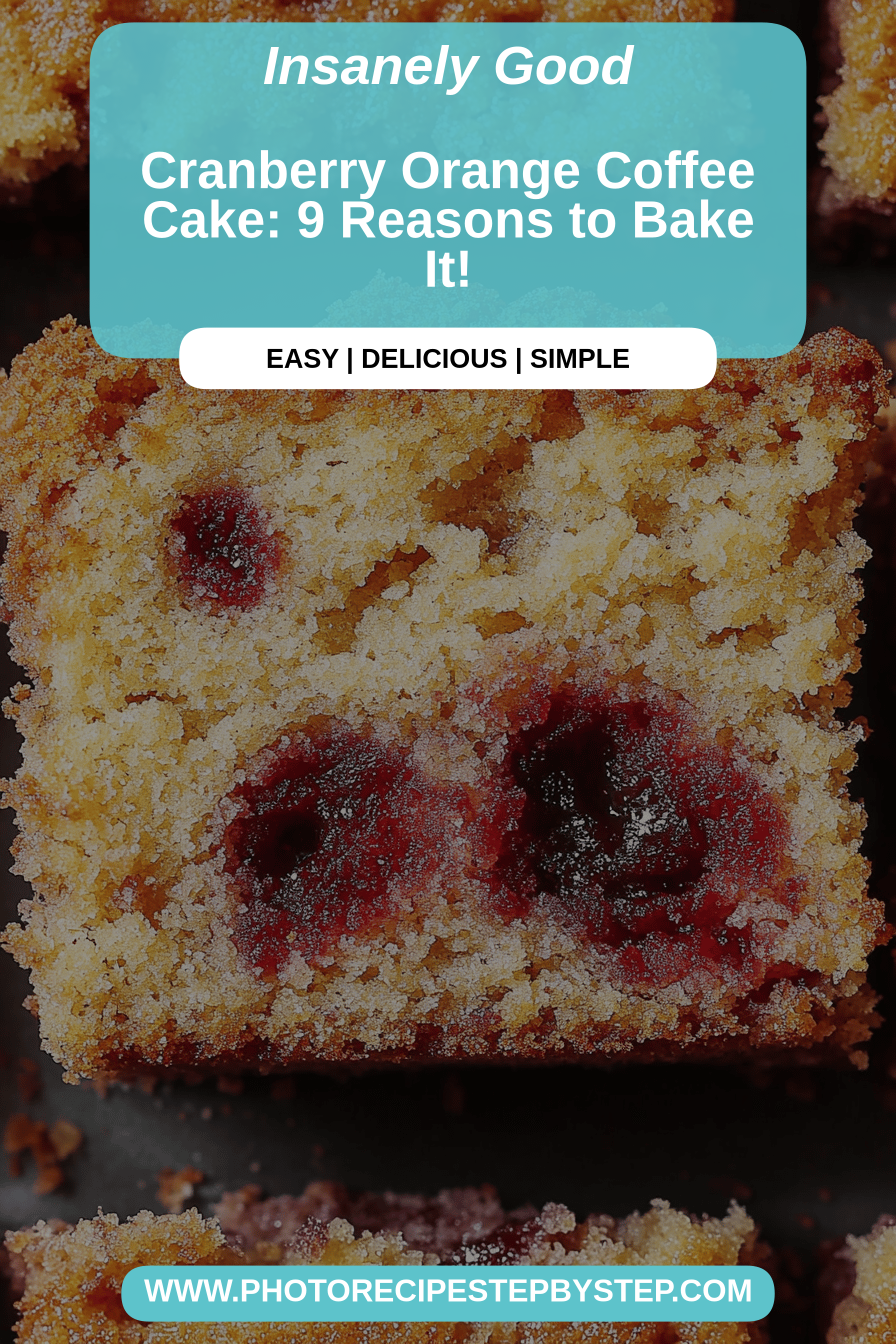
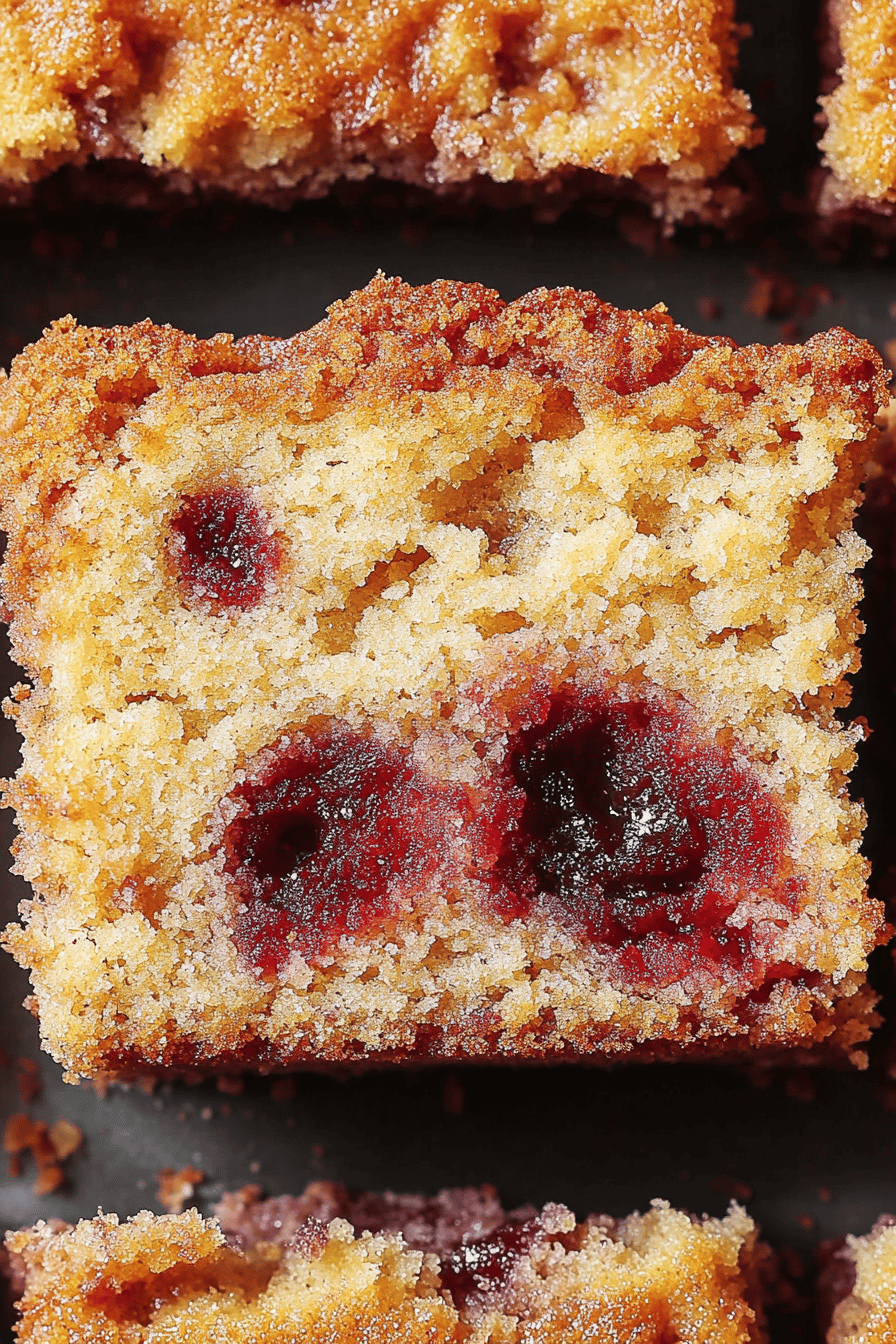
Cranberry Orange Coffee Cake
Ingredients
Cake Batter
- 2.5 cup all-purpose flour
- 1.5 cup granulated sugar
- 2 teaspoon baking powder
- 0.5 teaspoon salt
- 0.5 cup unsalted butter, softened
- 2 large eggs
- 1 cup milk
- 1 teaspoon vanilla extract
- 1 cup fresh cranberries, roughly chopped
- 1 tablespoon orange zest
Streusel Topping
- 1 cup all-purpose flour
- 0.75 cup brown sugar
- 0.5 cup unsalted butter, cold and cubed
- 1 teaspoon cinnamon
Instructions
Preparation Steps
- Preheat oven to 350°F (175°C). Grease and flour a 9x13 inch baking pan.
- In a large bowl, whisk together the flour, granulated sugar, baking powder, and salt for the cake batter.
- Add the softened butter to the dry ingredients and mix until the mixture resembles coarse crumbs.
- In a separate small bowl, whisk together the eggs, milk, and vanilla extract.
- Gradually add the wet ingredients to the dry ingredients, mixing until just combined. Do not overmix.
- Gently fold in the chopped cranberries and orange zest.
- In a medium bowl, combine the ingredients for the streusel topping. Mix with your fingers or a pastry blender until crumbly.
- Pour the cake batter into the prepared baking pan and spread evenly.
- Sprinkle the streusel topping evenly over the batter.
- Bake for 35-45 minutes, or until a toothpick inserted into the center comes out clean.
- Let the coffee cake cool in the pan on a wire rack before slicing and serving.
