
Oh, you guys, I’ve been so excited to share this recipe with you! It feels like ages since I first stumbled upon making these Champagne Cake Balls, and honestly, they’ve become my absolute go-to for *any* occasion that calls for a little sparkle and a whole lot of deliciousness. Seriously, if you’ve ever seen those adorable cake pops or truffles and thought, “Wow, that looks complicated,” let me tell you, this is your gateway. It’s way less fussy than you might imagine, and the result? Pure magic. Think of it as the sophisticated cousin of the classic chocolate truffle, but with this incredible, subtle champagne undertone that just makes everything feel a bit more celebratory. I’ve made these for everything from impromptu weekend brunches to holiday parties, and they disappear like, well, champagne at a New Year’s Eve bash! If you’re a fan of my classic vanilla cake, you’re going to adore this. It’s that perfect blend of sweet, moist cake and rich, decadent coating that just melts in your mouth.

What is Champagne cake ball?
So, what exactly are Champagne Cake Balls, you ask? Well, at its heart, it’s exactly what it sounds like – little bites of heavenly cake infused with the glorious flavor of champagne, all rolled up and dipped in a smooth, rich coating. Think of them as a mini, no-bake cake experience, but way more elegant and easier to manage. The “cake” part isn’t actual baked cake that you’ve crumbled (though you *could* do that!), but rather a wonderfully moist, quick batter that bakes up with the perfect texture for rolling. The champagne isn’t just for show; it adds this delicate, sophisticated note that cuts through the sweetness beautifully. It’s not overpowering, mind you, just a whisper that makes you go, “Hmm, what *is* that delightful flavor?” They’re essentially little spheres of joy, perfect for popping into your mouth when you need a little pick-me-up or when you want to impress your friends without spending hours in the kitchen. It’s that perfect bite-sized treat that feels special, even if you made it on a Tuesday afternoon.
Why you’ll love this recipe?
There are so many reasons why this Champagne Cake Balls recipe has earned a permanent spot in my recipe binder, and I just know you’re going to feel the same way. First off, the FLAVOR! It’s divine. That subtle hint of champagne really elevates it beyond a regular cake ball. It’s not overtly boozy, but it adds this wonderful complexity that just makes everything taste a little more refined. It’s like a little party in your mouth! Then there’s the SIMPLICITY. Honestly, this is a lifesaver when I’m short on time but still want something impressive. You mix up a simple batter, bake it, let it cool just enough to handle, and then roll and dip. No complicated frosting techniques, no intricate layering. It’s incredibly forgiving, which is a huge win in my book. Plus, it’s surprisingly COST-EFFECTIVE. Compared to buying fancy desserts from a bakery, making these at home is a fraction of the price, especially when you consider how many you get from one batch. And the VERSATILITY is off the charts! You can dress these up or down so easily. Dip them in white chocolate for a classic look, Dark Chocolate for a richer flavor, or even add sprinkles for a festive touch. They’re perfect for sharing at parties, gifting to friends, or just treating yourself. What I love most about this recipe is that it feels a little fancy, a little decadent, but it’s achievable for any home baker. It’s the kind of recipe that makes people ask, “Where did you get these?” and you can proudly say, “I made them!”
How do I make champagne cake balls?
Quick Overview
Making these Champagne Cake Balls is surprisingly straightforward! You’ll whip up a quick, moist Cake Batter infused with a touch of champagne, bake it until perfectly tender, and then, while it’s still slightly warm, you’ll form it into little balls. After they’ve cooled a bit, you’ll dip them in melted chocolate for that irresistible coating. The beauty of this method is that the cake batter is designed to be pliable enough to roll right after baking, saving you the step of waiting for a whole cake to cool and crumble. It’s a streamlined process that delivers maximum deliciousness with minimal fuss. Trust me, you’ll feel like a baking wizard!
Ingredients
For the Main Batter:
You’ll need 1 ½ cups of all-purpose flour – make sure it’s all-purpose, it gives the best texture here. I always like to sift my flour, it just makes things lighter. Then, 1 cup of granulated sugar for that perfect sweetness. Don’t skimp! ½ teaspoon of baking soda and ¼ teaspoon of salt are crucial for balance and lift. For the wet ingredients, you’ll need 2 large eggs, at room temperature – this is important for them to emulsify properly. ½ cup of buttermilk will give you that incredible tender crumb; if you don’t have buttermilk, just add ½ tablespoon of lemon juice or white vinegar to regular milk and let it sit for 5 minutes. And here’s the star: ½ cup of dry champagne or Prosecco. Make sure it’s dry, not sweet, so it doesn’t throw off the sugar balance. A good quality vanilla extract, about 1 teaspoon, is a must for depth of flavor. And finally, ¼ cup of unsalted butter, melted and slightly cooled.
For the Filling:
For that extra decadent touch, we’ll make a simple filling. You’ll need 4 ounces of Cream Cheese, softened to room temperature – seriously, don’t try to use cold cream cheese, it will be lumpy. Then, ½ cup of powdered sugar, sifted to avoid any graininess. And another splash of vanilla extract, about ½ teaspoon, to keep that lovely flavor going.
For the Glaze:
The coating is key! You’ll need 12 ounces of good quality white chocolate chips or chopped white chocolate. Using good quality chocolate makes a HUGE difference in how smoothly it melts and how it tastes. If you prefer dark or milk chocolate, feel free to substitute that! For a slightly thinner, more manageable glaze, I sometimes add 1 tablespoon of coconut oil or vegetable shortening. It helps create that perfectly smooth, dippable consistency.
Step-by-Step Instructions
Step 1: Preheat & Prep Pan
Alright, first things first. We need to get our oven ready. Preheat it to 350 degrees Fahrenheit (175 degrees Celsius). While that’s heating up, grab a 9×13 inch baking pan. You don’t need to grease it or flour it if it’s non-stick. If it’s a standard metal pan, a light greasing and a parchment paper lining is your best friend. This ensures your cake lifts out cleanly, which is crucial for rolling.
Step 2: Mix Dry Ingredients
In a medium-sized bowl, whisk together your sifted all-purpose flour, granulated sugar, baking soda, and salt. Give it a good whisk until everything is nicely combined and there are no pockets of baking soda. This step ensures even distribution, which means your cake will rise evenly.
Step 3: Mix Wet Ingredients
In a separate, larger bowl, whisk the room temperature eggs until they’re lightly beaten. Then, add in the buttermilk, the dry champagne (give it a little swirl first!), and the vanilla extract. Whisk these together until everything is well incorporated.
Step 4: Combine
Now, it’s time to bring them together! Pour the melted and slightly cooled butter into the wet ingredients and whisk briefly. Then, gradually add the dry ingredients to the wet ingredients, mixing until just combined. Be careful not to overmix here! Overmixing can lead to a tough cake, and we want these cake balls to be super tender. A few small lumps are totally fine. That’s what gives them that delightful, homemade texture.
Step 5: Prepare Filling
While the cake batter is resting for just a minute, let’s get our filling ready. In a small bowl, beat the softened cream cheese with an electric mixer until it’s smooth and creamy. Then, add in the sifted powdered sugar and vanilla extract. Beat again until it’s perfectly smooth and well combined. Set this aside.
Step 6: Layer & Swirl
Pour your cake batter evenly into the prepared 9×13 inch baking pan. Now, dollop spoonfuls of the cream cheese filling over the top of the batter. Don’t worry about making them perfect circles; they’ll spread. Using a knife or a skewer, gently swirl the filling into the batter. Aim for a marbled effect rather than completely mixing it in. This creates those lovely pockets of creamy goodness throughout the cake balls.
Step 7: Bake
Pop that pan into your preheated oven. Bake for about 25-30 minutes. You’ll know it’s ready when a toothpick inserted into the center comes out clean, or with just a few moist crumbs attached. Be careful not to overbake, as we want it to stay wonderfully moist.
Step 8: Cool & Glaze
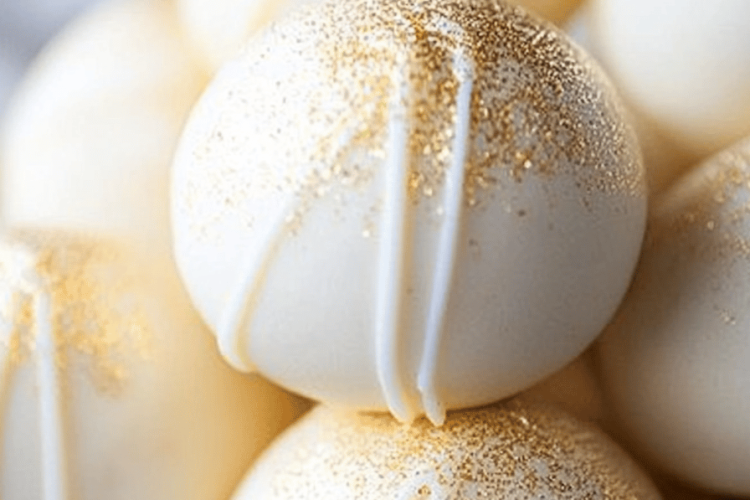
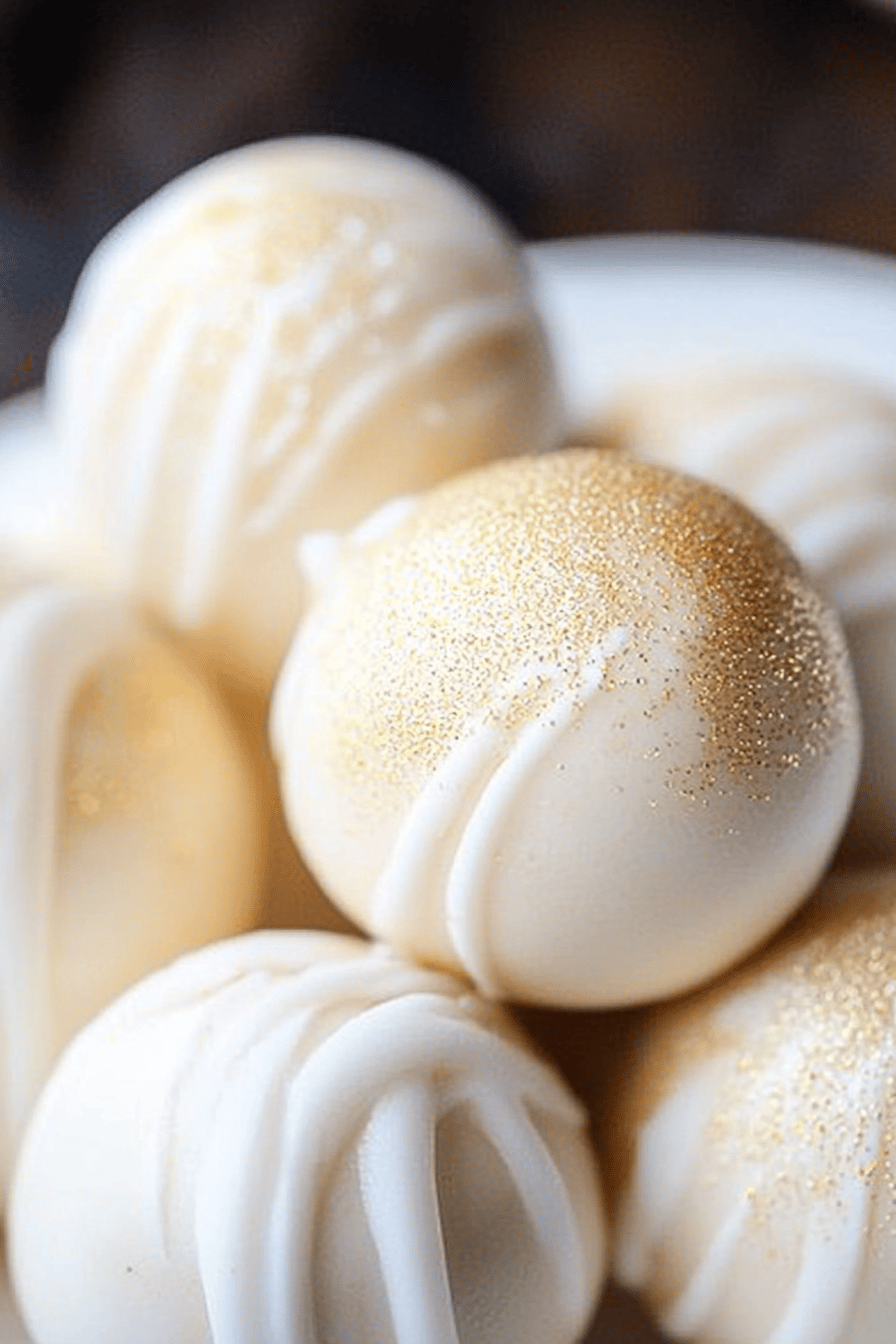
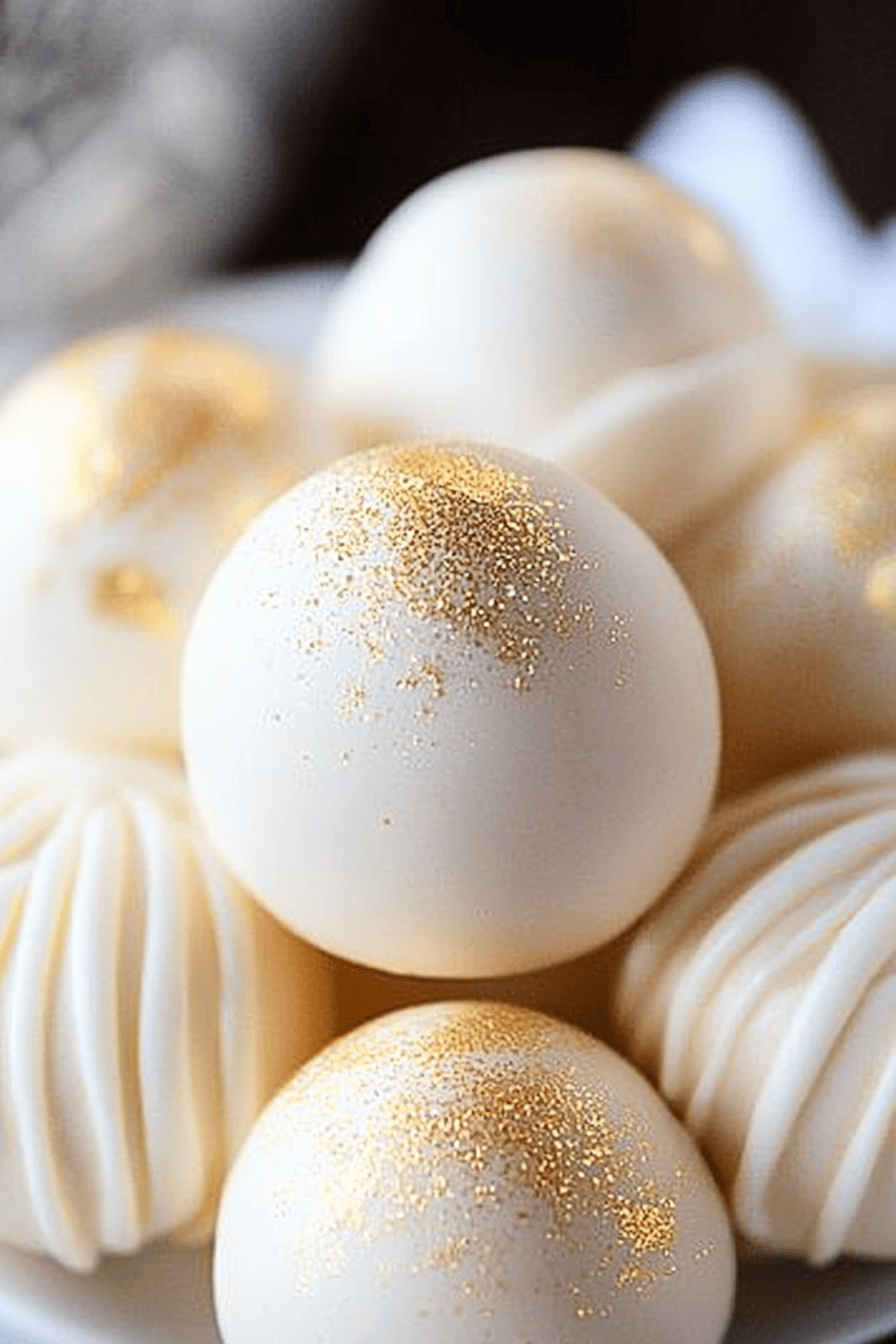
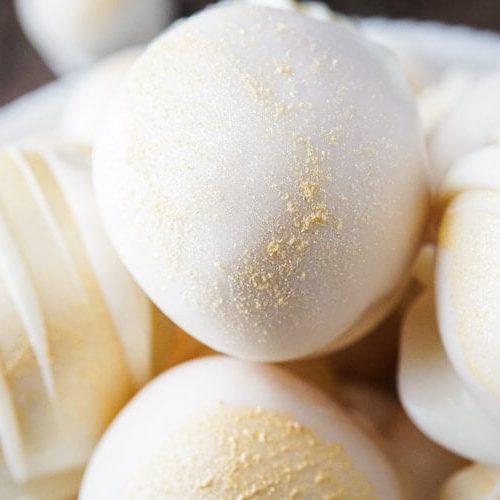
This is where things get a little interesting. You want to let the cake cool in the pan for about 10-15 minutes. It needs to be warm enough to be pliable but not so hot that it falls apart. While it’s cooling, melt your white chocolate (or your preferred chocolate) in a microwave-safe bowl in 30-second intervals, stirring between each, until it’s smooth. You can also use a double boiler. If using, stir in the coconut oil or shortening for a smoother consistency. Once the cake is cool enough to handle but still warm, scoop out portions and roll them into balls. Don’t worry if they’re not perfectly round, that’s part of the charm! Then, dip each ball into the melted chocolate, letting any excess drip back into the bowl. Place them on a parchment-lined baking sheet to set.
Step 9: Slice & Serve
Once the chocolate has set (this usually takes about 15-20 minutes at room temperature, or you can speed it up in the fridge for a few minutes), your Champagne Cake Balls are ready to be devoured! You can serve them as is, or if you want to get fancy, you can drizzle a little extra melted chocolate over the top for decoration. They are best served at room temperature to truly appreciate their texture and flavor.
What to Serve It With
Honestly, these Champagne Cake Balls are so versatile, they fit into almost any occasion. For breakfast, I love them alongside a steaming mug of good quality coffee. They add just a hint of sweetness to start the day without being overwhelming, and the bubbly undertone feels a little bit special, even on a weekday. Imagine a lazy Sunday morning, a good book, and a couple of these little delights – pure bliss! At brunch, they’re an absolute showstopper. Serve them on a pretty tiered stand with fresh berries and perhaps some mimosas. They complement the lighter, fruity flavors of brunch perfectly and always get rave reviews. They’re a delightful alternative to heavier pastries. As dessert, they are simply elegant. After a lovely dinner, a few of these alongside some fresh fruit or a dollop of whipped cream is the perfect sweet ending. They’re especially wonderful with a glass of actual champagne or a crisp sparkling wine – talk about a flavor pairing! And for those cozy snack moments? They’re my secret weapon. When that 10 pm craving hits and I don’t want to bake a whole cake, these are what I reach for. They’re satisfyingly sweet and feel like a real treat without being too heavy. My family also loves them simply arranged on a platter for movie nights; they’re just so easy to grab and enjoy.
Top Tips for Perfecting Your Champagne Cake Balls
Over the years, I’ve learned a few tricks that really make these Champagne Cake Balls sing. First off, for the cake batter itself, don’t be tempted to use a super-sweet champagne; a brut or extra brut is ideal. It provides that lovely flavor without making the whole thing too sugary. Also, and this is a big one, don’t overbake the cake! It should be just set. A slightly underbaked cake (but not raw, of course) will be incredibly moist and perfect for rolling while still warm. Speaking of rolling, don’t aim for absolute perfection with your balls. A slightly rustic shape is charming and shows they’re homemade with love. If your batter is a bit too sticky to handle, pop the pan in the fridge for about 10-15 minutes to firm it up slightly – this is a lifesaver on warmer days. When it comes to the filling, make sure your cream cheese is truly at room temperature. I’ve learned the hard way that cold cream cheese results in lumpy filling, and nobody wants that! A good whisking is key. For the chocolate coating, always use good quality chocolate. The difference in meltability and taste is significant. If your chocolate seizes up (gets grainy and thick), don’t panic! Sometimes adding a tiny bit more melted chocolate or a touch of neutral oil can help revive it, but honestly, if it’s too far gone, it might be easier to start fresh. When dipping, use a fork or a dipping tool to hold the cake balls. A quick dip and lift, letting the excess chocolate drip off, is the best technique. If you want to add some flair, a sprinkle of edible glitter or fine chopped nuts on top of the wet chocolate looks gorgeous. And if you’re making these for a party, a little extra drizzle of chocolate in a contrasting color (like dark chocolate over white) adds a professional touch. Finally, remember that this recipe is quite forgiving. If your champagne is more of a prosecco, it’ll still be delicious! Taste as you go, and have fun with it!
Storing and Reheating Tips
Storing these little beauties is pretty straightforward, and they hold up well, which is always a bonus! For room temperature storage, I usually keep them in an airtight container for about 2 to 3 days. They stay moist and delicious within this timeframe, and the chocolate coating remains nice and firm, especially if your kitchen isn’t too warm. If you’re planning on keeping them for longer, or if your house is on the warmer side, the refrigerator is your best bet. Place them in a single layer in an airtight container, and they’ll be perfectly good for up to a week. I usually pop a piece of parchment paper between layers if I’m stacking them, just to prevent any sticking. When you’re ready to enjoy them from the fridge, I always recommend letting them sit out at room temperature for about 15-20 minutes. This allows the cake inside to soften up to its ideal texture and the chocolate to regain its lovely snap, rather than being hard and chalky. I wouldn’t really “reheat” them in the traditional sense; the goal is to bring them back to room temperature for the best eating experience. Freezing is also an option for longer storage, although I tend to make smaller batches more often because they are so good fresh! If you do freeze them, I’d wrap each cake ball individually in plastic wrap, then place them in a freezer-safe bag or container. They can last in the freezer for up to 2-3 months. To thaw, transfer them to the refrigerator overnight, and then let them come to room temperature as mentioned above. For the glaze timing advice, it’s always best to glaze them just before you plan to serve them or store them for a short period. If you glaze them and then store them for a long time, particularly in the fridge, you might notice a bit of condensation on the chocolate. So, if you’re making them for an event, glazing them the day before is usually fine, but for longer storage, consider glazing closer to serving time!
Frequently Asked Questions
Final Thoughts
I really hope you give these Champagne Cake Balls a try. They’re one of those recipes that just brings a smile to my face every single time I make them, and the joy they bring to others is even better. They’re the perfect little package of celebration, from the subtle hint of bubbly in the cake to the sweet, creamy filling and the satisfying crunch of the chocolate coating. They’re proof that you don’t need to be a professional baker to create something truly special and impressive. They’re ideal for those moments when you want to add a touch of elegance to your day, or when you need a crowd-pleasing treat that’s surprisingly easy to make. If you love these, I think you’d also adore my Sparkling Raspberry Tartlets – they have a similar celebratory vibe! Don’t hesitate to get creative with your coatings and decorations; that’s where the real fun begins. I can’t wait to hear how yours turn out! Please leave a comment below and tell me all about your creations, your favorite flavor combinations, or any tips you discovered along the way. Happy baking, and cheers!
Champagne Cake Balls
Ingredients
Cake Balls
- 1 box vanilla cake mix
- 3 large eggs
- 0.5 cup vegetable oil
- 1 cup champagne or sparkling wine, room temperature
- 1 container vanilla buttercream frosting (16 oz)
Coating and Decoration
- 2 cups white chocolate chips
- 0.5 cup pink candy melts
- 1 tablespoon shortening optional, for thinning chocolate
- edible glitter or sprinkles for decoration
Instructions
Preparation Steps
- Preheat oven to 350°F (175°C). Grease and flour a 9x13 inch baking pan.
- In a large bowl, combine the cake mix, eggs, vegetable oil, and champagne. Mix until just combined. Do not overmix.
- Pour the batter into the prepared baking pan and bake for 25-30 minutes, or until a toothpick inserted into the center comes out clean.
- Let the cake cool in the pan for 10 minutes before inverting it onto a wire rack to cool completely.
- Once the cake is completely cool, crumble it into fine crumbs in a large bowl. Ensure there are no large chunks.
- Add the vanilla buttercream frosting to the cake crumbs. Mix thoroughly with your hands until well combined and the mixture holds together when squeezed.
- Roll the mixture into 1-inch balls and place them on a parchment-lined baking sheet. Refrigerate for at least 30 minutes to firm up.
- Melt the white chocolate chips and pink candy melts separately in microwave-safe bowls. Microwave in 30-second intervals, stirring between each interval, until smooth. Add shortening if needed to thin the chocolate.
- Dip each chilled cake ball into the melted white chocolate, allowing excess to drip off. Place back on the parchment-lined baking sheet.
- While the white chocolate is still wet, drizzle with melted pink candy melts and sprinkle with edible glitter or sprinkles, if desired.
- Allow the cake balls to set completely at room temperature or in the refrigerator.
